- Video Watch Time = 10 minutes
Ever since I can remember, modern, store-bought light fixtures have disappointed me. Not all of them, but most. Flimsy, fake, predictable and expensive, I can only remember buying one light fixture in my life that impressed me, and that was a refurbished antique. Long-standing disappointment is what got me interested in making my own light fixtures from steel pipe and fittings. As I’ve discovered, there’s more to success than what you find from the many articles on this subject online. As usual with how-to information, it’s the details that matter, and details are what you’ll get here.
Steel pipe and fittings are sold in hardware stores everywhere, and it comes in two types. “Black iron” pipe is made of plain steel, while “galvanized” pipe is exactly the same except that the steel is coated in zinc to prevent rusting. You can make light fixtures out of either kind, but plain, uncoated black iron pipe is easier to paint reliably. Both types have threads that allow the pipe to tighten together.
Tip#1: Choose 1” Diameter Steel Pipe
One inch diameter steel pipe fittings make the most sense for light fixtures because it’s pleasing visually and it offers plenty of room inside for wires. The thing is, that 1” number is deceiving because 1” steel pipe actually measures 1 5/16” outside diameter. The 1” dimension refers to the smallest inside diameter of fittings in this size family. As you’re standing in a hardware store aisle, selecting pipe fittings, look at the bin labels not your tape measure for the correct diameter.
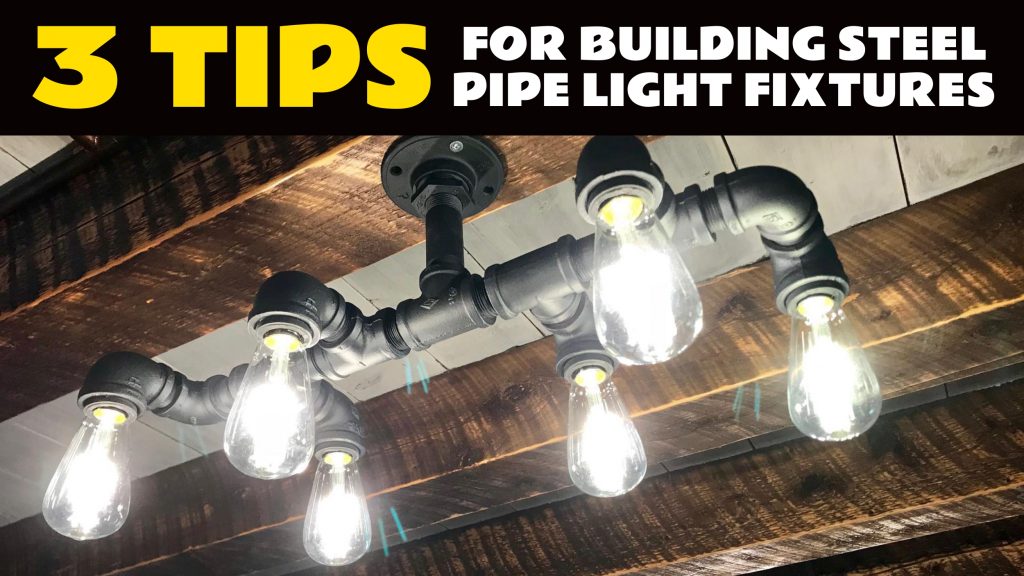
There is an exception to the 1” pipe size recommendation, and it has to do with light bulb sockets. Each light bulb needs to tighten into an actual electrical socket fitted inside the pipe, and the best type to use in a black iron pipe fixture is something called a “pig tail” socket. This black rubber lamp socket is very simple and inexpensive, with two wires coming off the end. And while 1” steel pipe is the ideal size visually for the overall fixture, it’s not large enough to accept a lamp socket. This is where a 1 1/4” diameter fitting comes in. It’s just the right size for a typical pig-tail light socket to slip inside. The fixture in the photo here includes a 90º elbow that transitions from 1” pipe thread to the 1 1/4” size that’s perfect for accepting the socket.
Tip#2: Choose a 1 1/2” Flange for Mounting
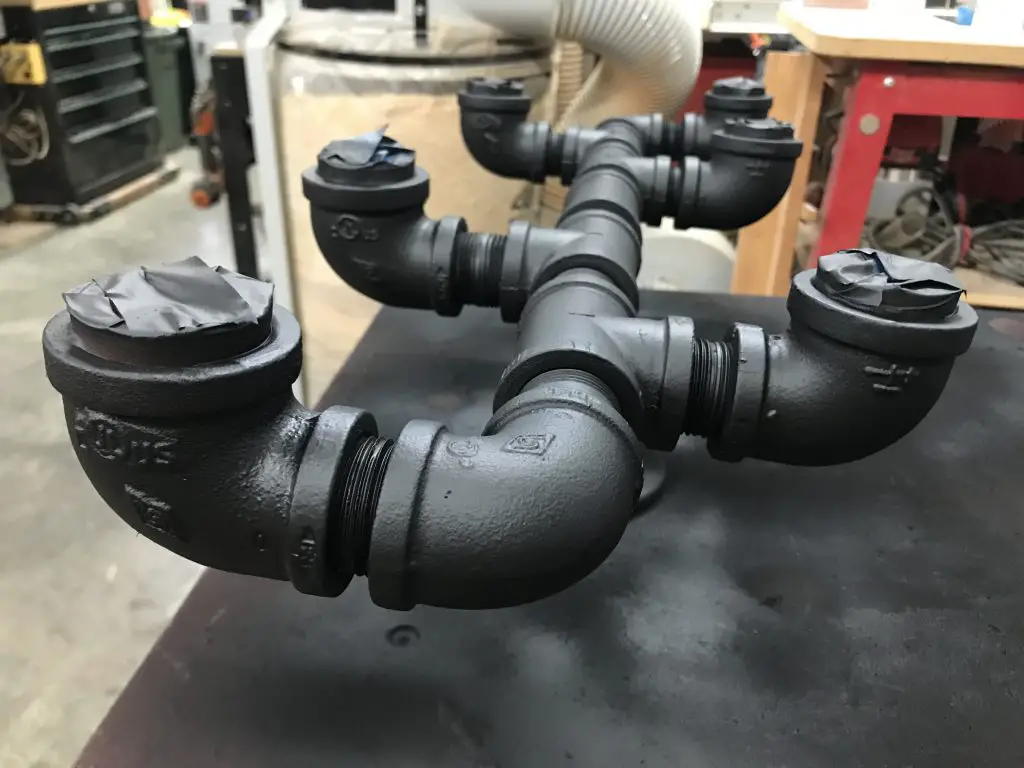
Every light fixture needs to be anchored to an electrical box in the ceiling, and something called a 1 1/2” floor flange is ideal for this. It just so happens that the standard holes in a flange like this match perfectly with the threaded holes in every standard electrical ceiling box. Take another look at the photo at the top of this article and you’ll see a fitting that allows the 1” vertical pipe to connect with the flange that’s made for a 1 1/2” diameter pipe. You can’t go with a 1” flange directly because it’s too small to cover a standard electrical box.
Tip#3: Ground Your Fixture
“Grounding” is an electrical term for a secondary wire that allows electricity to flow harmlessly to the earth in the event that a live wire inside the item becomes loose and touches the metal fixture body. As with any light fixture, be sure to connect the bare ground wire inside your ceiling electrical box to some part of the body of the steel light fixture you made. It doesn’t matter which part, as long as the ground wire is in solid and reliable contact with the metal fixture body when installed.
The look and feel of black iron light fixtures is not for every home and every situation, but there’s certainly something rugged and vintage about this approach. This is especially true when you use vintage-style Edison bulbs in your fixture.
Watch the video below to see how we build black iron pipe light fixtures at our place.

