SIPs panels empower ordinary people to create extraordinary building. There are more ways to raise a good building these days than at any other time in history. And many of the newer options are faster, less skill dependent and yield more energy efficient structures than anything in the past. That’s good news for owner-builders creating or improving their own place, and an option that’s generically called structural insulated panels (SIPs) are especially promising.
SIPs are factory-bonded sandwiches of rigid foam sheathed in wood-based sheet goods, typically 7/16”-thick oriented strand board (OSB). Panels are usually four feet wide, up to 24-feet long, and take the place of conventional stud frame walls. SIPs can even be used in place of roof trusses and rafters. And despite any ideas you might have about foam, these panels yield buildings that are actually three times stronger than stud frames. SIPs are also virtually free from the risk of internal moisture condensation and mold growth that plagues stud walls in cold climates. SIPs cost just a tiny bit more than insulated stud frame walls, but they go up much more quickly.
I’ve built structures with timbers, logs, stone and studs, and my experiences with SIPs has impressed me enough that I’ll use them again. Rectangular panels arrive on site, you cut them to create door and window openings, then tilt the panels upright one at a time to make walls. The foam is factory-recessed along panel edges to allow joint connectors (called splines) to be installed between panels. Solid wood 2x4s and 2x6s are also installed in the recessed edges around door and window openings. When you’re done, the foam is hidden and all you see is OSB on the inside and the outside faces of exterior walls.
Building Walls and Corners
 Various SIPs manufacturers offer assembly manuals that outline the details of construction, but all systems are put together in similar ways. Work begins with a 2×4 or 2×6 bottom plate anchored to your foundation. It’s important to take the time to firmly bolt the plates now, since they hold the wall panels vertical as they go up. Bottom plates must also be absolutely straight. All recessed panel edges are sized to fit over standard widths of lumber, and as you’ll see, this fact is key when it comes to the way these SIPs are fastened at the bottom.
Before you decide on a bottom plate design, there’s something you need to think about. If your SIPs wall rests on a poured concrete slab, consider the value of the double bottom plate. By anchoring an over-wide bottom plate to the slab first, then adding a 2×4 or 2×6 on top (whichever matches the thickness of panels you’re using), you raise panels and drywall 1 1/2” up off the floor, well away from any water that might accumulate on the floor from time to time.
With single or double bottom plates in place, continue by laying down a couple of beads of low-expansion polyurethane foam on your wood. Tilt a corner wall panel upright over the lumber, then get some help positioning it straight up and down using a carpenter’s level as reference. When the panel is plumb, drive nails every 8 inches through the OSB sheathing along the inside and outside bottom edges, into the edges of the bottom plate. Although it doesn’t seem likely, these nails lock the panel with surprising strength as long as the bottom plate is anchored solidly to the foundation. In fact, you’d better make sure your wall panels are perfectly plumb before nailing. Unlike with a stud frame wall, there’s no adjusting a nailed SIP after it’s up. You’ll find a power nailer especially helpful when putting up walls. Hoseless models are terrific with panels because they allow you to move around each one without getting tangled.
Standard practice for completing SIPs corners begins by filling in the recessed edge on one of your corner panels with a solid piece of 1 1/2”-thick construction lumber that matches panel size. Next, apply another piece of the same kind of lumber to the inside face of the first panel using foam and #8 x 1 1/2” screws to secure the joint. This creates a ridge of wood that interlocks with the recessed edge of the second panel as it’s raised to the vertical position. It’s a simple and strong approach.
Doors, Windows and Topping Off
There are two ways to make door or window openings. Although you can raise the panels upright, cut openings where you want them, recess the foam to make room for a wood frame, then install 2x4s or 2x6s as needed, this only makes sense for the smallest openings. You’ll get more accurate results using less materials if you install full-height wall panels on both sides of your proposed opening, with separate pieces of foam precut to fit in place above and below those openings.
 In the case of a window in a 6 1/2”-thick wall, begin by cutting and erecting the panel that forms the wall underneath the opening. Into the recessed edges of this small panel, install double lengths of 2×6, fastened together face-to-face using foam and #8 x 2 1/2” screws. Next, slide full-height wall panels into place on either side of the window wall, making sure that the distance between these panels at the top end is the same as the width of the short wall. Add more single 2x6s to line the sides of the window opening, including a 2×6 horizontally across the top. Finish up by adding another pair of double 2x6s into the recesses in the top end of the full-size panels before slipping in another piece of precut SIPs panel to form the top of the window opening.
The top of SIPs walls are finished off with a double layer of 2×4 or 2×6 lumber, just like any stud frame wall. The only difference is that this wood is installed one piece at a time into an extra-deep recess in the panel edges. This strategy is used on both regular walls, and the angled top of gable-end walls. Apply foam before each layer of wood is installed, fastening the lumber with nails driven through the OSB and into the edges of the wood.
When it comes to pursuing self-reliance today, there’s a danger that we’ll apply yesterday’s solutions to all our current challenges. And while there’s certainly value in learning from the past, there are also new ideas that have merit, too. And SIPs are just one example. Requiring only moderate amounts of resources to manufacture, these panels offer owner/builders the chance to create strong, energy efficient structures without the need to be master carpenters. And anything that lets people make good things happen for themselves is definitely worth a look.
Tip: Two Layers of Protection
The incredible strength of SIPs panels is entirely dependent on the integrity of the bond between OSB and foam. If this breaks down, you’re in big trouble. Where chronic water leaks around doors and windows on a stud frame wall will lead only to rotten sheathing, there’s still a wooden frame to provide structural support behind the scenes. Not so with SIPs. That’s why it’s very important to take moisture control seriously, and a double-layered approach is worth considering. Instead of relying on the questionable value of building wrap as secondary water protection, install ice and water shield next to and below corners, doors and windows. If the integrity of caulking or flashing or weather sealing ever fails in these locations, your all-important OSB will remain high and dry regardless..
Tip: Wiring In SIPs
 The installation of wiring is one of the first concerns people have with SIPs, but the reality of the challenge isn’t a big problem. The best way to install wires is by stringing them through floor and ceiling frames, then running the cables down slots routed through the interior surface of the OSB. Cut a plywood template to guide the travel of the router, speeding the operation. Vertical cuts in the OSB are completely acceptable and don’t interfere with wall integrity. Just be sure to avoid horizontal cuts since they greatly reduce panel strength. Extend the slots to 2” deep using a hot knife to remove foam, then install wiring and electrical boxes. Apply foam to the wire slots after inspection, then install interior wall surfaces.
Tip: Tools of the Trade
Working with SIPs requires a few special tools, and though you can bumble along without them, you’ll get better results more quickly with the right equipment.
Panel saw: Most types combine a small chainsaw bar with s hand-held circular saw body. This allows terrific depth of cut (more than 10” in some cases), with precision angle control.
Hot knife: It’s not uncommon to have to re-establish recessed edges on SIPs panels cut in the field. A hot knife uses an electrically heated wire to slice a section of foam from panel edges. You’ll get best results if your panels are perfectly dry, and if you slice the foam where it meets the OSB using a utility blade before turning on the hot knife.
 Professional foam gun: Expanding polyurethane foam is a key component behind the legendary energy performance of SIPs buildings, but to apply it accurately and at lowest cost, you need a good foam gun. The best are made of metal and thread onto a replaceable foam canister. Foam flow is controlled by a valve at the tip of the nozzle, connected to a trigger at the gun handle. In addition to foam, you’ll also need some solvent to clean the gun. This comes in a pressure can with the same kind of threaded top as the foam. Screw it onto the gun and let a bit of solvent run through the gun after removing a spent can of foam and before installing a new one.
Cordless impact driver: SIPs construction involves driving plenty of screws and this power tool is the very best one for the job. Impact drivers deliver more screw driving power than a similar size of cordless drill. The oscillating action imparted to the bit by the impact gun also makes it much less likely that the driver bit will round out the screw head.
Nail gun: One of the most effective ways to speed progress putting up SIPs panels is to use a nail gun to secure most of the joints. And a hoseless gun is the very easiest of all. The best use a canister of combustible gas to propel framing nails up to 3 1/4” long into wood.
Tip: An Attic For All Seasons
Even SIPs suppliers will tell you that there’s no significant technical advantage in using panels on a conventional roof. If all you’re after is an empty attic space with fiberglass insulation between the joists, then trusses are the fastest, easiest and cheapest option. But if you question this standard design approach in favor of a livable attic, then SIPs make a great deal of sense. And the reason has to do with ventilation.
To function correctly, framed roofs with insulation need to have ventilation channels built into the space between rafters. And while it’s possible to combine conventional insulation along with eaves-to-peak ventilation passageways, it’s not an easy or efficient proposition And if you simply stuff the rafter cavities full of fiberglass and cover everything with polyethylene, then you’re probably creating a moisture trap that will spawn mold growth and seasonal condensation drips.
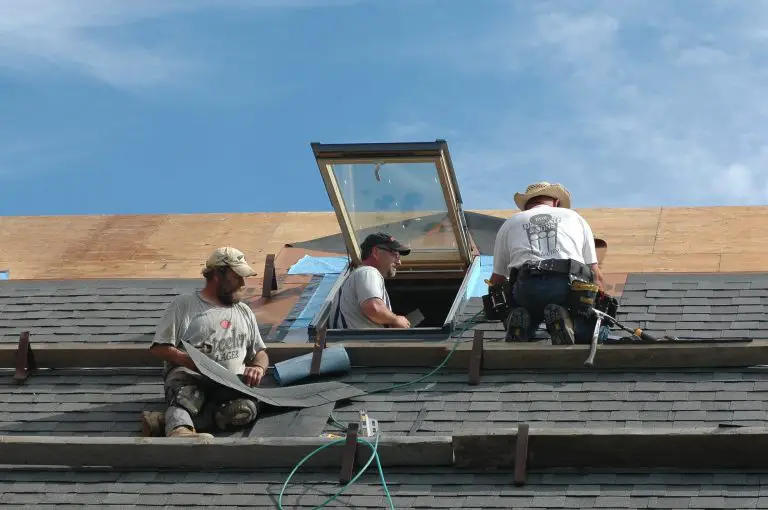
SIPs panels, on the other hand are both impervious to moisture and self-supporting. They don’t need to be ventilated and they’re strong enough to function without rafters. You simply hoist the roof panel in place with a boom truck, setting it down on a bead of polyurethane foam at the bottom and on a ridge beam on top. Roof panels are secured with long washered screws.
The only drawback of a SIPs roof is the high temperatures that develop on the surface from sunshine. Since the roof is unventilated, daytime temperatures can get high enough to fry conventional asphalt shingles in just five or six years. Fiberglass shingles, on the other hand, have a much higher heat tolerance than organic versions, and some brands are even warranted for 50 years on specific SIPs roofs. Apply drywall to the inside of your attic loft (no need for a vapour barrier), and you’re done.


I hope you found this content useful!
Your generous support helps me produce more practical, hands-on content that I hope you’ll find useful.
Steve Maxwell