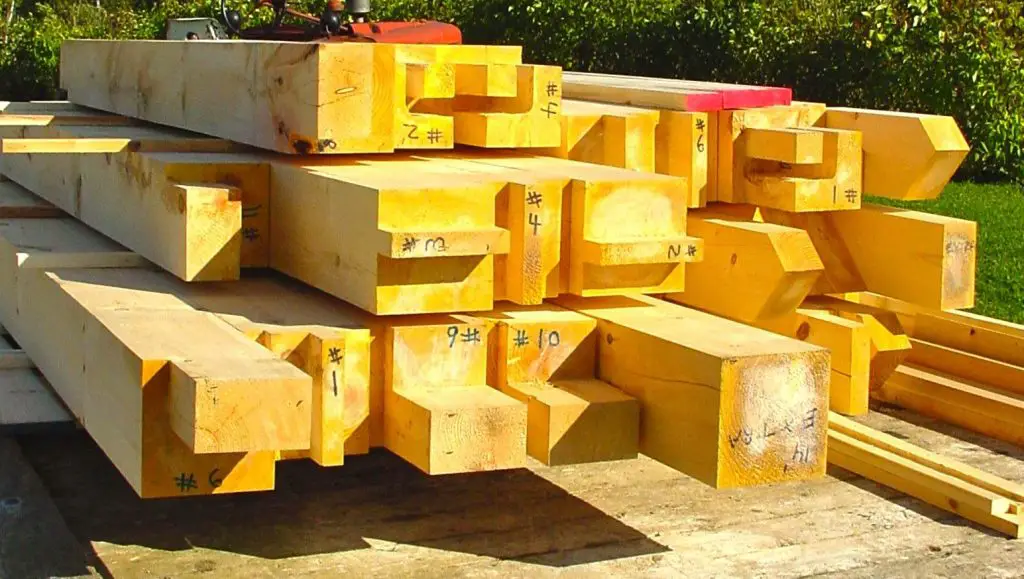
This load of timbers arrived at a building site near my place ready to assemble into a frame. It came from a company that makes and sells timber frames across North America.
- Reading Time = 9 1/2 minutes
- Video Watch Time = 2 minutes
I live in Canada, and my country grows more big trees than many other nations in the world. The thing is, you’d never know it by looking at most of our houses. Even though wood is almost always involved in Canadian home building, it’s typically sawn into boring, uniform 1 1/2”-thick planks, spiked together with no thought for appearance, then hidden under drywall. That’s too bad because the reality is that it’s never been easier to incorporate big, majestic, visible timbers into renovations and new homes, as you’ll see.
All of this is why I want to introduce you to a handful of innovative technical details that can bring visible timbers to many houses. To understand the logic behind these approaches, you first need to understand why timbers so rarely make it into homes and cottages in the first place.
Timbers are big, heavy and more difficult to source than regular lumber. People who can skillfully cut and join timbers in traditional ways are even harder to find than the wood itself. Physical challenges and labour realities like these have always been part of building with timbers, it’s just that we’ve sidestepped them with more modern, less elegant methods. Typically, standard lumber is milled into planks 1 1/2″ thick by the truckload, then joined together with nail guns by armies of workers paid by the piece. This makes for more affordable houses, but it also stifles the kind of majesty and grandeur that only big, exposed timbers can conjure. Over the last 35 years I’ve used various unconventional methods to incorporate structural timbers into my home renovation and building projects. Here are three that I particularly like.
Hybrid Timber Frame Approach
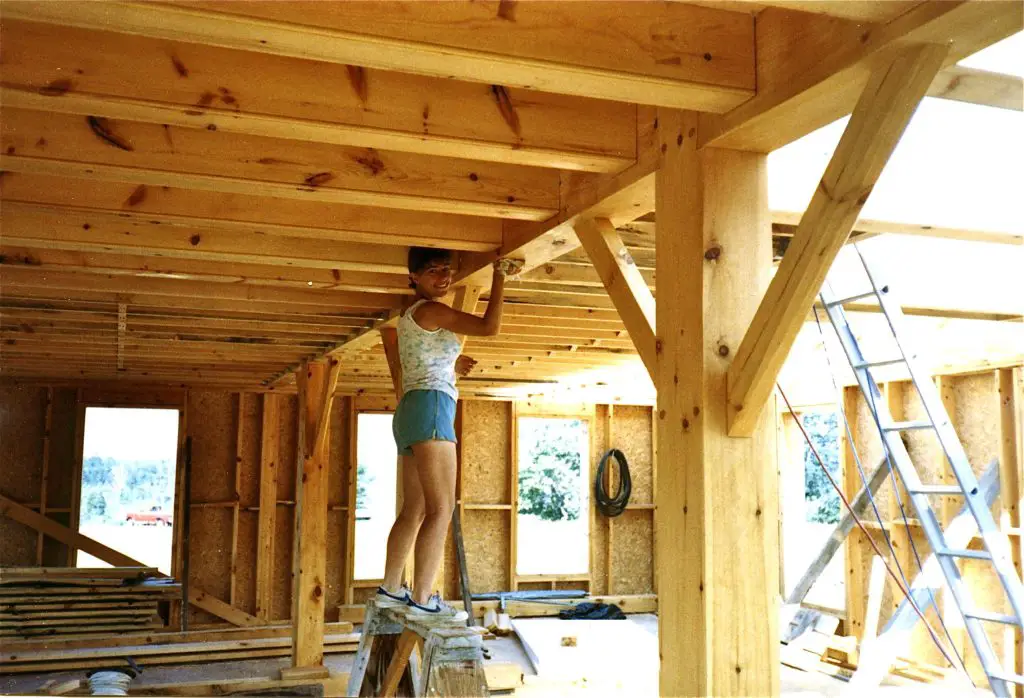
This my wife, Mary, in 1989, working with me to build our hybrid timber-stud frame home. Exterior walls are 2×6, with visible posts and beams inside. These timber elements went up one at a time, making perfect sense for us as we built on our own (just the two of us) and for the first time.Traditional timber frame homes are still built today as they’ve always been, with big wood joined together without metal fasteners, then raised upright as frames to form walls and roofs. This is a beautiful thing indeed, but out of reach financially for many people. One way to ease the cost and complexity of this process, while still retaining most of the stunning interior appearance of traditional timber framing, involves combining modern stud frame outer walls with timber frame posts and beams raised one at a time wherever they’ll be visible in the completed structure.
While this approach may offend timber purists, it does make it more affordable and practical for ordinary people to make real timbers part of everyday life. Traditional timber joinery techniques such as pegged mortise and tenons, dovetails, let-in knee braces and visible overhead beams are all still possible and practical with this hybrid approach, while the effort of raising the components is significantly reduced because the timbers go up one by one, not entire frame huge sections at once. My favourite timber framing guidebook is Building the Timber Frame House: The Revival of a Forgotten Craft by Tedd Benson. It covers everything you need to know about the old-fashioned joinery side of things. As for how your traditional timber beams and posts interface with modern stud frame walls, this involves a couple of simple tricks.
The main engineering difference between stud frame walls and timber frame construction has to do with how loads are distributed. Stud frame walls distribute loads much more evenly across their length than the large point loads typical of timber beams. To accommodate this fact you need to create composite posts within stud walls wherever they’re supporting beams above. Where an 8×10 main beam joins to an outside wall, for instance, spike four or five 2×6 studs together vertically within the wall frame, immediately below the beam, to create a kind of composite post. Smaller beams, such as 6x8s spaced 24” on centre to replace conventional floor joists, can rest directly on the double top plate of a stud wall. Either way, I use 8”, 10” and 12” spikes to secure timbers to the underlying stud frame wall structures. Predrill holes through the beams to make sure the spikes drive straight. All timber connections themselves are made using traditional joinery methods.
Build-Up Beams
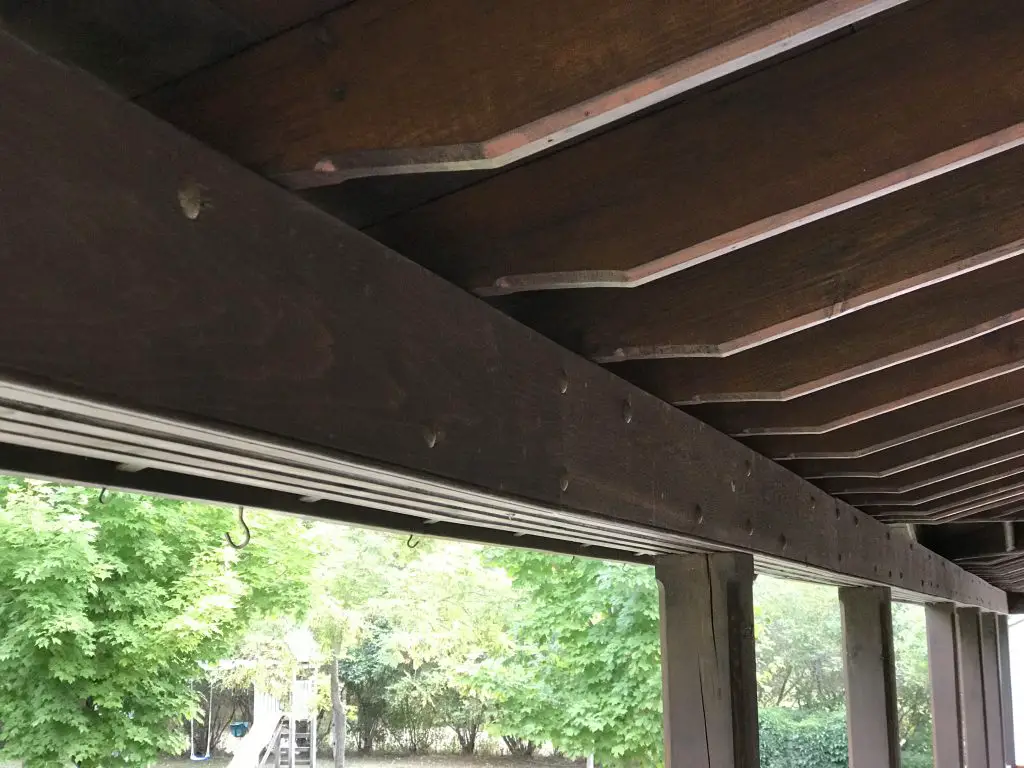
Sometimes even the weight of handling and raising solid timbers one at a time is a problem, and at times like these built-up timbers make sense. They’re made from ordinary, construction-grade 2×8, 2×10 and 2×12 planks bolted together, but don’t let that homely description fool you. Built-up beams provide surprisingly beautiful results when sanded, routed and bolted together with care. This approach works well indoors or in sheltered outdoor applications, too. Built-up beams are also less likely to inflame your building inspector. Concealed versions of built-up beams are a regular part of modern home building, so your inspector has charts for allowable span, beam width and beam thickness.
The fact that you’re using composite beams in an exposed application makes no technical difference, though there are steps to follow if you want built-up beams to look good when you’re done. If you bolt three or four 2x10s together, the result will look pretty much like three or four 2x10s. Ugly. That’s not terrific, but it doesn’t have to be this way for you. Three simple steps make all the difference.
My favourite approach begins with a small 45º chamfer bit, in a small laminate router to mill angled edges wherever planks meet each other as they’re bolted together. Besides looking great, chamfered edges hide the slight but inevitable mismatches that occur between boards as they’re bolted together. The outer edges of composite beams also look best milled with a much larger chamfer bit, with the profile stopping several inches before the edge of the beam meets adjoining surfaces. You’ll find wooden hand screws most useful for aligning multiple boards as you’re marking, drilling and bolting them together.
While you could use nails or screws to hold the layers of a built-up beam tight, 1/2” diameter carriage bolts, flat washers and nuts are much better on three counts. First, bolts let you pull the layers of wood together and hold them with a lot of force. The domed heads of carriage bolts also look pretty good. And if your composite beam will spend its life in a heated, indoor space, bolts also allow the option of tightening the nuts when layers of wood inevitably shrink.
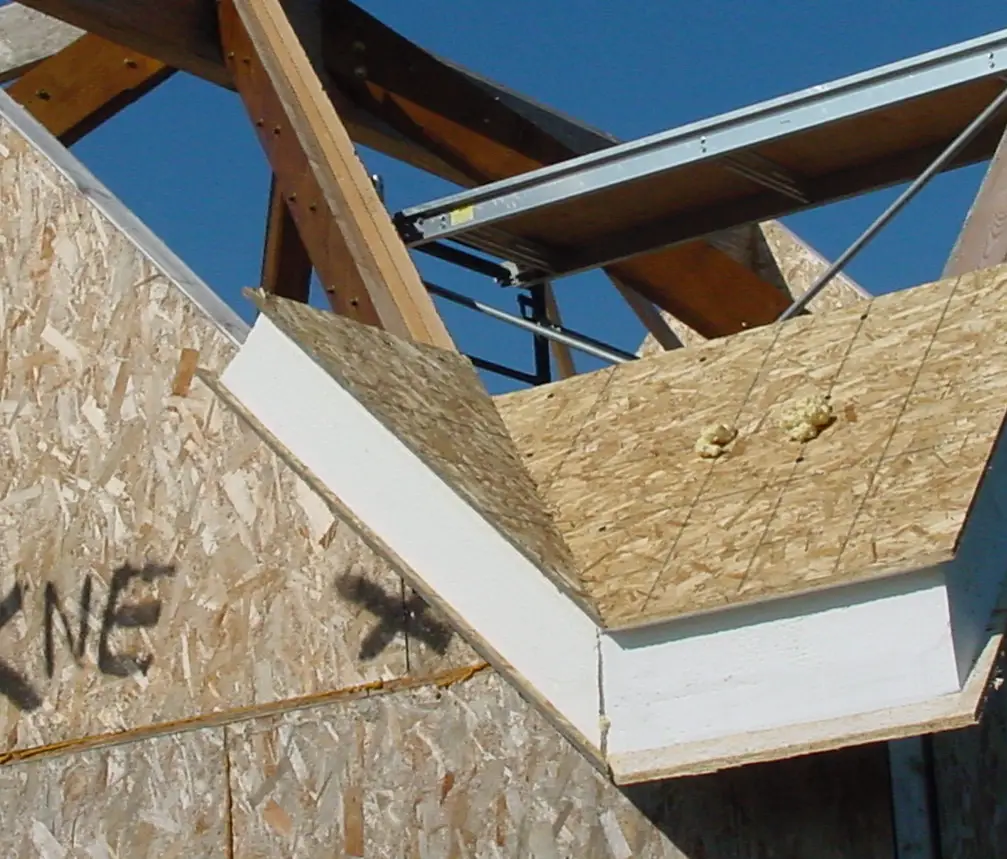
There’s one other situation where built-up beams really shine. In cases where you need a beam to support a roof valley, the built-up approach can’t be beat. The layered design allows inward sloping angles to be sawn on the top edges of the planks before the layers come together. This creates the ideal trough-like shape necessary along the top of the beam to properly support roof sheathing. This is even more important when you’re building a roof with structural insulated panels because of the higher point loads involved. That’s what you can see in the image above.
Metal Timber Hardware Helps

This kind of steel plate joinery greatly simplifies timber frame construction.Preparing interlocking joints is the most difficult part of timber framing work, and it’s why metal connection hardware was invented. Besides the typical bolted plate-type connectors, metal hardware exists for holding posts and beams together invisibly, too. Timberlinx (877.900.3111) is a Canadian firm that offers a unique range of hidden timber fasteners that require nothing more than accurately drilled 1 1/8” holes. A special jig makes it easy to bore these holes square. The system works in traditional solid wood beams as well as modern glulam or microlam timbers.
Custom-fabricated metal brackets are another option. Make a full-size model of the bracket you need using corrugated cardboard and hot melt glue, then hand it over to a welding shop to be built in mild steel.
If you’ve got access to timbers where you live, your home could reflect the heritage of craftsmanship and timber availability – a heritage that not everyone around the world enjoys. Visible timbers aren’t for every building and every owner. That said, if you’ve ever felt an attraction to big timbers, know for sure that it’s easier than you might realize to bring them into your life.
Prefab Timber Option
A handful of suppliers around the world offer custom-cut timber frame packages built to your particular design. It’s an option that eliminates the need for skilled labour on site, though you still need a strong, burly crew to assemble the parts. Joints are milled with large machines in a factory setting, with the numbered timbers ready for assembly when they arrive. The timbers shown on my farm wagon, above, come as prefabbed pieces, ready to go together.
Dealing With Sap From Timbers

Most timber frames are built from softwoods, and this means that oozing sap may show up – and keep showing up – around knots. This is especially true if you’re working with spruce in exterior applications. Although there’s nothing that reliably stems the flow of sap from a determined knot, there are ways of periodically cleaning off the goop. A putty knife is ideal for scraping off the bulk of hardened sap, and turpentine is the ideal solvent for removing anything remaining. You’ll have much better results if you let fresh sap harden for a while. It comes off easier that way, even if you’re using turpentine. It’s surprising how long an oozy spruce timber can keep on oozing. I’ve seen them do it for years.

Outdoor projects let you gain low-risk experience with timbers where precision doesn’t matter quite as much as with interior structures. One of the most common operations involved in outdoor timber work is the lap joint. Notches are cut half way through the thickness of interlocking pieces of wood, allowing them to overlap each other evenly, forming a strong, 90º connection. Multiple cuts with a hand-held circular saw defines the width and depth of each lap, while also making it easy to knock waste wood out of the joint area with a mallet and chisel. You can see a lap joint I was making in an 8×8 timber above.
VIDEO: Timber Frame Details
Click below to watch my video tour of simple, timber frame details you can apply to outdoor building projects.I think you’ll like this video.
 Did you find this useful? I hope so. Please consider helping me cover the cost of creating and publishing content like this. Click the “buy me a coffee” button below for a fast, safe and simple way to contribute. Thank you very much.
– Steve Maxwell
