- Video Watch Time = 31 1/2 minutes
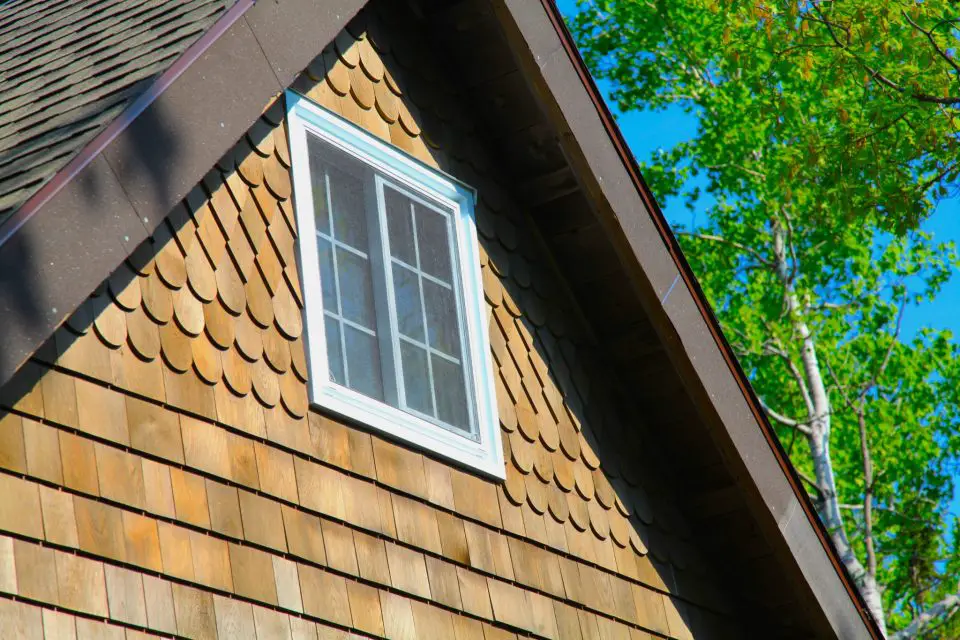
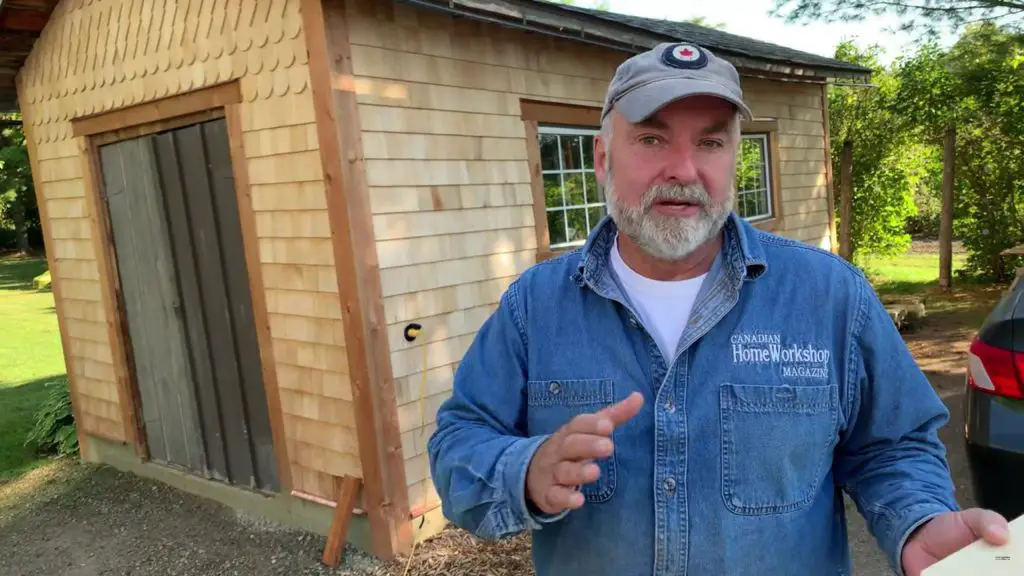
Cedar sidewall shingles have got to be the most under-appreciated exterior siding option going. Long-lasting, beautiful and a pleasure to install, I know about these virtues first-hand. Besides the fact that I live in a part of Canada with a century-long tradition of successful cedar sidewall shingling, I’ve installed plenty of white cedar shingles on projects of my own and those I’ve helped out with. The cabin below is the house one of my son’s built for himself, with cedar sidewall shingles as you can see.
How I Work Differently
This approach to siding is the culmination of research and experience I’ve done over the years, all with one main aim. I’m not just interested in an ordinary cedar siding shingle installation, beautiful as it would be. I’m aiming for an installation with a good chance to be in place and working with full vigour 50 years from now (without maintenance), and it takes particular installation details to make this happen. That said, it’s what’s going on behind the scenes that I’m really interested in sharing with you.
Cedar Shingles for Exterior Walls
Shingles for cedar siding are tapered pieces of wood that overlap each other to form weatherproof wall and roof surfaces. Cladding exterior walls with cedar shingles fits visually into any neighbourhood, but they’re especially appropriate in natural settings where more modern siding options are often out of place aesthetically. In fact, very few siding choices are as visually appropriate as cedar shingles in a forested or lakeside building site. As far as durability goes, there are three issues you need to keep in mind as you plan:
- Shingle choice
- Back-of-shingle drainage
- Fastener choice
There’s no shortage of places to buy wood shingles for cedar siding, but regardless of where you go you need to choose between one of two species of cedar used for commercial shingle production. White cedar grows on the east side of North America, so that’s the traditional choice for shingles east of the middle of the continent. I buy my white cedar shingles directly from a mill in New Brunswick, Canada called Waska. Red cedar is a west coast tree, but because of the abundance of this wood and the huge diameter of logs, red cedar shingles are popular locally out west, and easily available through building suppliers across the North America.
Outlets that sell white cedar shingles claim longer life, better rot resistance and physically stronger and less crack-prone wood than red cedar, but that’s not why I usually opt for white cedar shingles. In the end it was the chance to use an indigenous wood that swayed me, and the fact that white cedar weathers to a silver grey while red cedar shingles weather to a much darker colour.
Shingle quality is excellent from Waska, and the company delivered them right to my building site for less than the cost of shingles purchased locally that I would have had to pick up myself. I also paid extra to have the thick ends of the shingles trimmed perfectly square to the sides – an operation called resquaring and rebutted – R&R for short. It makes for easier and more precise installation, so it’s definitely worth it.
Cedar Wall Shingles: Create a Drainage Channel
To get the longest working life from cedar sidewall shingles, you need to install them in a way that allows ventilation to occur on their back faces. This means creating some kind of gap behind the shingles where they’d normally touch wall sheathing, and there are a couple of ways to do this. The traditional approach is to fasten horizontal strips of wood to the building frame, then fasten the shingles to these. Trouble is, these strips must run horizontally, preventing leaked and condensed water from free downward drainage onto the ground. Instead, I opted to use a product called DELTA-DRY rainscreen over the wall (www.cosella-dorken.com; 888.433.5824), before the shingles went down. It’s a dimpled plastic membrane installed over waterproof building wrap. Shingles sit on top of this membrane, secured about 1/2” away from the underlying wall sheathing.
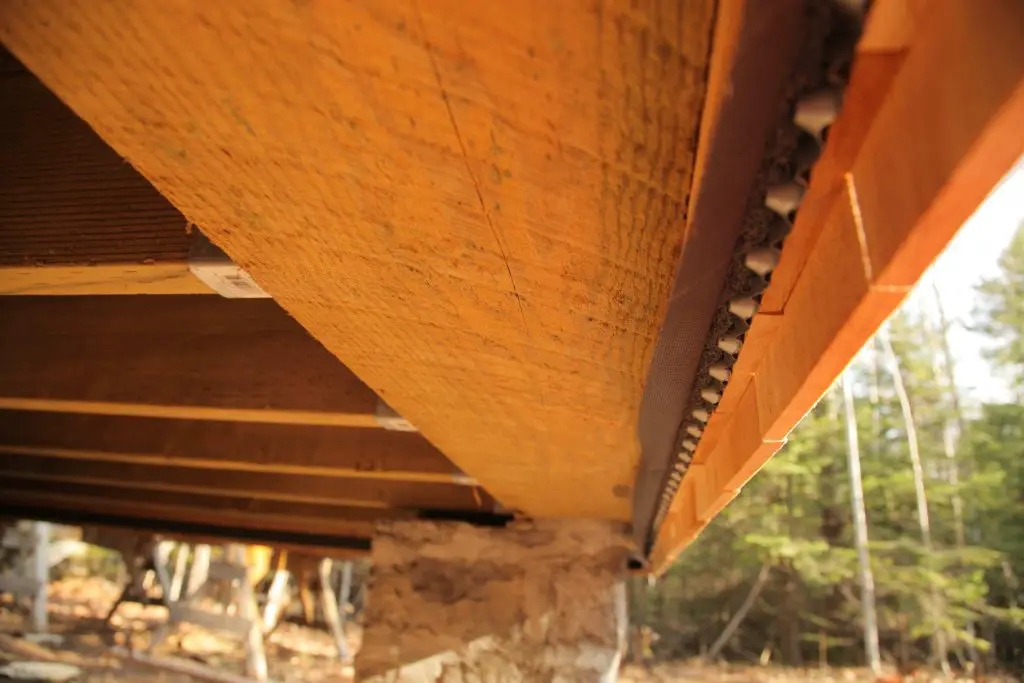
Gaps around the perimeter of the rainscreen are filled with woven poly mesh during installation to keep insects out, while still allowing downward drainage of water in the event that moisture builds up behind the shingles. You can certainly install cedar shingles without a drainage channel like this, but the longest lasting installations always have them. Besides the threat of leaked water, condensation can build up behind shingles, too. The last time I checked with Cosella-Dorken, DELTA-DRY wasn’t specifically rated for use underneath cedar shingles, but only because they hadn’t tried this application yet. I can tell you first-hand that shingles go down wonderfully over this material. It’s a pleasure to cut, fit and fasten.
Cedar Wall Shingles: Stainless Steel Fasteners Are Best
Although cedar shingles are often installed with a variety of different nails or staples, if you take the time to look you’ll find that official trade agencies and manufacturers in the shingle industry are fairly particular about fastener choice. According to my research, there are two best-practice options:
- shingle nails
- air-driven staples measuring 7/16” wide
Stainless steel fasteners are always optimal for exterior applications because they never rust, but finding shingle-friendly fasteners in these configurations isn’t easy. My local building supply outlet offered to order them with a 3 week wait time, but for half the price I had them in my hands in two days. I bought from an online outfit in California called Fastener USA (www.fastenerusa.com; 877.593.2723). They knew exactly how to handle shipments to Canada duty-free, and offered first-class advice when I explained what I was doing. I ordered 2” stainless steel staples (long enough to go through the shingles and the rainscreen and into the wall sheathing), as well as 2” shingle nails for those times when hand driving makes more sense than using an air stapler.
If you’ve never considered cedar sidewall shingles, you’re missing out on something worthwhile. It’s traditional, a joy to install, it comes from a renewable resource and the best installations offer at least a lifetime of pretty much maintenance-free service. The video below teaches details of how I install cedar sidewall shingles. If you give this a try I don’t think you’ll be disappointed.


I hope you found this content useful!
Your generous support helps me produce more practical, hands-on content that I hope you’ll find useful.
Steve Maxwell