Hot-rodding? Yes, this means tuning up for optimal performance and that’s what this article is all about. But first, a true story . . .
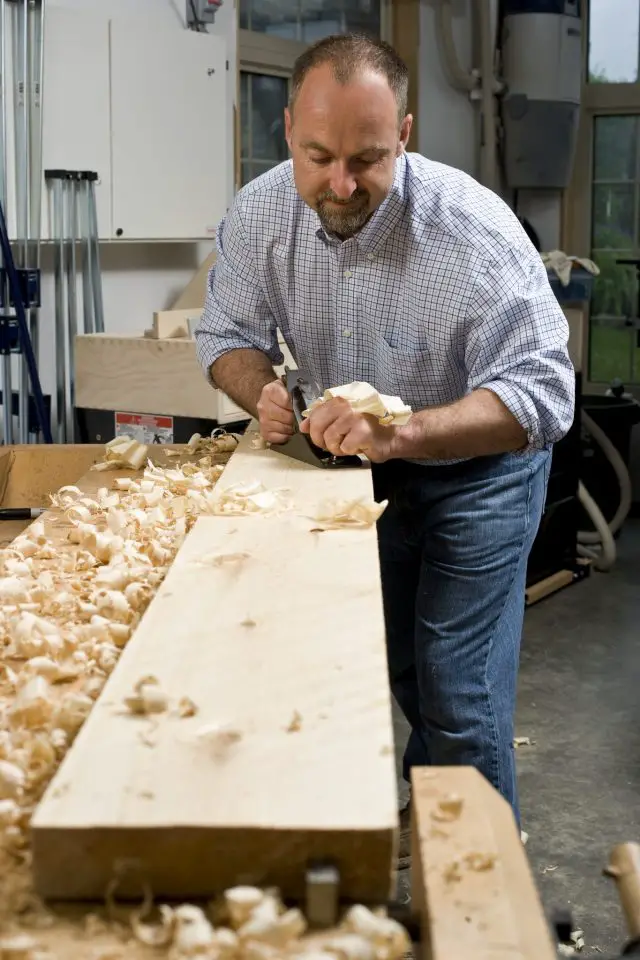
I was seven years-old when I used a hand plane for the first time, and the experience almost crushed me under a load of guilt. It happened while my grandfather was letting me use an all-wood smoothing plane originally owned by his father, a British-trained cabinetmaker. Everything was going well until I hit a finishing nail buried in the scrap pine I was practicing on. That accident nicked the blade, of course, inflicting what seemed to me like permanent damage on the tool. Every time I took another stroke, a long, thin bulge of wood on the otherwise smooth, planed surface reminded me of my mistake.
But wise granddads don’t earn their positions without knowing how to deal calmly with all the nicks that life dishes out. And it wasn’t long before I witnessed first-hand how my enormous problem could be eliminated and the tool made better than before by applying skill and patience. Time spent honing out the nick and tuning the plane left it much improved before it was back in my hands. The experience also showed me that some things are worth tinkering with. Hand planes are one of these things. I’ve since learned to tune my own collection of hand planes — both old and new — and to experience the satisfaction that comes from curls of wood swooshing out of a hotrod hand plane that’s firing on all cylinders. It’s a great feeling, but it won’t happen without applying know-how. This is what it means to turn your hand plane into a hot rod, and it’s what you’ll learn about here.
Watch the video below, then scroll down for more detailed instruction.
- Video#1 Watch Time = 45 minutes

Understanding Hand Planes
If you’re new to hand planes, start by looking at the labeled illustration above. It shows all the technical terms that apply to standard smoothing, jack and jointer planes, terms you’ll need to understand as you strive for better plane performance. Although block planes can benefit from most of the tips you’ll read here, their anatomy isn’t exactly the same so they don’t all apply directly. Either way, most of the procedures you’ll read about are part of a one-time investment of effort that enables your new (or new to you) plane to perform optimally for years. You’re completing small but important tweaks to optimize performance. After that, it’s just a matter of keeping the blade sharp. Just like every violin needs to be tuned regularly by the person playing the instrument, every hand plane needs to be sharpened and adjusted before and during each use. It’s not a big deal when you understand the whys and hows.
Four Key Plane Details
There are four things you can do to make a hand plane work optimally:
- sharpening the blade
- tweaking the cap iron and lever cap
- refining the frog
- flattening the bottom of the plane (called the sole).
Of these four steps, sharpening the blade, or plane iron as it’s called in the world of hand planes, is your first task. You can muddle along with a less-than-flat sole or a frog that’s not as smooth as it should be, but a dull plane iron turns any plane into nothing more than a fancy paperweight.
There are two essentials behind every sharp plane iron: a correct bevel angle of 25 to 30 degrees; and a finely honed edge that’s capable of cleanly slicing curls of end-grain from softwood test blocks. Both bevel angle and a sharp edge work together to create success. The bevel angle is the angle formed by the two surfaces of the plane iron that come together in a point. Both faces of the bevel must be fully honed for the edge to be effective.
Grinding Your Plane Iron
If your plane is new, you can probably skip the first sharpening step — grinding a correct bevel on the plane iron. High quality, factory-new planes will have this detail right, so you can skip ahead to the section on honing. You’ll need to grind your plane irons later in the event a large nick develops in the blade or when the bevel angle gets too steep after considerable use and honing. But as I said, grinding probably won’t be necessary with a new plane and won’t be necessary very often with an old one.
So let’s say you’re dealing with an old plane iron that’s seen lots of brutal action, perhaps even opening paint cans or scraping off furniture finishes. Grinding is essential here.
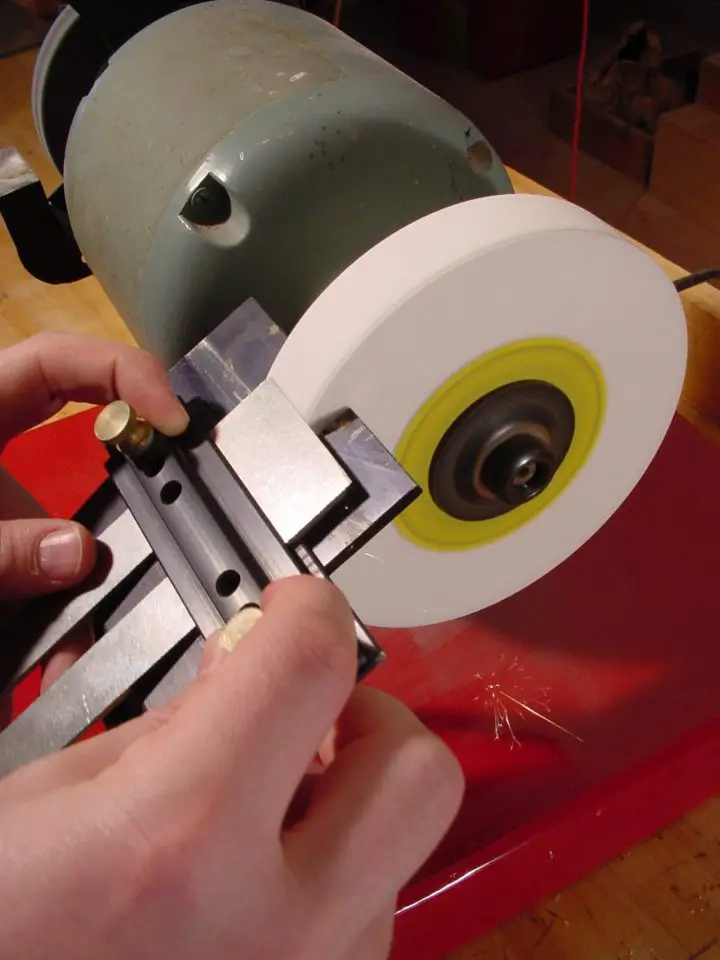
Successfully grinding a plane iron demands the same things needed for reshaping the business-end of any woodworking edge tool. To start you’ll need a stationary bench grinder capable of supporting the plane iron securely while reshaping its surface with minimal heat build up. Understand right now that heat is any edge tool’s enemy. If your plane iron becomes yellow or blue at the tip because of grinding heat, it will never hold an edge properly again. At least not until it gets re-tempered by someone expert at working high-carbon steel.
When it comes to tool grinding machinery, you’ll find more than a few wet grinders that can do a great job for you. Trouble is, they’re often beyond the average budget and limited in their use for general-purpose grinding. The good news is that an inexpensive bench grinder can do a great job for you preparing tools, as long as you upgrade the tool rest and grinding wheel. A generous size, accurate control over grinding angle, and a sliding tool holder are features you’ll find on all good bench grinders.
Another thing to consider for your bench grinder is a cool-running, soft-bond abrasive wheel. Except for their white color, these look the same as regular grinding wheels. But the softer consistency means that fresh, sharp abrasive particles are continually being exposed while grinding. These remove tool steel with much less friction than the old, rounded particles that develop on traditional wheels. The result is a cooler grind, though the cool wheels do have a shorter working life precisely because they’re softer than regular wheels. They need to be.
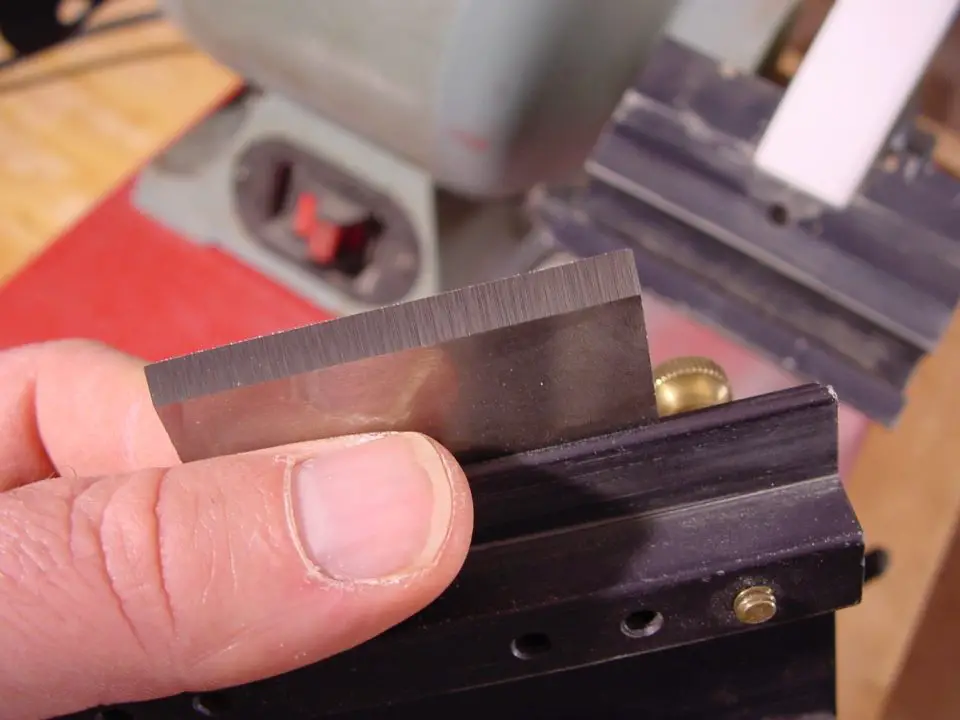
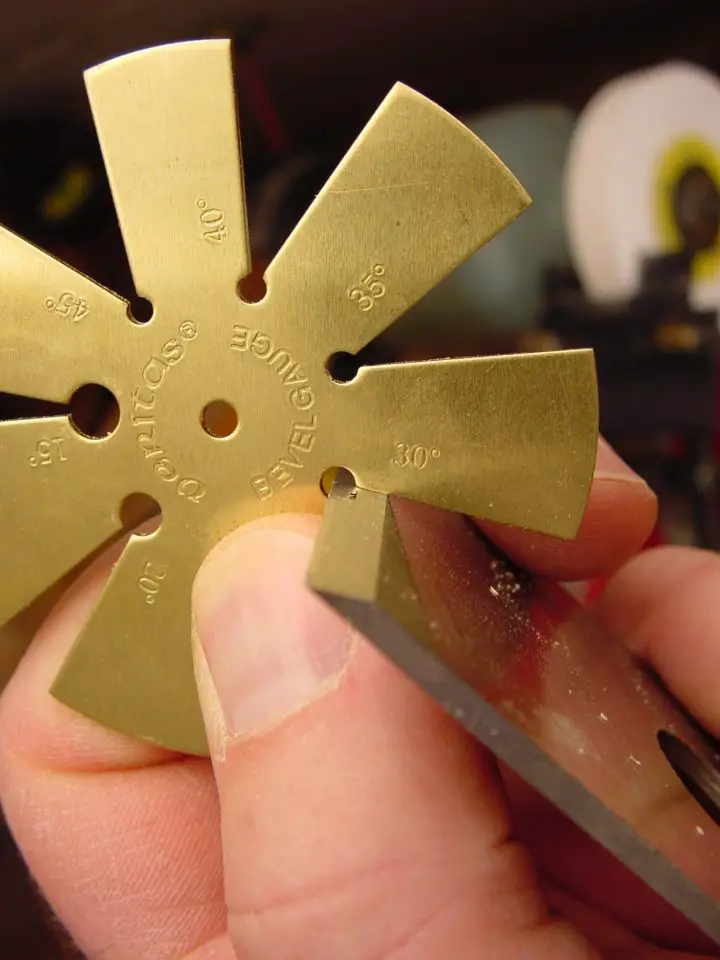
Even with a cool-grind wheel, you still need to be careful. Don’t make sparks for more than two or three seconds at a time before dipping the tip of the iron in cold water for five seconds. Keep the grinding and cooling process going until the entire bevel shows an even, freshly-ground surface, with a small burr of rough metal formed at the tip. There are great little tools out there for measuring the angle of the bevel you’re creating (you can see my favourite below), or you can use a sliding T-bevel and protractor.
Honing a Plane Blade
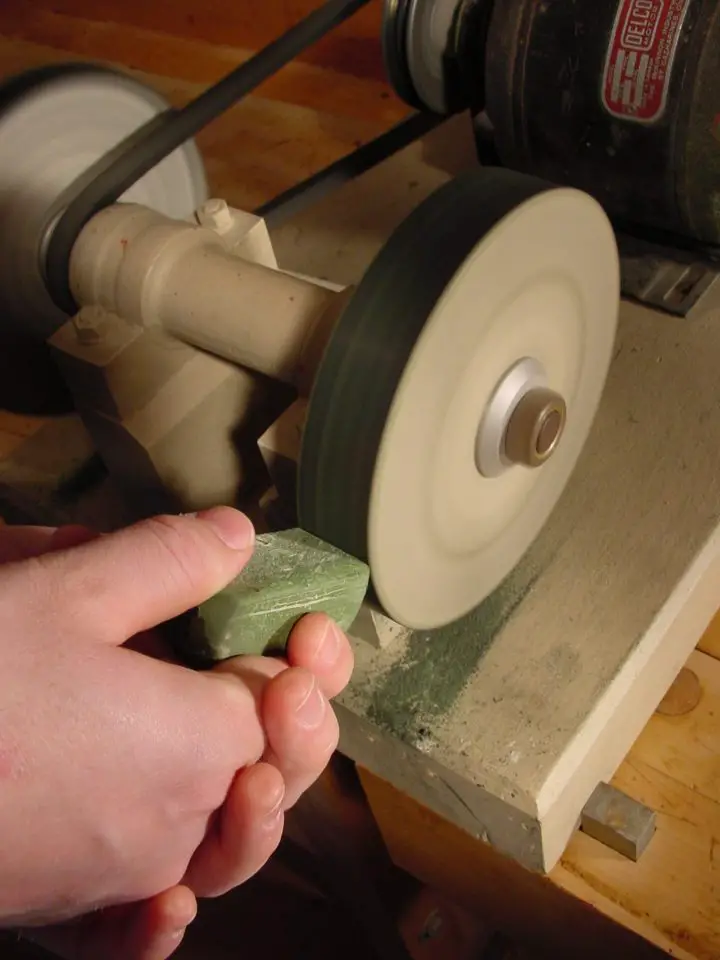
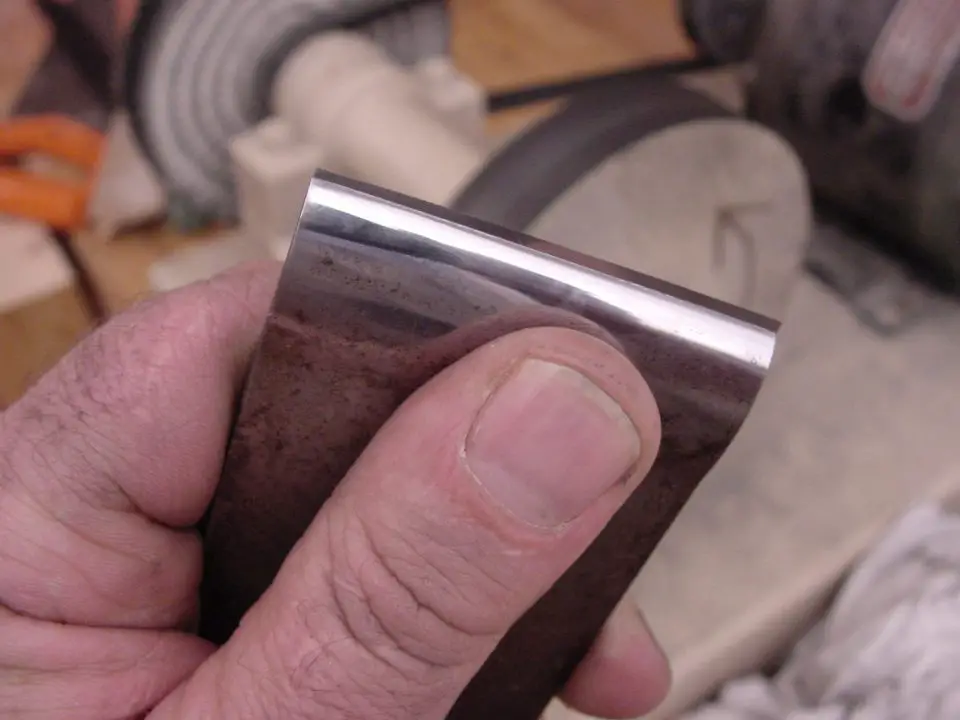
Honing comes next, and it will be a regular job for you. Count on honing and re-honing after every 15 or 20 minutes of planing if you want top performance. And though I have an entire collection of Japanese water stones in my shop for honing, I almost never use them because I’ve discovered something much faster and better for honing all my woodworking edge tools. I take all my plane irons and woodworking chisels directly from the grinder to a hard felt buffing wheel on a bench grinder charged with a chromium oxide abrasive compound for honing. It’s very fast and effective. You can see me charging my buffing wheel with abrasive compound below.
All it takes is one or two minutes to impart a razor-sharp edge on the iron this way. And buffing a slightly dull edge back to exquisite sharpness takes even less time than it does to get the iron out of the plane.
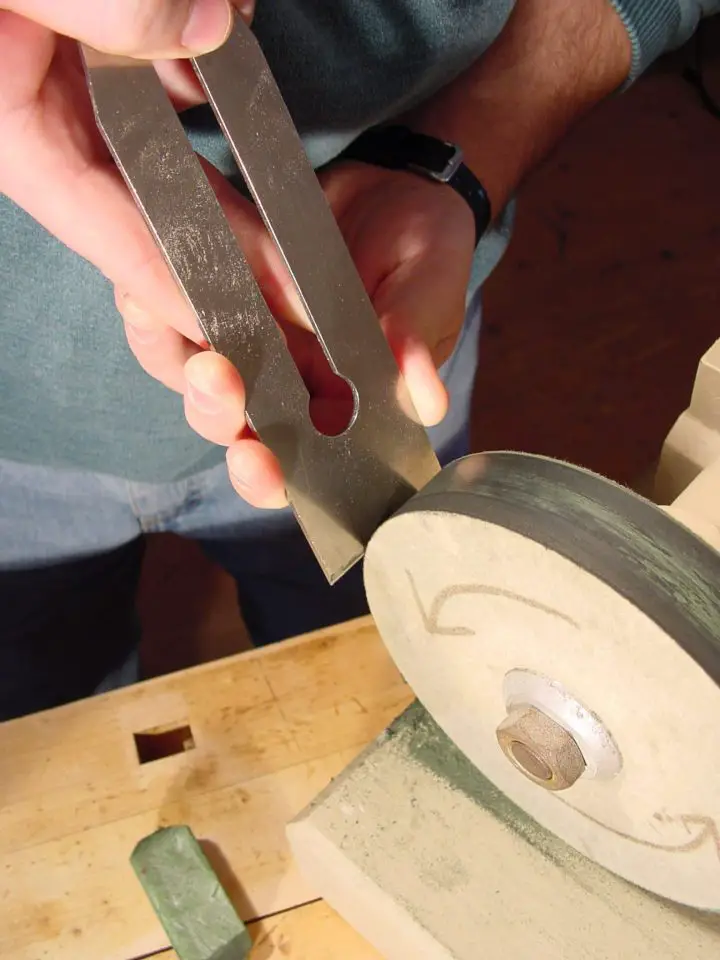
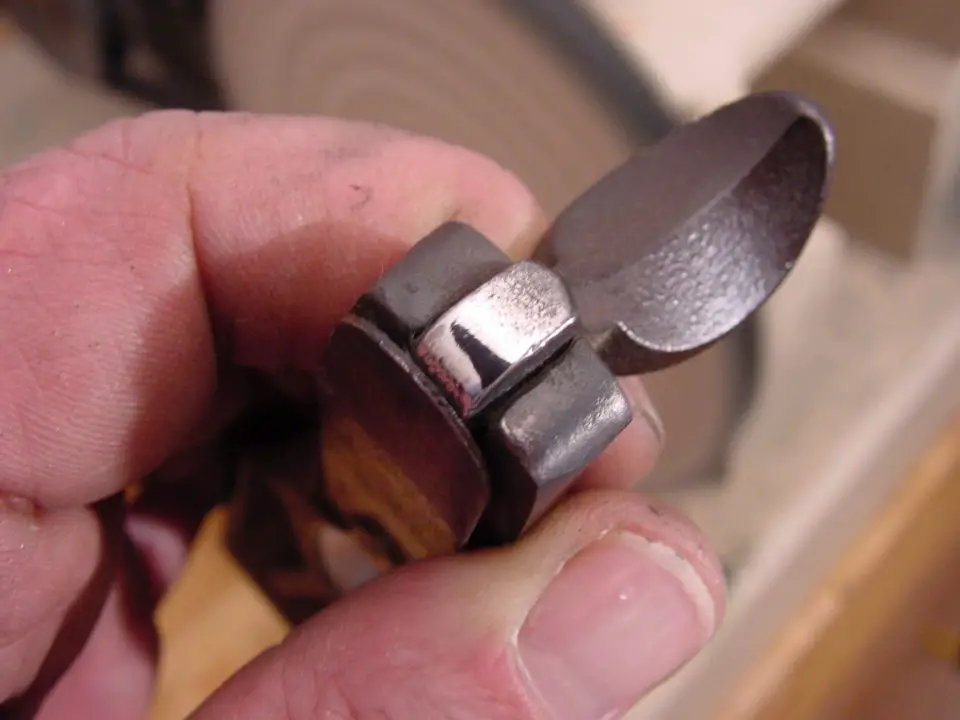
Just hold the edge of the plane iron tangent to the spinning wheel as you work, with the tip pointing in the same direction as wheel rotation. Buff the flat back surface, then the bevel again. Both the angled surface of the bevel and the flat back face of the blade must be polished and shiny for the edge to be optimal. Sometimes, with some brand new plane irons, the back face of the blade is rough enough that it needs a one-time smoothening procedure called lapping. This involves rubbing the back face of the plane iron on an abrasive resting on a flat surface until it’s smooth. More on lapping plane irons and other plane parts later.
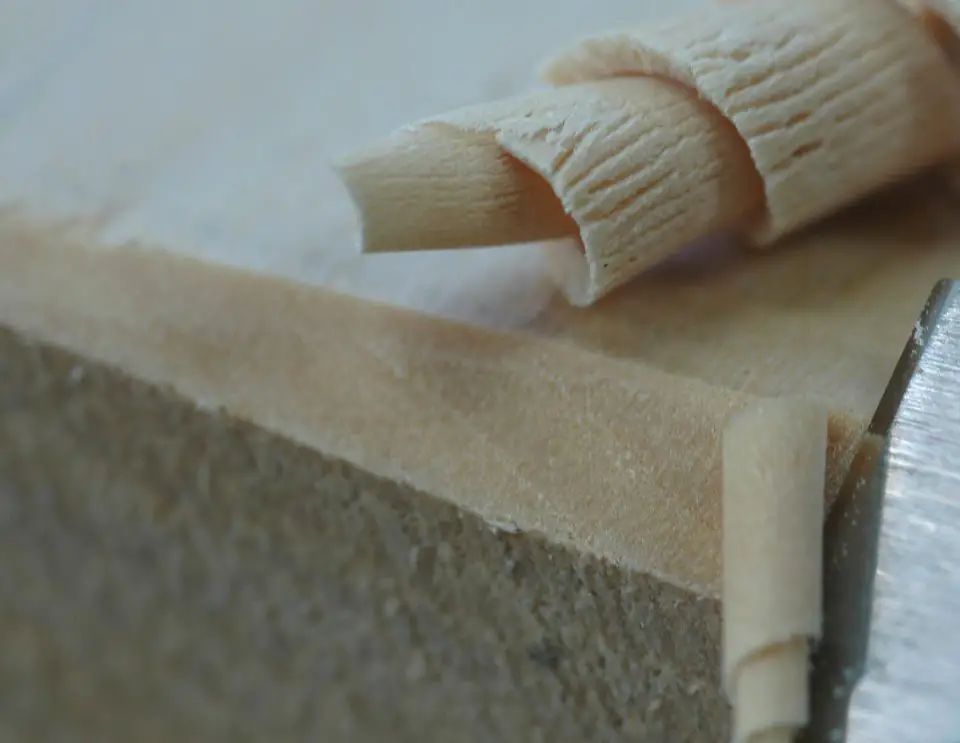
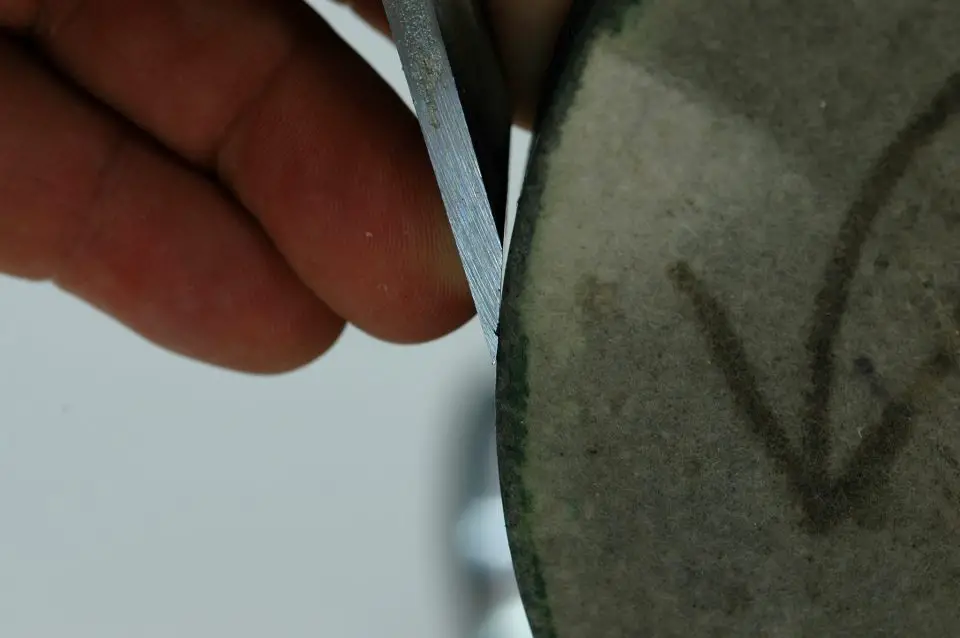
As I mentioned before, no hand plane will work properly without a very sharp iron. How do you tell if the edge is sharp enough? I apply two tests after honing, an initial test and a secondary test. Begin by attempting to shave hair from the back of your hand or arm with the blade. A properly sharpened plane iron will remove hair cleanly just like a new razor blade. If your iron passes the shaving test, give it a final check by slicing the end grain of a piece of softwood. If the plane iron is sharpened well, it’ll slice end grain with no tearing of the wood fibers. If your iron won’t shave hair or slice end grain cleanly, go back and hone again.
Tweak the Cap Iron and Lever Cap
Unlike the ongoing need for honing and (to a lesser extent) grinding, tweaking the cap iron and lever cap is a one-time operation. As the tip of a sharp plane iron slices wood fibres, the curved leading edge of the cap iron directs those shavings up and out of the tool, giving them their curly shape. That’s why the cap iron is sometimes called the chip breaker and should be highly polished (to reduce friction), with a tight, gap-free fit against the flat back of the plane iron. If you’ve ever used a plane that regularly plugs up with shavings, it probably means there’s a gap where the cap iron meets the flat back of the plane iron.
As you can see in the labelled illustration at the beginning of this article, the plane iron and cap iron are held together with a single bolt. With the two parts together but out of the plane, take a close look at the place where the plane iron and cap iron meet. If you see gaps anywhere — even tiny ones — you’ll need to rub the leading edge of the cap iron against a perfectly flat, abrasive surface to refine the edge. This is called lapping, a process you’ll follow elsewhere as you tune your plane towards better and better performance.
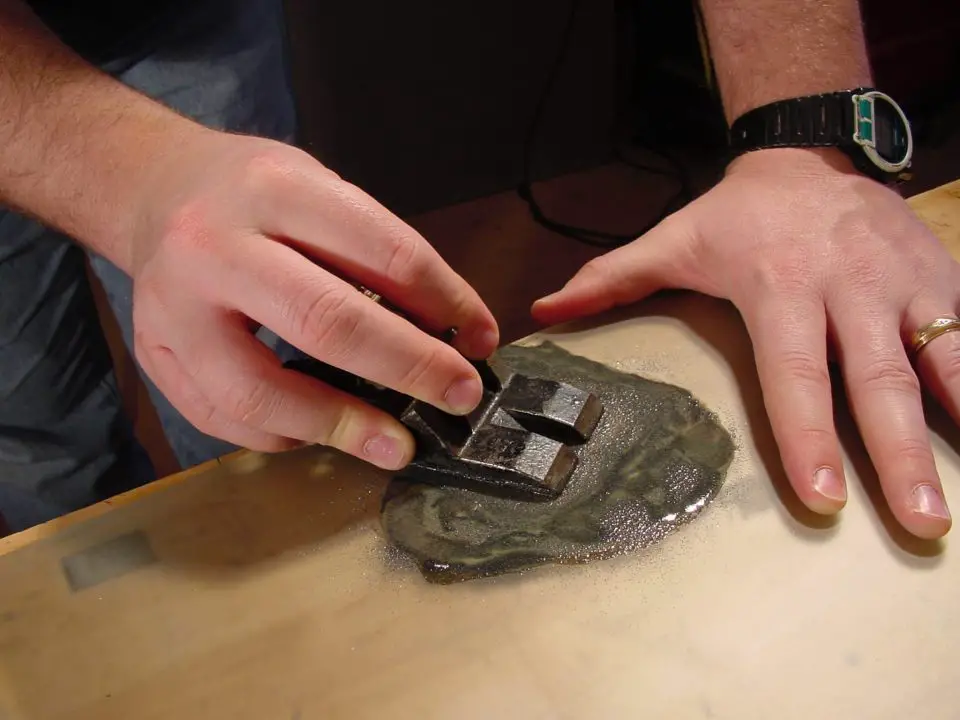
The ideal lapping surface is a piece of 1/4-inch thick plate glass. A cast iron table saw top or jointer bed works well, too. And although you could use a slurry of 180-grit abrasive lapping powder and oil for this job, a piece of 220-grit wet/dry silicone carbide paper (lubed with light machine oil) works better in this case and it’s neater. Place the leading edge of the cap iron against the abrasive (with the back end riding on the glass but not the paper) then rub back and forth a dozen times. Take the cap iron off, wipe it clean, and hold it against the flat side of the plane iron for inspection. If the gaps aren’t completely gone, repeat the lapping and checking process until they are.
Complete this stage by polishing the curved leading edge of the cap iron and the cam face of the lever cap so they both gleam. A smooth surface leads to reduced friction in both these places, and this means a plane that performs more effortlessly and adjusts more easily. That hard felt buffing wheel you used before for honing your plane iron makes quick work of polishing these parts.
Flatten the Frog
The frog supports the back face of the plane iron during use, but if this support isn’t complete if the frog is not truly flat, the iron may chatter, leaving a wavy surface on your wood. This is not usually a problem with finely made planes, but it’s worth looking at no matter what. The solution, as with most other plane-tuning procedures, involves lapping.
Begin by removing the screws that secure the frog within the plane body, lift it out, then brush all the saw dust off. Next, place the working surface of the frog, the one that supports the blade, down against your lapping surface and rub. Some 180-grit carborundum slurry or 220-grit wet/dry paper will work fine. Remove the frog every few minutes, wipe it clean, then take a look the working surface. If you don’t see that all areas have been touched by the lapping process, rub some more and wipe again until you do. The frog doesn’t have to be shiny, just flat so it can fully support the blade.
Flatten the Bottom of the Plane
Lapping the bottom of the plane (called the “sole”) is the final step in hot-rodding your plane. Lapping the sole will probably not be needed with a high-quality plane, but you should check and see first. The objective is to make the sole perfectly flat, and that’s more important than you might think. At issue is the removal of just a few thousandths of an inch of metal that makes the sole convex, concave or twisted. A flat sole is more effective at imposing flat and smooth surfaces on wood, the job that a plane is made to do.
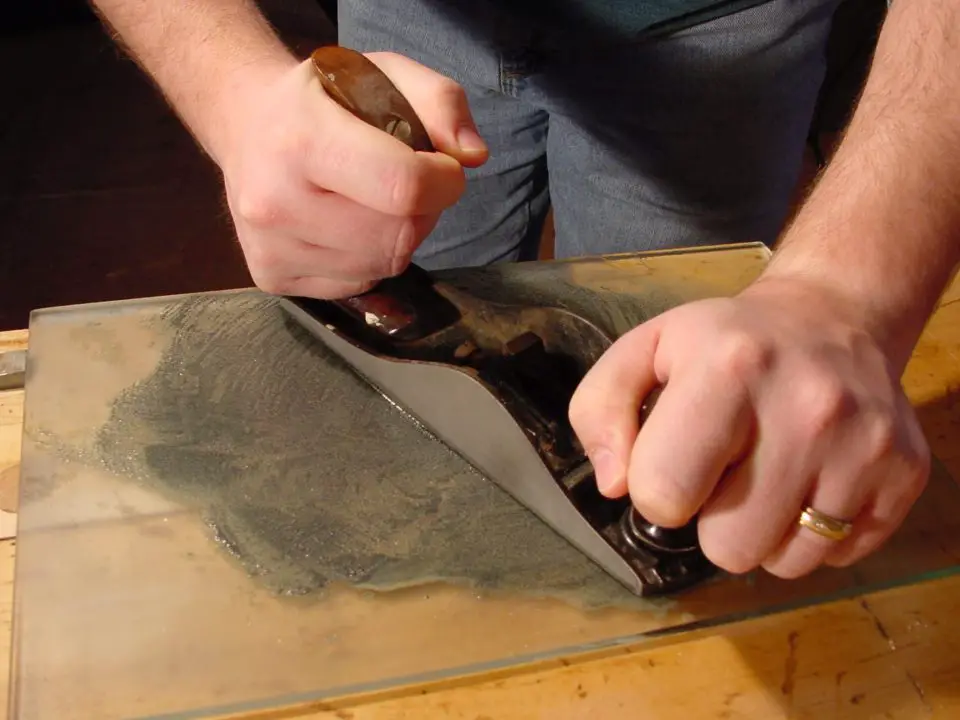
Start by making a slurry using two level tablespoons of 90-grit carborundum powder, and a couple of generous squirts of light machine oil on your lapping surface. Since things are going to get messy, take a second look at getting a piece of plate glass for this job if you don’t already have one. Otherwise your tablesaw top will get black and oily. No big deal since it can wipe clean, but you might want glass just the same.
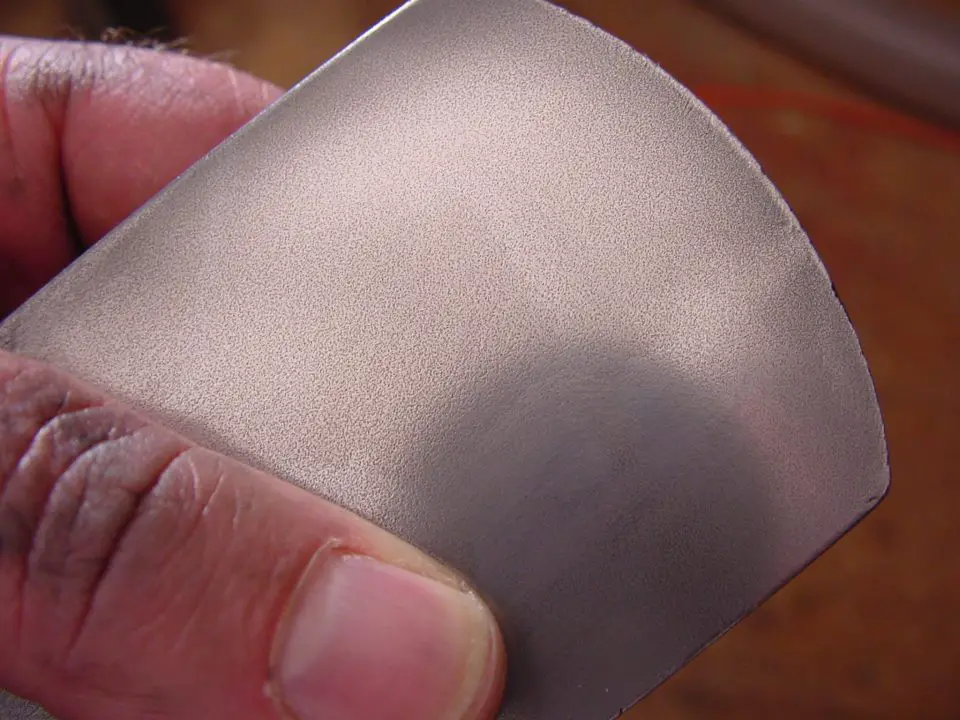
Work your plane over the lapping surface with a figure-eight motion, maintaining an even pressure and flipping the plane end for end every minute. The slurry should be the consistency of melted ice cream. If it’s thicker, add more oil. If it’s thinner, add more abrasive. Keep working the tool like this for 5 minutes, then lift the plane body off, wipe it clean, and look at the surface of the sole. High spots show as dull areas, low spots remain unchanged. Keep working until the entire sole of the plane has developed an dull, even appearance across the entire surface.
Wipe the lapping surface clean, then set it up again with 180-grit carborundum powder and oil. Repeat the figure-eight pattern until the entire surface has a lighter sheen, then wipe again and repeat with 280-grit and 400-grit carborundum pastes for a final finish. Although you can call it quits at this stage, polishing the sole on a buffing wheel and makes it glide more effortlessly over wood. A soft cloth buffing wheel does the best job in this application.
Don’t make the mistake of thinking that it’s a long and difficult process keeping a hand plane working properly. It’s not. With the initial hot-rodding process done, all you need to do is keep the plane iron sharp. That’s a surprisingly simple job if you use a buffing wheel, making it easy to master your hand planes and get a lot of enjoyment from them as they perform the way they were supposed to. At most you’ll also need to do a bit of grinding of the plane iron now and then, especially if you nick the blade. Don’t sweat it, like I did as a boy. Getting and keeping your plane in top shape isn’t as difficult as it seems and the pay-off is big.
The video below is a detailed tour of a new line of high-quality hand planes. It covers some of the ideas you’ve read about here. I think you’ll like this video.
- Video#2 Watch Time = 13 minutes


I hope you found this content useful!
Your generous support helps me produce more practical, hands-on content that I hope you’ll find useful.
Steve Maxwell