Most people are afraid of household mold and that’s a good thing. Mold isn’t always dangerous, but how can you tell? That’s why it’s wise to treat all mold with caution when you discover it in your home. The trick is understanding the steps behind highly effective and safe ways to kill mold on your own. There’s a lot of confusion about this, but there doesn’t have to be. The DIY details are below. If you’ve got mold in your house you should definitely read them.
Kill Mold Step#1: Size Up the Situation

Let’s say you’re tearing out an old basement, or working in an attic somewhere, or cutting into a wall before adding in an addition. Homeowners everywhere discover mold all the time in ways like this. The question is, what are you going to do about it? Another common problem is mold growing around windows that form condensation as the cold temperatures of winter settle in.
The main issue is how big and bad your mold growth is. With the proper know-how, precautions and the treatment strategies I’ll show you here, go ahead and tackle any situation up to the size of a few sheets of plywood. If the moldy area is bigger than this, or if it seems to be associated with some kind of sewage leak, consider calling in a mold abatement professional.
Kill Mold Step#2: Eliminate the Moisture Source
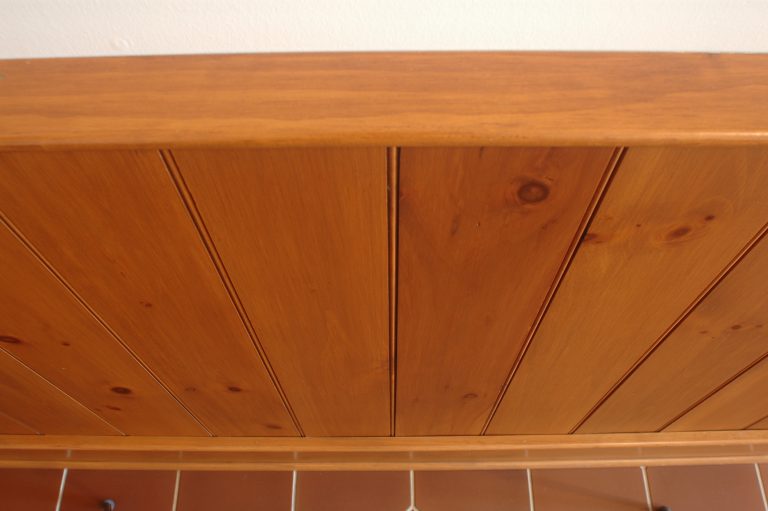
Mold never appears without moisture. That’s why you always need to start your work by finding and drying the water causing the problem. Liquid water is easy enough to spot, but most hidden household mold is probably due to condensation or some other form of water vapor. You’ll almost always find mold in the fiber insulation stuffed into the rim joists where basement ceilings meet outside walls in cold climates, for instance. Basements and crawl space walls and floors are also a common breeding ground for mold, but don’t make the mistake of thinking this is always because of a lack of ventilation. The basement mold you see below is entirely due to chronic moisture problems.

Fresh air is usually great and necessary, but not when it’s warm and humid outside. The leading cause of mold and musty basements and crawl spaces is ventilation during hot summer months. Not lack of ventilation, but too much. When warm, moist, humid outdoor air makes its way into a cool basement, water condenses out, kickstarting the mold growth process. There are more possible sources of mold inducing moisture, but you get the picture.
Kill Mold Step#3: Make Removal Decisions

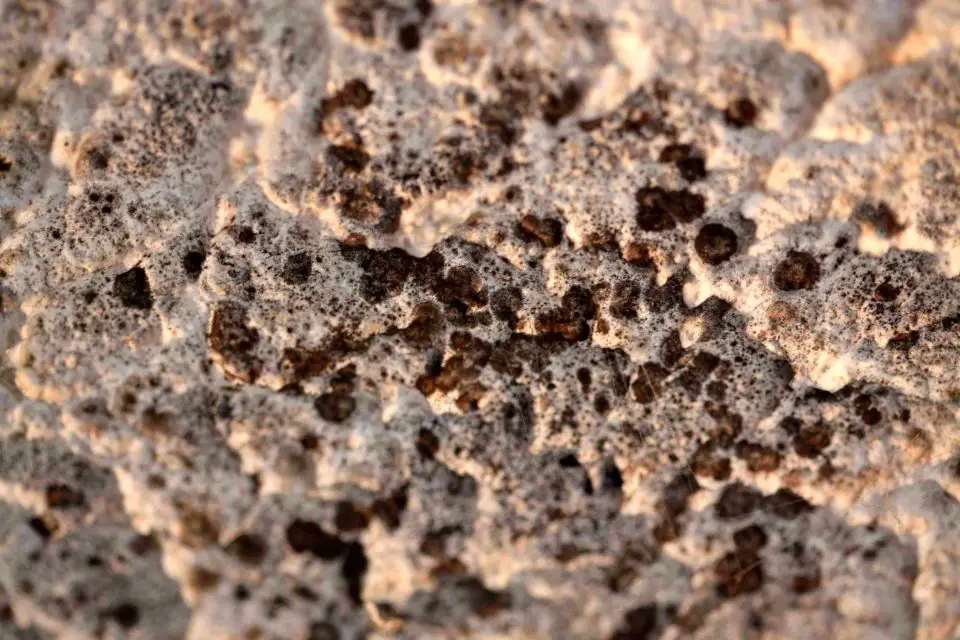
Not all moldy surfaces should be treated. Sometimes tearing out moldy materials and replacement is a better strategy. Moldy drywall, fiber ceiling tiles, carpets, wood paneling and other non-structural materials are best removed rather than decontaminated. Just don’t be a brave idiot about the work. Not all mold is dangerous, but how do you know? That’s why you should always wear a HEPA-rated respirator when dealing with moldy areas. Your body is pretty important, and there are certain kinds of molds that will cripple you for life if you’re not protected. The mold shown below is on the floor of a bedroom in a home that’s tight but lacking sufficient ventilation. The boy living in this room had chronic, lifelong asthma which disappeared when a heat recovery ventilator (that was present in the house all along) began to be used. lowering indoor humidity in winter.
Kill Mold Step#4: Dry the Area & Keep It Dry
Depending on the time of year, different drying strategies make sense. In wintertime, adding heat to the situation makes a huge difference. The warmer the air is, the lower its relative humidity. And air with a low humidity is hungry to dry up wet areas quicker. Just don’t use any kind of propane heater for the work. Besides the obvious dangers of carbon monoxide, burning propane gives off tons of moisture which will make the air wetter than it was when cool, not drier. And while it doesn’t sound like much, air circulation with simple household fans really boosts drying action. Just be patient about it. Don’t rush ahead and work with a damp situation just because it suits your schedule.
Kill Mold Step#5: Get Rid of the Organisms
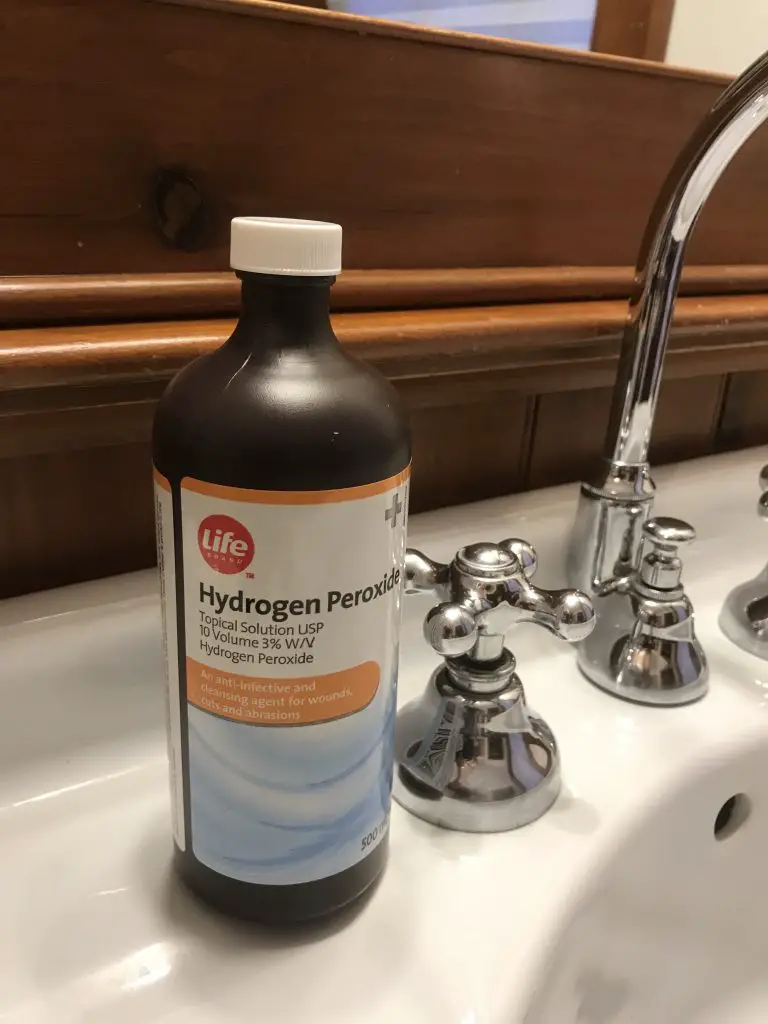
Bleach is the first thing most people reach for when it comes time to nuke the mold in their life, but this is a mistake. There are three reasons why. First, bleach is actually only minimally effective when it comes to killing mold, especially mold growing on porous surfaces. That’s because bleach doesn’t have the ability to penetrate deeply enough into wood or concrete to kill the hidden roots of the mold that are growing below the surface. Bleach-killed mold comes back easily. Another issue with bleach is that it makes surfaces lighter in color. This isn’t always a problem, but why risk making matters worse with spatters of light color where they’re not supposed to be? And finally, bleach stinks and is irritating to some homeowners, especially when it’s used over a large area.
The government is involved in just about everything in our lives these days, including assessment of how well commercial mold killing products work. That’s why you’ll find registered fungicides on the market. Even though you’re probably not killing fungus, a registered fungicide is what you want to use for mold. The best are odorless liquid products that kill mold and mold spores by mechanical action, physically crushing all parts of the mold organism as it dries. This explains how something that’s non-toxic can still kill a tiny organism like active mold and mold spores without hurting people. I’ve used these kinds of products before and they’re as pleasant as water. That’s one reason it’s become so popular with mold abatement professionals. The best are even thin enough to run through an electric fogger for treating really large areas, if you opt to do that.
Kill Mold Step#6: Stop Mold from Coming Back
This is trickier than it looks, and that’s why you want to look at using some kind of fungistat. Some of the best mold control products are also proven fungistats and this means they both kill mold and inhibit mold regrowth, too. That said, no fungistat is magic. If areas of potential mold get moist again and stay wet, mold will grow back eventually, no matter what you do. That’s why you’ve got to look towards boosting the right kind of ventilation, while also eliminating places where wintertime condensation can occur. Most of this is very simple – ridge vents on roofs, keeping soffit areas open and free from insulation, dealing with basement leaks – but other mold problems aren’t so simple. The biggest single cause of mold in homes that get cold weather is insufficient wintertime ventilation. This accounts for everything from the mold growing along the bottom of windows, to moldy exterior wall corners and even internal mold growth within walls. A heat recovery ventilator (HRV) is one of the most powerful anti-mold items you can install in your home.
The thing to understand is that building codes usually under emphasize the need for mechanical ventilation. They certainly do in Canada. Even if your building inspector doesn’t insist on a heat recovery ventilator (HRV), for instance, an HRV really is an excellent option. This is especially true if the renovations you’re doing will be tightening the house up with new windows and air sealing strategies. Are HRVs new to you? Click here to watch a video on how they work and why they’re such a good idea.
Kill Mold Step#7: Eliminate Mold Stains
This isn’t always as easy as it looks. Mold stains can be almost impossible to get off with a scrub brush, and while bleach, hydrogen peroxide or oxalic acid all work to remove stains, they also lighten the colour of surrounding surfaces. The best option I’ve found so far for removing mold stains is the relatively new family of oxygen-based products made by different companies. The best take the form of a white powder that you mix with warm water and let sit for 10 minutes before sloshing onto the surface. You can see the results below.

Occasionally you might need to do a bit of scrubbing after the solution goes on, but most times it simply removes staining all by itself. And somehow it does this without lightening surrounding areas at all. I’ve even had excellent results using these products to remove grey weathering from exterior wood, without getting rid of the underlying woodgrain.
Click the video below to see my current favourite oxygen-based stain remover in action.
- Video Watch Time = 4 1/2 minutes


I hope you found this content useful!
Your generous support helps me produce more practical, hands-on content that I hope you’ll find useful.
Steve Maxwell