After 25 years of sharpening chainsaws with a file by hand, I don’t do much of it any more. Not since I discovered how fast and effective pro-grade electric saw chain sharpeners can be. Here at our country home on Manitoulin Island, Canada, most winters we heat exclusively with wood. This means a 2800 sq.ft. home, a 1200 sq.ft. workshop and all the domestic hot water used by a household of people. And it gets pretty cold in the winter here on Manitoulin Island, too. We regularly see -25ºF (-13ºF) each winter. All this is why our fleet of chainsaws is pretty important. And a chainsaw must be sharp to work properly.
- Reading time = 10 minutes
- Video watch time = 4 minutes
How to Sharpen a Chainsaw: Why an Electric Sharpener?
Chainsaws are completely useless when they’re dull. Anyone who has operated a saw knows this. The difference between a dull chain and a sharp one comes down to the shape of the tiniest tip of each cutter. Getting this small but crucial detail correct is what a chainsaw sharpener does so well. The two models I use in my shop are made by Oregon and cost $320 and $650 the last time I looked. There are cheaper models out there, and while some of them may be good, I can’t vouch for bargain-basement electric sharpeners. Click here for an in-depth video tour of the sharpening process you see here.
If you cut much wood, electric saw chain technology makes financial sense. When you’ve got the ability to resharpen a dead saw chain three or four times faster than with a file (and a whole lot more accurately and sharper), it makes sense to do this work in-house, rather than farming it out to a sharpening shop or springing for a new $30 chain before you need one. This post is all about how to use a standard electric sharpener properly. There are many models around, but most work in the same way. The instructions here will help you no matter which model you buy. Click here for an overview of the different electric saw chain sharpeners from ConsumersBase.com.
Click below for a video that gives a close look at my own electric saw chain sharpener.
Choosing and Electric Saw Chain Sharpener
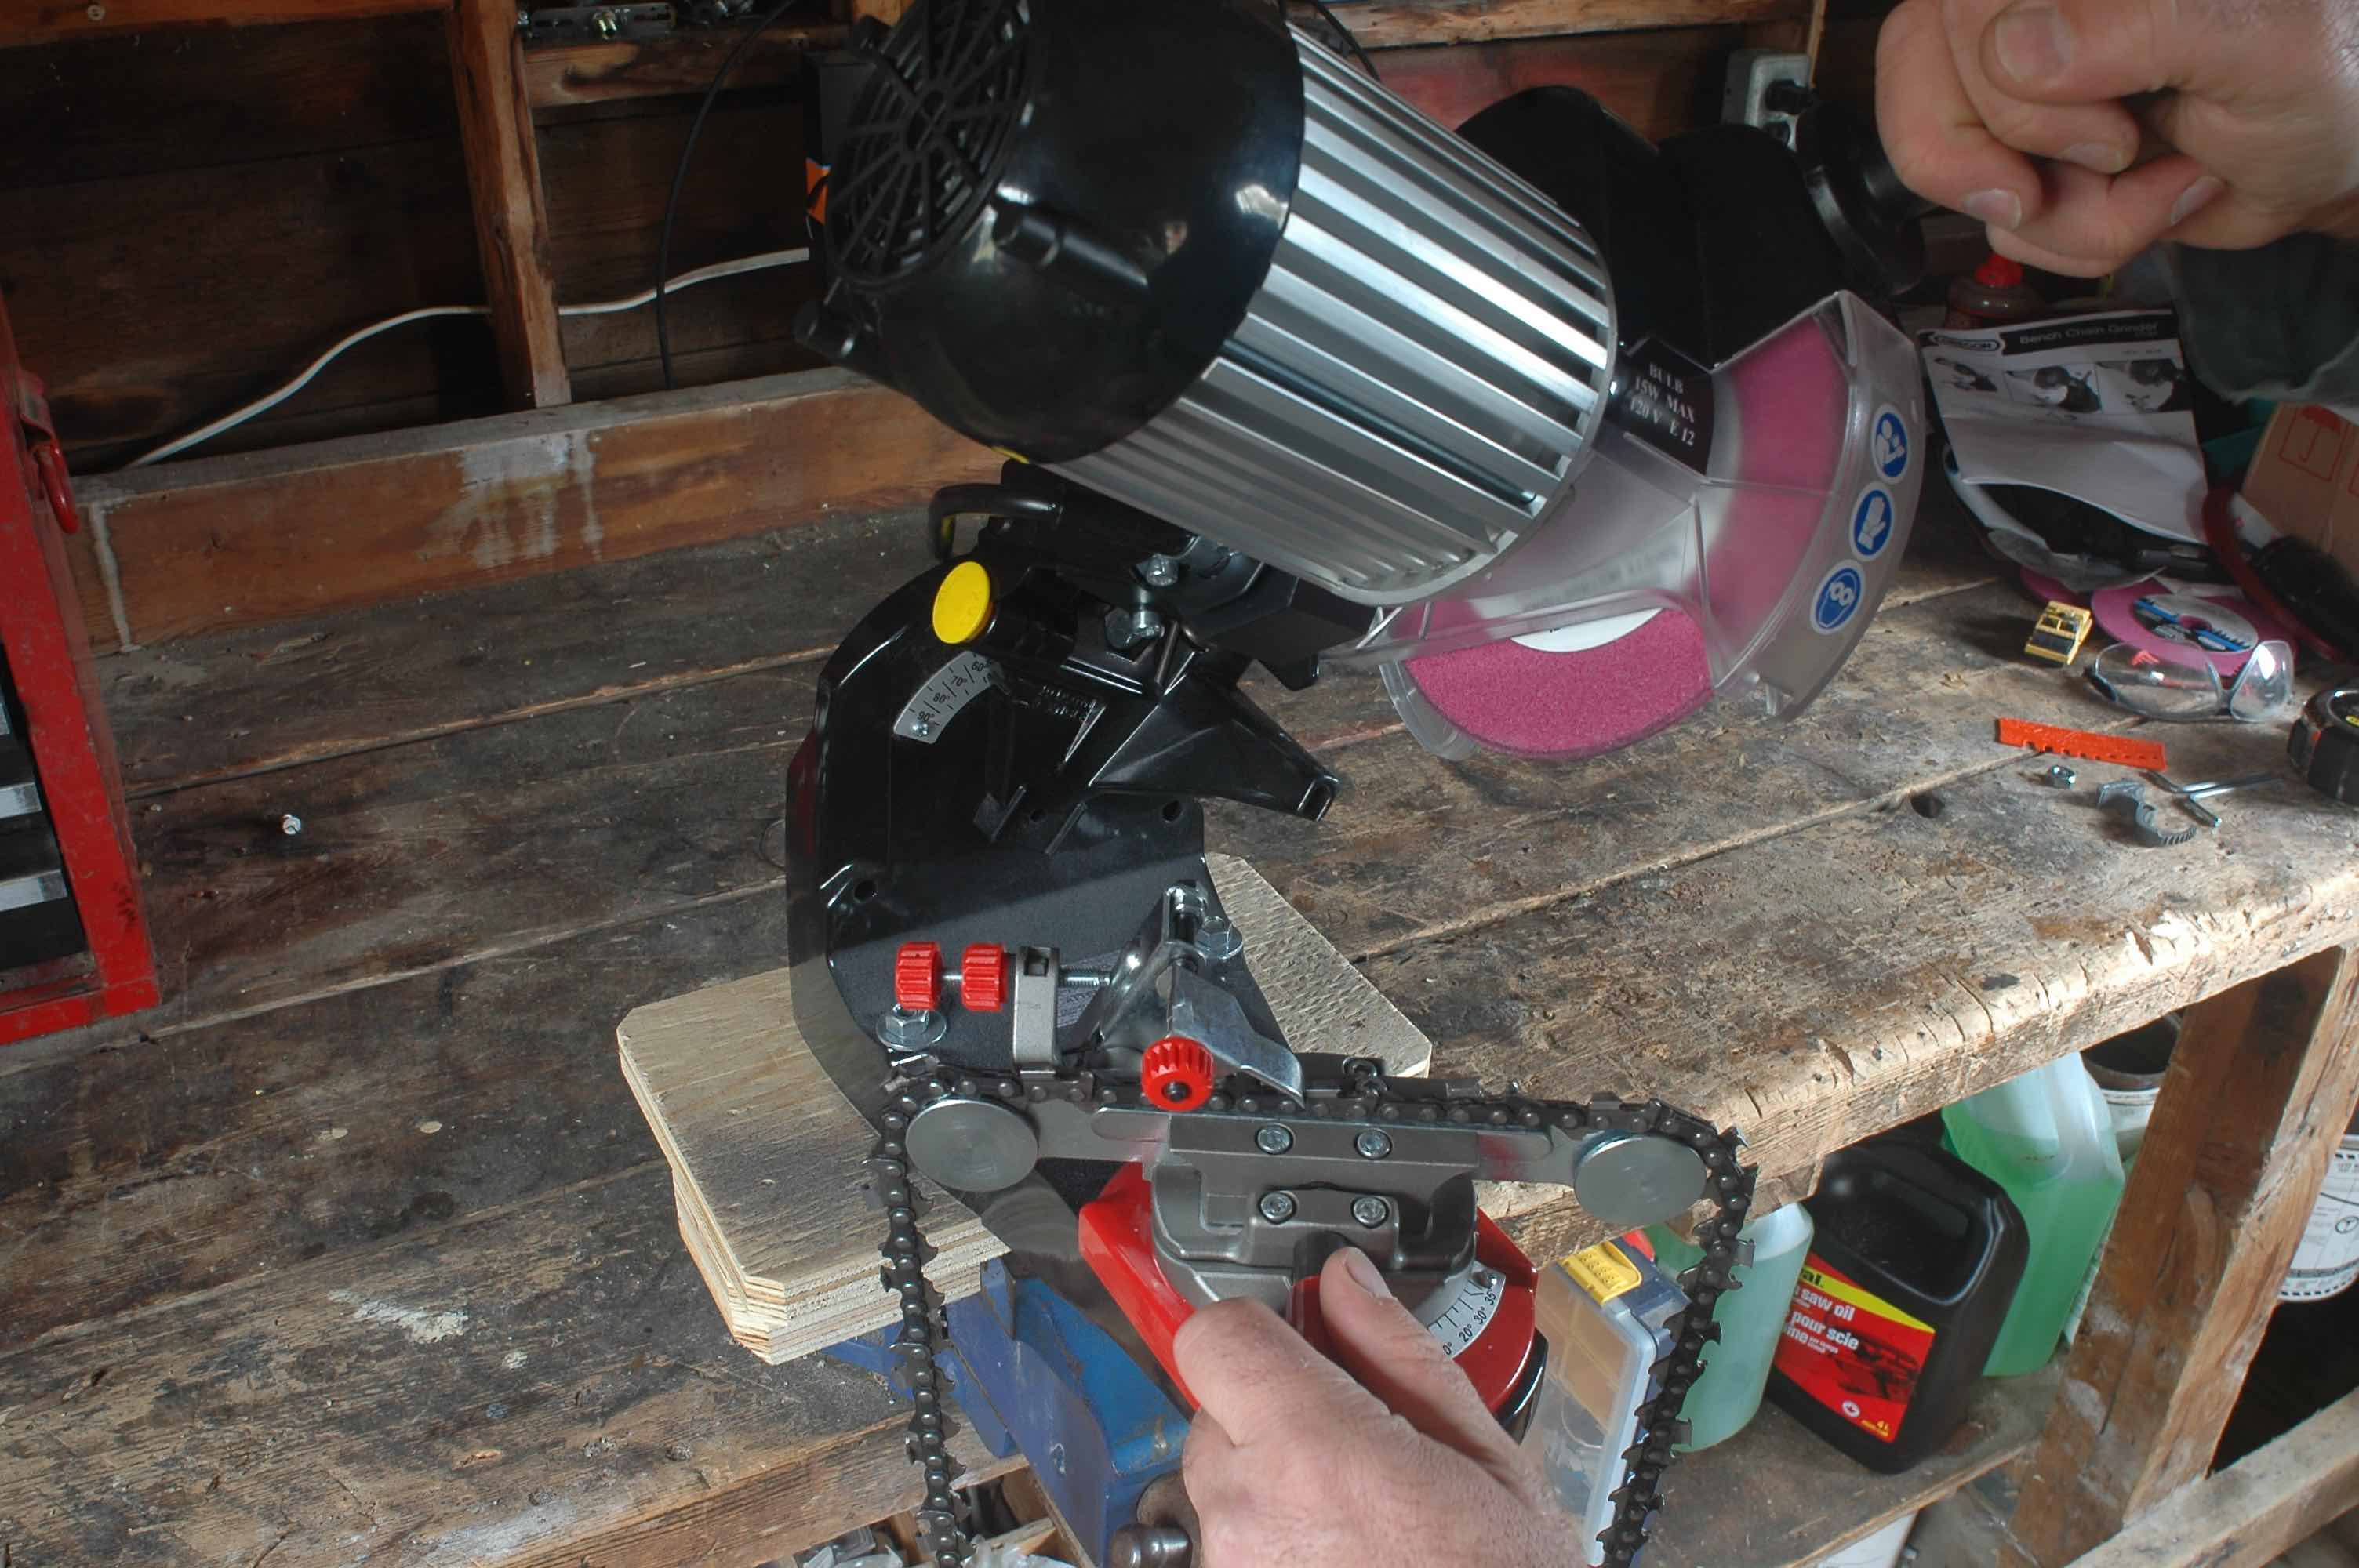
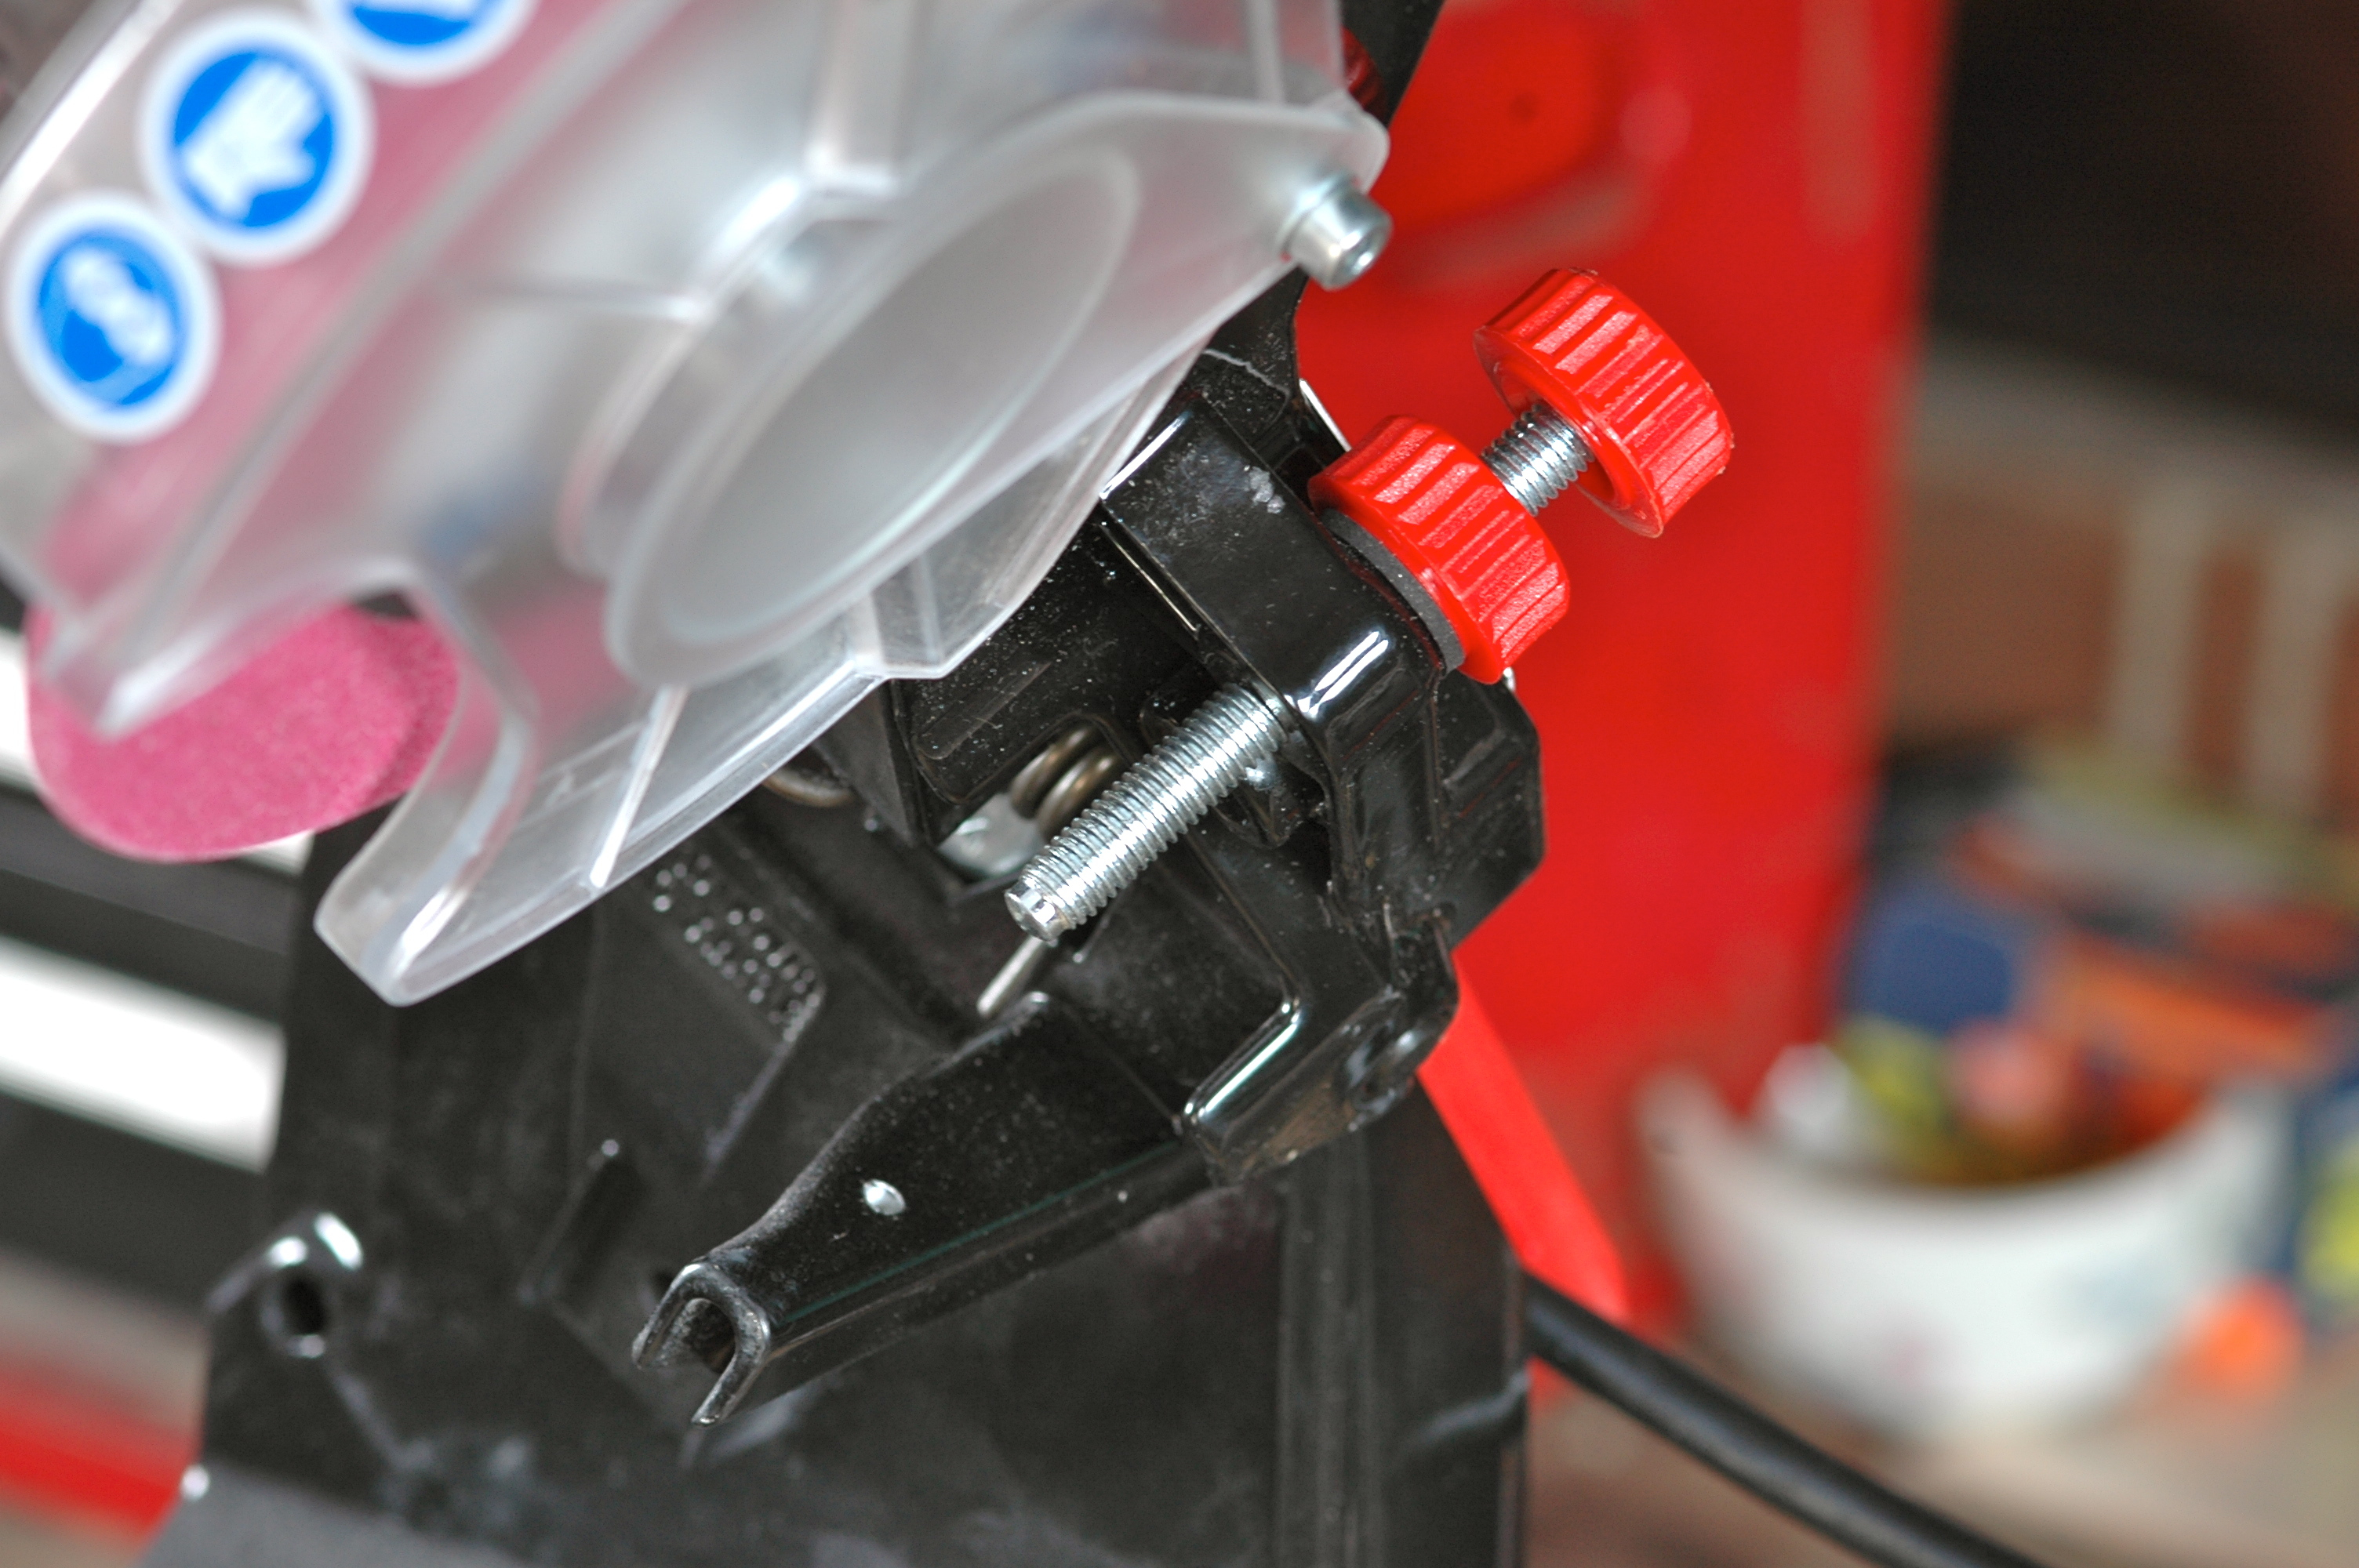
The kind of sharpeners that make sense for serious chainsaw users look like a miniature woodworking chopsaw. But instead of spinning a toothed blade, they spin a thin, abrasive wheel about 4” or 5” in diameter. The pink disk in the photo below is what I’m talking about. Don’t bother with any consumer-grade chainsaw sharpener that use tiny, cylindrical grinding bits in rotary tools. They’re way too slow and the cute little abrasives wear out way too fast.
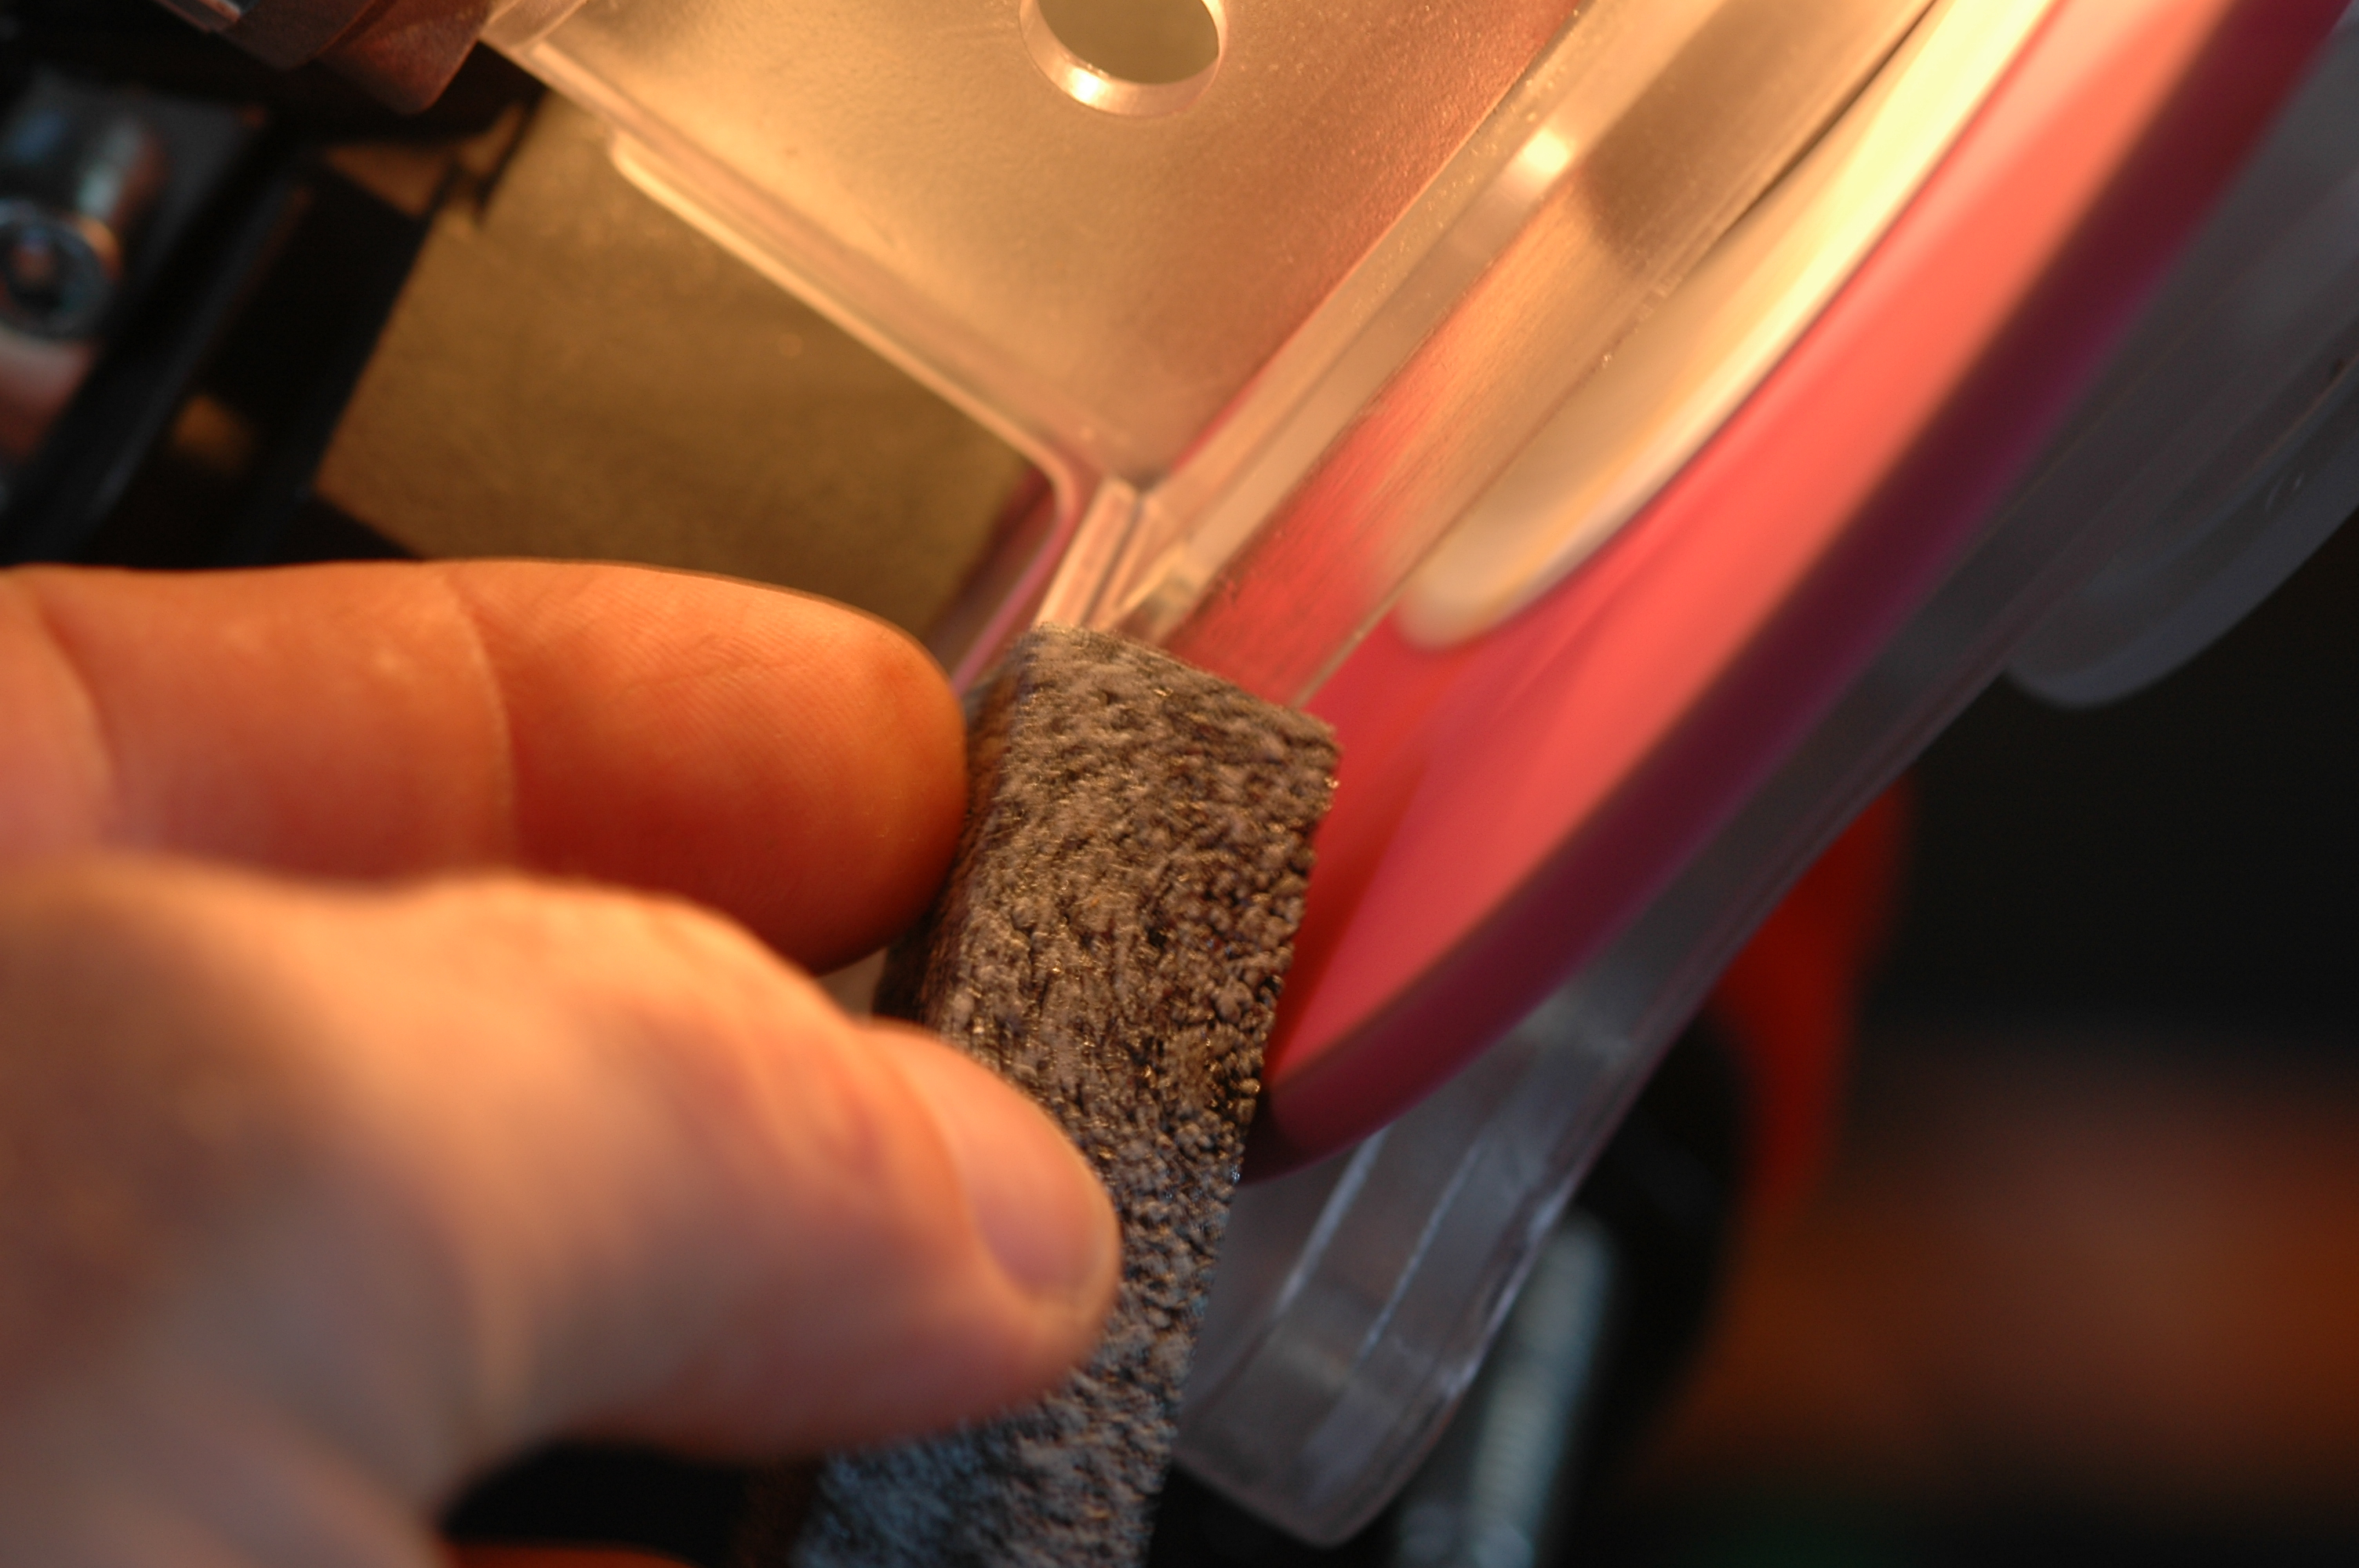
Abrasive wheels for saw chains need to have a semi-circular profile to work properly, and the sharpeners I’m using here in this post come with a plastic gauge to assess wheel shape. That’s me using the guide above. Regular maintenance of the abrasive wheel is vital, and happens by holding an extra-hard dressing stone against the spinning abrasive wheel to work it down to shape. Regular dressing of the wheel also keeps the wheel clean and effective, too.
Using an Electric Saw Chain Sharpener
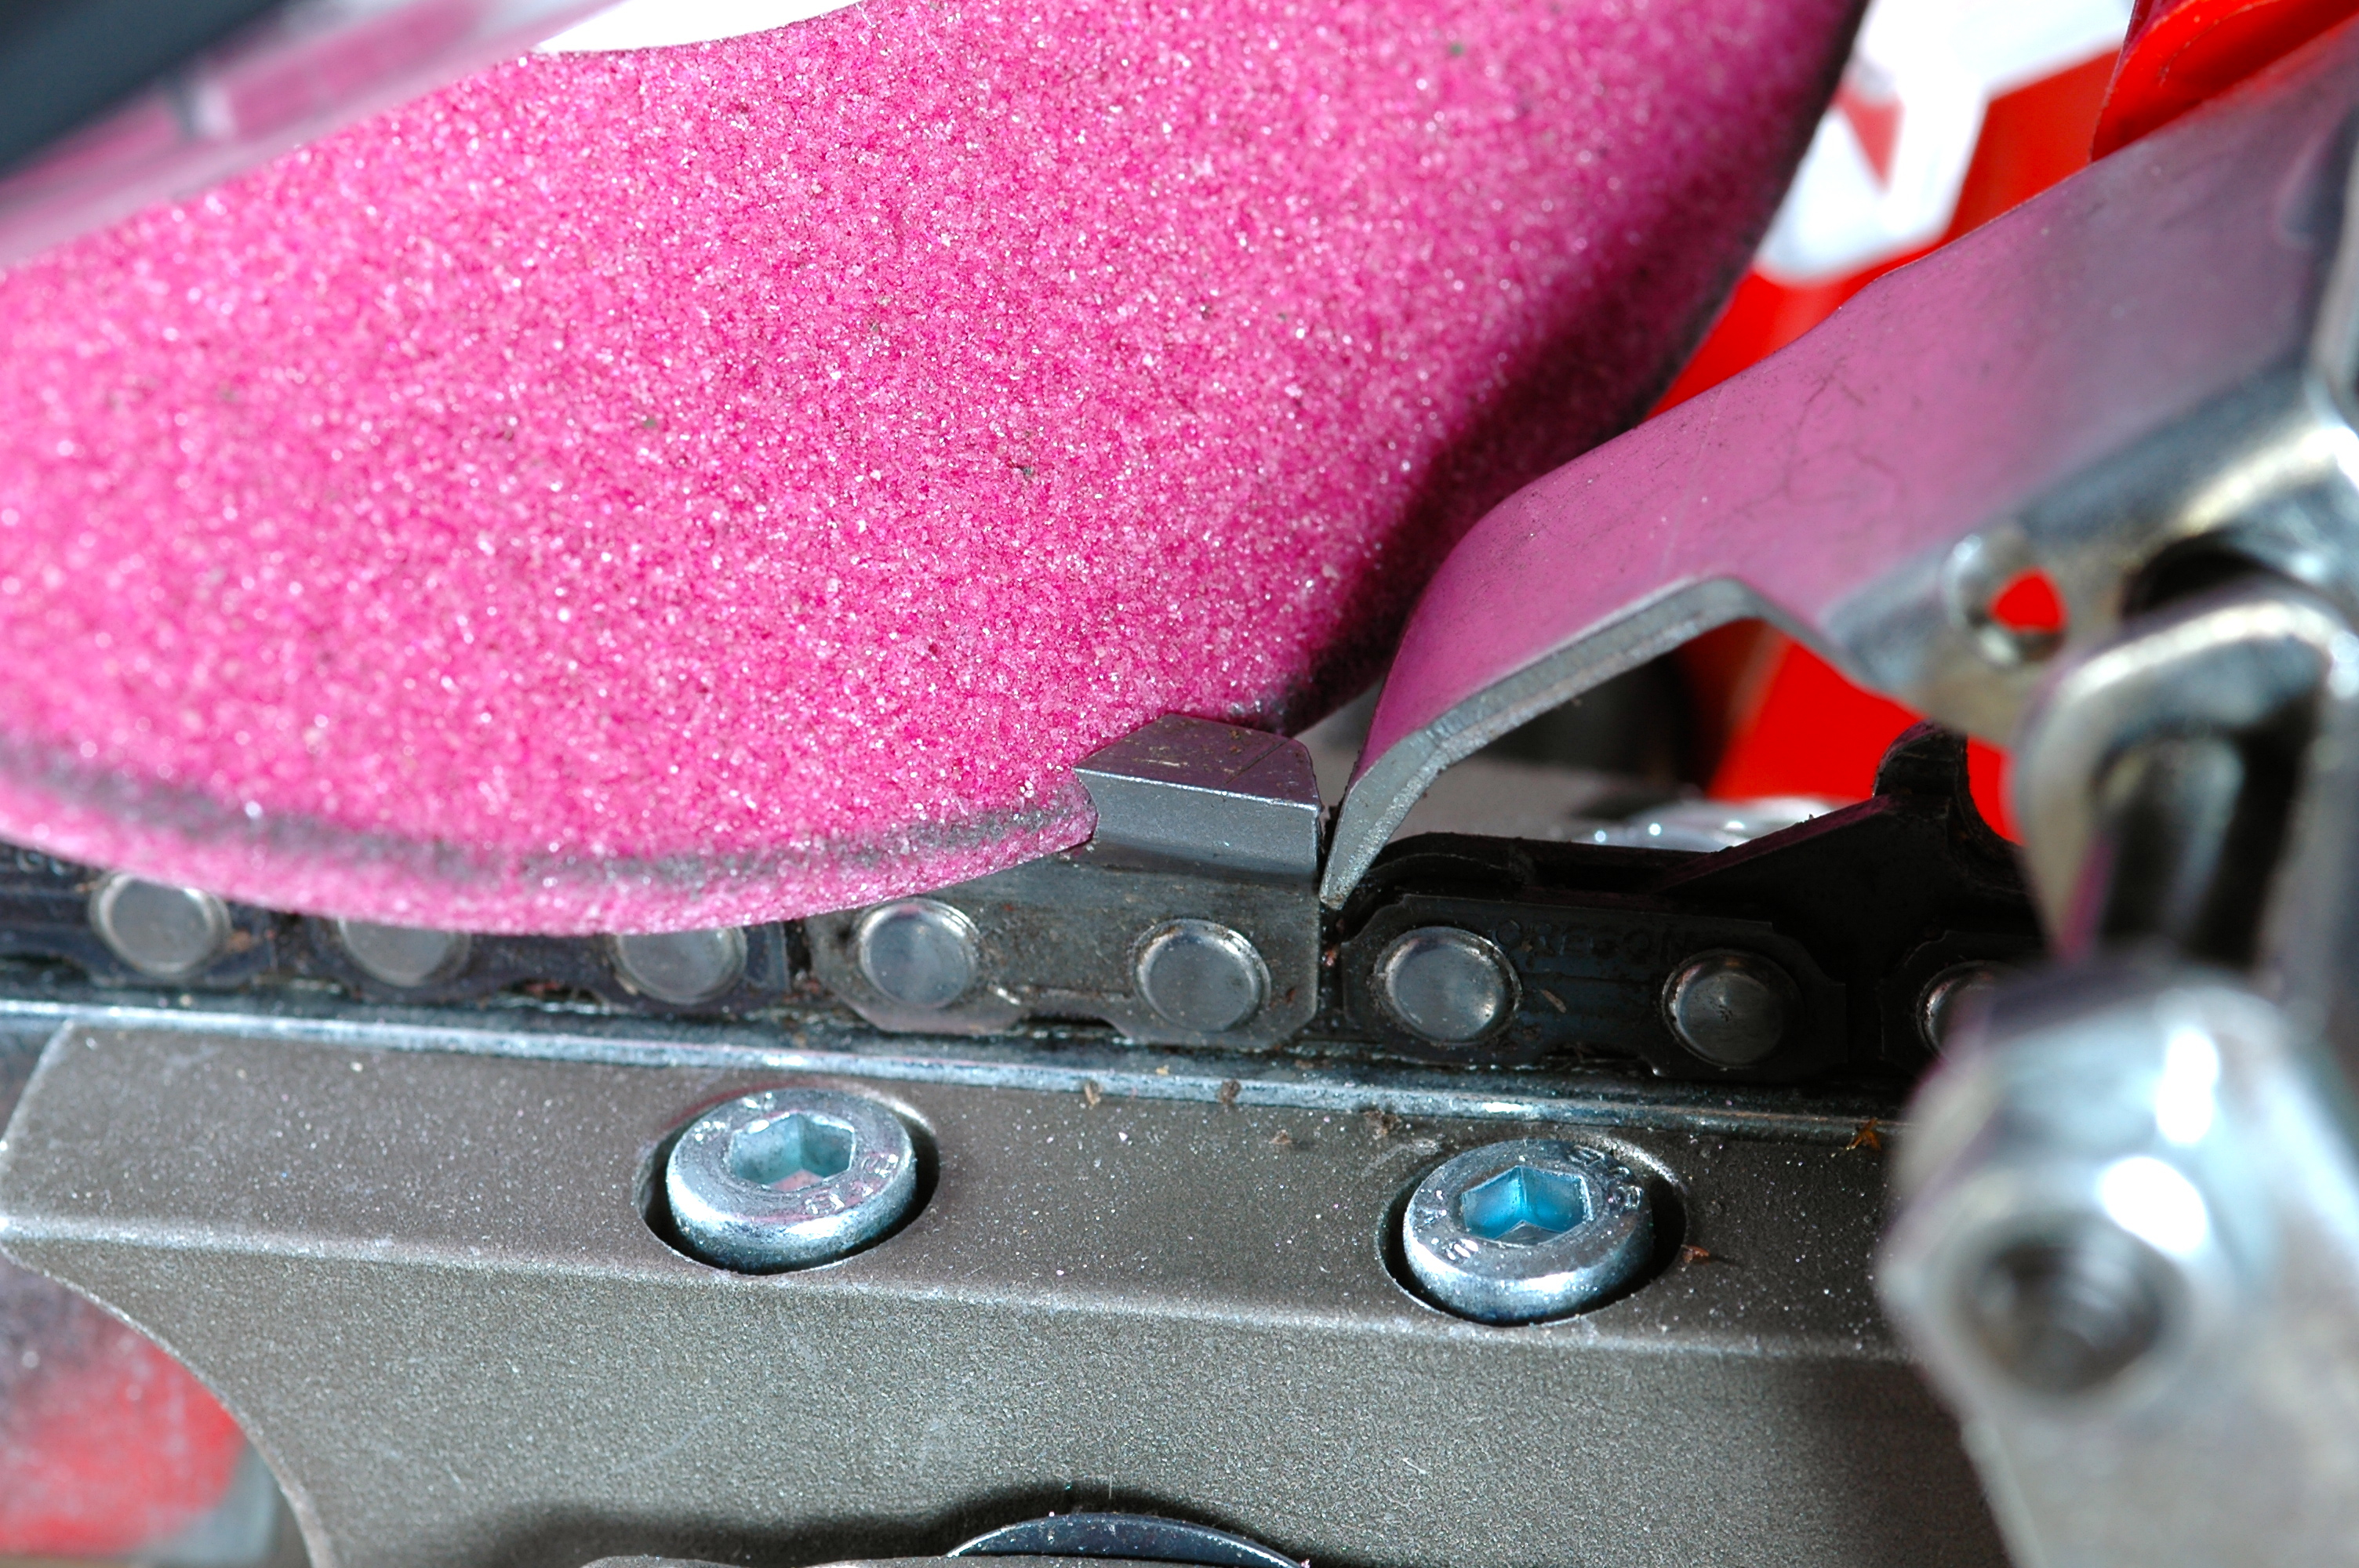
Even with the right equipment, there’s finesse involved in successful machine sharpening. But before you can develop the touch, you’ve got to understand crucial steps in the sharpening process. First, the chain comes off the saw. Place the chain on the sliding track underneath the abrasive wheel, adjust a couple of angle settings and depth stops (more on that later), lock the chain by tightening a handle, then chop the spinning wheel down into the chain so the abrasive contacts the very front edge of a cutter. It takes just a couple of seconds to make one cutter sharp. After that you’re ready to slide the chain to the next link, then chop down and make more sparks fly.
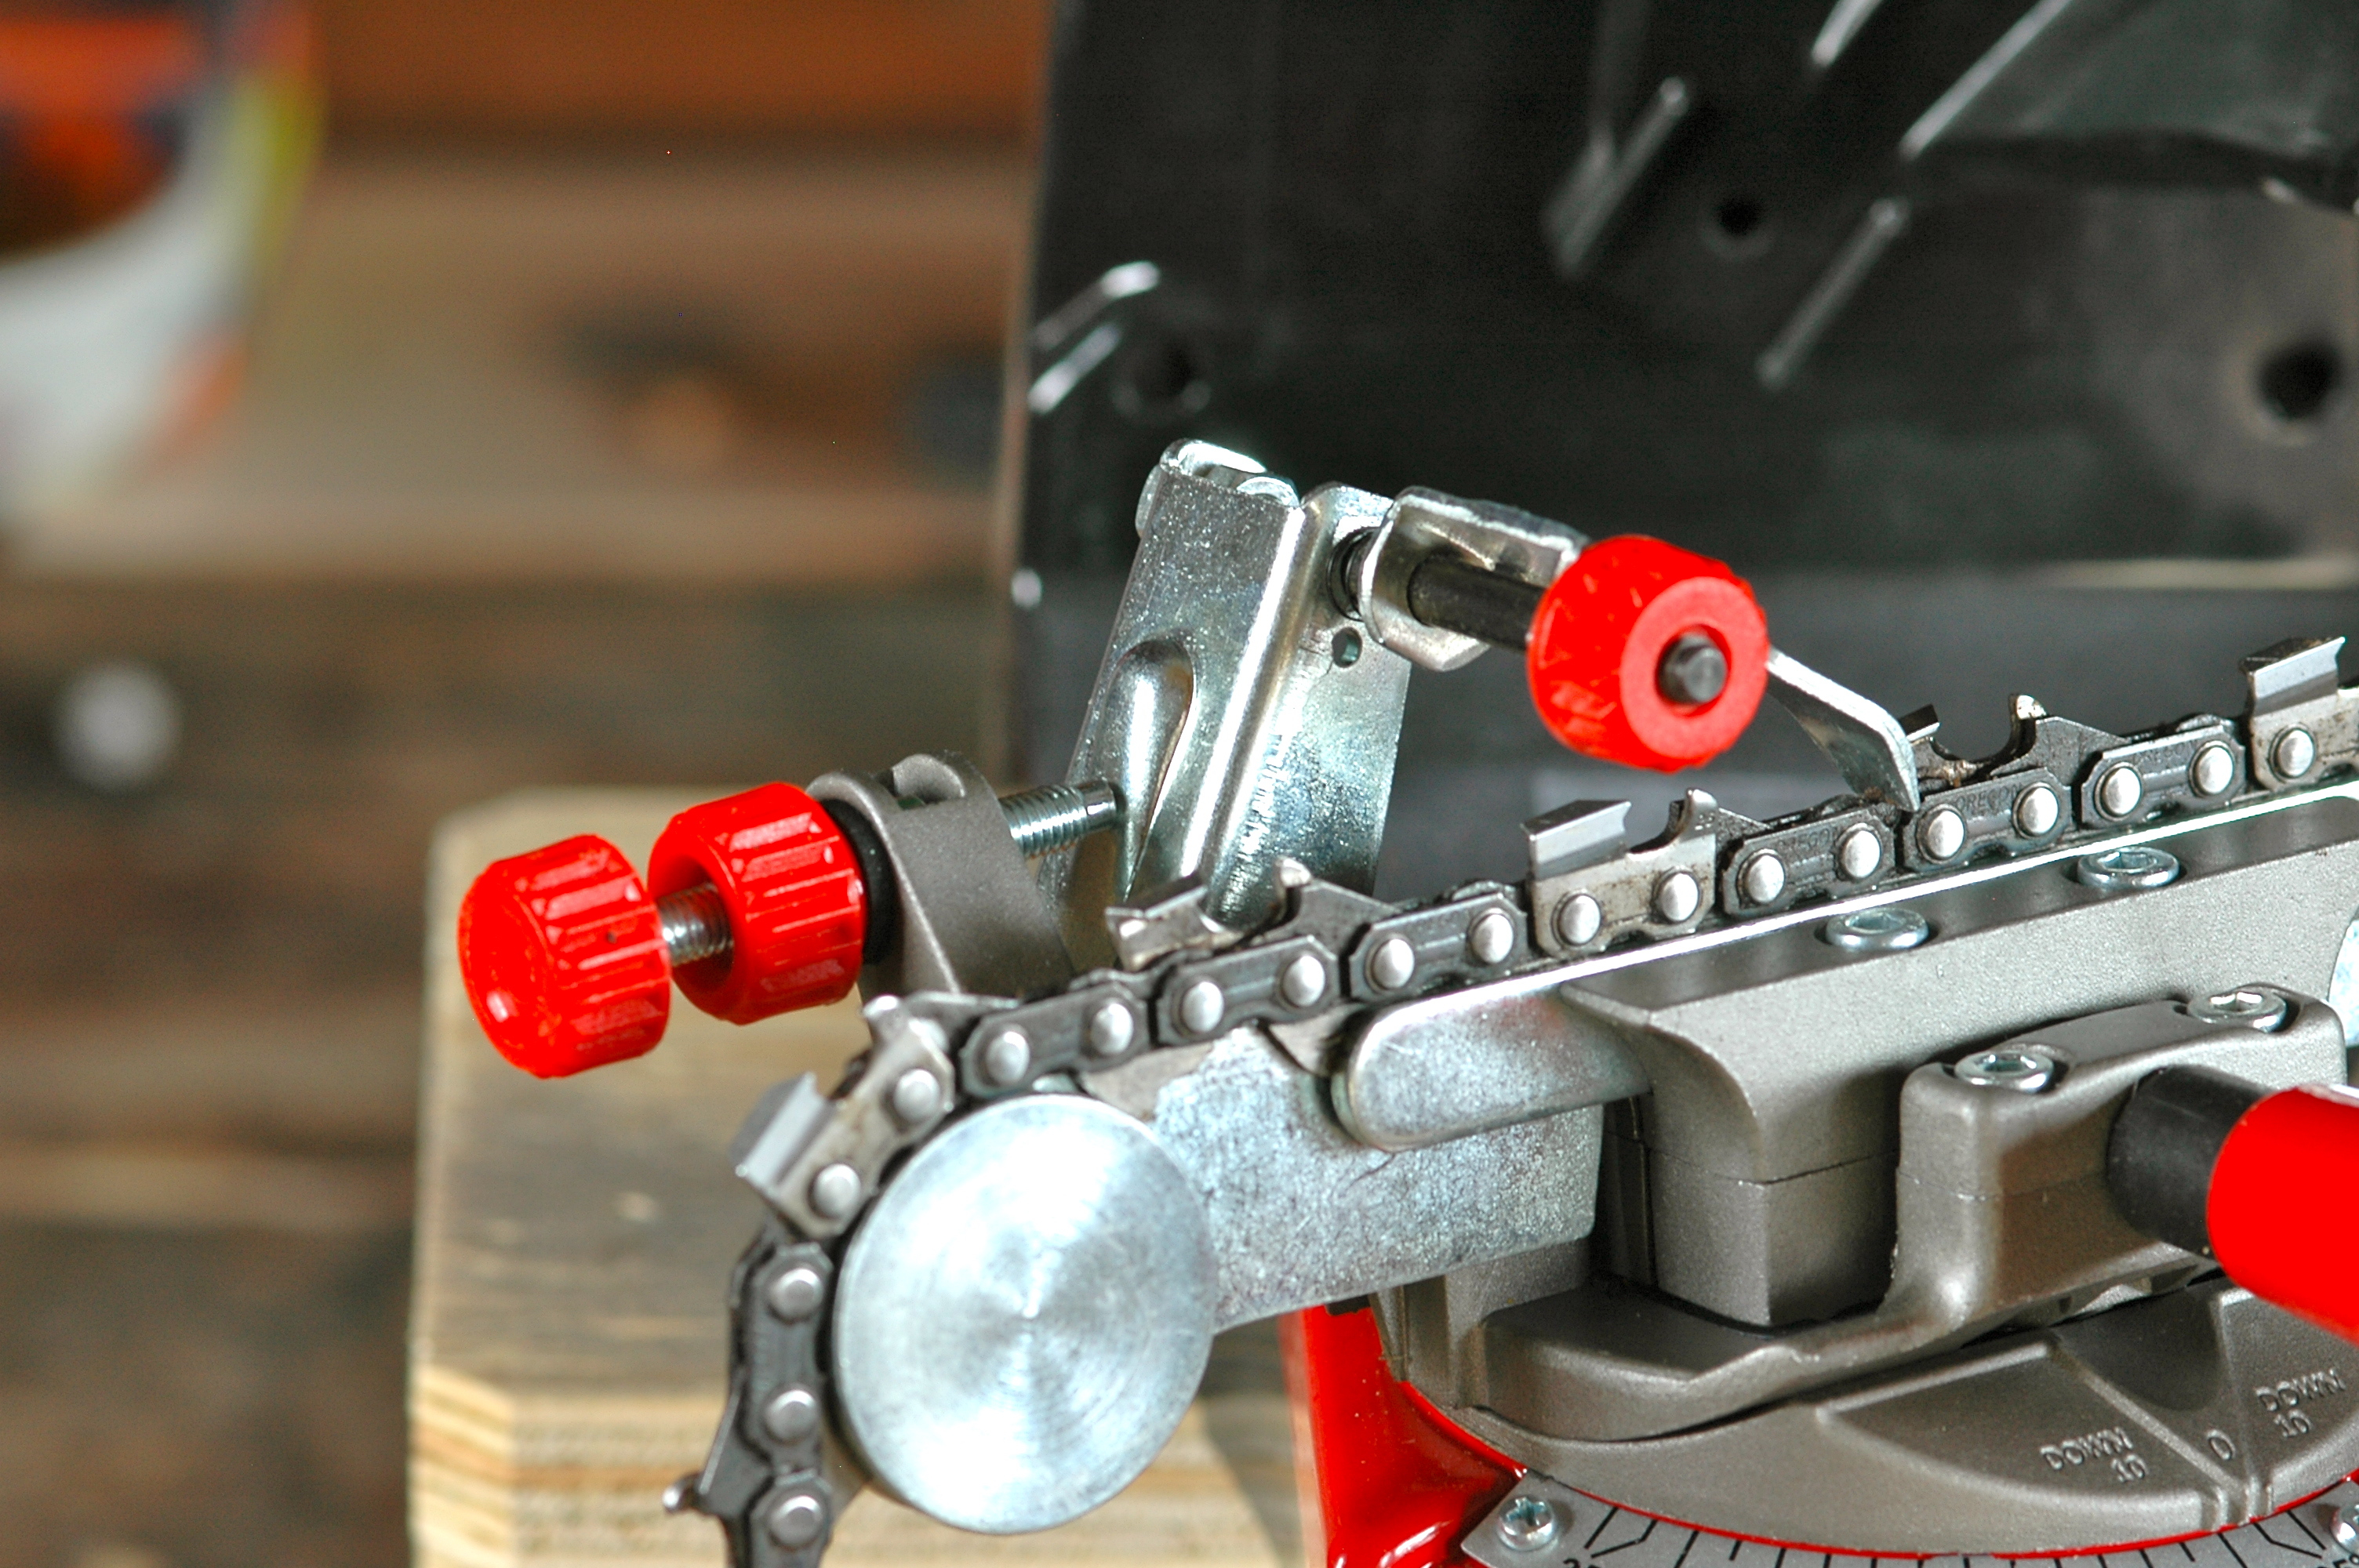
All electric sharpeners have two adjustable stops, one that regulates the horizontal, side-to-side position of each cutter relative to the abrasive wheel , and another stop that regulates grinding depth. The horizontal stop determines how much metal will be removed from the all-important leading edge of each cutter, and this is the adjustment to start tweaking first. You can see it above. The depth stop is the other adjustment and it’s shown below.
How Does the Saw Chain Look?
Start by examining the chain for any particularly damaged cutters. You’ll need to grind all cutters down to this level so the chain remains balanced and cuts evenly. That’s why you adjust the tool to suit the worst cutter. bringing all other cutters down to this level. In practice the horizontal stop rests against the back edge of one cutter, holding it some fixed distance from the side of the wheel.
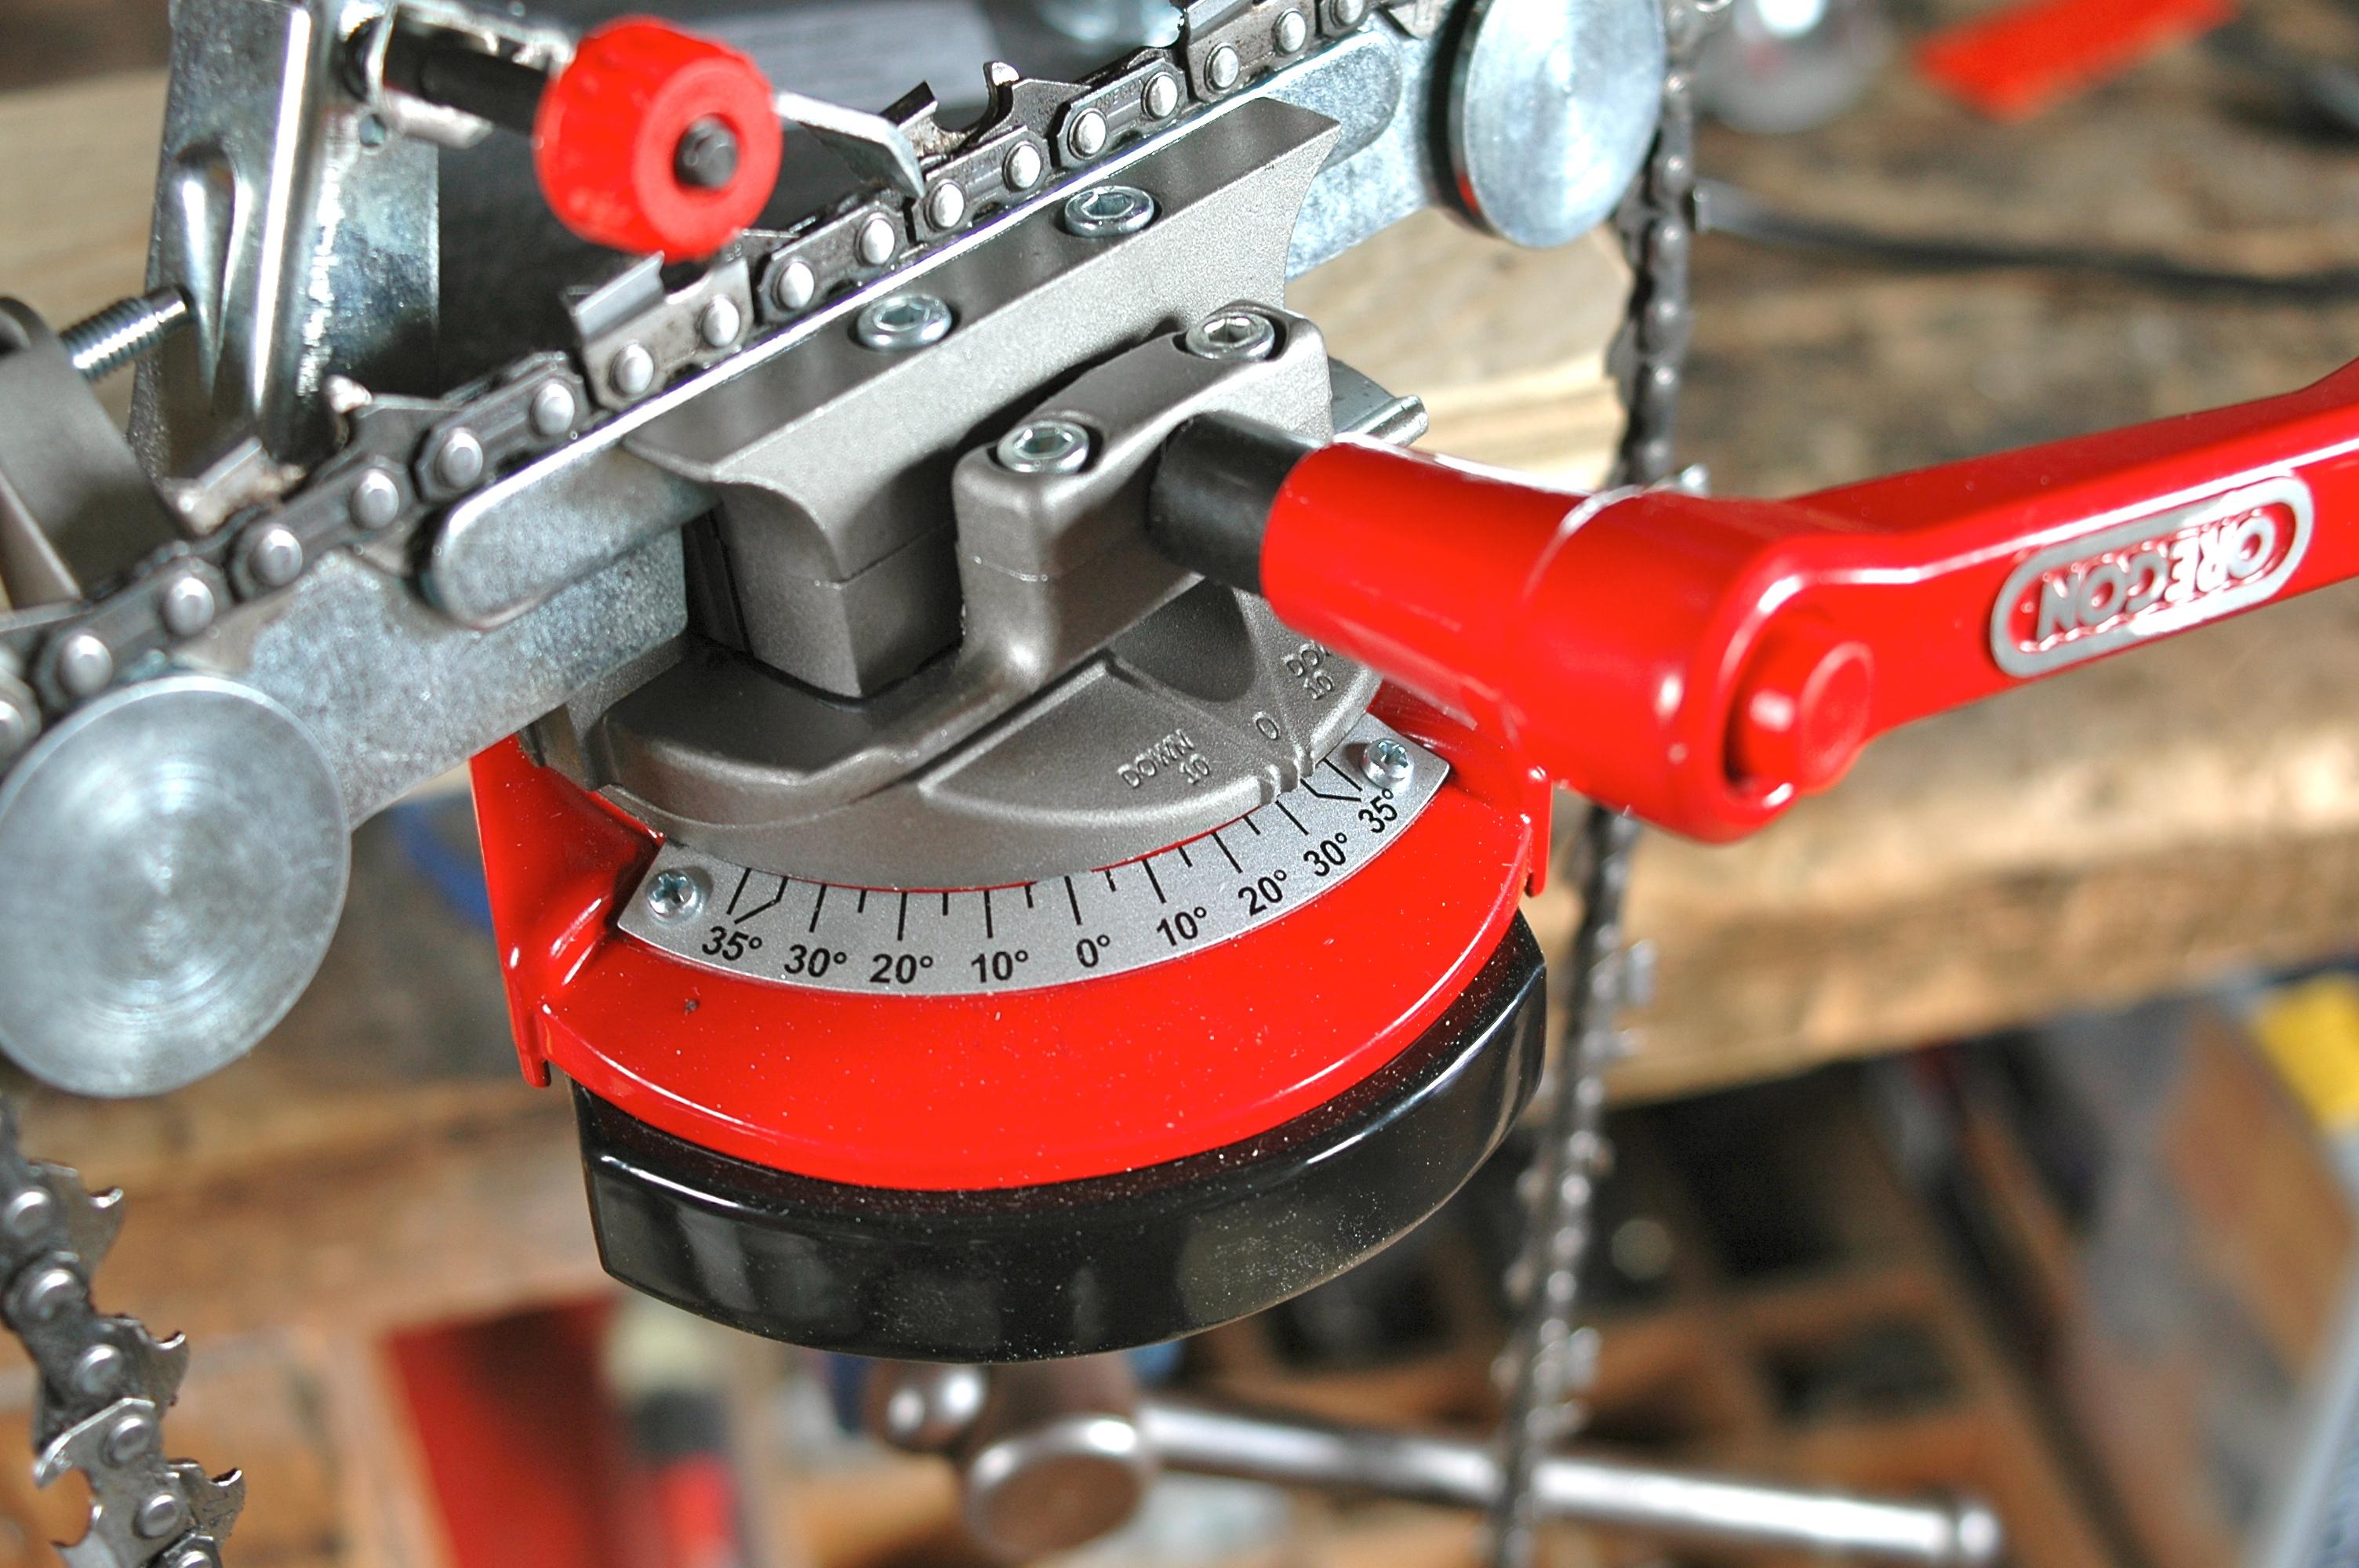
Place the chain in the holder groove then adjust the swiveling table so the abrasive wheel encounters the chain at the factory-ground angle. All my chains are made with 30º angles, and yours probably are, too. Next, turn the threaded adjustment knob on the horizontal stop so just enough metal is removed from the leading edge of the cutter to make it sharp, but no more. Gingerly grind one cutter and readjust until you’ve got it right. Most sharpening jobs remove less than 1/32” of metal from the leading edge of the cutter.
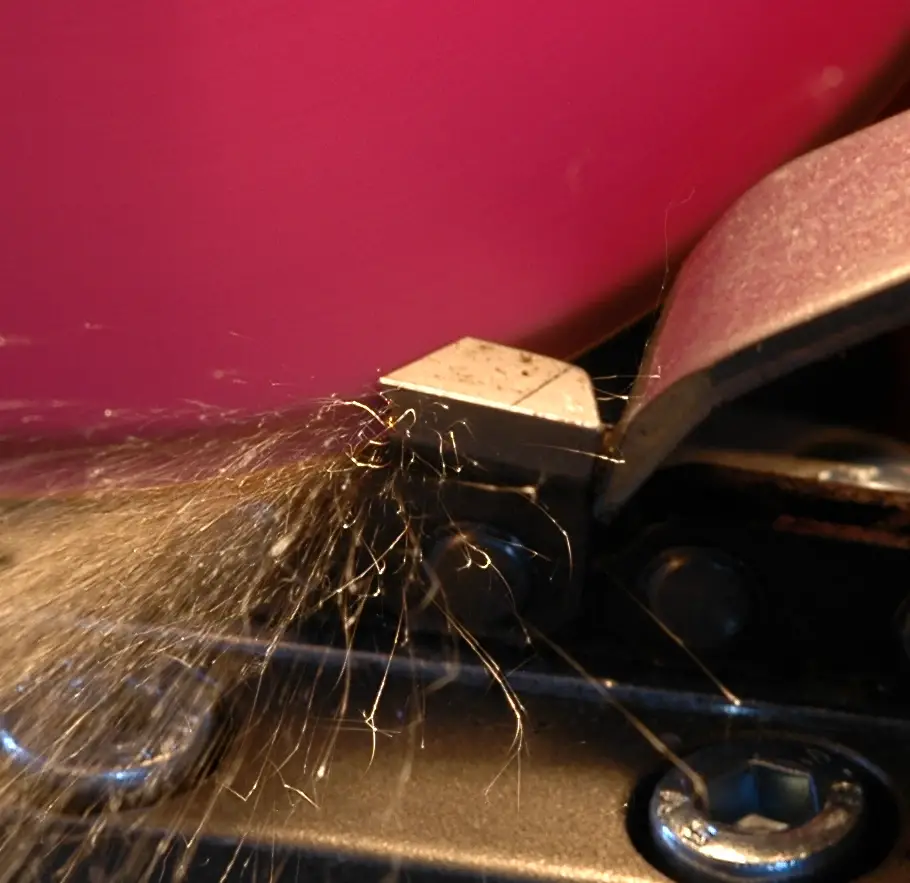
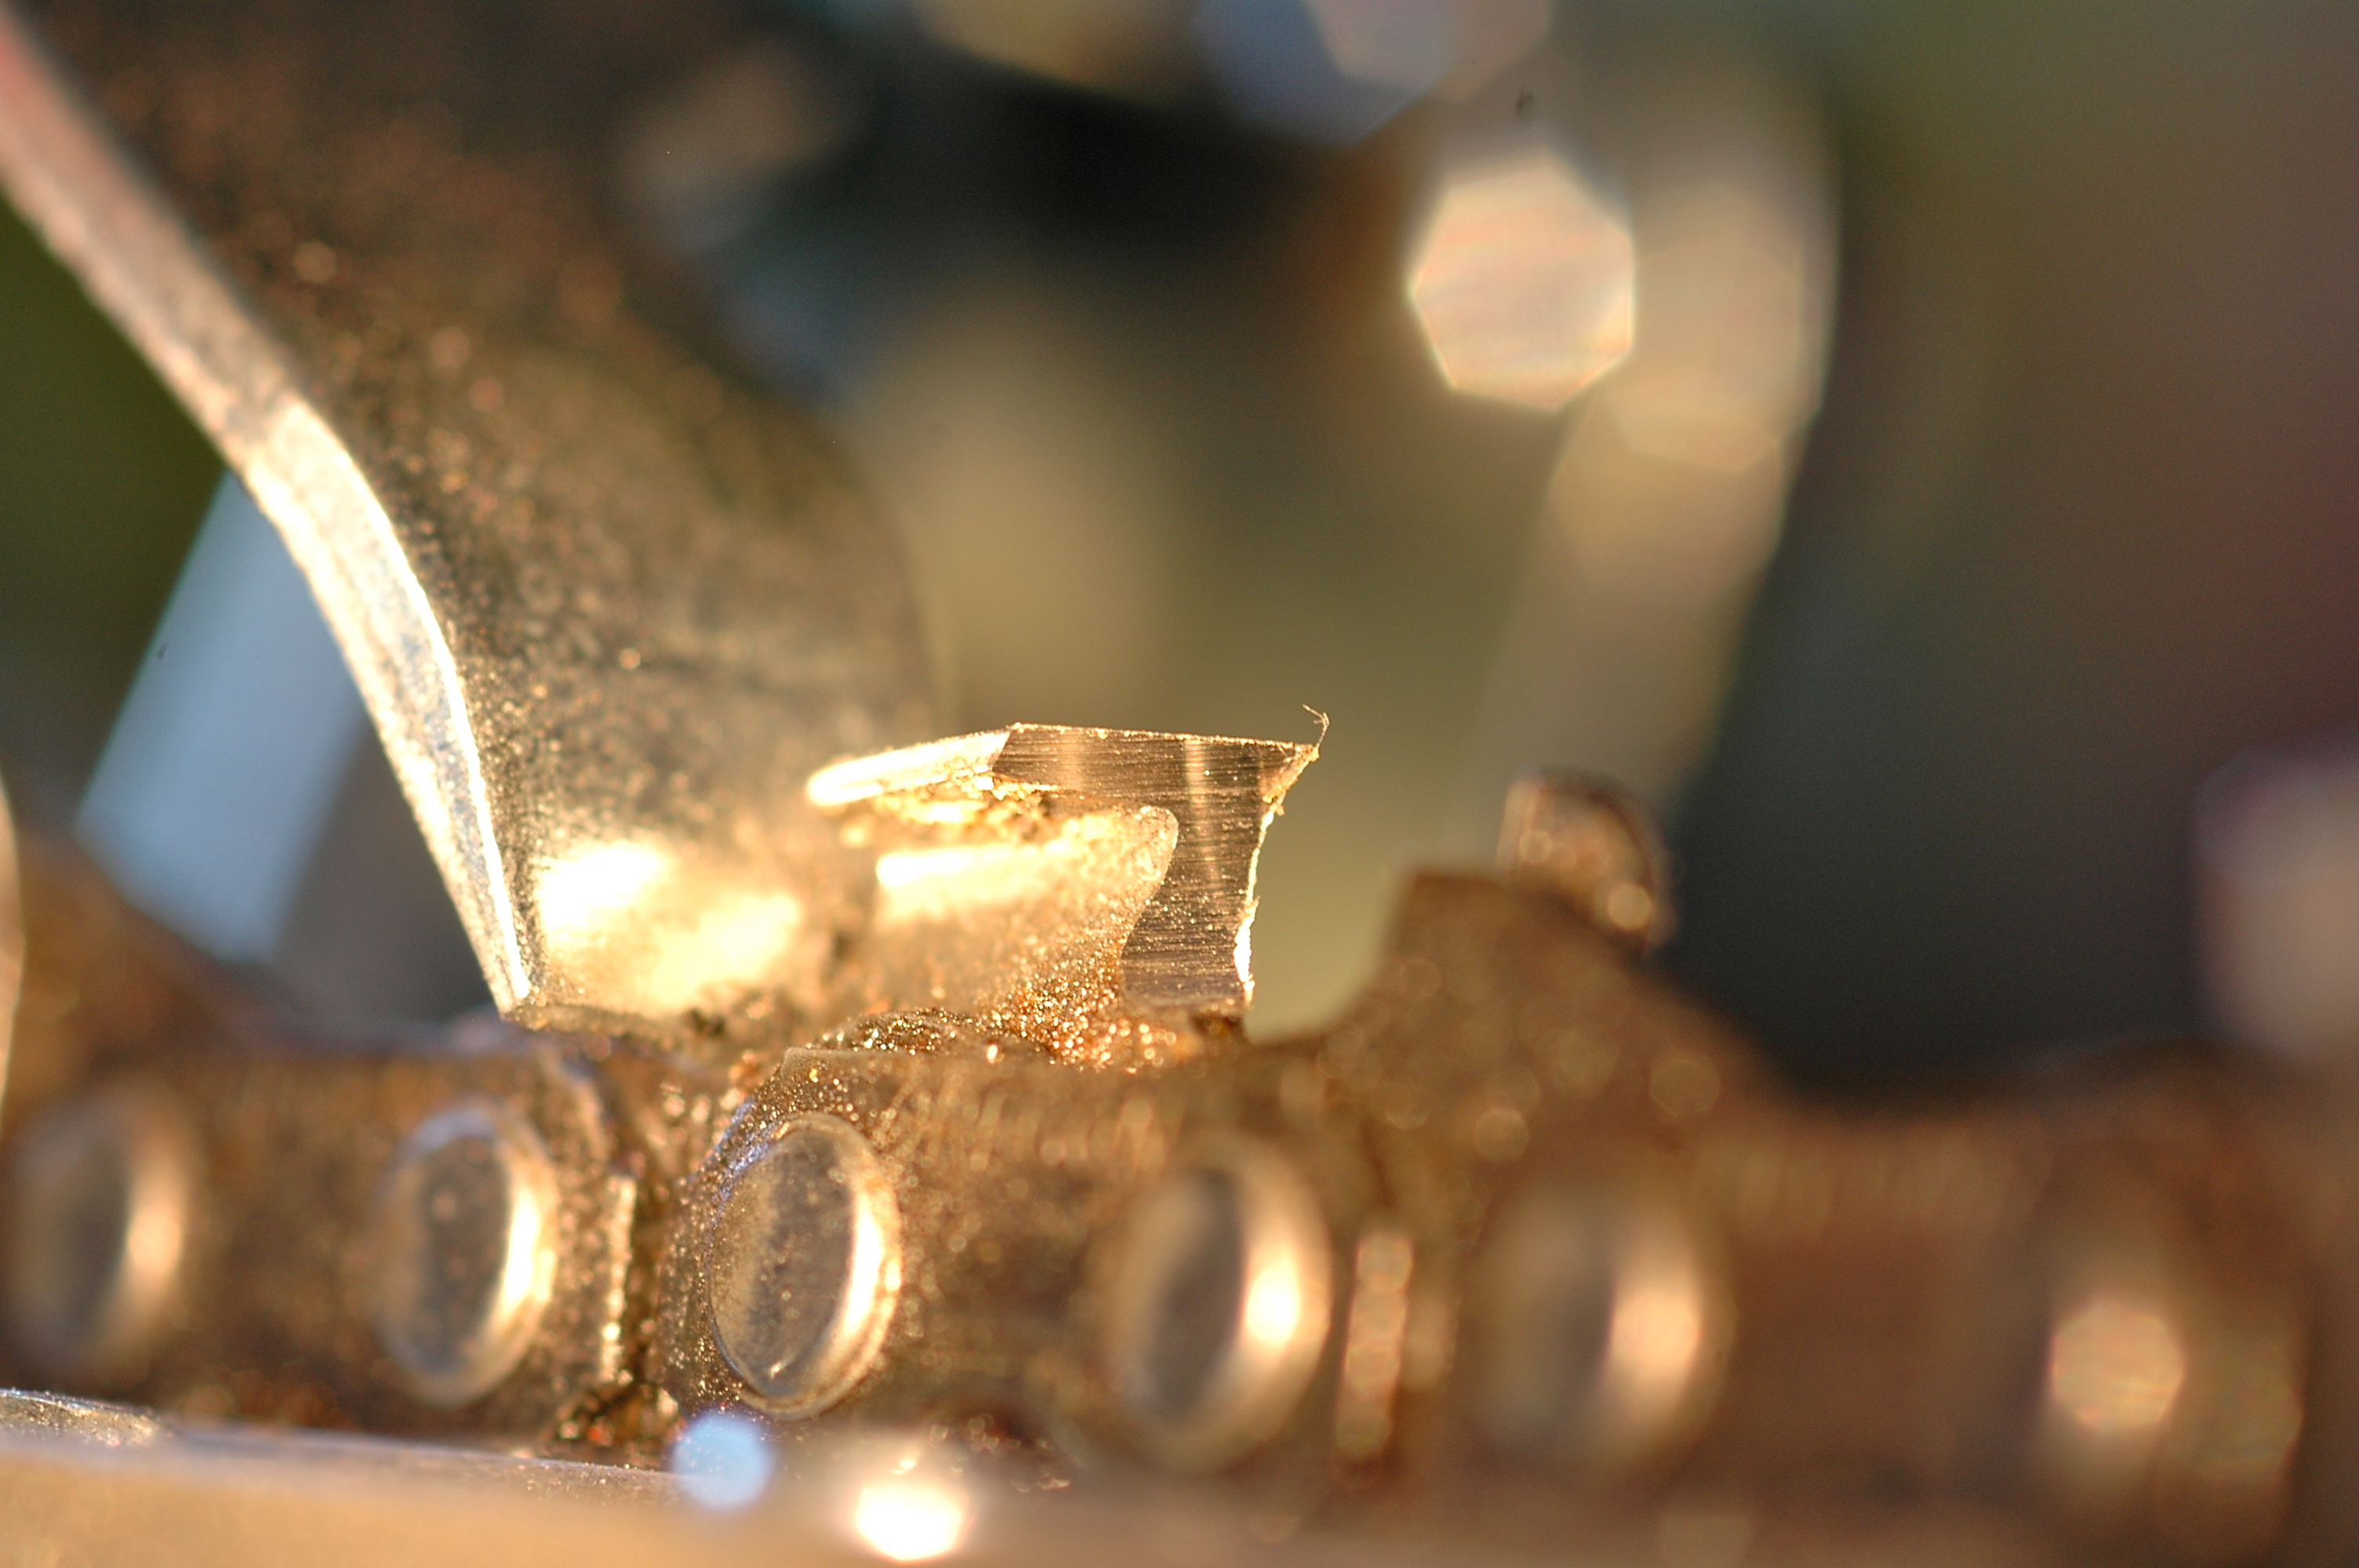
A Properly Ground Cutter
Next, tweak the threaded adjuster that controls how far down the abrasive wheel chops. It needs to go down far enough to impart a hooked side profile to the cutter, though not so far that it grinds down into the main body of each link. Try your set-up on a few teeth before getting underway. Grind each cutter repeatedly, but for a very short time – less than a second with each little chop – until full grinding depth has been achieved. Since the metal at the leading edge of the cutter is so thin, it’s essential that you don’t overheat it by grinding too long. A good edge looks clean and crisp and razor sharp to the finger. If the working edge of the abrasive wheel becomes dark, and doesn’t grind the metal as aggressively as it once did, it means the wheel has become glazed with metal filings. No problem. Work the surface with the dressing stone until the original colour is restored. This refreshed surface will cut more quickly and with less heat build up. You can see me using a dressing stone in the second photo below.
Since saw chains have cutters that alternate orientation along the chain (one right, one left, the next right, etc), you need to use a chainsaw sharpener on all cutters on one side, then swivel the chain holder and tackle those cutters pointing the other way. I mark the starting cutter with permanent marker, so you know exactly where to stop, without wasting any time accidentally regrinding sharp cutters.
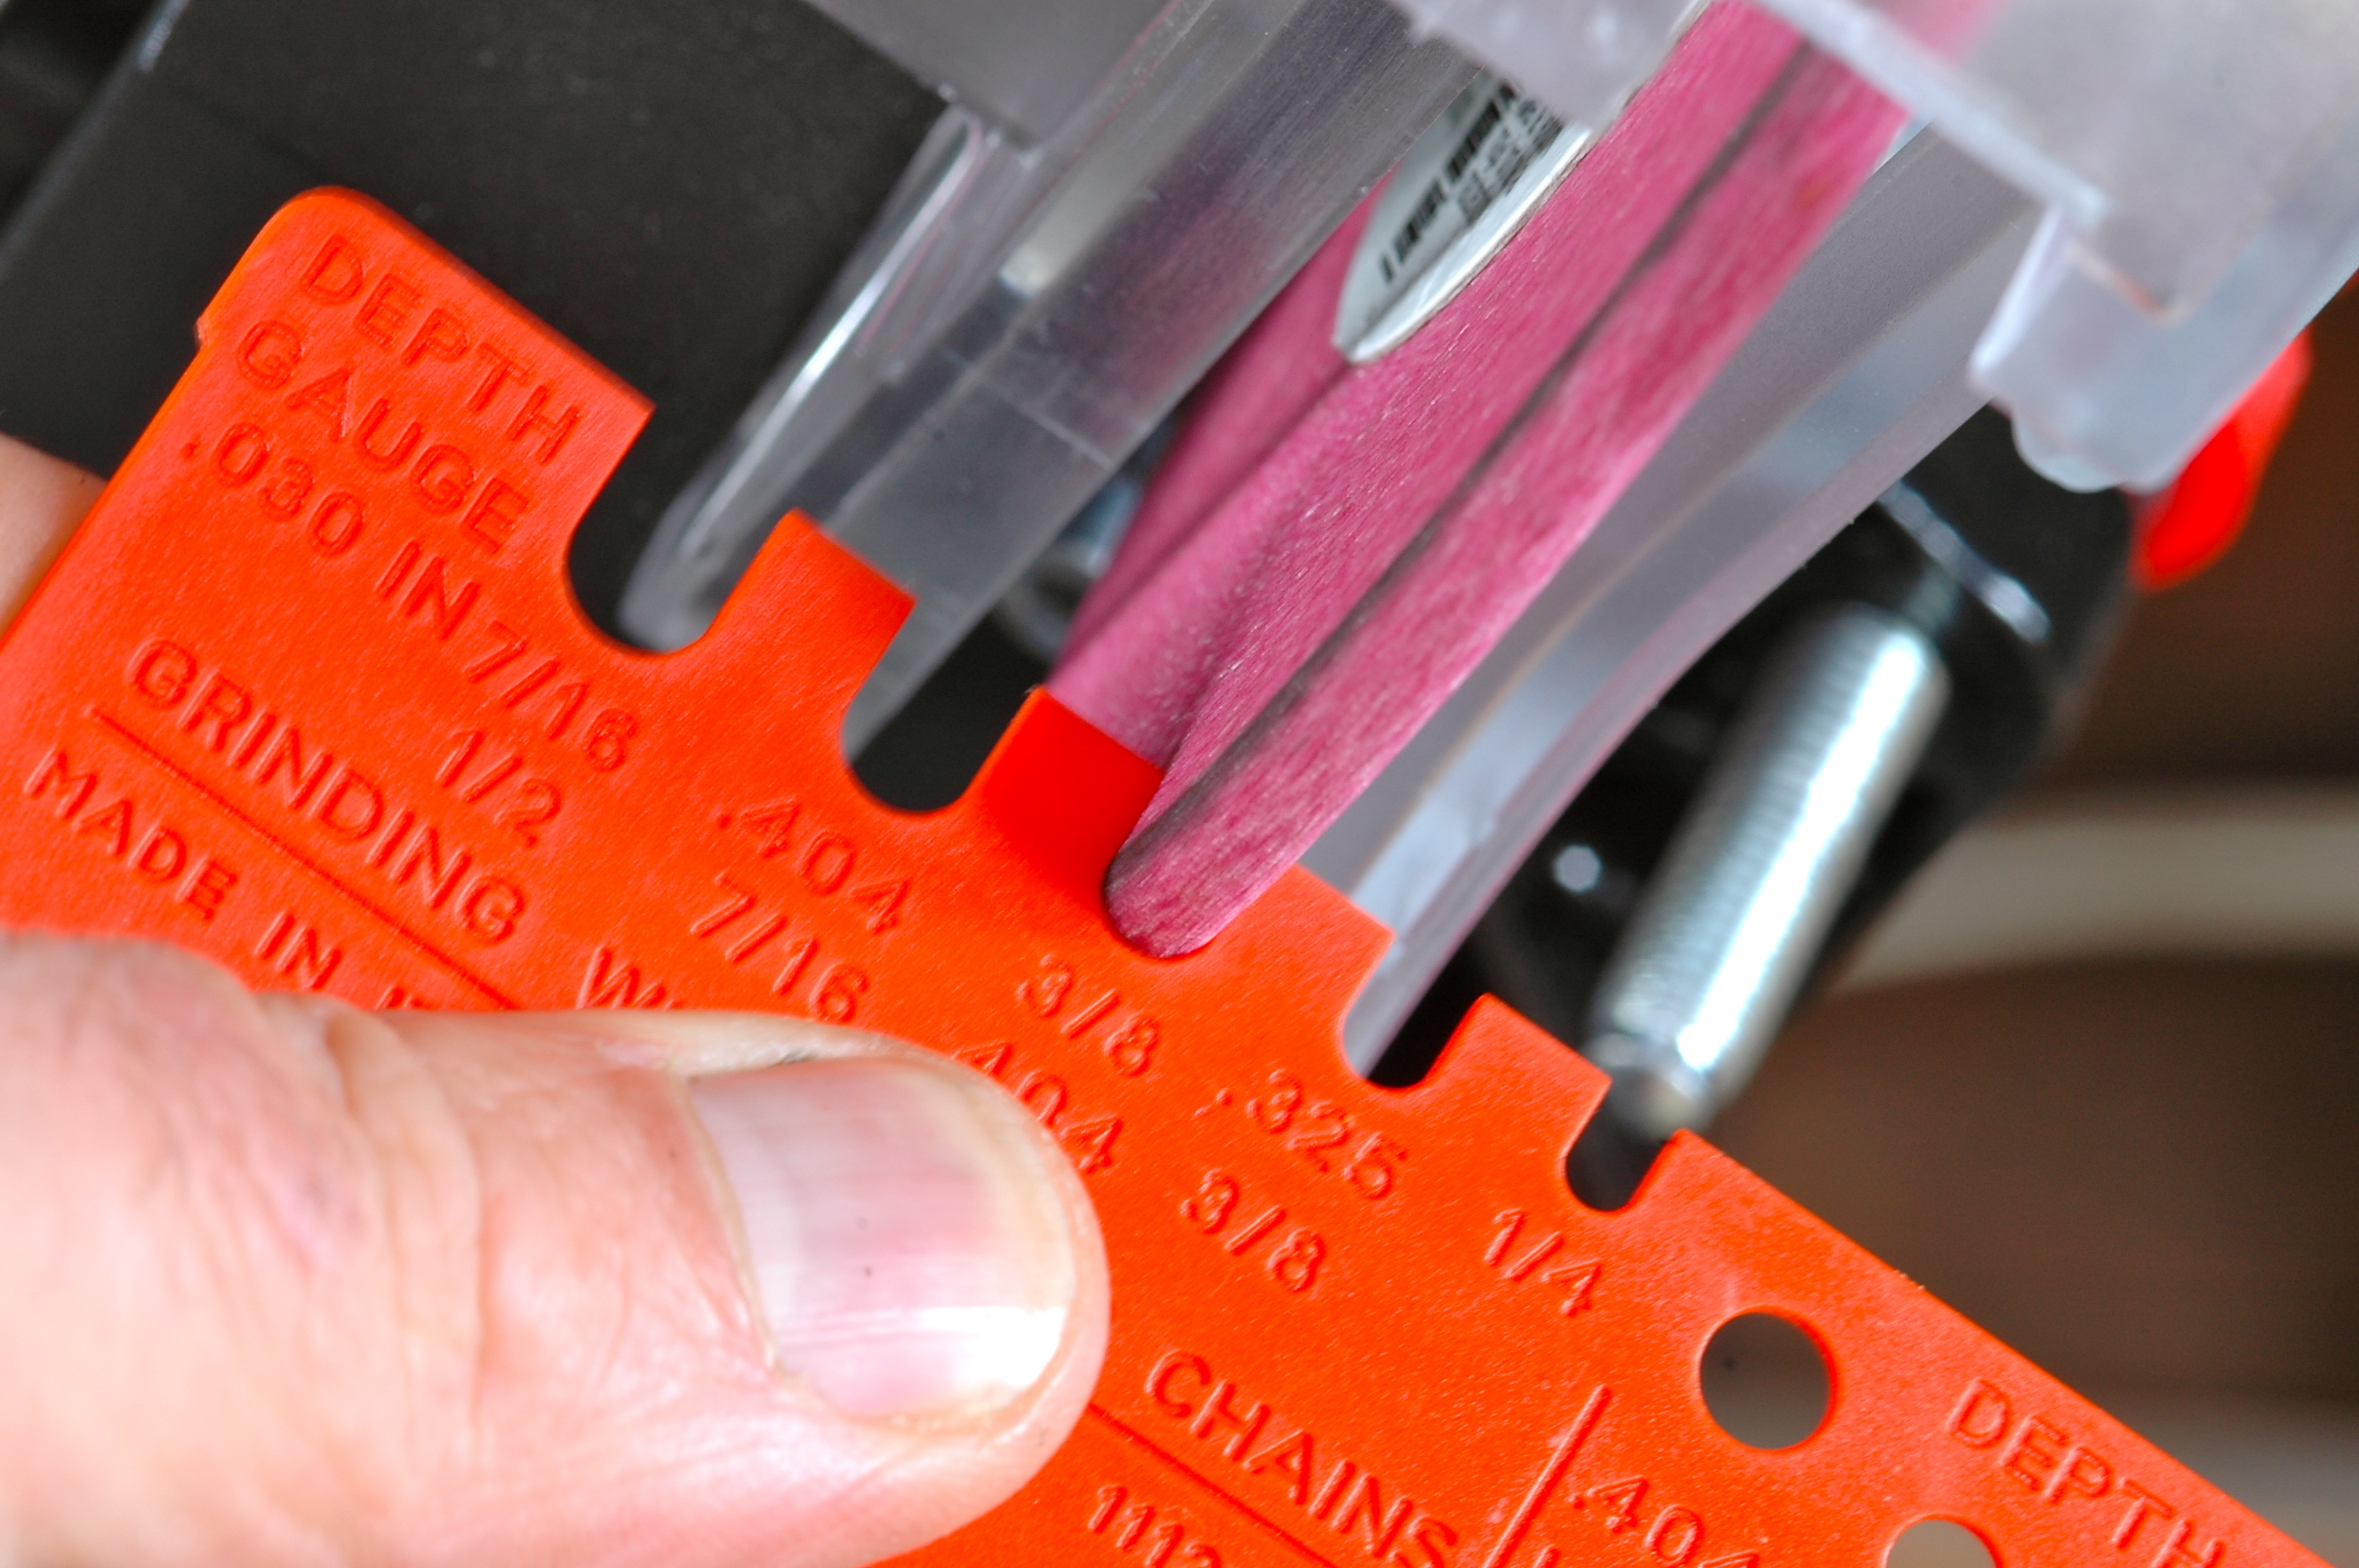
Although successful saw chain sharpening is mostly about shaping cutters so they can slice, it’s also about periodically adjusting the height of another part of the chain, a part called the depth gauges. These rounded, curved extensions of metal sit in front of each tooth, regulating the bite that each one can take as it slides over the material you’re sawing. After four or five sharpenings, the height of the cutters becomes reduced enough that it’s necessary to also reduce the height of the depth gauges correspondingly. Without this periodic maintenance step, no chain will cut properly during the last half of its working life, no matter how sharp the cutters are.
Don’t Forget the Depth Gauges
Start by manually filing one depth gauge down to proper height using a guide made especially for this job and a flat hand file. The chain itself is stamped with a number that represents the number of thousandths of an inch that the depth gauges need to sit below the cutting edge. Next, use this filed depth gauge to set up the depth stop so the abrasive wheel grinds all other depth gauges to the same height. An electric chainsaw sharpener is ideal for this kind of periodic chain maintenance, though you will need to change the abrasive wheel to an extra-wide version made for this work.

If you use a chainsaw professionally or for making serious amounts of firewood for your own use, being efficient with sharpening is important. Tooling up to sharpen your own chains costs less than you might expect and yields more than you’d guess. Our electric sharpeners have delivered a huge boost in efficiency here at our country home, and not just because these sharpeners get the job done faster. They also yield a chain that cuts better than even a brand new chain. It’s amazing.
Chainsaw Sharpener: Two Chains & the Essential Saw Box
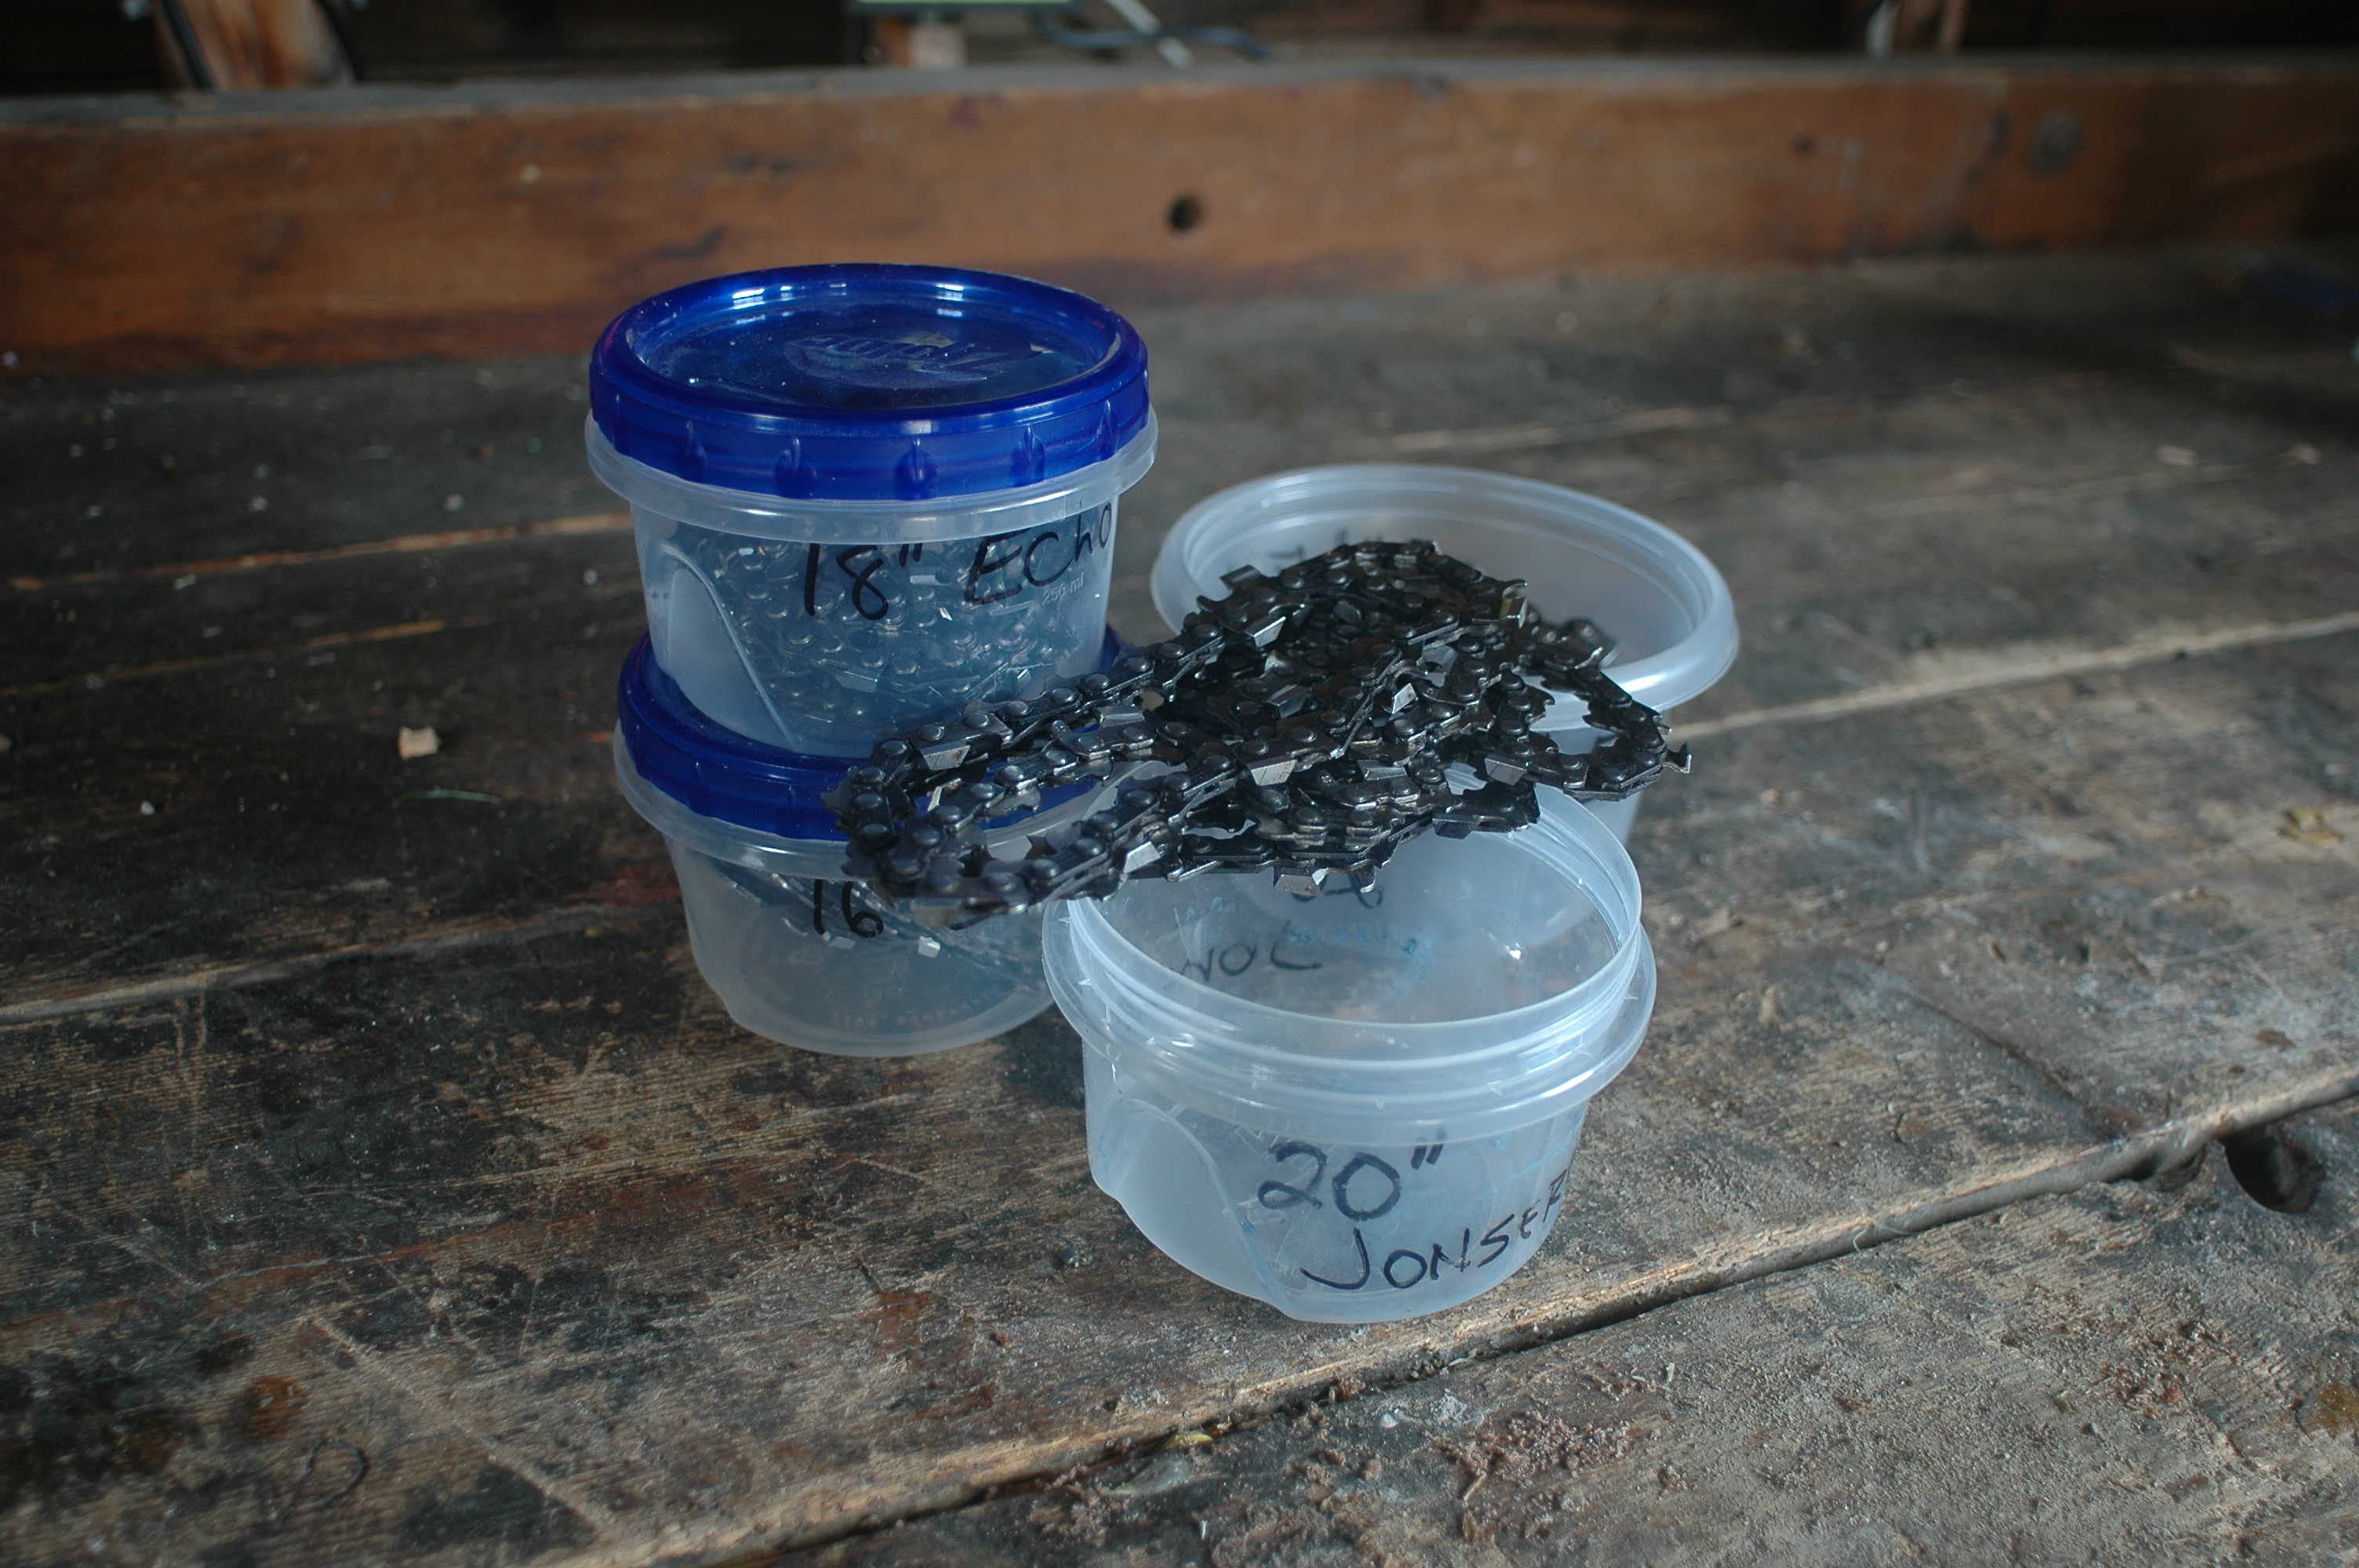
No matter how you use a chainsaw sharpener, it makes sense to keep an extra chain or two on hand, sharp and ready to go as you’re working in the forest. When your chain gets dull and cuts poorly, just take it off and replace it with one of your pre-sharpened chains. I keep spare chains in small, plastic containers in my saw box, ready to sling on as needed. It takes about two minutes for the swap. Keeping several chains in reserve also makes using an electric sharpener more efficient. Instead of setting yourself up to use a chainsaw sharpener just one chain at a time, wait until you’ve got a few dull ones and some down time to fill productively, then grind away.
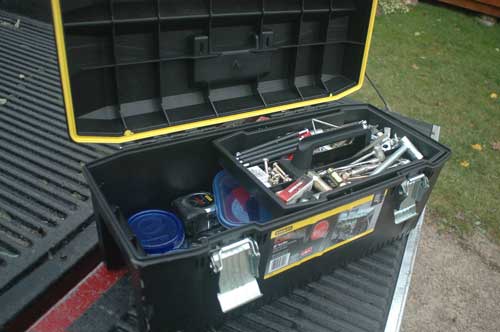
Chainsaws need a lot of auxiliary stuff to keep them running right, and that’s why you should keep a weatherproof toolbox properly stocked for the job. You’ll need a wrench to keep the chain tensioned correctly, some spare chains, a length of fresh pull cord, a spare spark plug, and your sharpening equipment. Does this kind of organization sound obsessive? It’s actually a really nice way to work. I’ve owned three saw boxes over the years, and my weatherproof Stanley is the biggest and my current favourite. That’s it below, open and fully stocked.
 Has this article been useful to you? I hope so. Please consider helping me cover the cost of creating and publish content like this. Click the “buy me a coffee” button below for a safe, simple and fast way to make a contribution. Thank you very much, and bye for now.