DIY Laminate Floor Installation
Q: What do I need to know to install my own laminate floor? I want to save money and do the work myself, but need to make sure I understand the basics.
 A: Installing a laminate floor is easier than it looks and doing the work will save you money, but there are things you need to understand before you decide if DIY is for you. The first has to do with wall clearances. Although laminate flooring doesn’t expand and contract very much at all with changes in humidity, it’s still a good idea to leave a small expansion gap around the perimeter of the floor where it meets walls. About 1/2” is fine. Also, the subfloor you’re installing laminate on must be very flat. Since laminates just sit on top of a thin foam sheet, unattached to the underlying subfloor, dips and hollows will leave the laminate unsupported and flexible under foot. Most manufacturers recommend no more than 1/4” of deviation from flat within a 10-foot radius. When it comes to selecting a laminate to buy, the industry rates durability on something called the “abrasion class” scale, or AC for short. A rating of 1 is the most fragile and 5 is tough enough for public spaces.
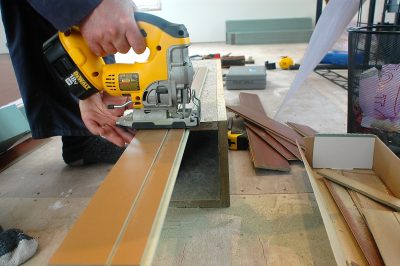
 A hand-held jigsaw is my favourite tool for cutting laminates where they meet walls around edges of a room. Jigsaws don’t kick up fine dust into the air, they’re safe, relatively quiet and the blades last a long time when cutting through the highly abrasive laminate material. Don’t use a chopsaw to cut laminates unless you’ve got a special blade. Regular chopsaw blades for cutting wood get surprisingly dull after just a few cuts. The only drawback to using a jigsaw is the rough cut it produces, but this doesn’t matter for perimeter cuts because they’re hidden underneath the baseboard that goes on later.
It’s natural to feel uneasy when choosing a particular type and colour of laminate because it’s so hard to visualize how it will look over your entire room. You can get a better sense of how you like a particular laminate floor by buying a couple of bundles as an experiment, click them together temporarily on some high traffic area of your home, then see how they hold up and show the dirt. A small investment of money and patience could save you from a colour or type of laminate you don’t like as much as you thought you would.
Dealing With Household Bats
Q: How can I get rid of bats that have moved in under the peak of the new metal roof I installed?
A: Keeping bats out of a house can be challenging in two ways. First, the little darlings are persistent and easily able to get into cracks narrower than 4mm or 5mm. Also, bats are valuable parts of the ecosystem and your efforts to exclude them need to be gentle and humane.
I’ve installed purpose-built bat houses to lure bats out of attics, but it didn’t help. Blocking entryways is the only thing that I’ve found works, and in the case of your roof that may be easier than you realize. Metal roofing manufacturers offer contoured foam gaskets made to fit under the curved profile of the metal. Many installers don’t bother with these because they’re not required to keep rain out, so check and see if they’re in place on your roof. I suspect they’re not. These days all metal roofs are installed with weatherproof screws which can be loosened, allowing the metal to be raised for installation of the gaskets, then retightened.
Bats migrate south during the fall, so if you pay attention you’ll see when they’ve gone, allowing work to proceed.


