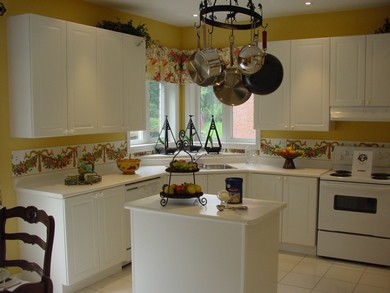
You don’t get something for nothing, and that’s especially true when it comes to home building. While houses go up faster and better than ever, there’s a price to pay for this gain and it’s not entirely financial. If you’re not careful, your new home or renovation can get pretty boring unless you add something beyond the same high-efficiency modular components everyone else is using. And kitchen cabinets are the best place to make a unique investment in the character of your project because the payoff is so big.
Few other home features offer as much showoff potential as kitchen cabinets. You use them every day, visitors often see them, and home buyers are always impressed by a knockout kitchen. Even better than all this is the fact that building your own great cabinets on-site, is easier than it looks.
Traditional, Solid Wood Design
There are a handful of ways to build kitchen cabinets, but I’m going to focus on one. It’s a traditional, solid wood design that I learned to build in a commercial shop, before taking the process into the field for on-site construction.
The building process I’ve settled on has three parts.
- It starts with construction of 3/4-inch thick veneered plywood boxes that form the inner shell of both upper and lower cabinets.
- Next comes enhancing these boxes with solid wood stiles, rails, panels and trim.
- The final step is building matching inset frame-and-panel doors.
None of this is fine woodworking, even though it looks that way. Don’t be intimidated. If you can use a table saw, chopsaw, router table, random orbit sander and air nailer, then you’ve got what it takes.
Basic Kitchen Cabinet Boxes
- Begin by settling on an overall design that includes the location and size of all the individual upper and lower cabinets that make up your installation. Scale drawings of window, door and appliance locations are the best way to work out the wrinkles. What you’re aiming for at this stage is simple: a cut list for butt-joined plywood parts that form the boxes that will be your cabinets.
- Although you could choose 3/4-inch thick veneered particleboard for your boxes, veneered ply is best. Besides being lighter and better able to hold screws and nails, plywood scraps are much more useful for making jigs, fixtures, extension cord spools, power tool boxes, and everything else that handy people build for themselves. Resist the temptation to save a little money by using 1/2-inch plywood. It’s too thin and flexible.
- Cut all box parts to width and length, then assemble them with glue and finishing nails. No need for fancy joinery in the corners. The most you need to do is notch the back edge of side members so they can accept horizontal anchor strips made of pine. This is where you’ll drive mounting screws through into underlying walls studs when it’s time to install the finished cabinets.
- Complete the boxes by gluing and nailing a 1/4-inch thick plywood back panel on the rear edges of all boxes. No need to nestle this into any sort of a groove since all plywood edges will be hidden by the solid wood you’ll add next.
Add Some Beauty
- I find 3/4”-thick x 2 1/4”-wide wood looks best as stiles and rails on kitchen cabinets. Stiles and rails form frames that surround solid wood panels and door openings, giving this design its traditional look.
- Pre-joining rails and stiles with biscuits or dowels into a four-sided frame, before installation is one way to work, but it’s cumbersome. There’s another approach that’s easier when you’re working on a building site. Start by using finishing nails and glue to fasten the face frame stiles and rails to your project, piece by piece. Even though you can fill the nail holes later, hide as many as possible in places that will be covered later by crown molding and base trim. Nails driven into visible places should be spaced evenly, so they look neater.
- Before you get to this stage, rout panel grooves around the inside edges of the stiles and rails, then temporarily assemble these parts on the plywood cabinet boxes. This step gives you the chance to measure precisely for the panels you’ll need to cut, mill and fit into the surrounding frames. You can bevel panel edges on a router table, or rough-cut the bevels on a table-saw as I do, then clean up the surfaces with a razor sharp hand plane.
- When your frame and panels parts are ready, install them on the plywood wood boxes with finishing nails driven through the edges of the stiles and rails only. Panels need to remain free of glue and nails so they can move seasonally with changes in humidity. Tighten clamps across the joints after assembly, then drill a 5/16″ diameter dowel hole through the joint. Work some glue into the hole with a finishing nail, tap a dowel all the way in, then trim off the excess. Leave clamps on overnight, until the glue dries. The dowel acts as a kind of after-the-fact, light-duty tenon, and it’s all that’s needed to create long-lasting joints where face frames are fastened to the cabinet parts behind.
- On cabinets with frame and panel elements on the sides, you’ll get cleaner results using long mitre joints to connect face frame and side frame stiles. Sounds tricky but it isn’t when you know the trick. Trim the edges of both stiles to 45 degrees on your table saw, then glue them together on your workbench, bound with wraps of masking tape every 6″ until dry. Immediately after assembly, burnish the outer corner of the L-shaped arrangement, rubbing the round shank of a screwdriver across the point of the joint. This bends the sharp edges of the mitre inwards slightly, closing small gaps that may be there. Take the tape off when dry, then install the pre-assembled corner onto your cabinet before sanding.
- No matter how you assemble a face frame, the result is going to look rough until you sand. It doesn’t take much part-to-part mismatch for this to happen, but neither does it take much sanding to effect a cure. The trick is preventing cross-grain scratches, and a random orbit sander is the ideal tool for this.
- Start with a 120-grit disc and gently sand the entire face frame area. While you work, sand everything — not just the wonky joints — and keep the sander level as you do. If you let the sander rock from side-to-side, you’ll get face frame surfaces that are less than flat and less than beautiful.
Making Cabinet Doors
- Cabinet doors are nothing more than movable versions of the fixed frame-and-panel assemblies you applied to the cabinet sides. The only difference is that the corner joinery needs to be beefier because the parts aren’t all glued to a plywood base. Even large cabinet door frames hold together well with double #20 biscuits at the corners where stiles and rails come together, and that’s a good thing. This kind of joinery is fast and easy — ideal for any on-site cabinetmaking campaign.
- Flush-fit doors sit within the opening that surrounds them, and though these require more precise craftsmanship than face-mounted doors, the trouble is worth it. When you’re planning door part sizes, always begin with doors that are larger than they need to be. In practice this means sizing them about 3/32” wider and longer than the cabinet openings you’ve already built and measured. This fitting allowance may seem excessive, until you realize that you might need (probably will need) all that extra wood to allow for deviations from square between the doors and face frame openings. Ideally you’re aiming for a 1/16” gap all around single doors, with perhaps 1/8” of space along the mating edges of doors hung side-by-side. The extra clearance along this edge allows room for seasonal expansion that always shows up most between double doors.
- Assemble the parts, then fit them into their openings when dry. You’re challenge here is to create precise clearance gaps in places that receive constant and close visual scrutiny. It doesn’t take more than 1/32” of error in the fit between door and stile for an inset door to look shabby.
- Does all this sound like more trouble than buying ready-made melamine boxes and screwing them to the walls? That’s because it is. But if you’re interested in more than just the basics, you’ll be surprised what some hands-on woodworking can do to boost the atmosphere of your home. And compared with custom-made, solid wood kitchens, building unique cabinets on site can even make financial sense for both builders and owners.
Work site Workshop
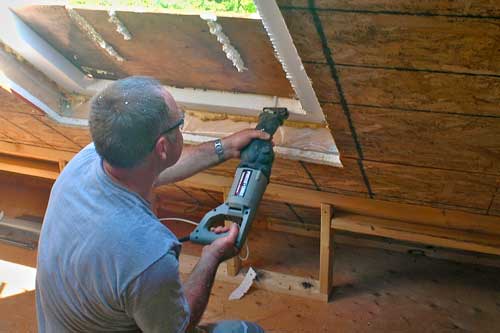
The best time to build kitchen cabinets on site is when the structure is dried in, the drywall is up, but the finished floor hasn’t gone down yet. This way you can measure the walls you’re working to, but don’t have to worry about dragging around your table-saw and materials. Set up your chopsaw on a stand, and your bench saw with an out-feed table to support the heavy sheet goods you’ll be cutting.
Size It Right
Start with these broad-stroke dimensions when you’re designing kitchen cabinets, then adjust to suit:
- Lower Cabinets: 36” overall counter height and 22” to 24” working counter top width.
- Upper Cabinets: 13” deep overall, 36” to 42” tall (depending on ceiling height) and 19” to 21” above counter top.


I hope you found this content useful!
Your generous support helps me produce more practical, hands-on content that I hope you’ll find useful.
Steve Maxwell