 Ceramic tiles can either make a terrific, long-lasting floor or an expensive nightmare, depending on how you deal with them. Few home improvement issues are as black and white as this one, and that’s why it pays to know what’s involved before you dive into ceramics. And don’t think that hiring a professional necessarily gets you off the hook. Solid knowledge pays off in solid results, whether you lay the tiles yourself or pay someone to do it.
Installing ceramic tiles isn’t technically complicated, but there are make-or-break details involved in the process. What you’ll learn here is my favourite approach to the job: creation of a traditional mortar-bed base followed by tile installation on site mixed, mortar-type setting compound. There’s more than one surface on which you can install a ceramic tile floor, but I favour a mortar bed for two reasons. First, I know it well from personal installation experience over the last 12 years. Second, I’ve never seen a mortar-bed approach deliver anything other than stable, rock-solid results over the long haul. You can count on it. If you follow the steps you’ll read here, you’ll have crack-free tiles and bulletproof grout. There are easier methods of tile installation, but none offer better results.
Phase#1: A Solid Foundation
The first thing to understand is that the reliability of any ceramic tile floor depends almost entirely on an absolutely rigid base. That’s why I’ll devote most of this article to this part of the job. If there’s flex in the floor structure – even a little – tiles and grout eventually break loose. Guaranteed. That’s bad enough, but it gets worse. Repair of such a floor is only a stop-gap measure. New tiles and grout will also come loose in time because the underlying problem remains – a flexible support structure underneath an inflexible floor surface. And since you can’t adequately fix an inadequate ceramic floor after the fact, you’ve got to be prepared to roll up your sleeves and do it right the first time.
Avoiding trouble means going beyond what’s normally adequate as a subfloor for non-ceramic flooring options, and there are a handful of choices for this. Some ceramic tile professionals add a layer of 5/8-inch plywood on top of the existing subfloor, before fastening tiles directly to this new wood using an adhesive rated for the job. Others swear by a layer of fibre-reinforced cement board on the subfloor instead of ply, screwed in place before the ceramics go down. In my experience the traditional mortar bed installation is more reliable than either of these options, though it’s also substantially more work.
Putting one down involves applying a 1 to 1 1/2-inch thick bed of smooth, reinforced, site-poured mortar on a wooden subfloor. This mortar is allowed to fully cure before tiles are secured with a setting-type compound before grouting. Installing a mortar bed involves five distinct steps:
Waterproofing the Subfloor
The purpose of this first step is to prevent the dry, wooden subfloor from sucking moisture out of the mortar as it cures. Subfloor waterproofing also offers the advantage of waterproofing the whole tile installation, even without the application of a grout sealer liquid.
Start by rolling a layer of tar-based foundation coating onto your subfloor after securing it with screws driven at least 1-inch into the underlying floor joists. Next, roll out overlapping layers of 15 lbs. roofing felt onto the tar while it’s still wet. Secure this tar paper with staples driven every 12 inches along edges.
Steel Reinforcement
Like all masonry products, the mortar you’ll apply to the floor is quite strong in compression, but weak in tension. That’s why it’s necessary to add a layer of steel reinforcement next, before the mortar pour. I’ve seen people use chicken wire for this, but I believe the textured surface of expanded metal lath offers better strength. Cut lengths to fit your room, overlapping the layers a couple of inches along the edges. Secure the screen with more staples driven down through the tar paper and into the subfloor.
Installing Screeds
Besides being strong, your mortar bed needs to be flat and of consistent thickness. And for this you can’t do without the mechanical help offered by screed strips. These are narrow strips of wood screwed to the floor (usually along the edges) that guide the travel of a larger piece of wood you drag across the freshly plopped mortar to make it smooth and consistent. If your room is narrower than 8 feet, install strips of wood along the perimeter of the walls. If it’s wider, install one strip along a wall, and another parallel to it, seven or eight feet out into the room. Screed strips installed along the walls can be left in place after the mortar cures. Screed strips installed away from walls are temporary and must be moved as the mortar pour continues along the room. Cut your strips wide enough to create a mortar bed that’s 1 to 1 1/2 inches thick, including the thickness of the expanded metal lath they rest on. A 2×4 with beveled edges makes a great screed when drawn over these strips.
Mixing Mortar
Mortar for a ceramic tile base needs to be strong and crack-resistant. Here’s a recipe that works every time: 1 part Portland cement; 3 parts clean mortar sand. Use a latex bonding agent in place of half the water you’d normally use to mix the mortar into a workable consistency. Latex bonding agent is a kind of low-viscosity glue. It binds the hardened mortar together and boosts strength. Mechanical mixing is best for achieving consistent mortar composition, and the popular drum-style mixer works fine if its drum is tipped over far enough. Normally a mixer of this sort only works well with concrete that contains a crushed stone component. So if your mortar sticks to the sides of the drum, tilt the mixer on one side to bring the drum nearly horizontal as it spins. And as you mix, keep the mortar a little on the dry side. It must have the consistency of cookie dough when you’re done.
Screeding the Mortar
As you dump shovelfuls of mortar on the first couple of feet of your floor, you’ll probably wonder how it could ever get smooth enough to support tiles. The screed will do that for you. Draw your 2×4 over the screed strips, jiggling it back and forth as you do. Your first pass will level the high spots and reveal areas that need more mortar. Trowel some into these low places, then screed again. It might take half a dozen passes before the surface is smooth enough to leave alone as you move over and dump more mortar into a new 2-foot wide swath.
Phase#2: Setting the Tiles
Leave your smooth and level mortar bed alone for three or four days to cure before breaking open boxes of tile in preparation for setting them. As with any tile-type floor covering, place ceramic tiles temporarily along the walls to determine where to locate the cut edges for minimum visibility. You should also mix tiles from all cartons for a consistent appearance.
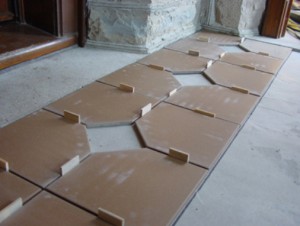
A snap cutter is a fast, easy and accurate tool for making the straight cuts you’ll need to complete at this stage. You could rent a diamond-blade tile saw, but that’s overkill unless you have complicated shapes to prepare. Mark, cut and dry-fit tiles along the edges of the floor, leaving whole tiles between the edges for later. I cut wooden spacer strips to regulate the gap between tiles because I’m such a cheap-skate. You can buy plastic spacers if you want to go on a spending spree.
I prefer a powdered setting compound that you mix with water, and once again, mechanical mixing is just the ticket. Use a paddle attachment spinning on an electric drill to create a smooth mixture. Aim for the consistency of peanut butter.
Apply setting compound to your mortar bed using a trowel with 5/16-inch or 3/8-inch deep notches. The aim is to spread the compound thickly enough to fully cover the bottom of each tile after it’s pressed in place, yet not so thick that it oozes up around the tiles, filling the grout grooves. During the course of learning how much setting compound to spread, it’s quite likely the goo will sneak up around the tile edges. Keep a small slot screwdriver and rag on hand to clean out excess setting compound between neighbouring tiles. You’ll find that the spacers you use to regulate tile gaps are helpful, but don’t take the place of a good eye. Small inconsistencies in tile shape means you often need to equalize errors for a consistent look. Spacers only create a starting point for this work.
Phase#3: Grouting
Grout fills the gaps between tiles and creates a contrasting visual framework that boosts the appeal of any tile installation. Leave the tiles alone for two or three days after setting then get out your grout powder, mixing paddle, a 12-inch steel trowel, a large sponge and a large basin for wash water.
Start by mixing a batch of grout to the consistency of peanut butter, then spread it over the tiles in a 10 or 20 square foot area, forcing it into the gaps with back and forth passes of your trowel. Make sure all gaps are filled, with excess grout scraped off the surface. What you’ll have at this stage is a dirty looking floor, but one that’s almost done. Wait for five minutes and gently wipe the tiles over a grout joint with a damp sponge. What you’re looking for is grout that’s partially hard, but still soft enough to be wiped cleanly off the tiles. Wipe and rinse your sponge often. It may take six or eight passes before the tiles are completely clean. Leave the area alone for a day or two, then open it up to full traffic. You’ve now got a great floor you can count on.
Installing ceramic tiles is a lot like life in general. True success isn’t quick nor easy, but it is durable, attractive, valuable and worth pursuing. Prepare to pay this price and you’ll enjoy a great ceramic floor for years.


