- Video watch time = 6 1/2 minutes
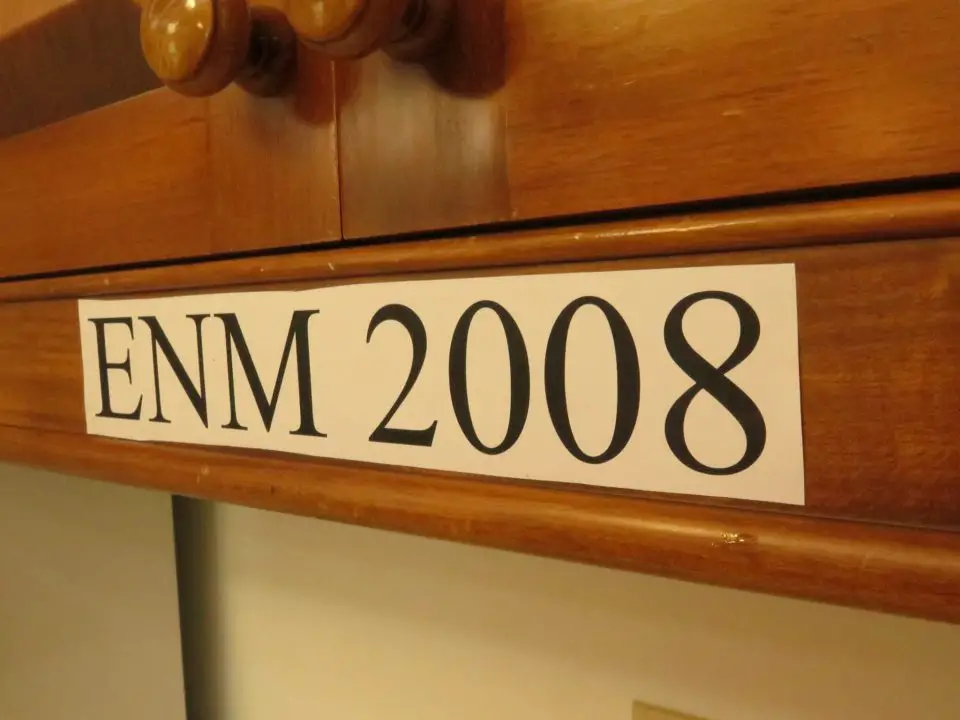
It’s funny what sticks with you from childhood. One of my earliest woodworking memories is of my grandfather using a jack knife to carve Roman numerals into the edges of wooden window sashes and their matching storm windows at the cottage. Since each window was a little different, the numbers let him reinstall the storms in the right spot every fall. The half-hour I spent watching him carve more than 50 years ago has not only influenced my woodworking today, but it’s the reason you’re reading this now. It’s astonishing how small actions can sometimes launch far-reaching ripples into history.
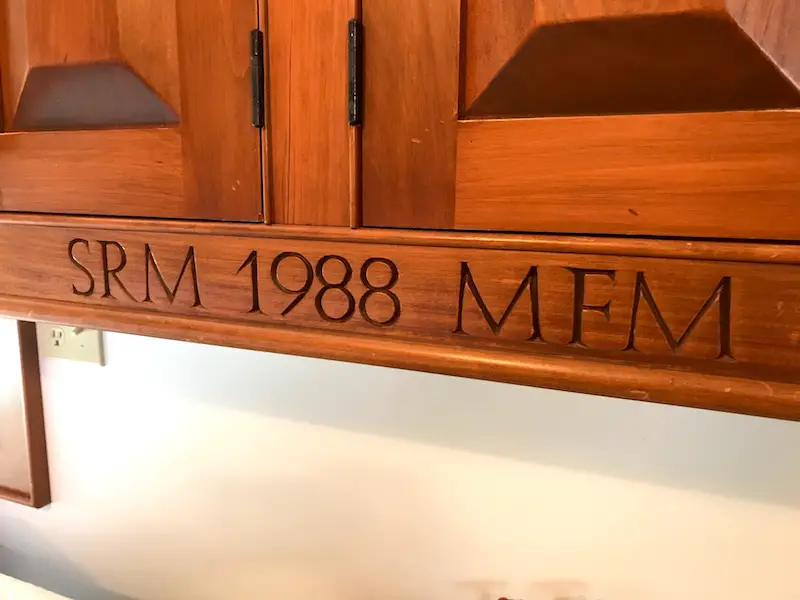
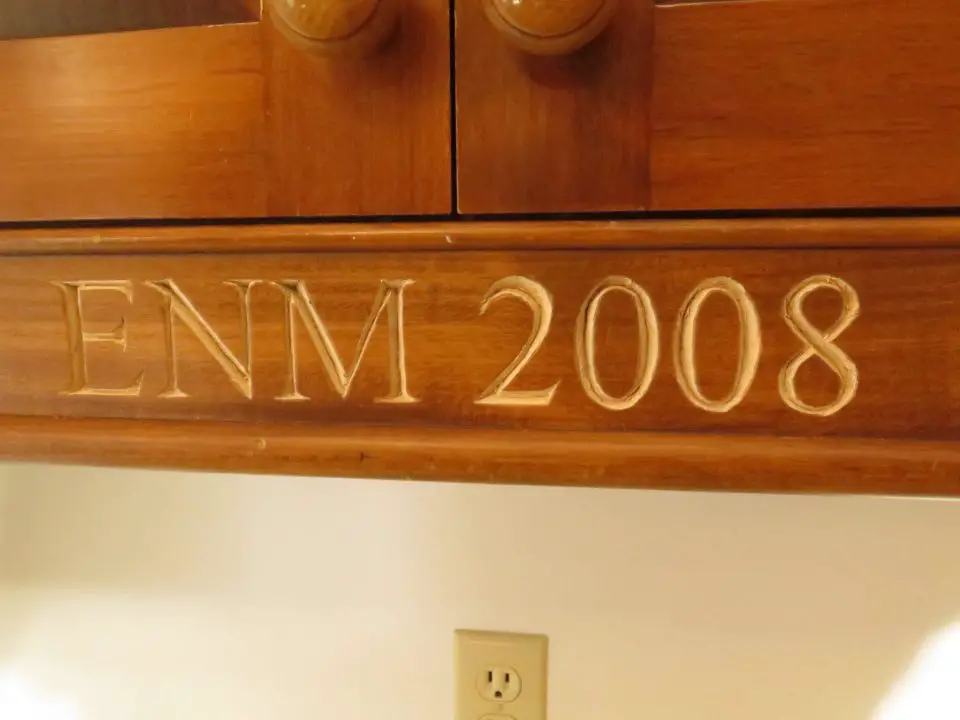
I’ve since refined and expanded Grandpa’s wood carving idea and use it to decorative carve letters and numbers into workshop projects I especially like. A date, a name, initials or a fun label add a dimension to woodworking that you can’t get any other way. I’ve also brought my computer and printer into the process to speed and improve results, as you’ll see in the video and article below.
Wood carving incised letters and numbers is a two-part process. First there’s drawing of the shapes, then comes the carving. But no matter how skillful you are with tools, your letters will look ugly unless you follow an accurate, pleasing pattern. And drawing those patterns freehand could take as long as the carving itself with no guarantee of success.
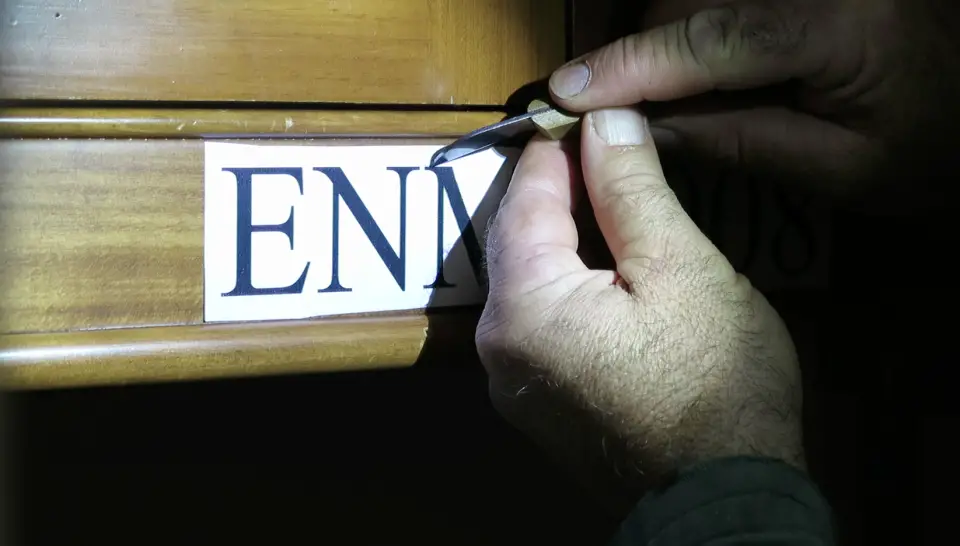
But the patterns I follow never involve any drawing, they’re always perfectly proportioned, and they take just a few minutes to prepare. I make them on my computer screen, then print them out and glue the paper to my work piece with rubber cement. I then carve right through the paper into the wood. After I’m finished, I peel off the remaining paper. It’s easy and the results look great.
Wood Carving Letter Layout Made Easy
There are three advantages to computer-generated carving patterns. First, you can choose any shape and size of letter you like. There are thousands of fonts out there, so it’s easy to get the look you want. Second, you can optimize letter sizes instantly on-screen. Any word processing program offers an enormous range of letter sizing options. And third, making computer carving patterns is fast. It takes just minutes to get exactly what you want.
If you’ve never carved before, it won’t be obvious what separates a carver-friendly font from a carving-impaired one. My favourite carving font is the good old Times or Times New Roman. Look for letters with “serifs”, those little pointy parts that cap each corner or letter-end. They make it easy to maintain crisp end cuts. I’m sure serifs were originally invented because they make letter carving so much easier.
Tools for Wood Carving Letters & Numbers
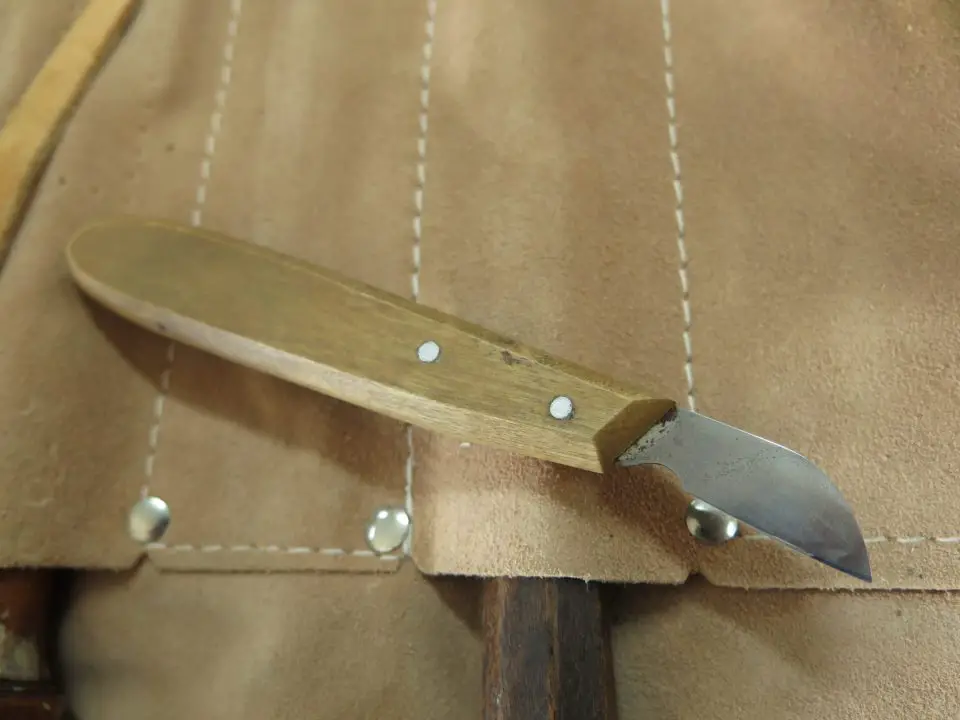
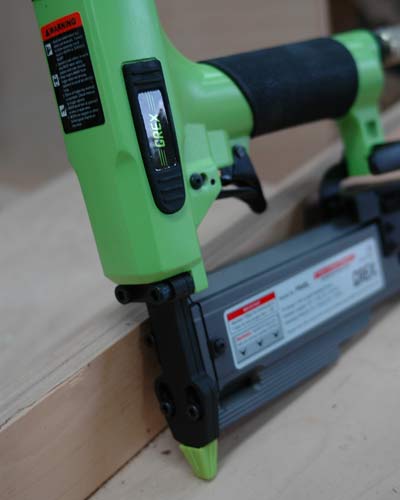
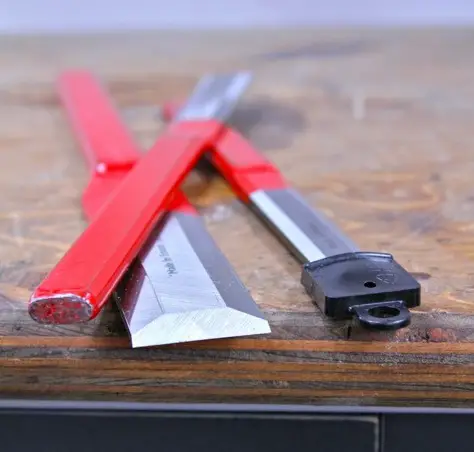
I use only three tools for carving incised letters and numbers: a large Alpine chip carving knife (you can see mine here above), a 1/2” #7 straight carving gouge, and a 1/4” #5 straight gouge. The tool collection that’s ideal for you might vary from this list, depending on the style and size of letters you like. In fact, the Alpine knife is the only tool I use for 90% of my incised carvings. But regardless of what you settle on, tools won’t be a big expense — $50 or $60 will let you make a lifetime of letters.
The hallmark of any carving style is bold, clean tool strokes. And unless your tools are sharp enough to cut wood cleanly, without tearing, your work will be fuzzy, indecisive and second-rate. I use an electric buffing wheel, not stones, to sharpen all my tools. The process only takes a few minutes, and it produces the keenest possible cutting edges. Click here to learn more about the online video tool sharpening course I offer.
Some woods carve better than others, and as a novice you want to give yourself every chance for success by using the best carving woods. My first choice is basswood, because it’s not too hard nor too soft, and has a tight, interlocking grain that offers no surprises when carved. Unfortunately, even though basswood grows widely in deciduous forests, it’s rarely sawn into lumber. You’ll find it easier to get some knot-free pine – a good second choice. Stay away from hardwoods, at least initially. Oak and ash are particularly troublesome because of their porous, open grain structure. Very soft woods aren’t great either. Eastern white and western red cedar are so soft that it’s difficult to create crisp carved edges.
Start practicing on some simple letters or numbers with no curves. The letter “V” or number “7” are good choices. You can take one of two approaches, depending on how you want the letters to look. If the lines of the letters are wider than about 3/8”, take many overlapping downward nibbles with the gouge. Always work towards the edge of the letter, leaving a v-shaped valley in the middle. The subtle, dish-shaped cuts of this second method are visually pleasing, and say “hand-carved” pretty plainly. If letters are made of lines that are narrower than about 3/8″, I use another technique.
With the paper stencil glued to the wood, trace the outside of one letter with the tip of your chip carving knife. The idea is to define the outer edge of the letter in paper, remove the paper after it’s free from the surrounding paper, then remove the wood within the area outlined. You never want to go beyond the outside of each letter because it looks messy and terrible.
Also, all tool strokes must angle down towards the middle of each letter, where they’ll converge into a sharp point at the bottom of the incised trough that forms the letter body. As I said, the cardinal rule here is to never, ever venture beyond the outer edges of your letter’s pattern.

I’ve built toy storage boxes with the Lego and Meccano insignias carved into the sides following photocopied patterns taken from instruction manuals. You can see them here. These carvings have the same feel as the printed logos. It’s neat to see them in wood. Like the computer, photocopiers can be used to vary final logo sizes to suit the object you’re carving into. But since it’s rarely convenient to bring a project-on-the-go into a copy shop, get several sizes of logos so you’ve got a choice when you get back to the bench.
Carving letters and numbers is the best way I know of to make wooden items special. Try it and see. You’ll probably do it more than once.


I hope you found this content useful!
Your generous support helps me produce more practical, hands-on content that I hope you’ll find useful.
Steve Maxwell