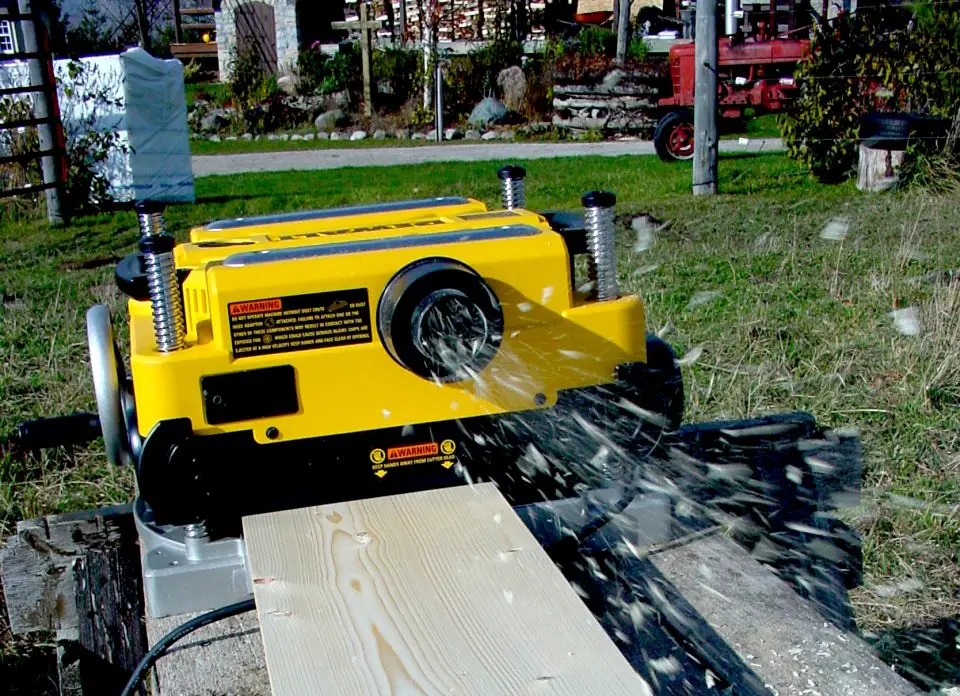
To be a successful woodworker, you also need to be something of a mechanic. I’m reminded of this every time I install a new set of blades in the thickness planer that’s served me well since 2003. That’s it above. There’s a video at the bottom of this post that shows everything you need to do to maintain a typical thickness planer so it works like new, but before you watch it let me give you a bit of background.
Thickness planers are more maintenance-dependent than a tablesaw, jointer or drill press. And though the work of keeping a planer functioning well isn’t difficult or time consuming, it is necessary. You’ve got to do it to avoid boards that stick, get gouged and come out with less than smooth surfaces.
I’ve been using benchtop thickness planers regularly since 1993, and during this time I’ve had many chances to do the two most important maintenance tasks:
- Waxing the planer bed: This seems insignificant, but it really matters.
- Replacing planer blades: These days blades are mostly two-side and disposable.
Wood Planer: Waxing the Planer Bed
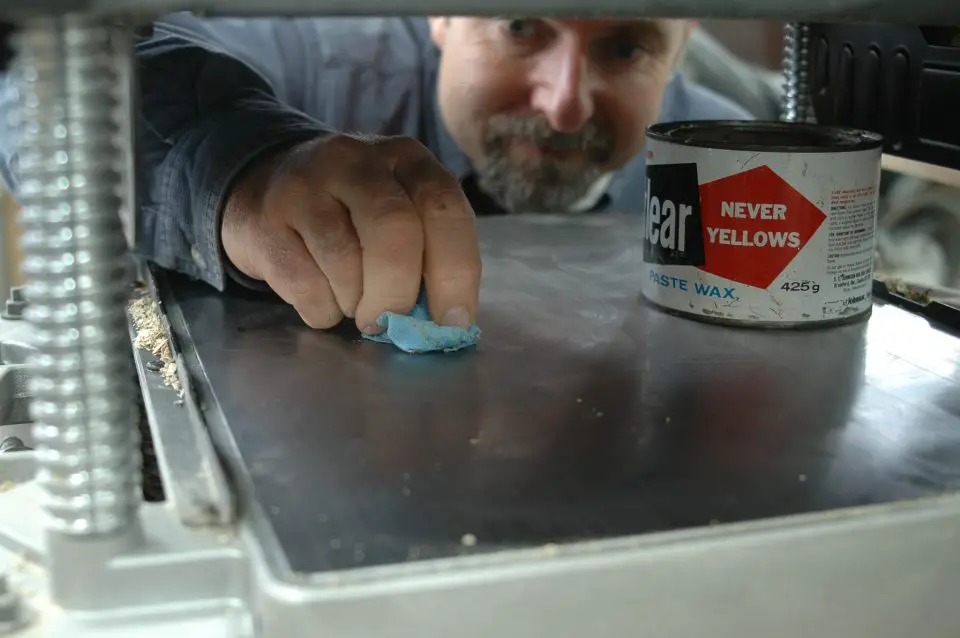
This is the first and most important maintenance issue. As unlikely as it sounds, a thin film of wax on the support bed is essential for wood to pass smoothly through every planer I’ve used. This applies to the dozens of machines I’ve tested over the years, as well as the three different planers I’ve used personally in my own workshop. Eventually, the wood stops feeding through properly without wax.
I prefer paste floor wax for planers because it’s the most likely formulation to dry hard, slippery and free from stickiness. That’s what you want. I’ve tried cabinetmakers waxes and they’ve never worked as well. They’re t’s too sticky.
Keep a rag in the wax can, and the can near the planer. At the first sign of boards not feeding through smoothly, switch off, unplug the machine, raise the cutter head and rub wax on the bed. Let it dry for a few minutes, then buff the surface with a clean rag. I can plane 500 to 1000 board feet of hardwood (about half as much softwood) before I need to re-wax.
Wood Planer: Maintaining the Blades
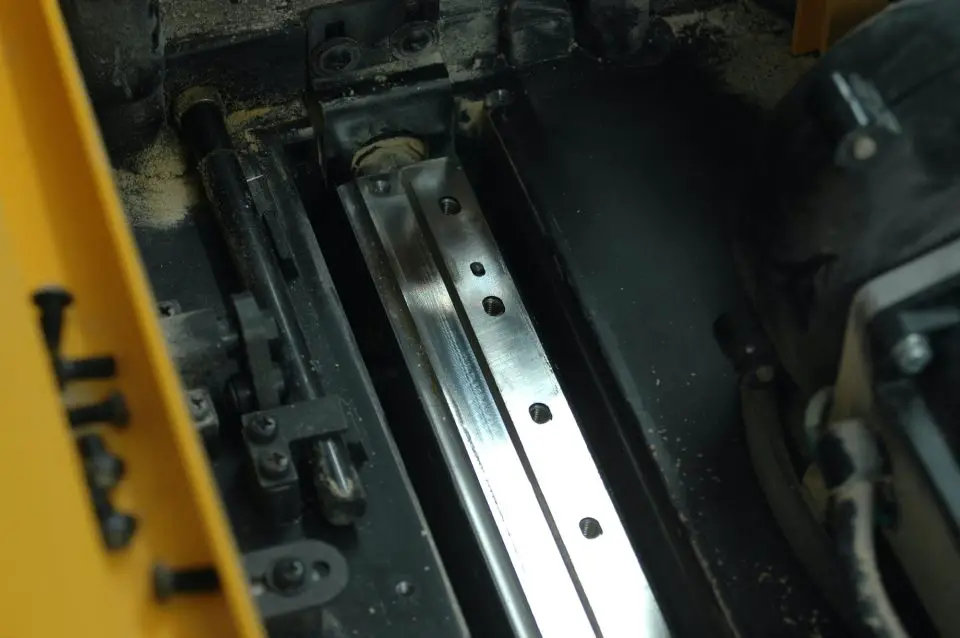
Dealing with dull blades is the second essential maintenance point. Begin by unplugging the power cord and get inside the planer by unbolting the top.
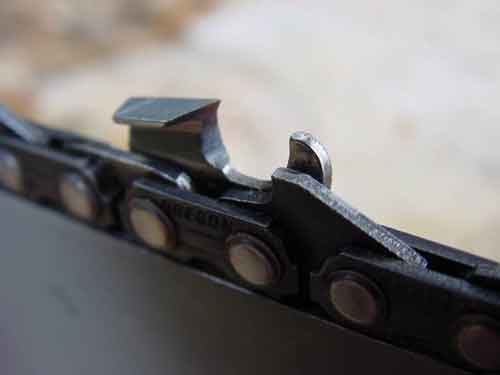
Planer blades wear in two ways. They either get dull (leaving fuzzy wood surfaces behind), or they get nicked, leaving long lines of raised wood that correspond to the chips along blade edges. Regardless of how your planer is misbehaving you need to understand how things work inside before you can restore like-new performance. The blade below shows what serious damage looks like.

Most planers have two internal knives that revolve and cut wood. Some have three. Regardless of the design, all planer knives bolt to a heavy, spinning component called the cutterhead. Most benchtop planer knives are not designed to be re-sharpened, and that’s a good thing because it makes them easy to deal with. They’re reversible (sharp along both edges) and priced to be disposable. Renewing blades is simply a matter of unbolting the old ones and either flipping them around or replacing them with new, then bolting everything together again.
All planers use many small bolts to secure blades, and losing just one means you won’t be able to use your planer until you get a replacement from the manufacturer. Avoid unnecessary hassles and frustrations by using a rare earth magnet to hold all knife bolts together in one clump after you take them out.
Before you go ahead and change blades that aren’t performing perfectly, take a look at something. You could save yourself time and money with this trick . . . Instead of removing blades that leave behind ridges on boards, simply loosen the bolts on one blade, slide the blade sideways in whichever direction allows the most travel, then tighten the bolts again. Replace the cover and plane some wood. Unless the raised ridges are wider than 1/16”, this small operation usually restores smooth planer performance for a while. You’ve essentially misaligned the nicks in the blades. The nicks used to line up (creating that long raised line of wood), but they don’t align any more so the ridge disappears.
Most planer blades are made with oval-shaped bolt holes for just this purpose. They allow blades to be moved sideways a bit before retightening the bolts, eliminating the alignment of nicks in the blade that caused the raised ridges in the first place. This operation won’t make dull blades sharp, but it will reduce the amount of sanding you need to complete later on planed pieces of wood with ridges.
One last thing: Whenever you have the cutterhead exposed for maintenance, it makes sense to get your can of wax out again. The shroud surrounding the cutterhead eventually gets rough and sticky as resin and small particles of wood stick to it. If this build up gets thick enough it’ll encourage planer shavings to jam up internally, causing problems during heavy cuts. Rubbing paste wax onto the sides of the shroud offers two benefits. Not only do the solvents in the wax help dissolve any resin buildup that’s present, but they also make the surface smooth, slippery and less likely to get grungy before your next blade maintenance session.
Feel like a mechanic yet? The fresh, smooth boards coming out of your planer will make all the efforts of learning your new trade worthwhile.
Wood Planer Tip: Extending Blade Life
If you’re planing any kind of wood that’s not absolutely, positively free of metal, then take the time to quickly go over each board with a metal detector. Small, hand-held units are not expensive, but they can save you from ruining an otherwise great set of blades and the time taken to change them. Even a small fragment of a nail, screw or bit of barbed wire that a fence-row tree grew around will cause a huge amount of damage to any blade that hits them. The mess you see here was caused by the hidden shank of a rusty deck screw.
Click below to watch a video tutorial covering the process of maintaining a wood planer.
- Video Watch Time = 3 minutes


I hope you found this content useful!
Your generous support helps me produce more practical, hands-on content that I hope you’ll find useful.
Steve Maxwell