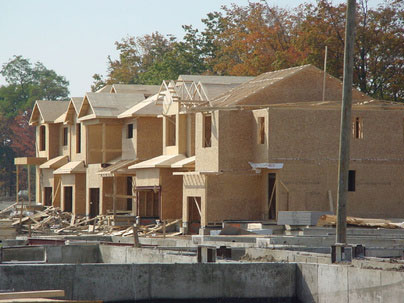
If you need to add shelter to your property easily and economically, pole barns may be for you. They’re one of the fastest, most cost-effective way to build permanent, solid shelter space for equipment storage, livestock shelter, a vehicle garage or workshop facilities. You can even use the pole barn approach to build a year-round home or barndominium. A big part of the attraction is simplicity. There are only four building steps involved, and the first one’s even optional! None of the work requires fancy tools or finely honed skills, either. Then there’s the advantage of design flexibility. Once you’ve mastered the skills required, and gathered the tools you need, you can build however many pole barn-type structures you need for your land.
The steps below explain the building process in a nutshell, but be sure to take a look at Tips & Tricks further along for more details. Downloadable plans below, too.
The steps to success are simple: Create a level base pad (if you want more than just natural earth under foot), set poles vertically into holes in the ground, connect them across the top with beams and braces, then put roof trusses on top. That’s a pole barn. No need for a complicated foundation, either. Even in regions with cold, frost-prone winters, pole barns endure quite well with nothing more than the simplest connections to the earth. And if this wasn’t advantage enough, pole barns also offer the option of using your own logs and rough-cut lumber for many parts of the job. The only thing wrong with pole barns is the name. This building approach is so much more useful than just for building barns alone.
If you’ve never constructed anything large before, then a pole barn is a good place to start. The illustration and information you’ll find here will equip you to custom build your own durable pole barn based on universal design and building principles. Most local building authorities require simple plans for project approval, though many will accept hand-drawn versions. Agricultural extension services across the continent also offer basic pole barn plans for free. You can buy fancier ones online. The trouble with all these resources is that they only tell you what to build, not how to do it. Success ultimately comes down to the kind of hands-on know-how you’ll find here.
Pole Barn Step#1: Create a Base
Besides the obvious fact that you’ll need to locate your pole barn on a relatively flat, well-drained location, you may also want to consider adding fill to create a raised base area. This isn’t necessary for all applications, though it does let you enjoy a flatter, more level floor space that’s also raised enough to keep water from draining in, even during wet seasons.
There are four reasons crushed rock screenings are my favourite choice for a raised pole barn base. Screenings are usually less expensive than other types of aggregate because they’re a by-product of many quarries. Screenings are also small in diameter – typically less than 1/4-inch around, with lots of stone dust mixed in. This makes screenings easy to rake and level accurately. They also pack down nice and firm, too. Screenings don’t ruin the future growing potential of soil forever, either. When your pole barn needs to come down after its working life is over, scrape off the screenings and use them somewhere else. Unlike larger grades of crushed stone, the leftover screenings that the loader can’t remove disappear when you till the soil.
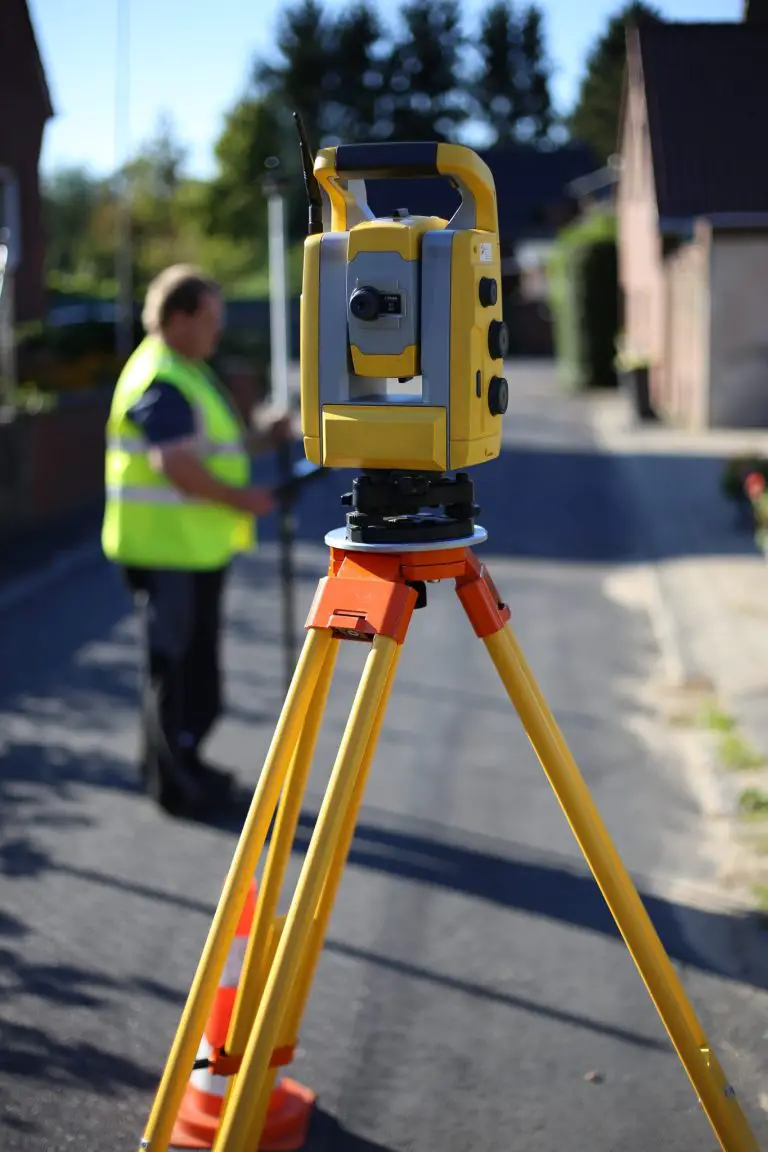
Before you order any fill for a base, you’ll need to mark out an area to guide the location and level of material required. Click here for valuable insights that speed the process of laying out a square foundation.
Pole Barn Step#2: Install Poles
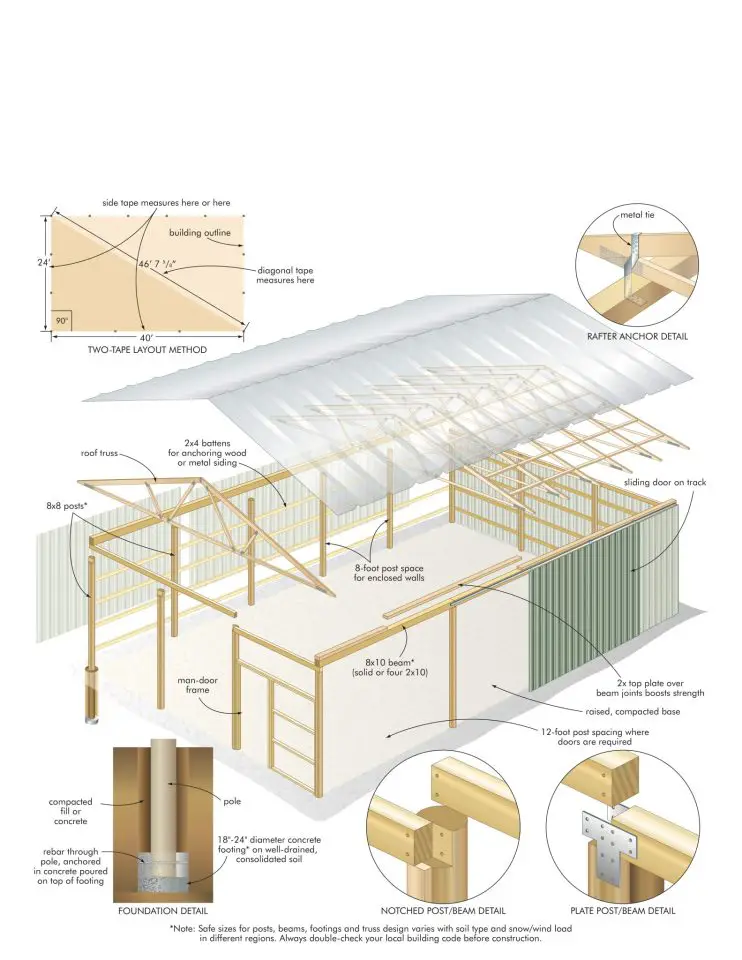
The downloadable plans below show the 8-foot pole spacing that’s common for enclosed walls on most pole barn designs. You can stretch that to 12-foot spacing on open sides where animal and machine access is required.
Pressure-treated timbers make good poles for small designs, and reclaimed utility poles (as long as they’re in sound condition), or rot-resistant logs cut from your own forest are good for large ones. The key is to select the right diameter poles for the height and spacing you’ve got planned.
If you have health and environmental concerns about using pressure treated lumber, there’s good news. The most common wood preservative compound in use today is abbreviated as ACQ and it replaces the arsenic-bearing substance called CCA that was used to preserve wood for many years until 2003.
ACQ is one of a handful of new preservatives that are believed to be significantly safer than CCA. But all these new products do have a downside. They’re much more corrosive to nails, screws and support brackets than CCA ever was. And as you’d expect, this corrosive action is greatly enhanced in the presence of moisture. The problem is especially troublesome where large areas of wood overlap. As a minimum, use hot-dipped galvanized nails and screws when building your pole barn. Better yet, for critical connections where additional fasteners can’t be driven in later, use stainless steel. Whatever you do, don’t use shiny, electroplated steel screws and nails. They can rust away to nothing after several years of contact with ACQ lumber.
Poles should be installed in 5-foot deep holes, sitting on top of concrete footings poured at the bottom of each hole. This gives them the strength needed to support the roof, and the ability to resist frost movement in cold regions. Does this seem unnecessarily diligent? Don’t fool yourself. The work of installing poles correctly is a small price to pay for a foundation under a building as large as a typical pole barn. And if that foundation should ever fail because it wasn’t properly built, all your other building work (and everything stored in the structure) is threatened. Chances aren’t worth taking here. Required footing diameter depends on the width of your building, pole spacing, the type of soil you have and the expected loads. Typically, 18- to 24-inch diameter footings are needed. Poles on open sides of a building must also be anchored directly to the footing to prevent wind uplift.
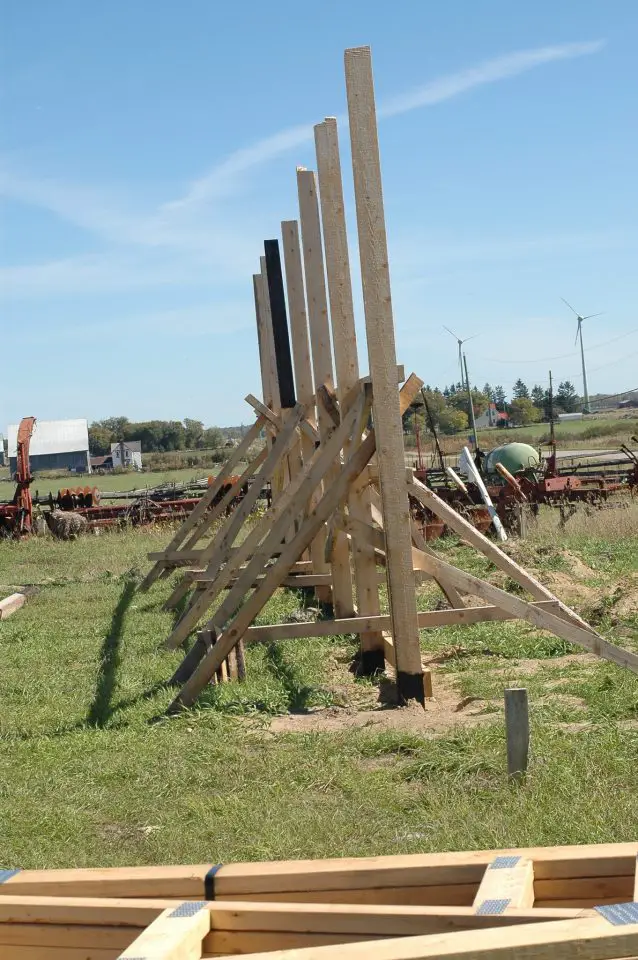
Another crucial issue is pole length. The top ends of all poles must end at exactly the same plane in the air. And since the depth of pole holes vary, you can’t simply cut all your poles the same length and expect them to work out fine up top. There are two schools of thought when it comes to tackling this challenge.
Some people like to bore all holes first, set poles in place temporarily, then mark the tops level before removing the posts, custom-cutting each pole to length on the ground, then setting them back into the holes before bracing and backfilling. I prefer to install all poles permanently, wait for the concrete to harden, then cut the pole tops level following a laser or water level. The price of cutting each pole in the air while you’re on a scaffold seems well worth the extra accuracy. It also saves a ton of work lifting poles in and out. Regardless of how you proceed, use the two-tape method to layout each side of your building with perfectly square corners.
If the soil in your area freezes solid, you need to anticipate the danger of frost jacking. Even if your poles extend down below the frost line, they could be lifted by the action of frost gripping the outside surface of the concrete at ground level. You can avoid frost jacking by keeping the level of concrete around each pole below any bell-shaped flare-out that might exist near the top of the hole. Stop pouring concrete 6 to 8 inches below ground level, where hole sides are still parallel and you’ll be fine.
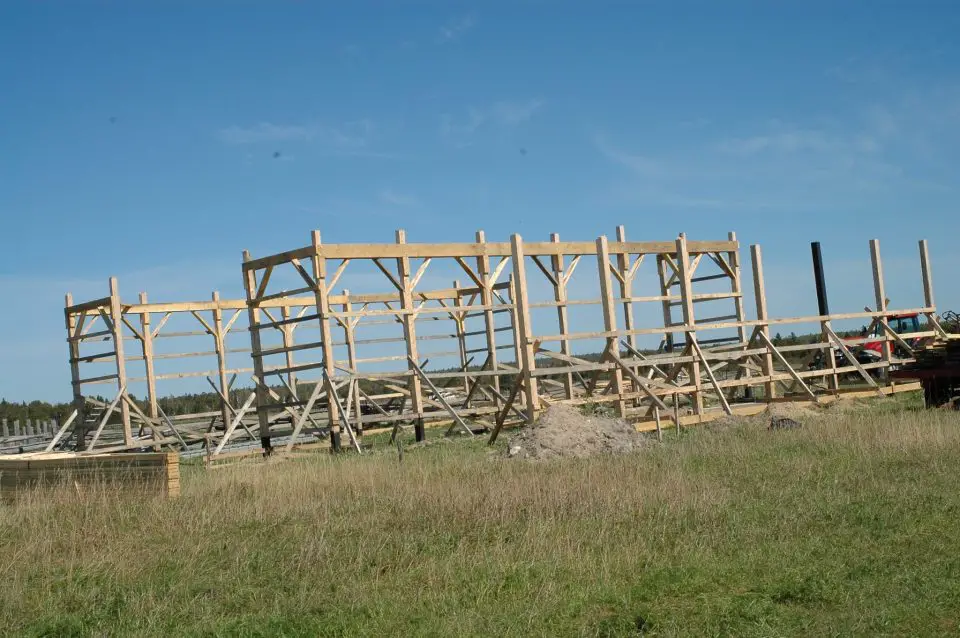
Pole Barn Step#3: Add Beams and Braces

The roof of your barn sits on horizontal beams that span the distance between each pole at the top. But before you install these beams, you’ll need to cut all poles to precisely the same height (if you didn’t already do that earlier). Use your laser level or water level to mark the top ends of all poles before cutting.
When it comes to securing beams on top of poles, you’ve got two options. The plans show both. The first involves setting solid beams on top of the poles and securing the connection with bolted metal plates. The other option is to notch each pole 8- to 12- inches down from the top, then set the beams into these notches and bolt them together. This is trickier to do, but it saves you the cost of metal connector plates. Either way, beam size is crucial. Double-check with your local building inspector before settling on a particular beam size.
Fastening beams to poles always involves boring large, deep holes, and for this job you’ll need something called a ship’s auger. This is a type of large drill bit that’s available in various diameters and lengths. Ship’s augers are great because they always include a self-feeding threaded portion on the tip. Chuck the auger into a large drill, then start drilling. The design of the bit draws itself into the wood, with no pushing required on your part.
Pole Barn Step#4: Frame the Roof
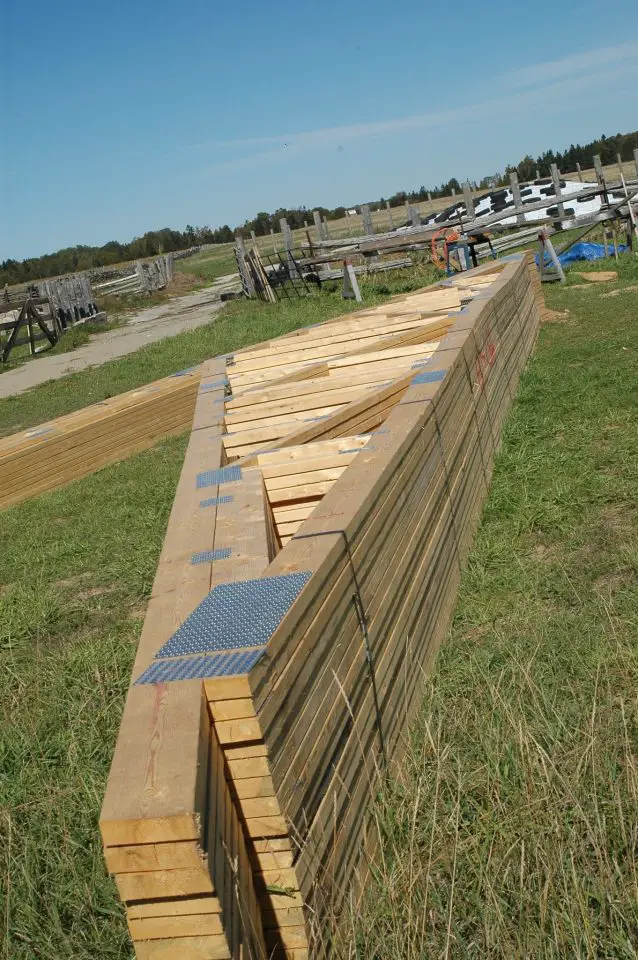
This is the exciting part where your building really starts to take shape. The best pole barns include a roof structure that’s self-supporting over the width of the building without any interior support. This is easier than ever thanks to advances in roof trusses. Ready-made trusses are economical, easy to install and readily available in widths up to 40 feet and more. That’s longer than anything you’re likely to need for a pole barn.
There are three things you need to understand as you install trusses: safe lifting techniques, the need to brace walls while trusses are going up, and the details required to secure the trusses properly to the beams.
When it comes to lifting trusses in place, there’s no substitute for lots of willing hands. One trick for making steady use of help is to raise all trusses up onto the walls at once, then sit them side-by-side on the wall, upside down, peak pointing towards the earth so they’re stable. Later, when the crowd is gone, fewer people can tilt the trusses upright then anchor them to the wall and add roof strapping. Whatever you do, don’t rely on nails alone to hold trusses to the beams they rest on. Metal connector plates are specially made for this purpose and well worth the price, especially when severe weather occurs.
Pole Barn Tips & Tricks
How to Layout Pole Barn Footprint
Whether you start by laying out boundaries for a crushed stone base, or you’ll be installing poles directly into the earth, the techniques you’ll read here are crucial to success.
Begin by grabbing 12-inch spikes for the initial layout phase. If you’re marking out your base location, make it extend three feet beyond where your pole barn walls will be, except in locations that’ll include a door. Here you’ll need to extend the base out further to ramp up the screenings from the level of the surrounding soil.
Pound two spikes into the ground to define one side of your base, then locate a second side perfectly square to it, using what I call the two-tape method (click the link earlier in the article). Slip the tip of one tape over the spike at one end of your base area, then unroll enough tape to get you a little beyond the intended length of the adjoining side you’re laying out. Think of this as your ‘side tape’, and eyeball it square to the existing side for now. Next, slip the hook of your second tape measure over the spike at the other end of the base side. This is your ‘diagonal tape’. Somewhere out in the ether is a length on that diagonal tape that yields a square corner when it overlaps the intended length of the second side of the base you’re locating. And to find this magic crisscross point, you need to turn to a high school geometry formula for help. You can see two tapes in action below, with the formula below that.
Length of diagonal tape = Square root of <(Length between spikes on existing base side)2 + (Length of proposed base side)2>
This is the Pythagorean Theorem in action, and the results are powerful. As long as the diagonal tape overlaps the side tape at the number determined above, you’ve got a perfectly square corner. Guaranteed. It works in every building situation where square corners must be laid out in large scale.
Repeat the process for the other two base sides, then replace the corner spikes with 2×2 wooden stakes that are tall enough to extend higher than the deepest part of the base you’ll be making. Stretch mason’s string between these stakes, then add more stakes between them – one every 8 to 10 feet. Mark a point at least 6 inches above the soil on the highest stake around the perimeter of your base (the minimum worthwhile thickness of any aggregate base), then use a laser level or water level to mark level points on all stakes. You’ll need one of these tools later for building, even if you aren’t installing a raised base.
Reinstall the strings on the level points you’ve just marked on the stakes to guide the placement, grading and compaction of your base fill material as it’s trucked in, dumped and spread.
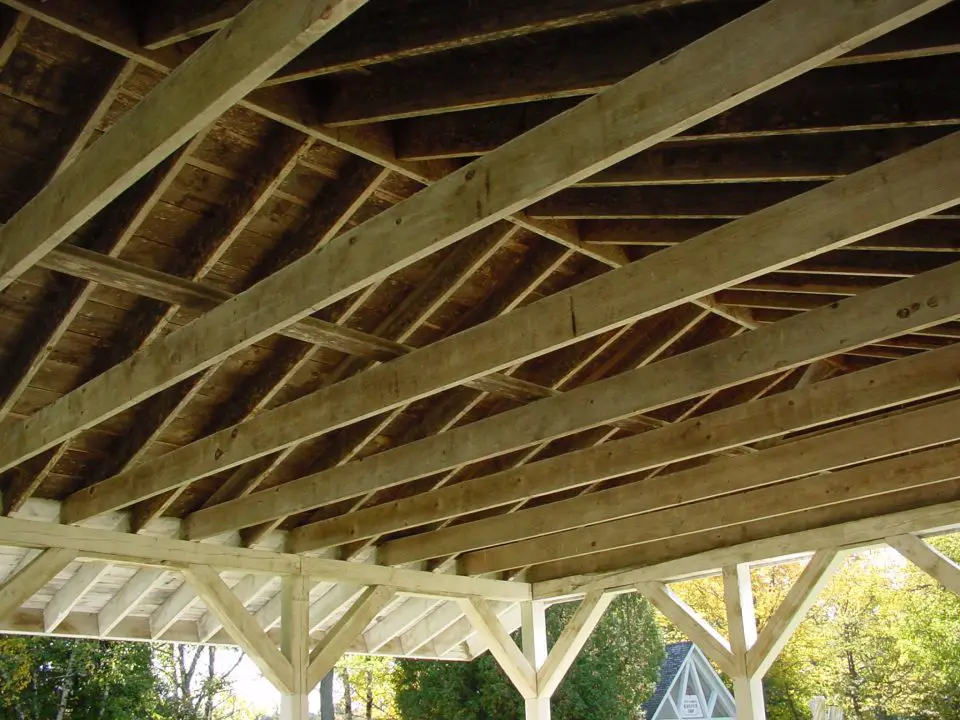
Pole Barn Roofing Fast and Simple
There are three reasons pole barns usually have metal roofs. The first is installation speed. Most types of metal roofing can be ordered custom-cut to extend from eaves to peak on your particular building, so there are few seams. Metal roofing also eliminates the need for full roof sheathing on top of trusses. All that’s required to anchor metal is 1×4 or 2×4 strapping nailed across trusses after installation. Durability is the third reason metal is so popular for pole barns. Today’s modern, washer-head screws hold on forever. You’ll find a cordless impact driver with magnetic driver tip ideal for torquing down roof screws. Tap the screw tips into ridges of the sheet metal using a hammer, then drive them the rest of the way with a cordless impact driver fitted with a magnetic driver tip. As you drive screws, be sure to stop just as the screw head begins to compress the metal.
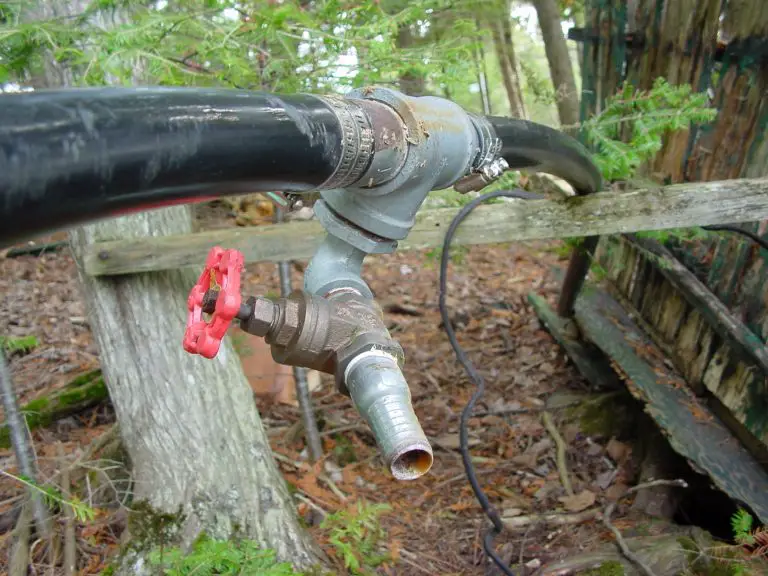
Plumbing Your Poles
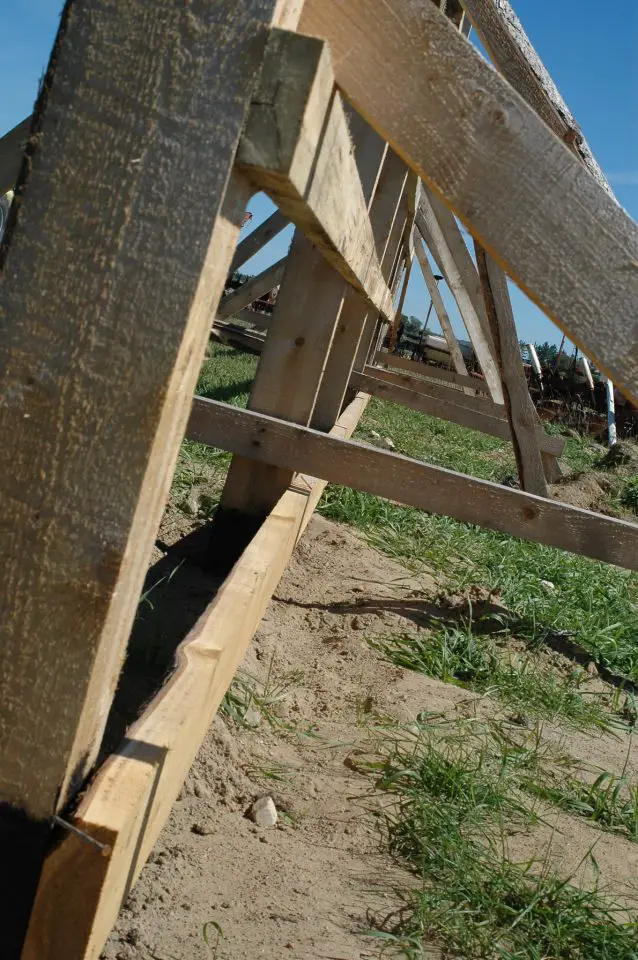
The best way to install poles is by supporting them with temporary tripods of wood as concrete and soil is packed in around them. The time you spend screwing braces in place is tiny compared with the speed you’ll gain by not having someone try to hold the poles steady while backfilling around them.
Click the image below to download generic pole barn plans.
Pole barns are more than just practical and economical to build. They’re also great confidence boosters, too. When you step back and look at the big, solid structure you’ve built, it makes every other kind of building project seem that much more doable.


I hope you found this content useful!
Your generous support helps me produce more practical, hands-on content that I hope you’ll find useful.
Steve Maxwell