Wainscoting is a premium home feature because it makes spaces feel more refined and beautiful. This article will help you get great wainscoting in one of several different ways. If you’re looking for help with wainscoting – whether you’ll be installing it yourself or hiring a pro – you’ve come to the right place.
Whether you recognize it or not, most people are highly motivated by appearances and feelings. That’s why beautiful interior details make such a difference in a home . . . as long as you pull those details off correctly, that is. Wainscoting is a classic case in point. It’s an age-old decorative wall treatment that uses wood rails and panels to add visual interest to the bottom half of interior walls. Wainscoting has no practical purpose, but it’s still important because it looks so good. The trick, as far as I’m concerned, is to make wainscoting happen in your home on a reasonable budget and without the need for highly skilled trades people. That’s the kind of thing this article will help you accomplish.
How to Install Wainscoting: Three Different Approaches
- The Quick, Cheap and Flimsy Wainscoting Approach: This involves the common short cut of applying thin strips of trim directly to walls, creating the illusion of wainscoting panels as the trim sits on the drywall. I figure the world already has too much of this wainscoting-wannabe stuff, so I’m not even going to talk about it here.
- The Custom-Made Wainscoting Approach: Another option is to build and install one-of-a-kind, custom-made wainscoting. Results here can be great, but the outcome depends on skill. This is the approach I usually take when I build wainscoting, but it’s not for everyone.
- The Wainscoting Kit Approach: This is often the most practical option for do-it-yourselfers. I know because I’ve installed several kits. You save a lot of money installing the parts yourself, with the job made easier by the fact that the heavy-duty milling and shaping has been done for you. Parts just fit together.
Want to install wainscoting on the walls of a staircase? Click here for a real-world video tour of an installation that I documented in a classic, century-old house.
Before you go further, you need to ask yourself a question: Will your wainscoting be stained to allow wood grain to show through, or will it be painted? This question seems minor and kind of silly to ask at this early stage, but the answer really matters. It affects the cost of installation and the technical difficulty of the job. Real wood wainscoting that’s stained and varnished is beautiful, but costs more for two reasons. First, it requires more expensive wood. And second, stain-grade wainscoting requires more time and skill to install than painted equivalents. The reason is that stained finishes don’t offer the option of filling less-than-perfect joints with latex caulking before hiding the results under paint, so it’s more of a challenge to get stain grade wainscoting looking just right.
How to Install Wainscoting: Paint Grade vs Stain Grade

Paint-grade wainscoting is usually made with medium density fiberboard (MDF), or inexpensive hardwoods like poplar. Both work equally well underneath paint. Stain-grade wainscoting kits come in oak, maple and other domestic hardwoods, and they’re best finished ahead of time, before installation. One of my favourite options for this work is coloured finishing oils. Brush on a coat, let it soak in for 15 minutes or so, then wipe off the excess. Let the surface dry for 24 hours, then repeat three or four times. The result is a deep finish that’s easily repairable; just wipe on more finishing oils to hide scratches and dents. It works great on wood stairs, too.
Do you want a clear wood finish? Something that protects the wood from picking up stains while also imparting no colour? The easiest option of this kind is something called Wipe-On Poly. It’s a thin viscosity polyurethane that you apply, then wipe off. Watch the video here to see a wipe-on finish in action. It’s in the context of some stair treads, but the process still applies to wainscoting, too.
Click above to see one of my favourite wipe-on wood finishes in action
How to Install Wainscoting: Understanding the Parts
Different wainscoting designs are typically made with elements that work together in the same way:
- “Baseboard” runs horizontally along the floor as it does in any trim installation.
- Vertical elements flanking decorative panels are called “stiles”.
- Horizontal elements are called “rails”.
- The top of all this is capped by another kind of horizontal trim called “chair rail”.
- Wainscoting can also be made of vertical strips of wood capped by chair rail on top and baseboard on the bottom.
How to Install Wainscoting: Simplest DIY Option

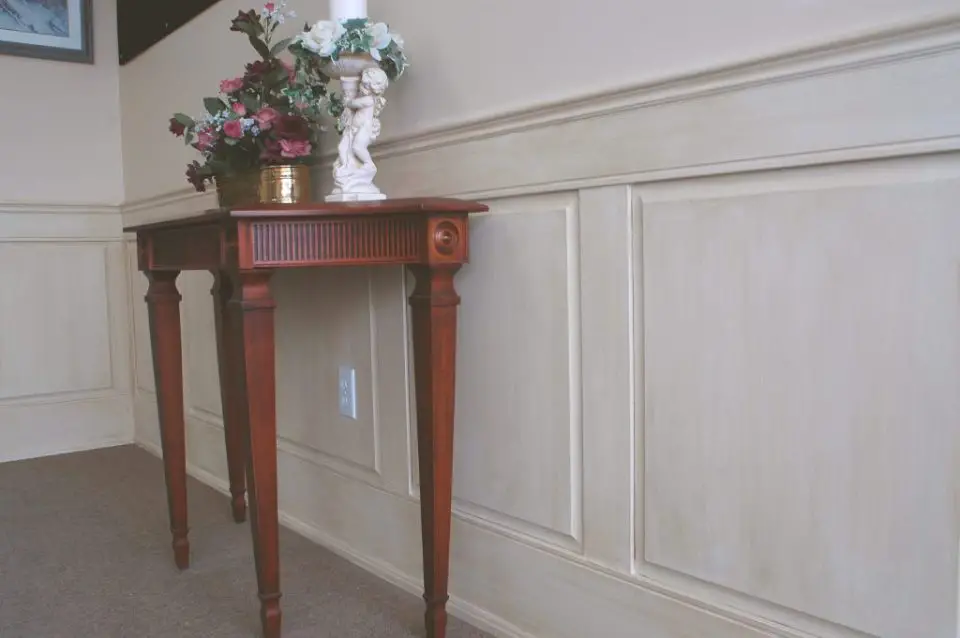
The brown wainscoting you see here is one of my own installations and looks much better than it deserves to, considering how easy it was to install. The main vertical boards are nothing but 1×6 tongue and groove pine. Actual thickness is 3/4″, with a semi-circular bullnose profile routed along the side near where the tongue is. The bottom of the installation has a plain 1/2″ x 5″ piece of pine that forms the main part of the baseboard, with a strip of quarter-round along the floor. There’s also a length of 1/2″ thick bullnose on the top of the baseboard to cap it off as a chair rail. You won’t find a cheaper option than this for getting into the wainscoting game.
At the top of the installation there’s a 1″-wide length of cove moulding with a 3/4″-thick bullnose above. The forms the chair rail. Nails driven into the bottom plate of the underlying wall frame fasten the tongue and groove boards at the bottom. The top end of the tongue and groove is also secured with nails driven into blocking installed between the studs. The nails are high enough that they get covered by the cove moulding.
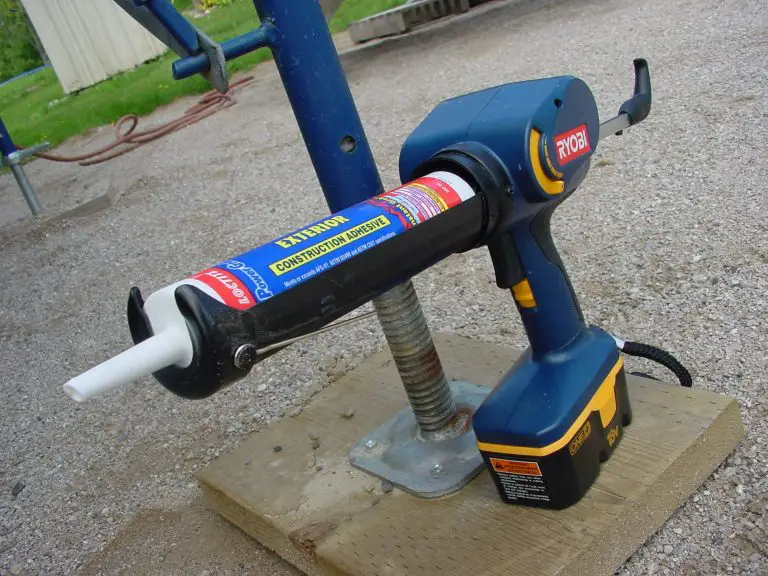
Want to try milling your own cove moulding and bullnose from scrap lumber? You’ll save a ton of money and get greater creative control over your project. Click here for a detailed article on making a router table fence. Free plans download.
How to Install Wainscoting: The Advantage of Kits
The main thing to understand about wainscoting kits is how quick they are to install. They do cost more than the raw wood required to make your own wainscoting from scratch, but you save money by greatly reduced installation labour and skill required. If you’re installing wainscoting on bare wall frames, install 1/2” plywood up to the height of the installation to offer support for nails, with drywall extending up to the ceiling from there. You can certainly install wainscoting kits directly on drywall in a renovation situation, but why not give yourself a solid base for nails and screws if you can? Plywood does this at minimal cost. Different wainscoting kits are made to be installed in different ways. One of the best sources of kits I’ve found is from a company called Elite Mouldings . I have no reasons to recommend them, except that they do a great job. I was so impressed that I visited their plant back in 2006. Their kits offer some of the best value for the money anywhere.
Do you love the look of real, high-end wood, but don’t have the budget for it? A family of products called “wrapped profiles” create some amazingly authentic wood substitutes that greatly reduce the cost of fancy results. I’m a cabinetmaker by trade, and not even I can tell a wrapped profile from real hardwood unless I look very closely. Click here to learn more about the wrapped profile option and how it applies to wainscoting. Lots of good info here, plus a video tour.
There’s so much standardization in houses these days that a lot of people are starved for indoor spaces that make you feel good just to be there. Add wainscoting to your place and it’ll go a long way towards making it look much better in ways that people respond to.
Want to learn more about adding other kinds of one-of-a-kind interior details to your home? Click below to watch a video on simple routed details that make a big difference. I use these myself in my own work.


I hope you found this content useful!
Your generous support helps me produce more practical, hands-on content that I hope you’ll find useful.
Steve Maxwell