VIDEO: Cutting Sheet Goods on a Budget
Not everyone has a full-size cabinet saw in their shop, but building kitchen cabinets doesn’t require one. A more economical option involves building an outfeed table from a single sheet of 3/4” plywood. Make L-shaped legs from 4”-wide strips of plywood, connect these legs with horizontal 3/4” rails, then screw the top onto these rails. A second set of rails half way down the legs makes the whole assembly sturdy. Use glue and 2” deck screws for assembly.
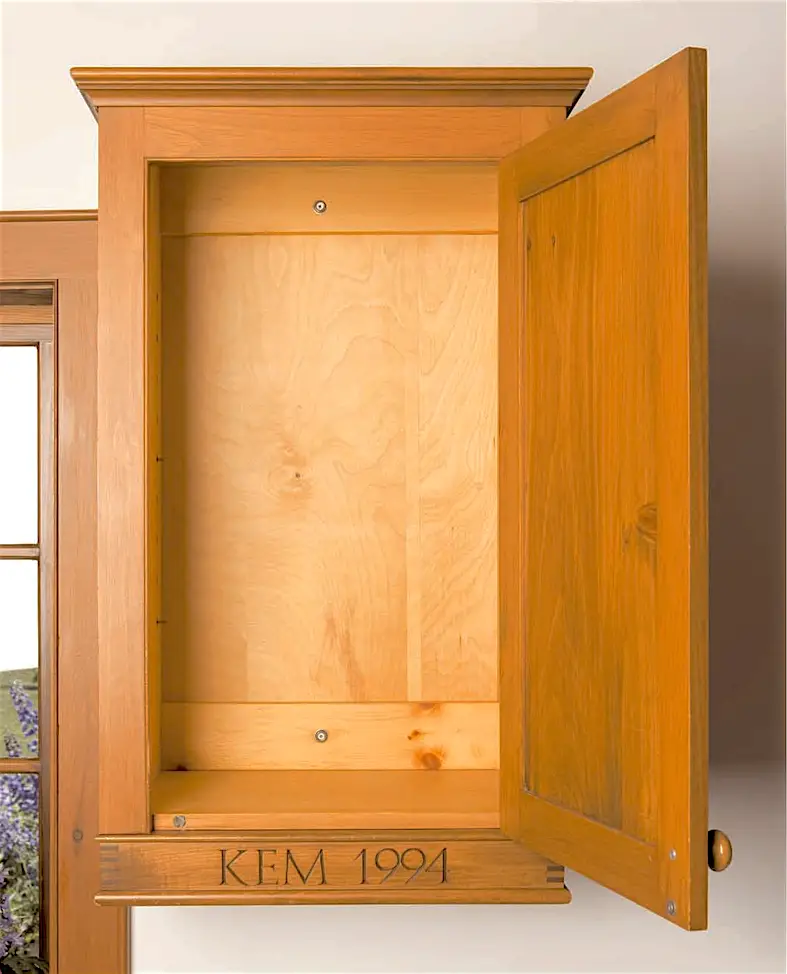 One thing you must do before assembly is decide on which type of cabinet back you’ll be creating. The plans show a notched arrangement that leaves room for 3/4” x 4” solid wood mounting strips, with a 1/4” plywood back panel on top of this. Upper cabinets need two notches and lower cabinets just one. This used to be my favorite approach, and it’s what you see in the open cabinet here. More recently I’ve come to prefer using 1/2” plywood backs everywhere instead of 1/4”. A thick back is simpler and serves the same purpose as the mounting strips. The thicker plywood offers a solid area for driving the screws that anchor the cabinets to the wall. Simply fasten these back panels to the back edge of upper or lower cabinets as they’re coming together. If you do go for the traditional notched back arrangement, create the notches after you cut out the cabinet parts.
 The plans show a detail that’s easy to miss. Look closely and you’ll see that on both the upper and lower cabinets, the doors extend down flush with the bottom of the face frame. Since there’s no face frame on the bottom of the cabinet, the bottom edge of the plywood box acts as a door stop. This detail is not typical for traditional face frame cabinets, but it does offer big advantages. Simple, solid, good looking, and most importantly it’s easier to slide things out of the cabinet with no ledge that would otherwise be created by a bottom face frame member. The only price you have to pay for this feature is the need to hide the laminations on the cabinet bottom pieces. No big deal. Glue a 3/4” x 3/4” strip of solid wood to the front edge of all cabinet bottoms, then saw these parts to the same width as the sides and top before assembly. Watch the video up next for tips on applying solid wood edging.
VIDEO: How to Apply Solid Wood Edging
TECH TIP: Finish First, Glue Later
One way or the other, you should never build your foundation boxes with plywood that’s bare and unfinished on the inside. Use either prefinished plywood or finish it yourself beforehand. Prefinished veneered plywood is just as the name suggests. It comes with a couple of coats of lacquer already applied. If you opt to finish bare plywood yourself before building, simply sand the interior surfaces of the veneered ply with 150- or 180-grit sandpaper in a 1/4-sheet finishing sander and clean off the dust. Set the parts on a flat surface, then spray or brush on two coats of satin urethane, sanding lightly with 220-grit paper between coats. Building with sheet goods that are prefinished on the inside side-steps the hassle of sanding and finishing into inside corners and there’s no chance of runs forming because you’re always applying a finish on horizontal surfaces.
Cleanliness during assembly is another reason to use prefinished ply or finish the plywood yourself before box assembly. With a finish in place, any glue squeeze-out is easy to wipe off cleanly without marring the wood. Just use a damp rag and you’re done.
