Understanding the reasons why submersible pumps fail and taking steps to protect against these reasons is one way you can boost the reliability of your water well system big-time. Equipment that works and keeps on working is one of the main things you need to aim for. The installation details coming up next aren’t usually done – even by professional plumbers – but the little bit of extra work they require is a small price to pay for the huge gain in reliability they deliver.
In short, here’s how a new submersible pump is installed:
- Pump is joined to intake pipe at bottom end.Pitless adaptor is added to top end of pipe.
- Wires extended as needed for length of pipe involved, plus extra to extend up past top of well.
- T-handle fastened to top of pitless adaptor
- Pump, pipe and wires lowered into well after smoothening and protecting top of well casing.
- Pitless adaptor engaged, safety rope secured and wiring connections made.
Pump Wire Protection
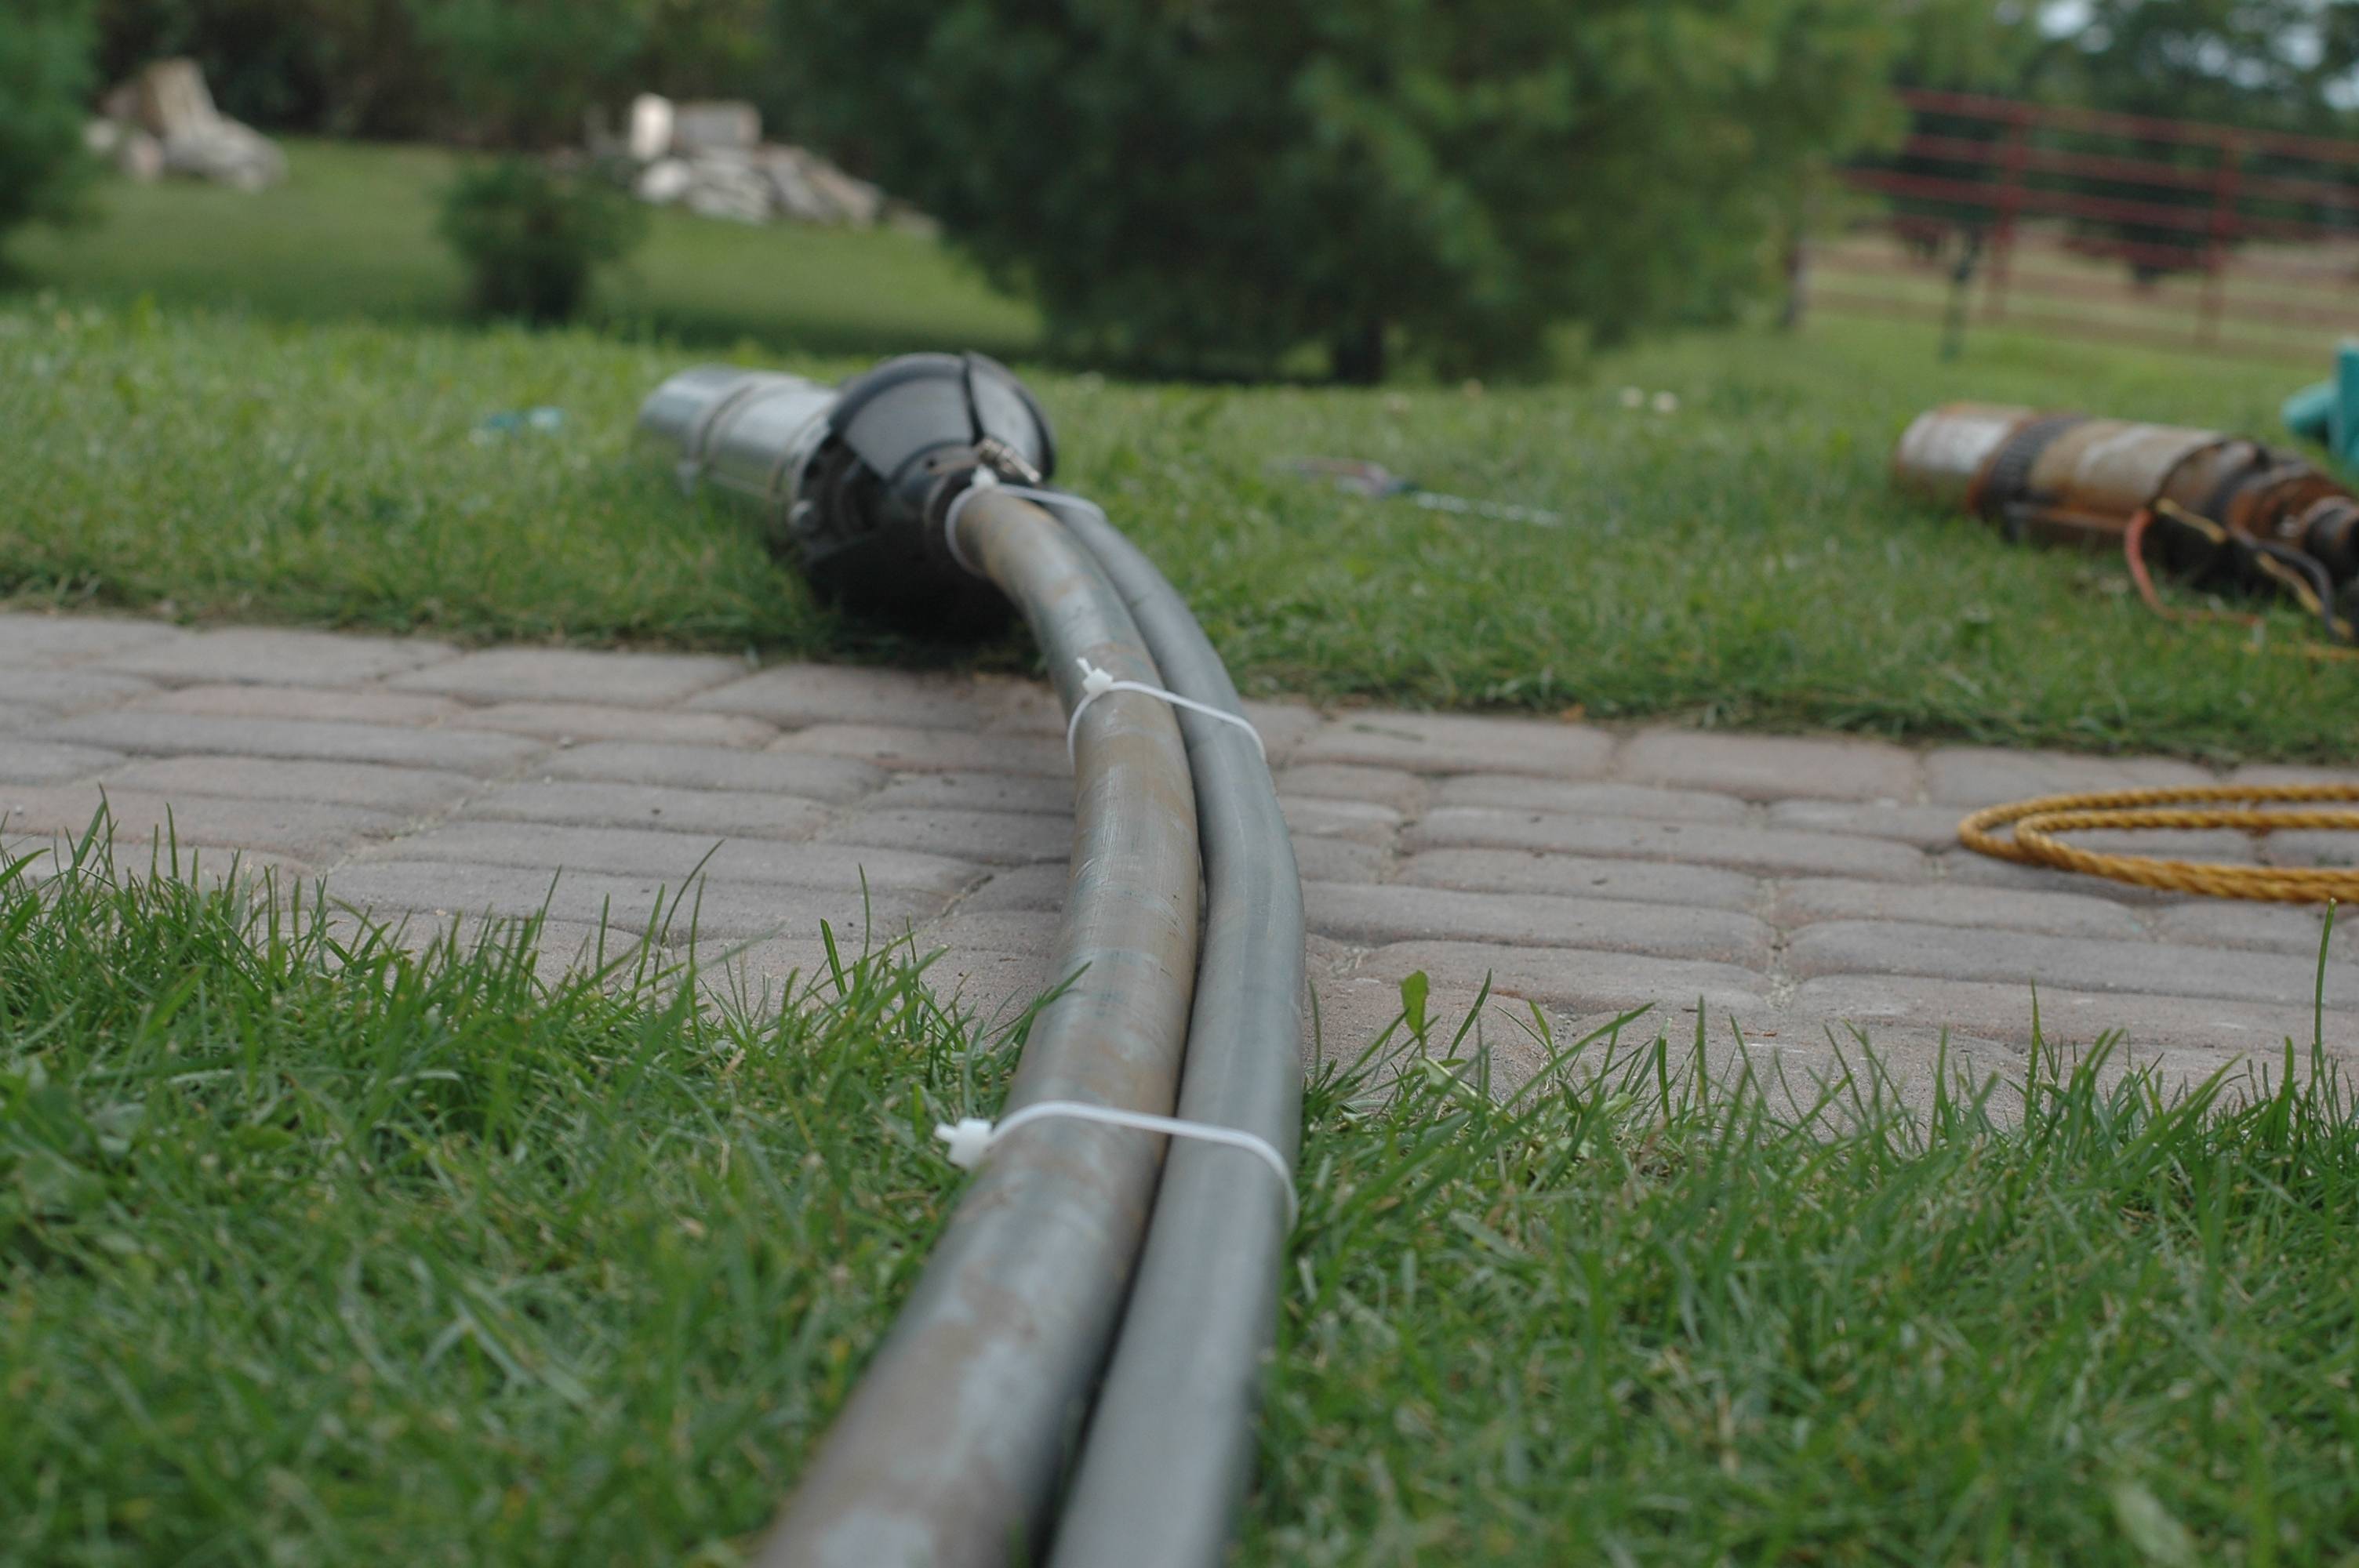 Although it’s not common practice, I protect submersible pump wires inside a run of 3/4” diameter pipe running down alongside the main pipe and strapped to it with plastic tie wraps. Think of it like a flexible conduit. I find that you can push pump wires through about 10 feet of pipe without it buckling. String as many pieces of 3/4” poly over the wires as needed to protect them while you have your installation laid out on the ground before putting it down in the well. Alternatively, use an electrician’s fish tape to pull wire all the way through one piece of protective pipe at once.
Prevent Pump Movement
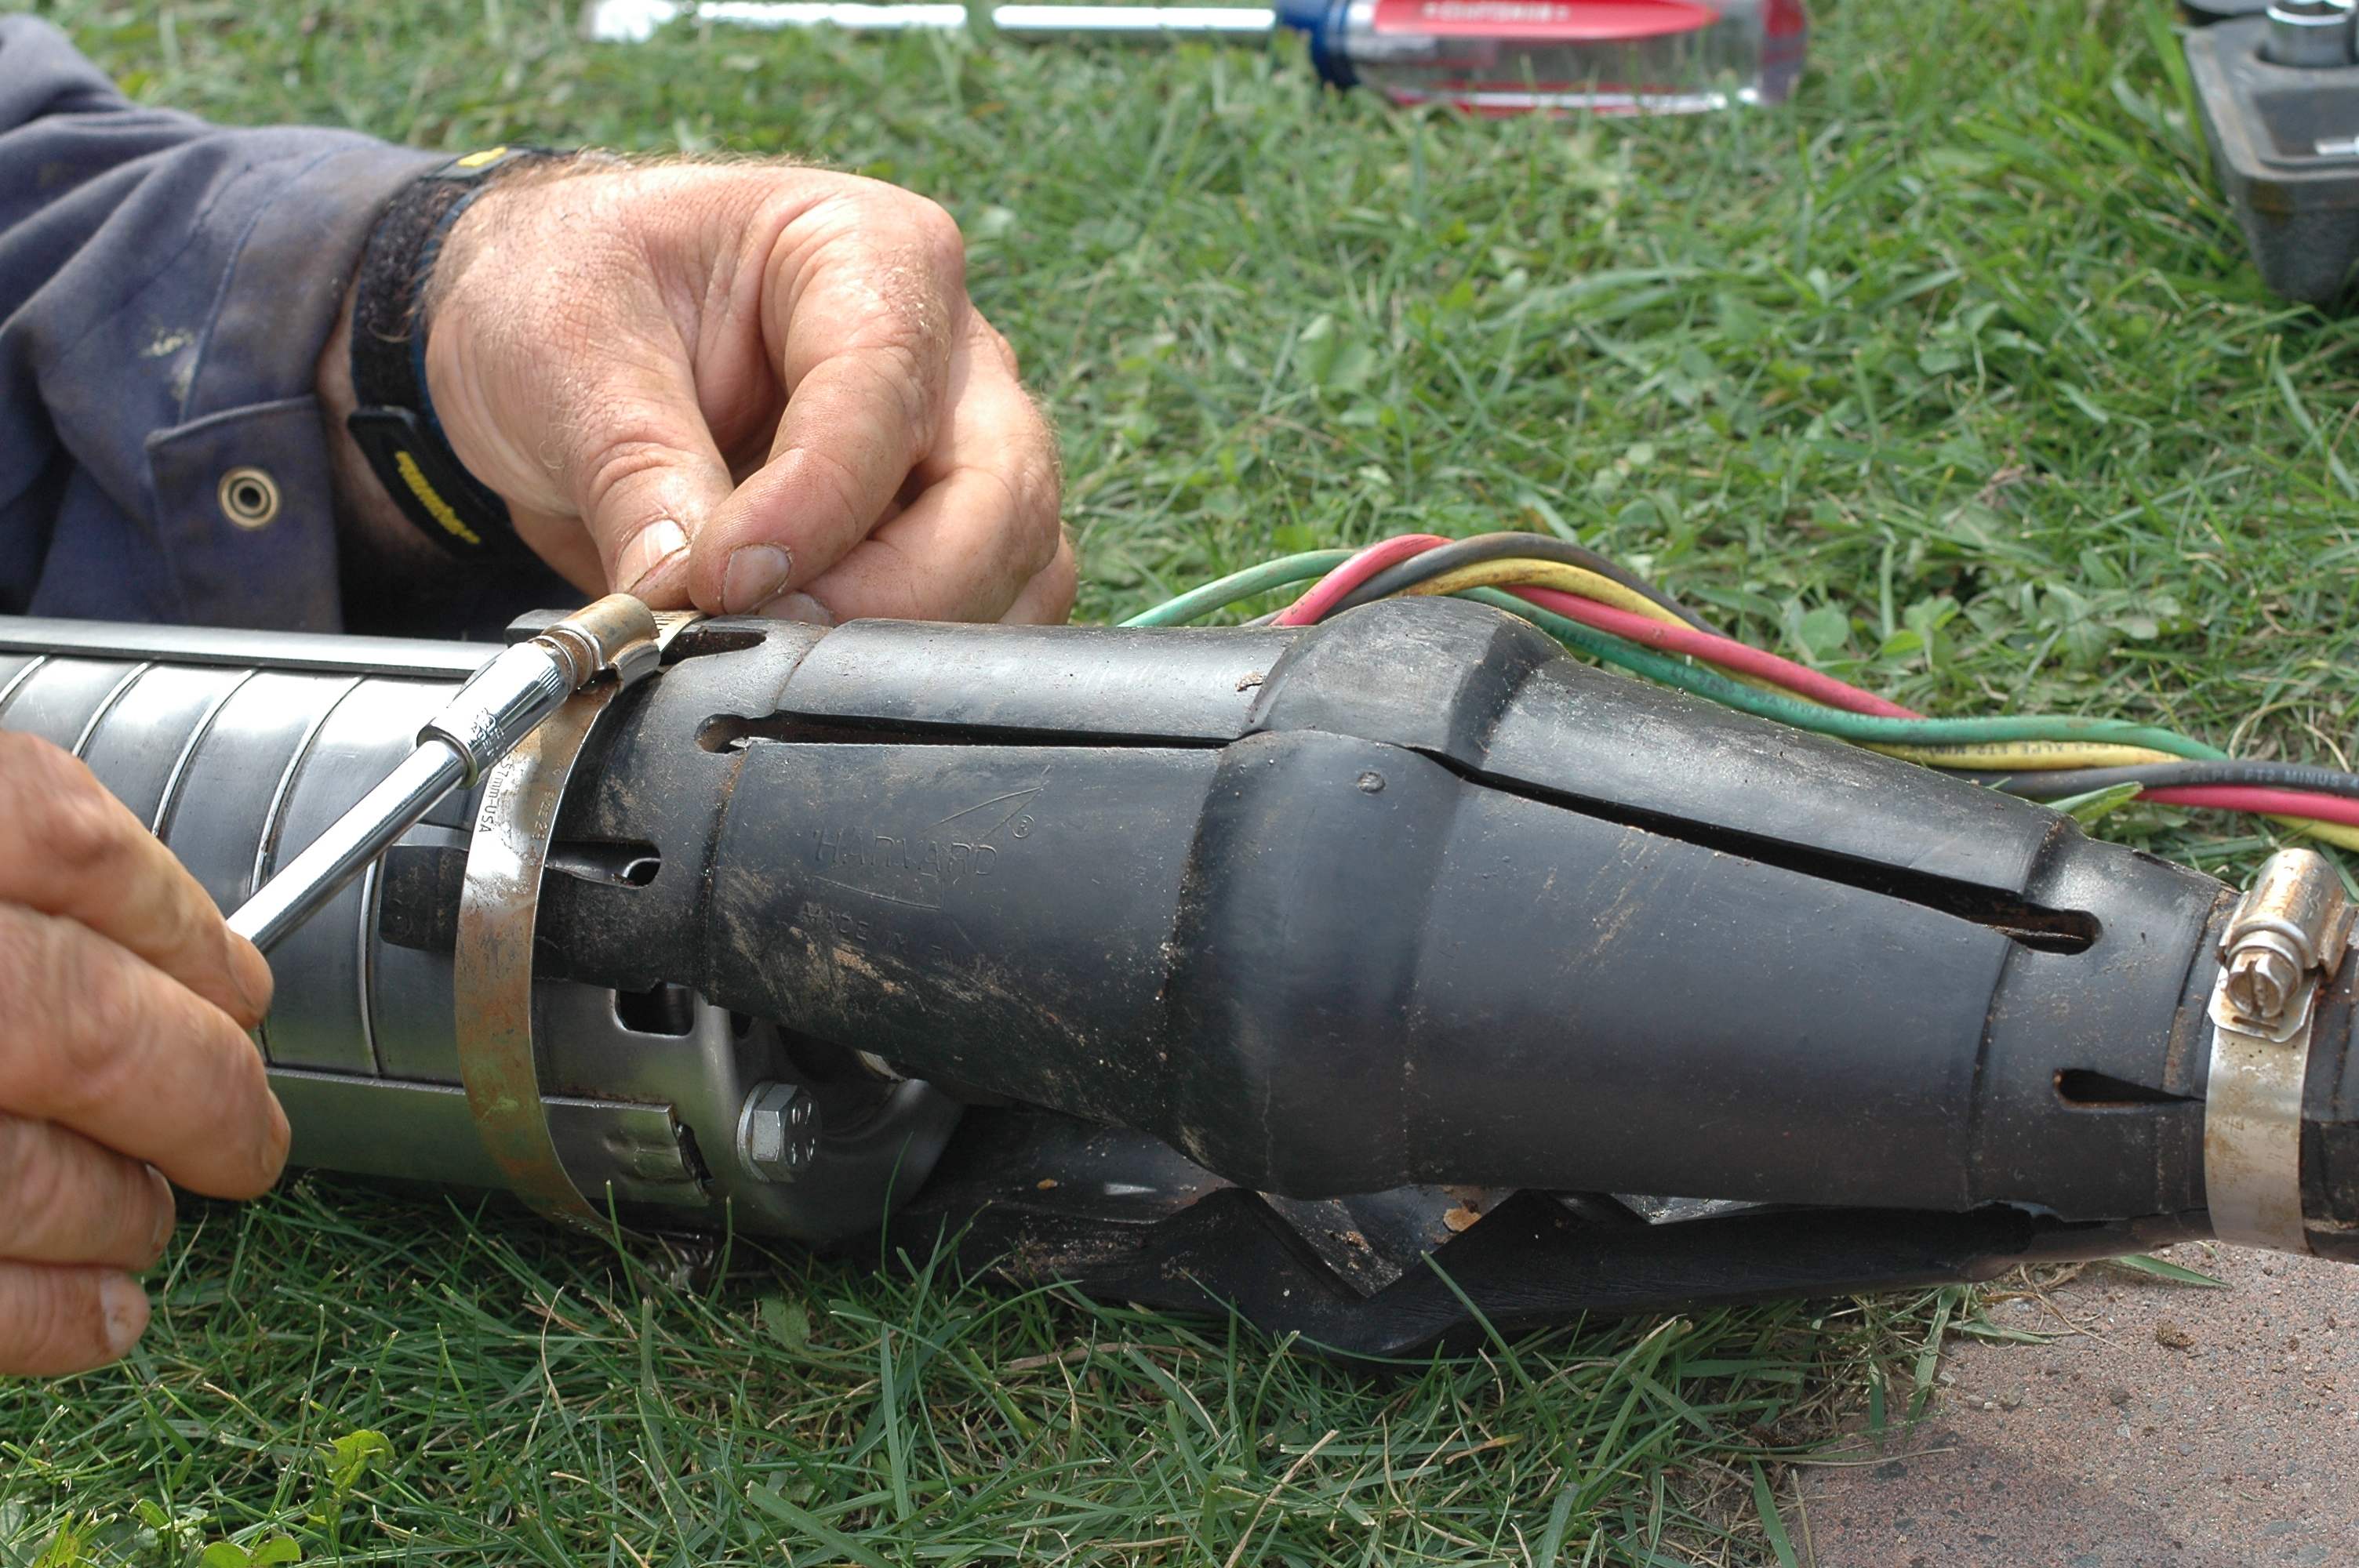 Another essential feature of extra-reliable submersible pump installations is a torque arrestor. It’s a two-part rubber support that clamps to the outside of the pipe and the top of the pump. The torque arrestor braces the installation against bumping into the sides of the well as the torque of the motor would otherwise make the whole thing sway within the well. The outer edges of the rubber torque arrestor are larger then the body of the submersible pump and pipe, but just a little smaller than the diameter of the drilled well. In this way the torque arrestor acts as a kind of bumper. It’s an extra layer of safety to protect against wire rubbing and system failure. The thing about a torque arrestor is that it needs to be installed correctly. Watch the video up next to learn important details.
VIDEO: Installing the All-Important Torque Arrestor
Corrosion-Proof Wire Connections
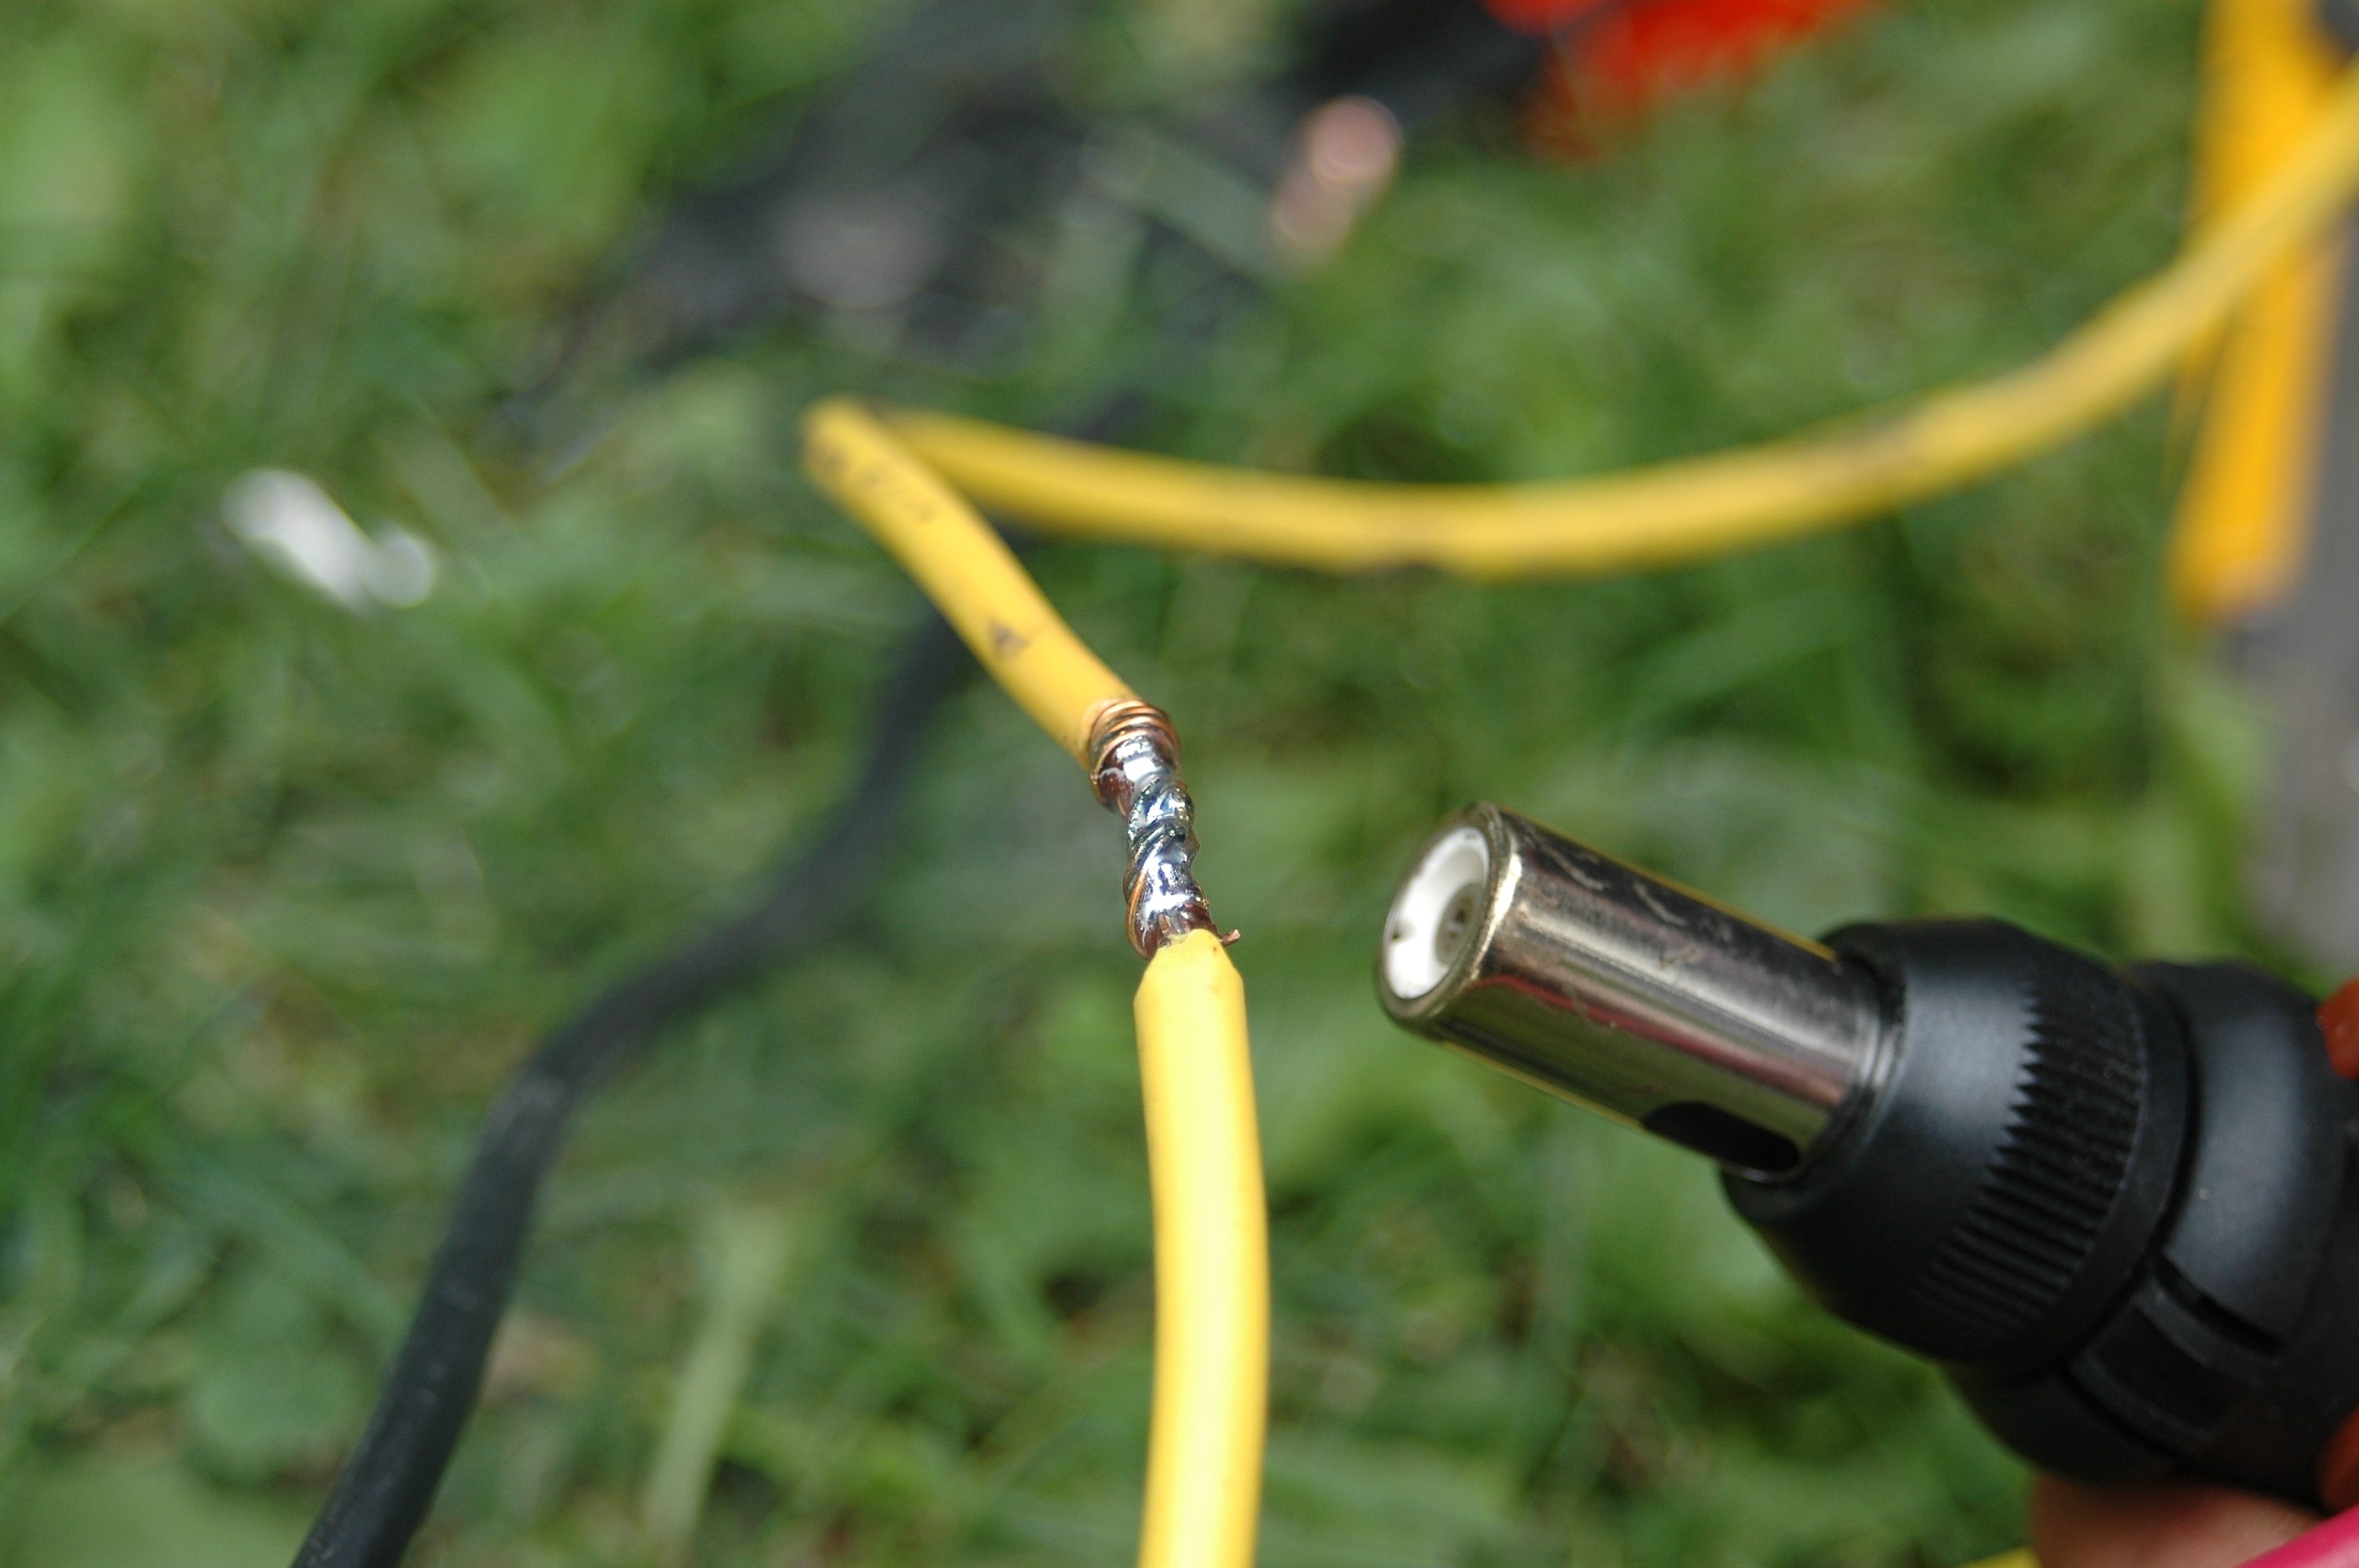 Submersible pumps come from the factory with a continuous length of wires attached to the motor, but this isn’t usually long enough to get to the top of the well. That’s why it’s often necessary to splice additional wires onto the existing pump wires. Soldering these connections is easy to do and makes good sense. Standard practice involves simply crimping these connections, which works fine at first. Trouble is, even waterproof crimps are susceptible to corrosion and failure over the years. Why take the chance that your water well system will fail just because one wire connection goes bad deep in the well? It’s so little trouble now to ensure this never happens by soldering, and so much trouble having no water and pulling the pump later if trouble does arise.
TECH TIP: So What’s With the Control Box?
Submersible pumps are the only type with something called a control box. This is a wall-mounted metal box that includes various electrical items, including a capacitor to start the pump running. The idea is to locate some serviceable items above ground for easier repairs. The control box also allows the motor of the pump to be tested electrically with a multimeter without pulling the pump from the well.
Protect Your Wire Connections
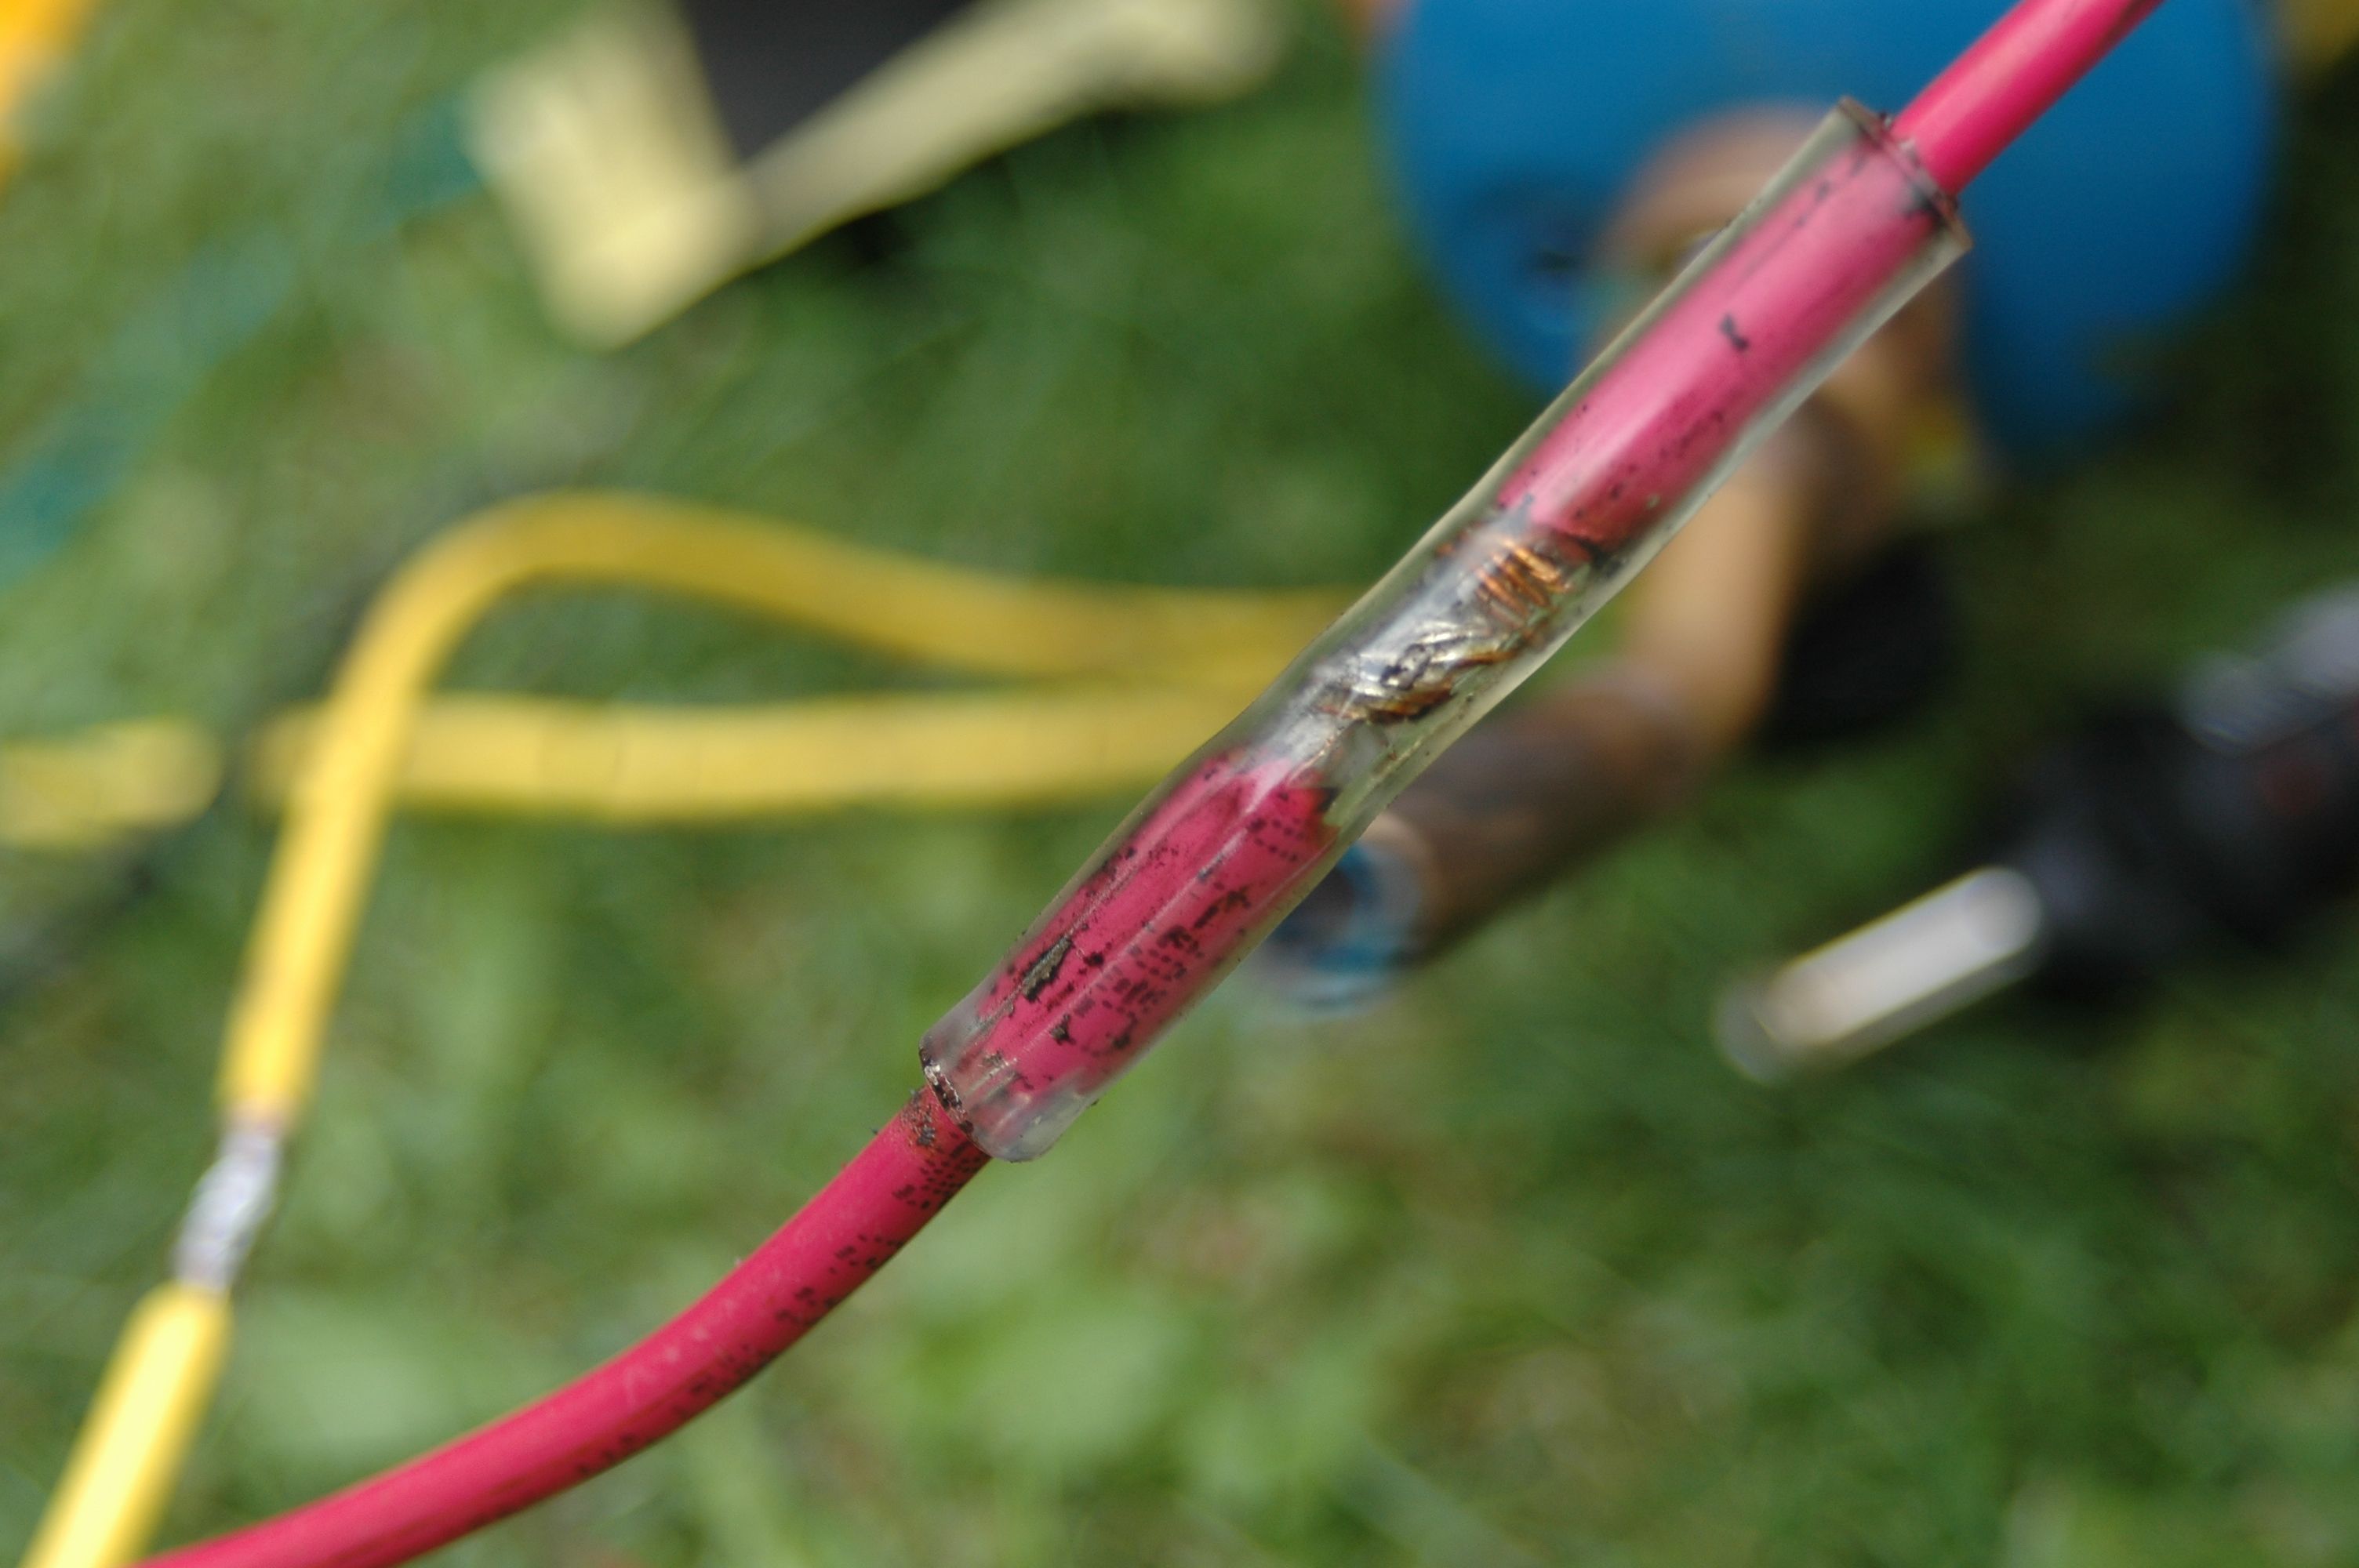 Like I said, for all the time it takes to solder wire connections, it’s fast insurance. But even with soldered connections, you want to protect them from water. Even if the wire connections aren’t actually under water (and they often are), the space inside a well is humid. That’s why you should cover each connection with waterproof, heat-shrink tubing, just to be sure. Multiple layers of safety may just prevent an unnecessary water system failure when the going gets tough. Probably will in time. Waterproof heat shrink tubing has thicker walls than regular heat shrink tubing, and it’s got internal goo that seals the connection when heated.
Install the Right Kind of Check Valves
Check valves are another issue that’s often overlooked or installed poorly in submersible pipe installations. Check valves allow water to only flow one way – into the house, not back down the well when the pump stops running. This prevents unnecessary strain on the pump and ensures immediate water flow into the tank when the pump starts up. But the fact is, all check valves will fail eventually, so install them where you can get at them easily for servicing. The best place I’ve found is shortly before the pressure tank, somewhere between where the water pipe enters your house and the pressure tank. There are two types of check valves on the market: the all-brass flap style and the spring-loaded rubber seal valve. Of these two, the all-brass flap style lasts longer and allows greater water flow. It’s definitely what you should use. Don’t use a spring-loaded type. You can tell you’ve got a flap style because you can hear the flap moving when you pick up and move an uninstalled valve. Spring-loaded check valves are completely cylindrical in shape (and completely silent when you shake them with your hand); flap-style check valves have a kind of threaded cap assembly on one side.
