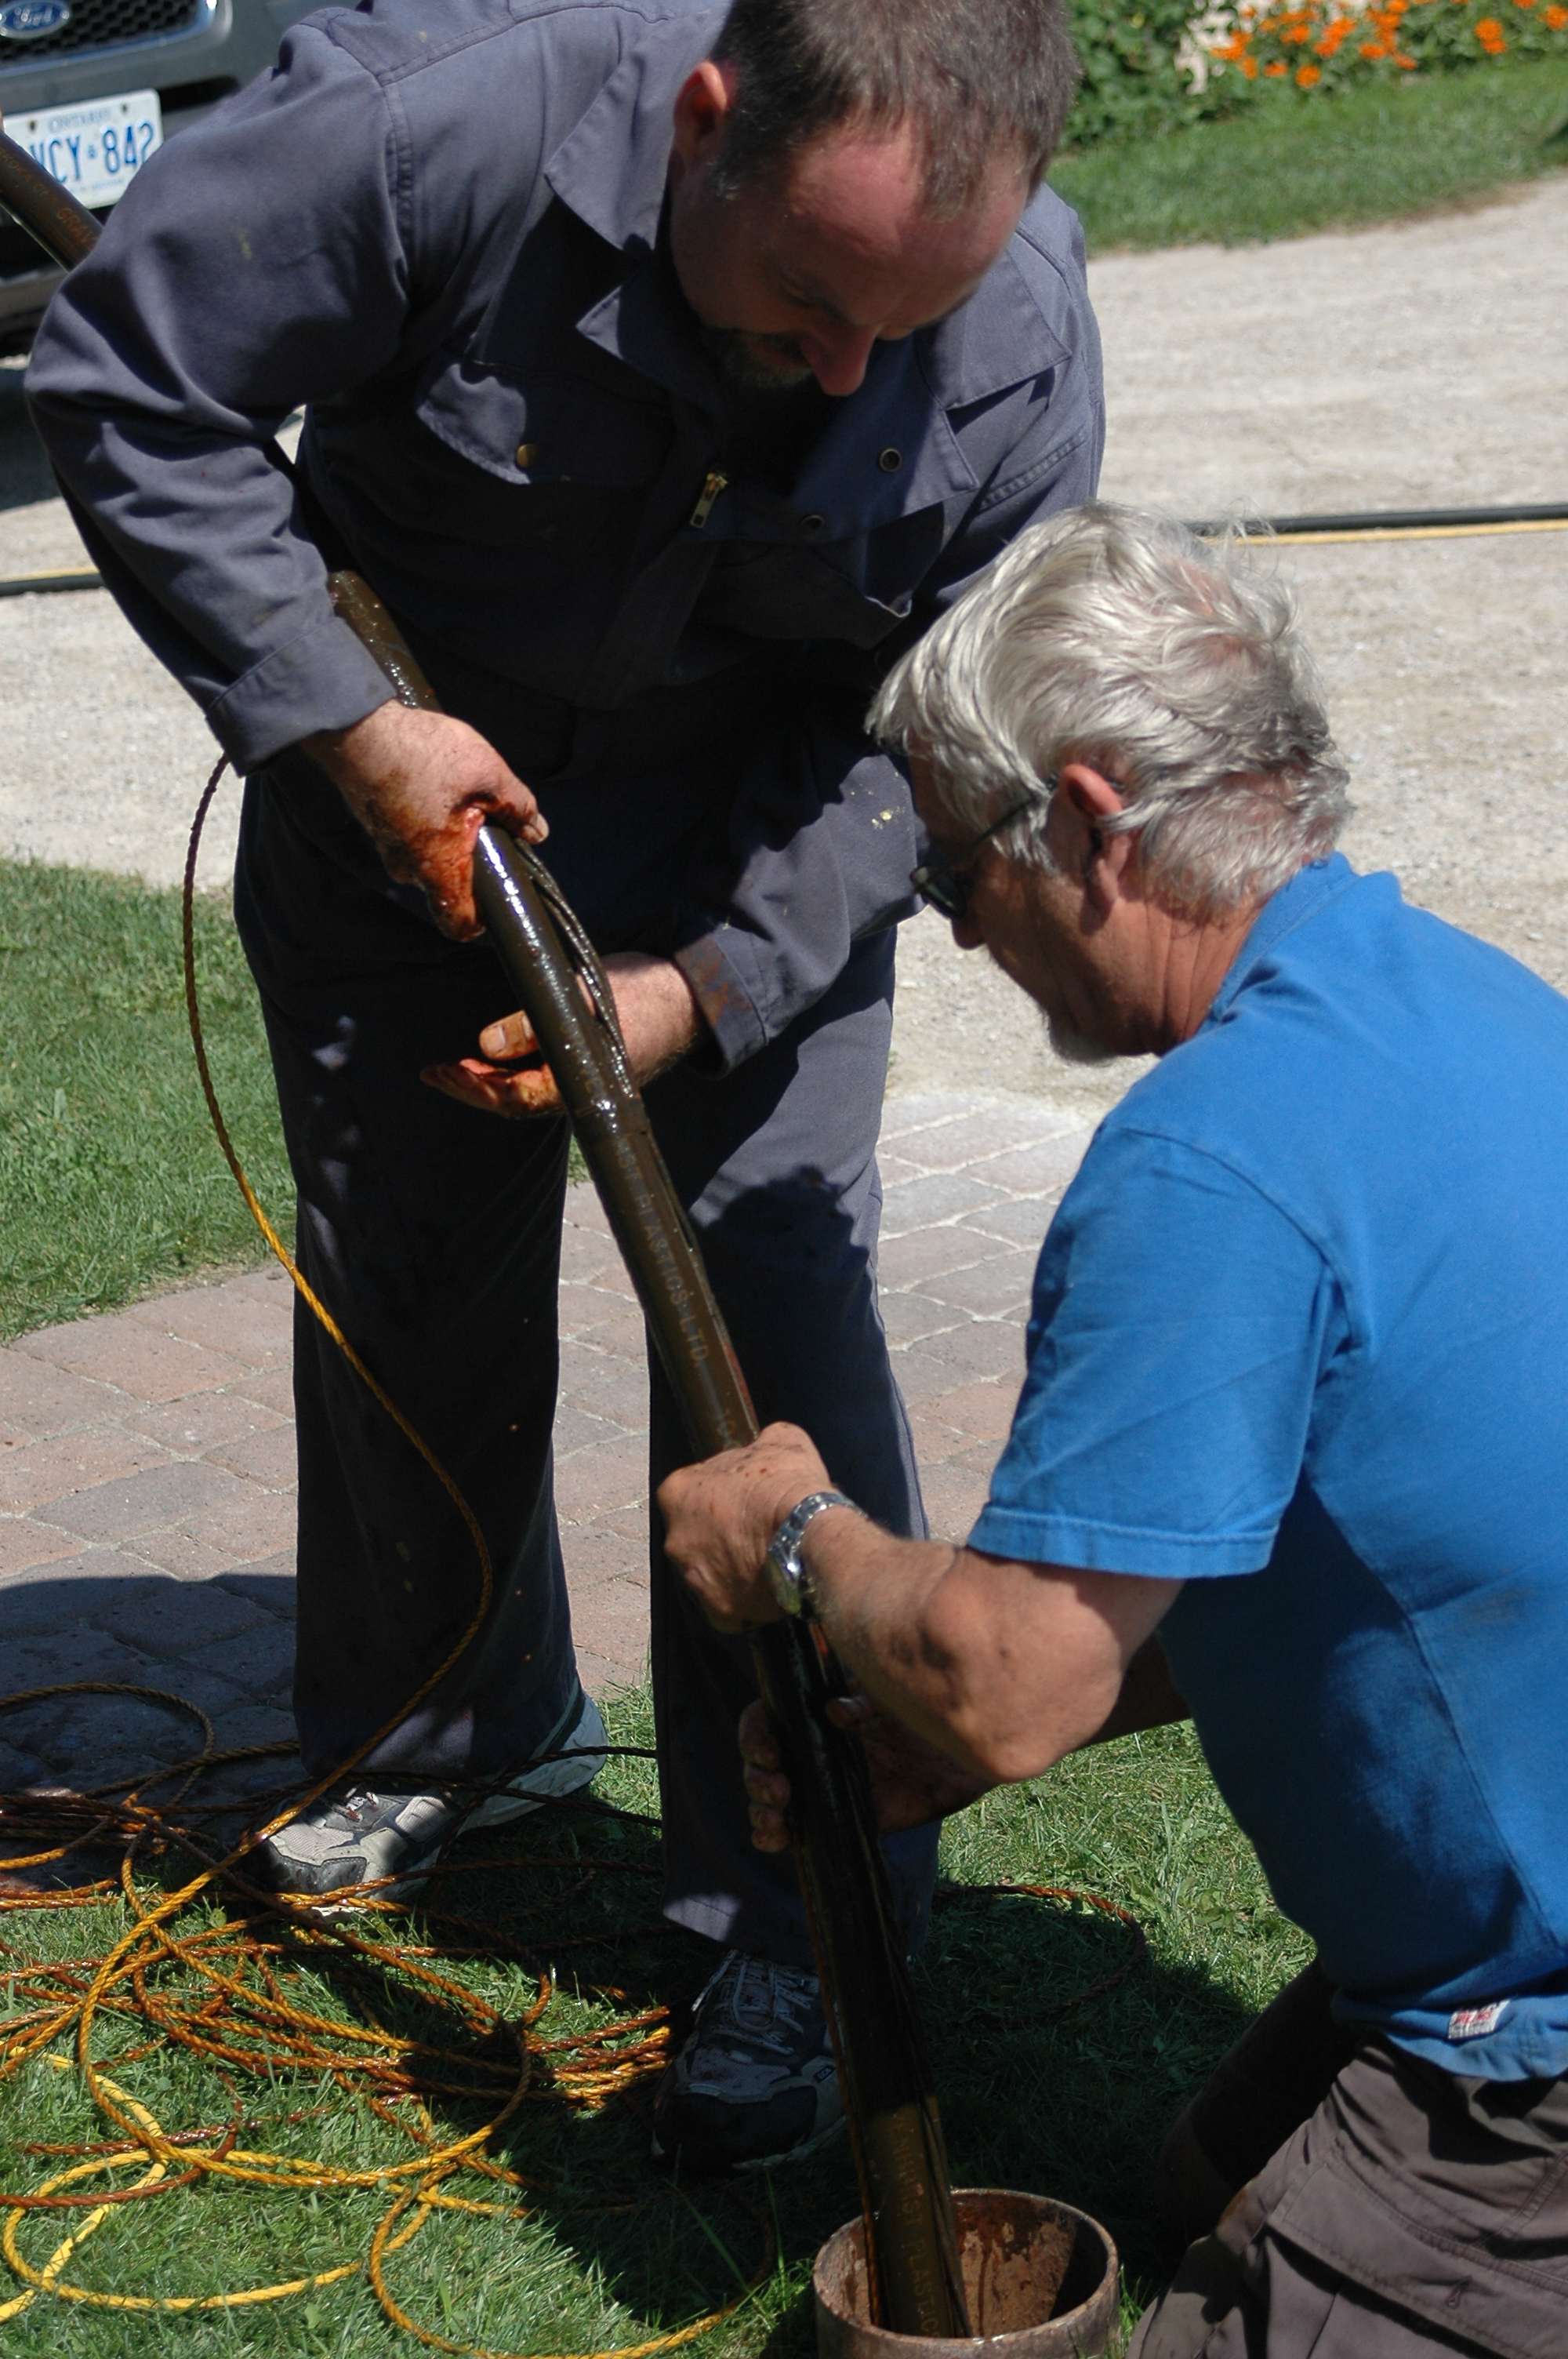
 Replacing a bad submersible involves the same tools and techniques for installing a new pump from scratch, except that you’ve got to lift the old one out first. The information you’ll get here are based on a pump replacement job I completed in the 143-foot deep drilled well on our rural home. This is a typical installation and it allows you to see both the removal and replacement sides of this work. Whether lifting or lowering a submersible, the process involves two things: a homemade tool made of galvanized steel pipe and a common water well fitting called a pitless adaptor.
TECH TIP: Fuel-Powered Portable Pumps
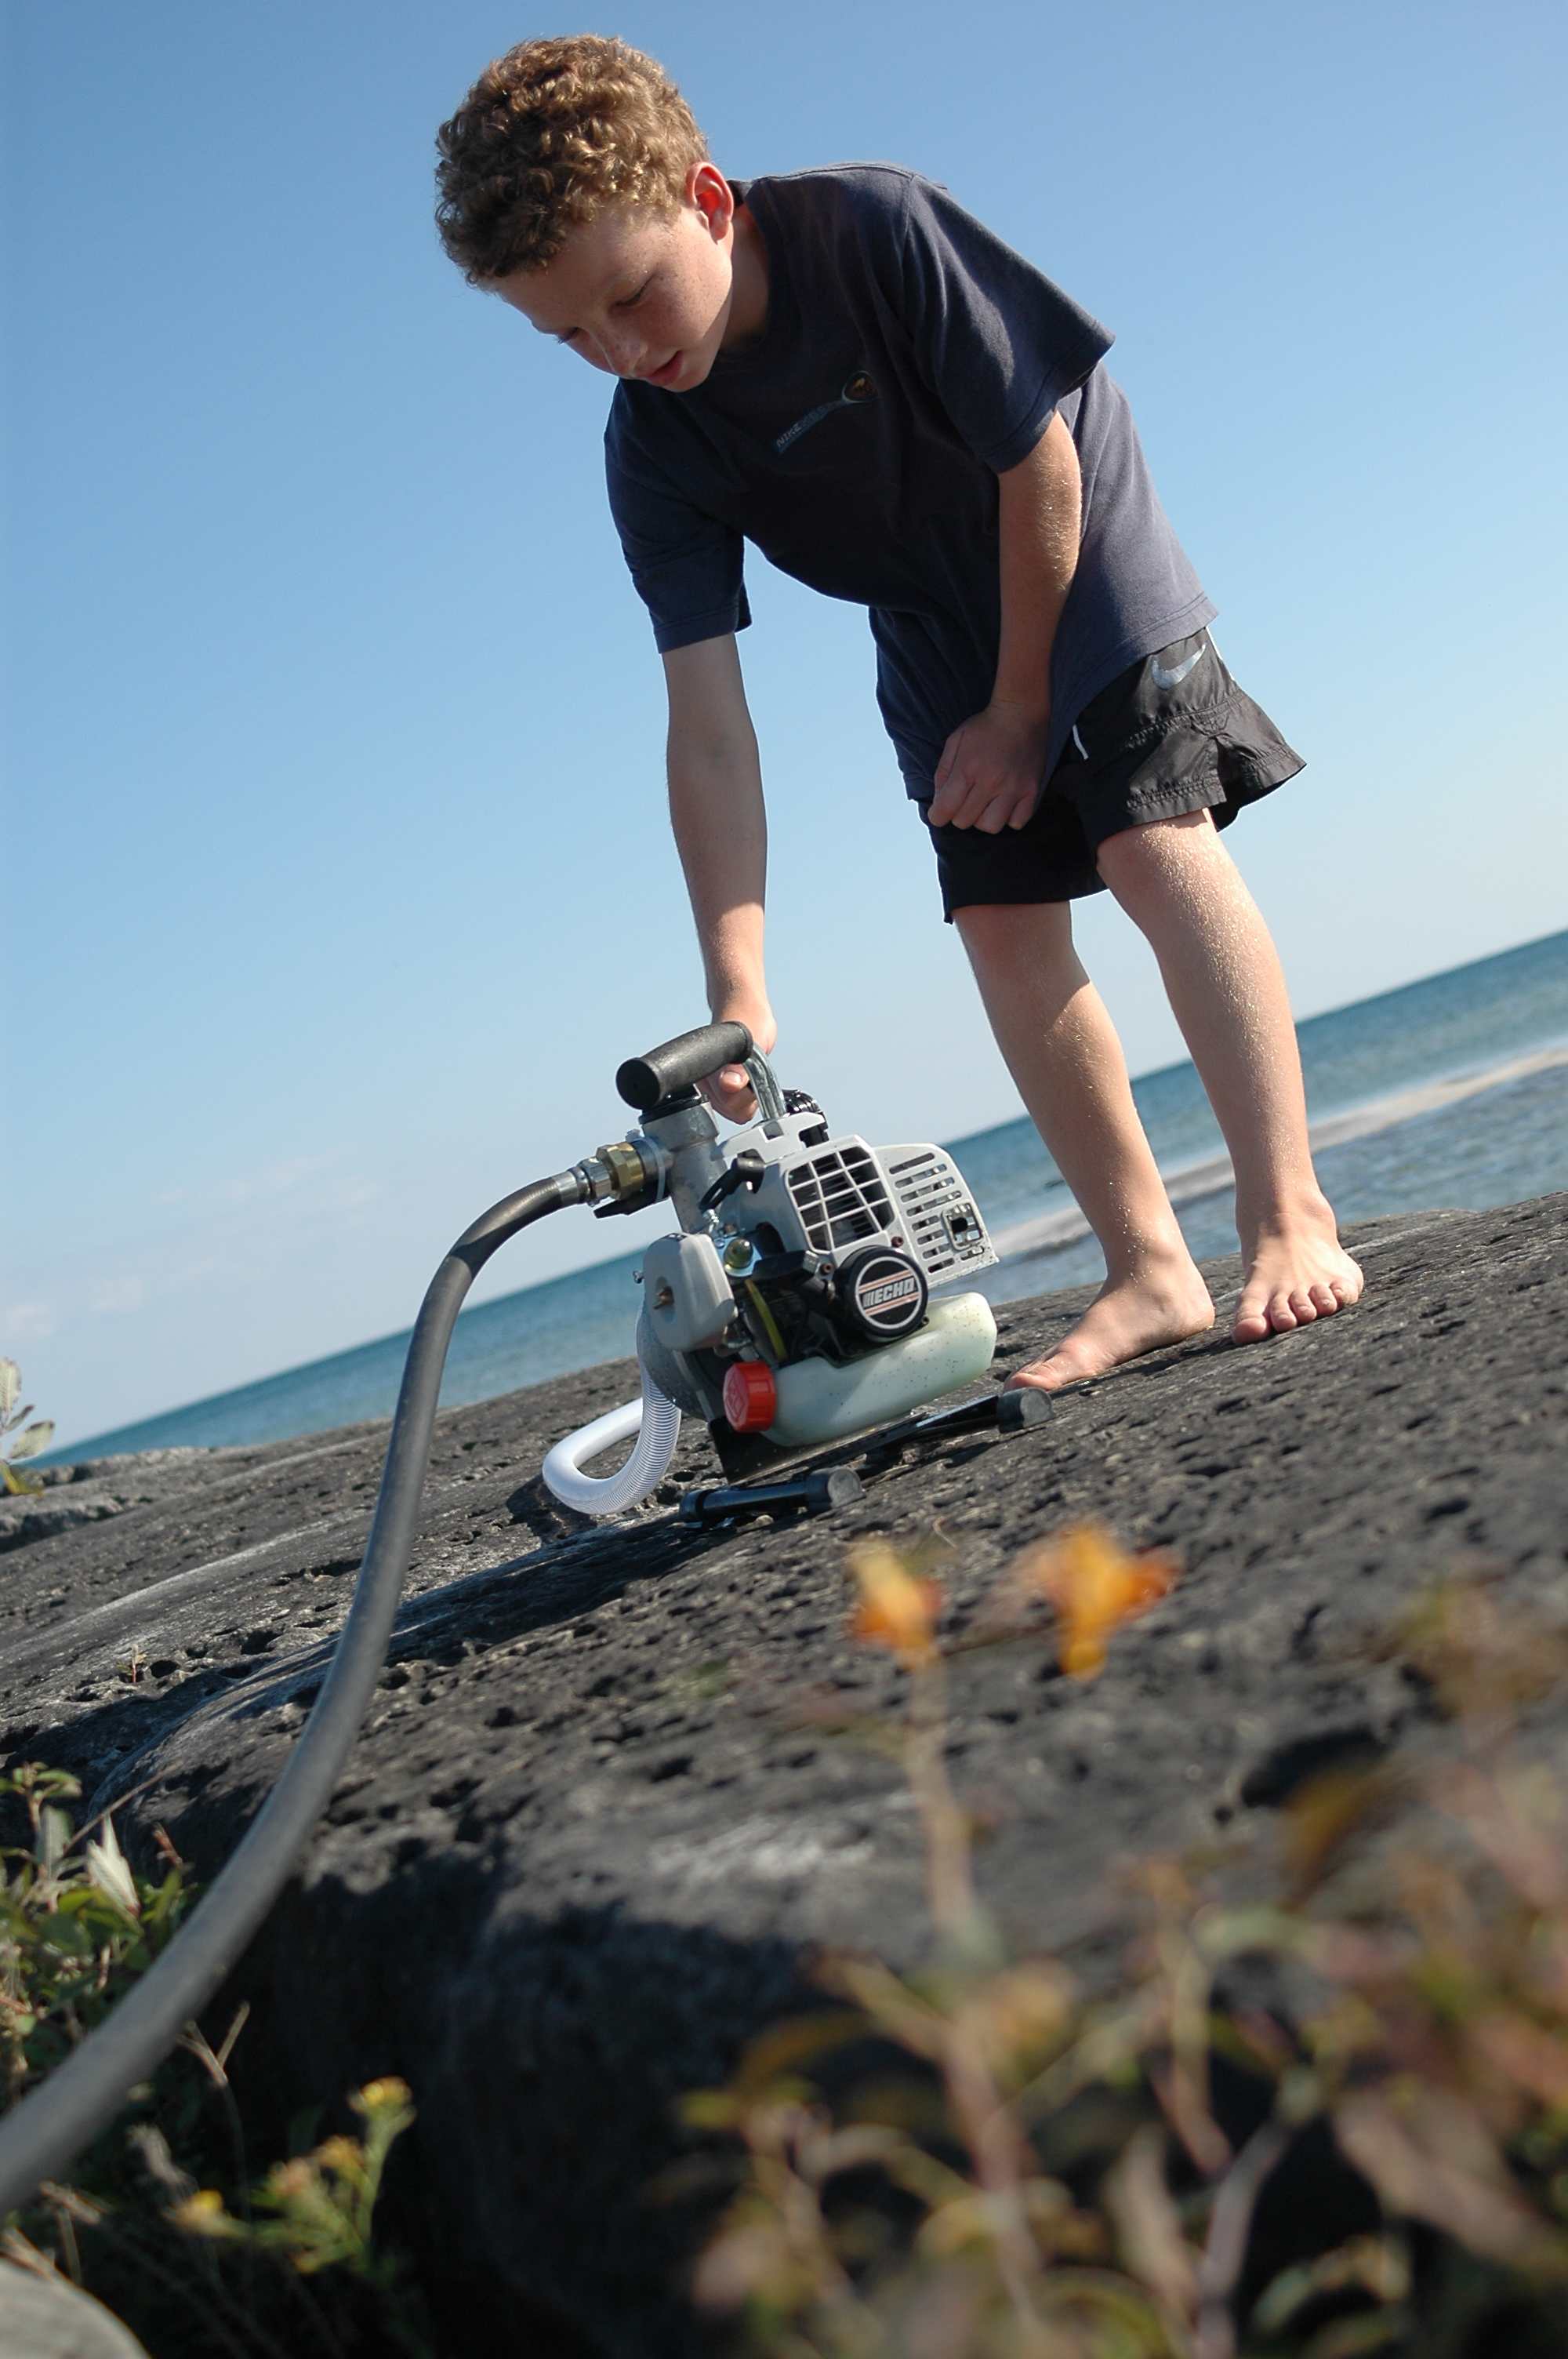 Portability and output are the main virtues of gasoline-powered water pumps. Though they’re not practical for powering a conventional domestic water system directly, they’re perfect for filling portable water tanks, for manual irrigation operations, for draining flooded areas and even for filling elevated water tanks for use with a gravity-feed household water system. Although most models are built around relatively heavy, 4-stroke engines, my little ECHO 2-stroke pump weighs less than 15 lbs. yet can fill a 200 gallon water tank in just over ten minutes. It’s been a great performer over the years. A pump like this will make you a hero if your area gets hit by flooding that leaves behind submerged basements and a power failure. Just stick the intake line into the basement through a window, prime the pump as it sits outside, then fire it up and watch water come gushing out.
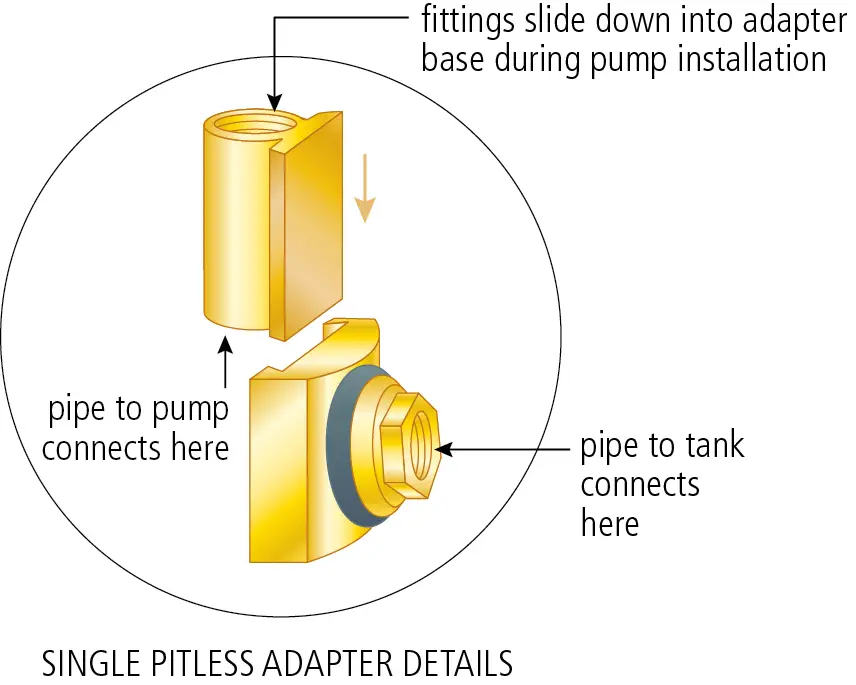 Imagine a metal plumbing elbow that slides apart in two pieces inside the well. This is a pitless adaptor. The horizontal half is permanently mounted through a hole bored in the side of the metal well casing, exiting the casing underground, below the frost line if you get cold weather where you live. The other half of the adaptor is connected to the flexible pipe that travels down to the bottom of the well, where the pump sits. The pitless adaptor includes a threaded handle hole at the top that accepts 1 1/4” pipe thread. More on this later.
During pump installation, the movable part of the pitless adaptor slides down, engaging with the stationary half of the fitting bolted through the well casing, creating a waterproof 90º connection. Removing the pump and water line involves separating the sliding part of the pitless adaptor by pulling it up and out of the well. This is what you need that homemade tool for.
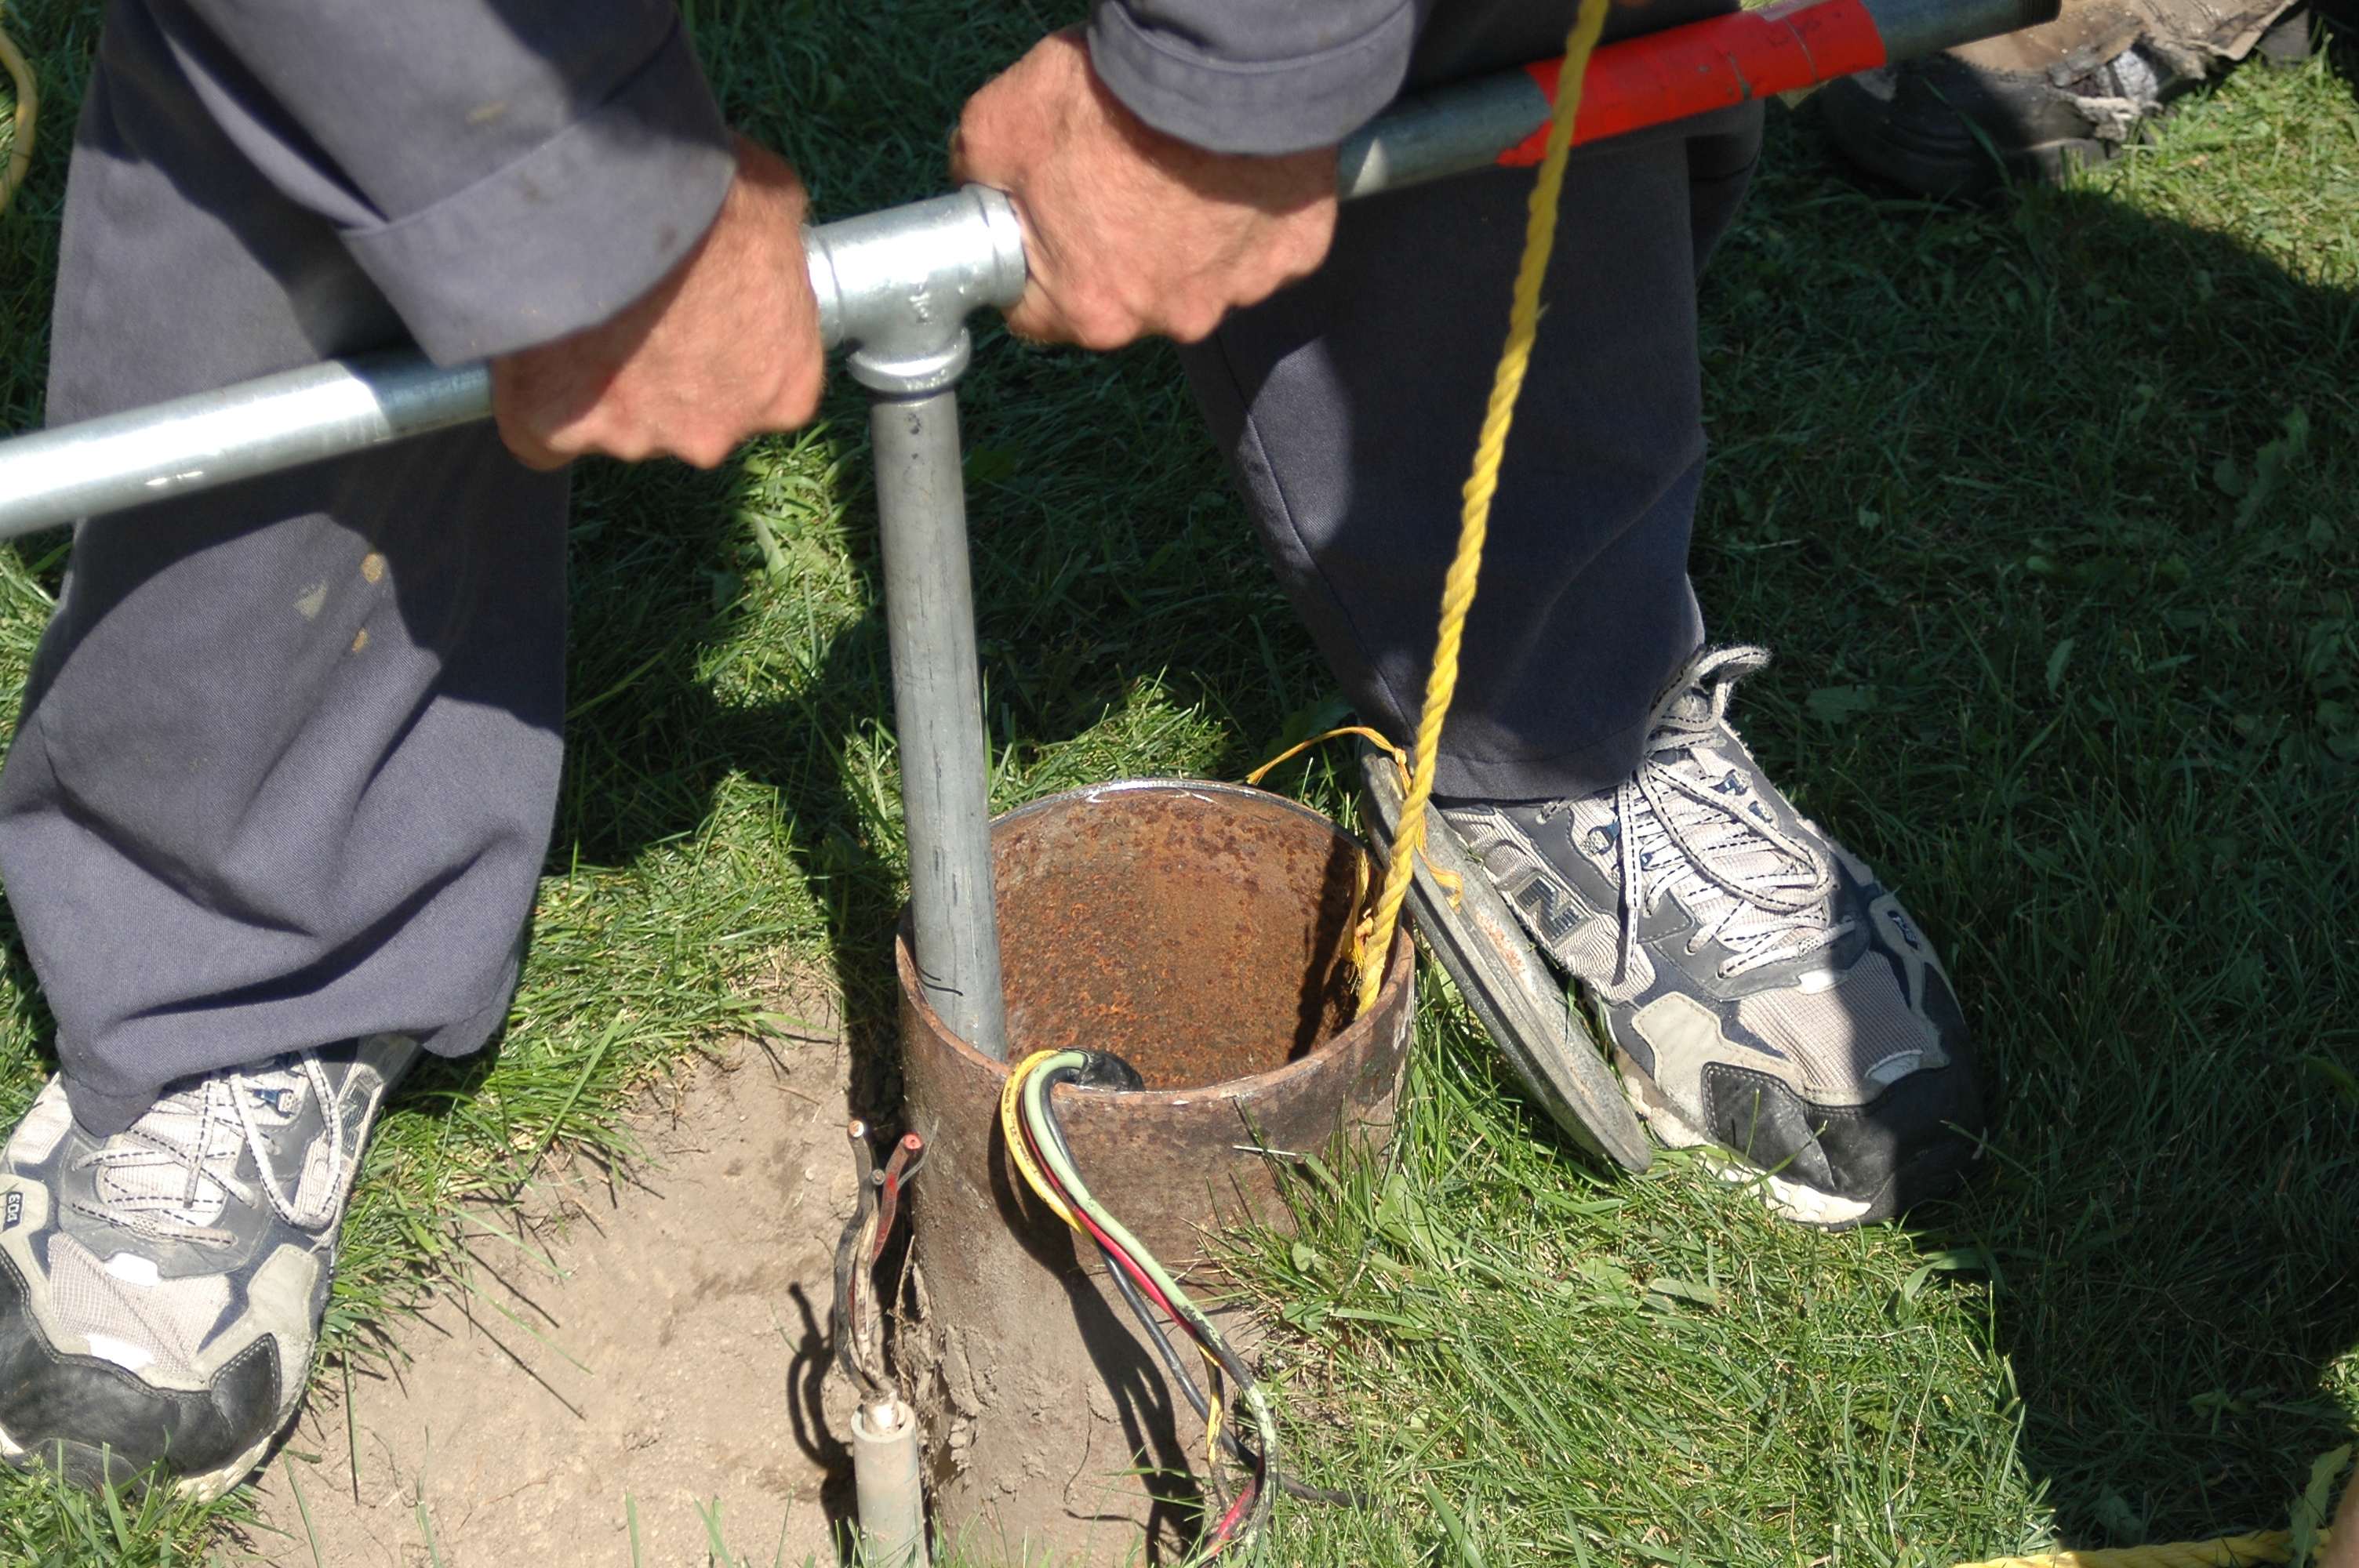 This tool is made with a six-foot length of 1 1/4” diameter threaded steel water pipe with a tee fitting on top and two handle pieces. The bottom end of the tool threads into the hole in the top of the pitless adaptor, allowing you to pull it and the pipe and pump up and out of the well. Pulling an existing installation up and out is heavy work on a deep well because the poly pipe is filled with water. Get some help.
Reliability By Design
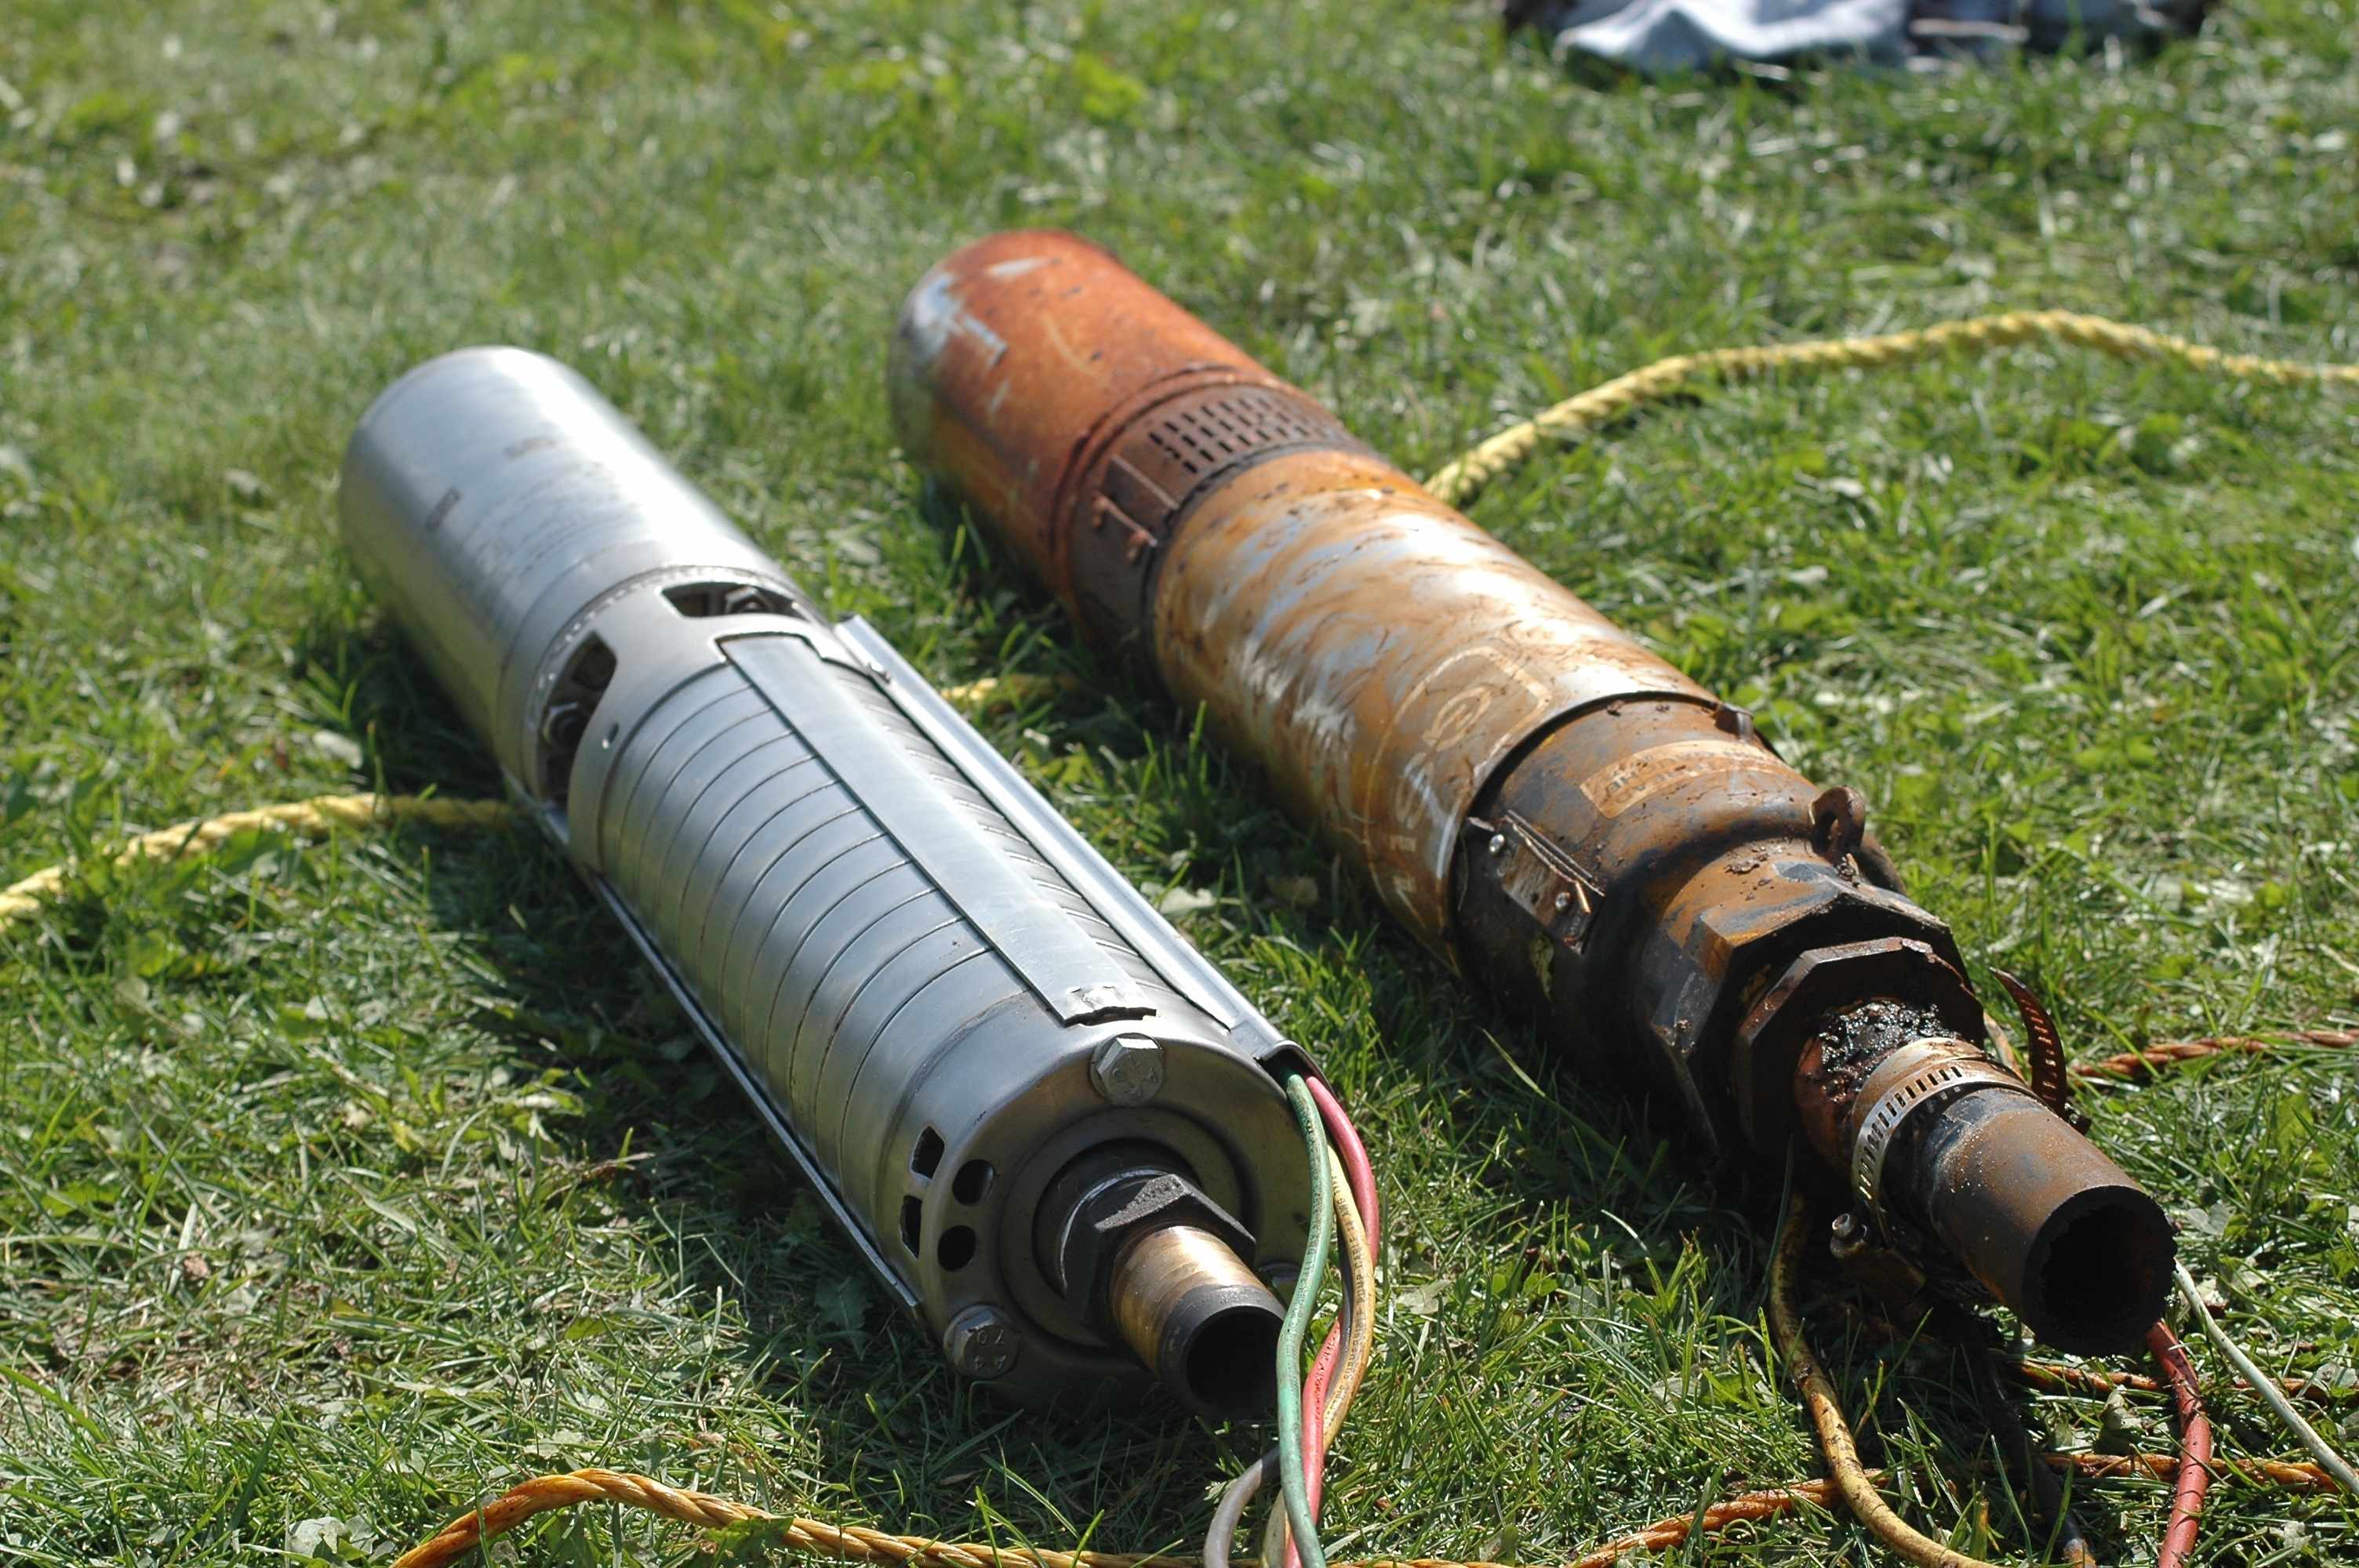 Pulling a failed submersible pump teaches many lessons, and one of the most surprising is the reason why many submersible pumps stop working in the first place. It’s not necessarily that the motor goes bad (though this can certainly happen), but often because the insulation on the wires gets worn off from repeated movement and rubbing against the inside of the metal well casing or the sides of the rock hole itself.
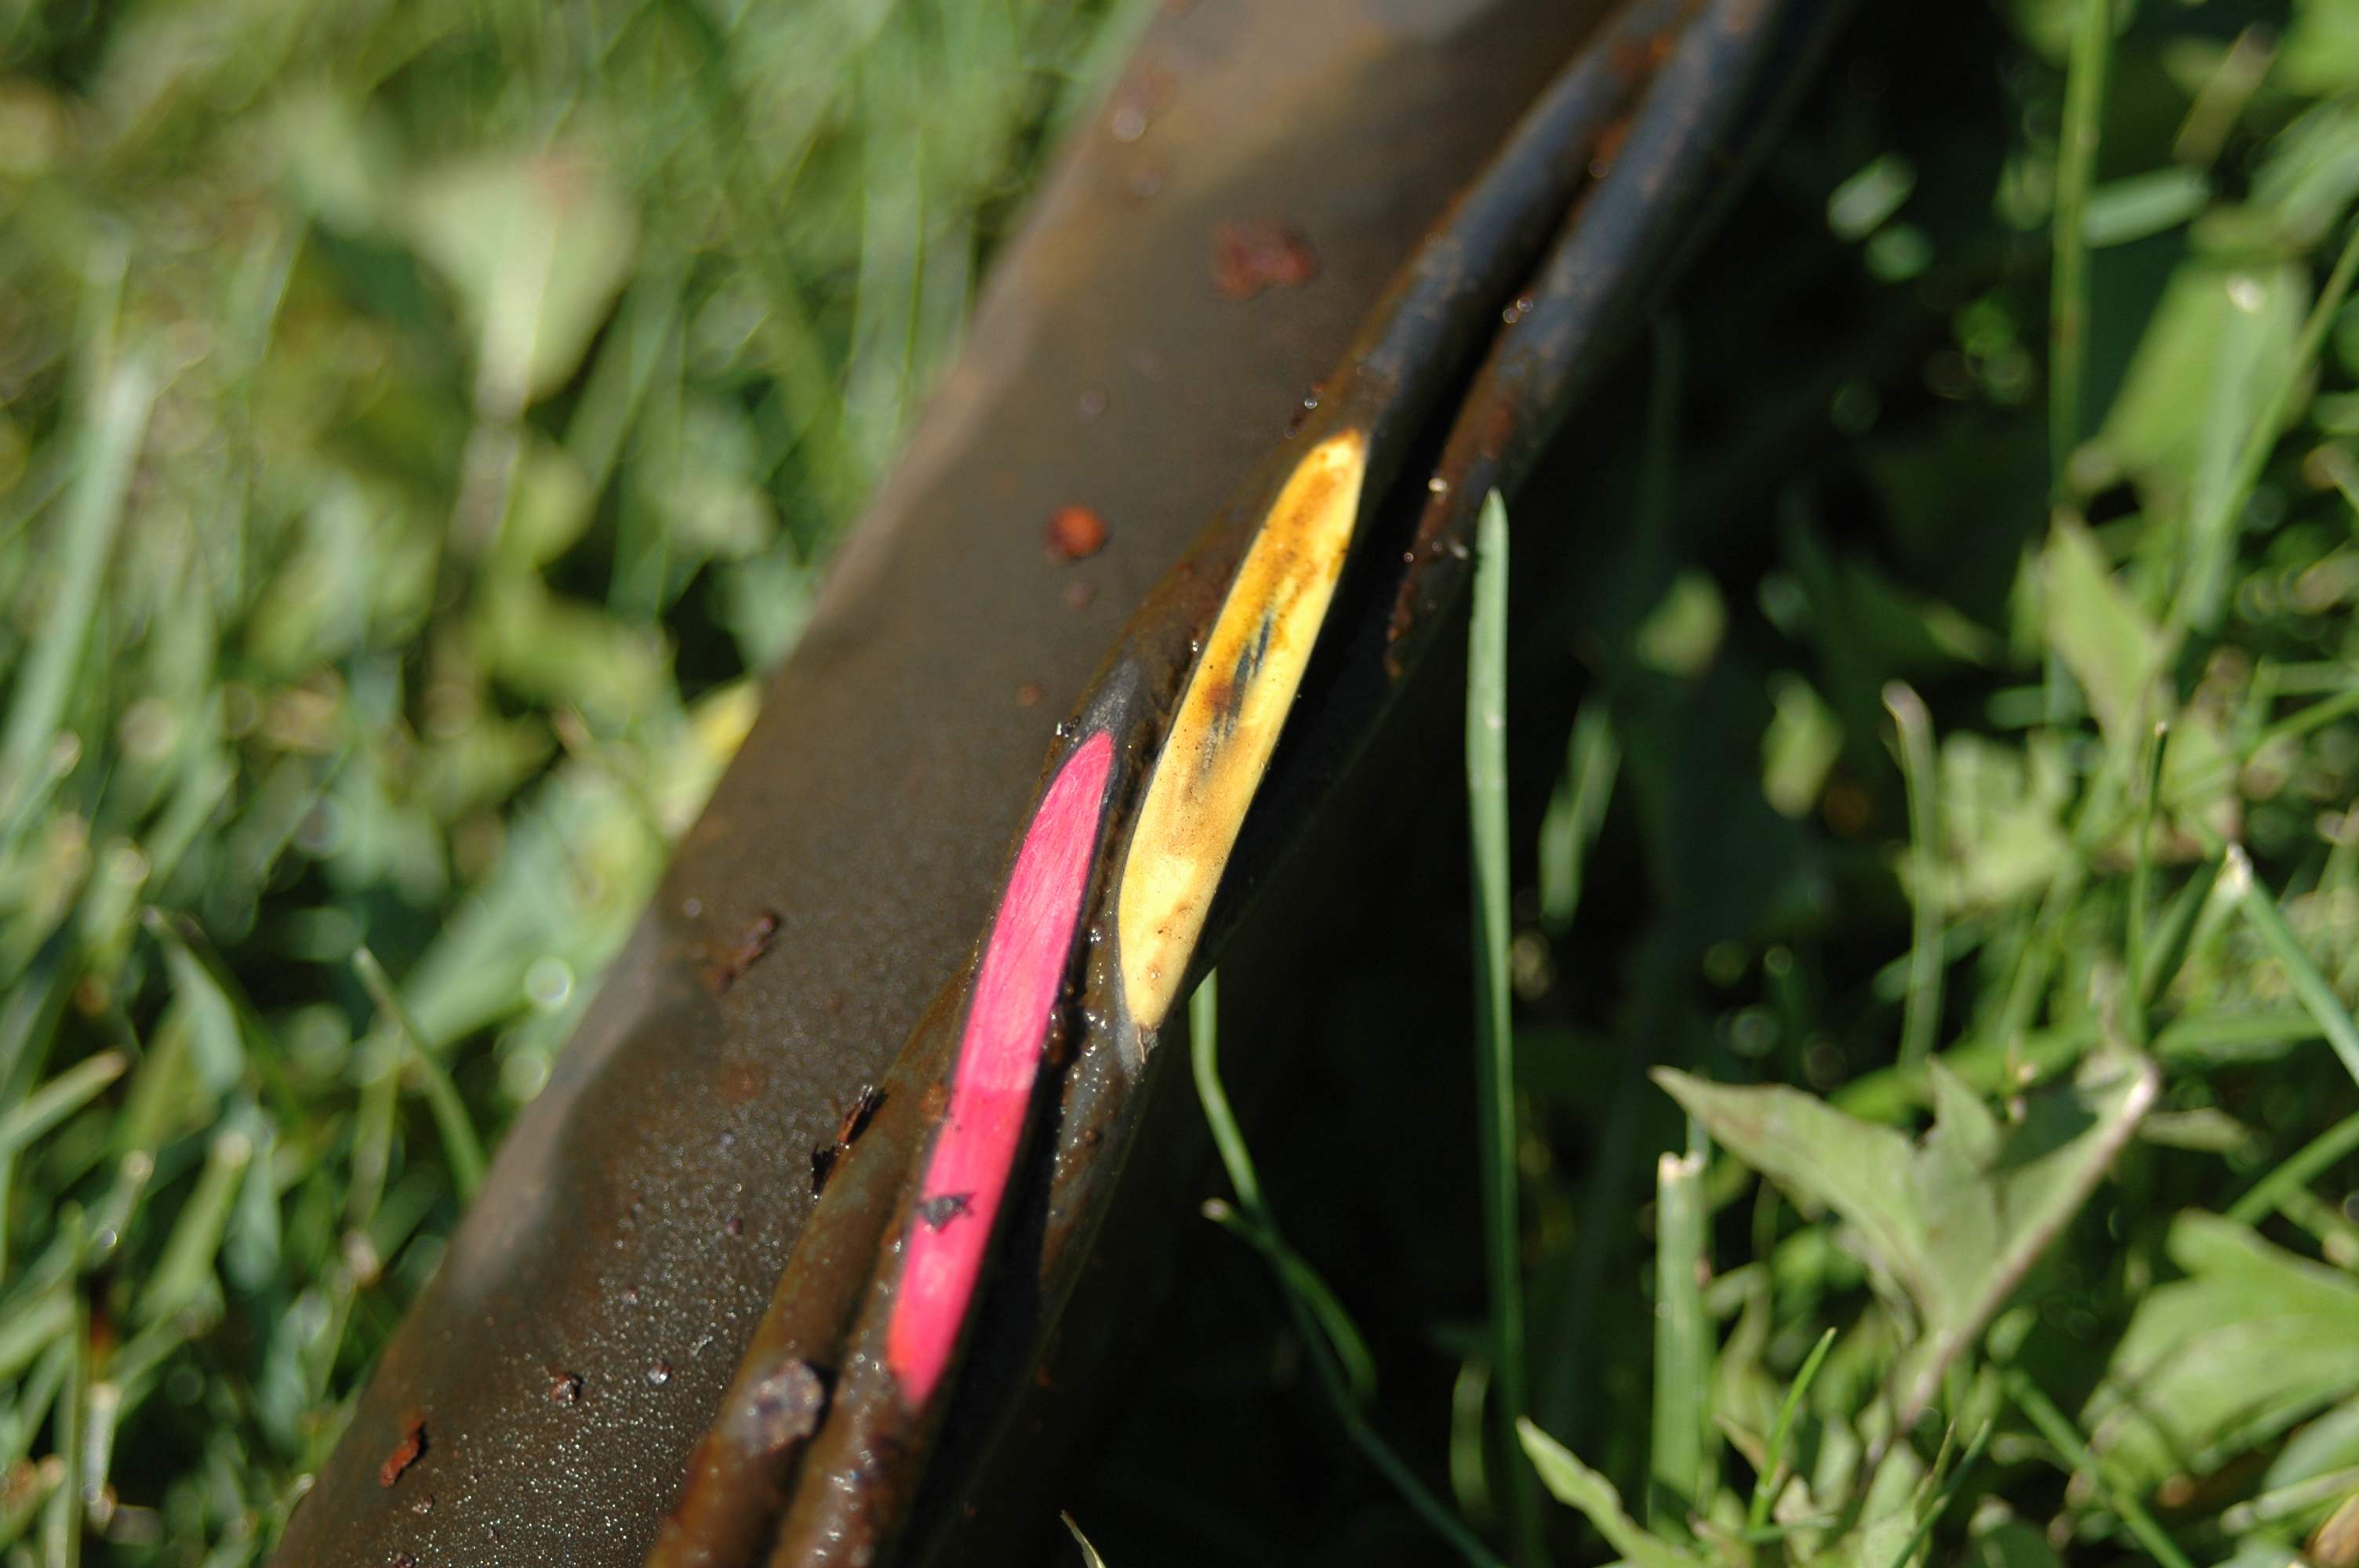 Every time the pump stops and starts as it hangs off the end of fifty, one hundred or two hundred feet of pipe, the whole installation swings in response to the torque of the motor. Stop, start, rub, rub. After years of this action the wire insulation wears thin, either breaking or exposing bare copper and creating a short circuit that prevents the pump from running.
Another common problem relates to motor torque, too. Over time the repeated twisting force of the motor starting up can cause the threaded pipe fittings on the top of the pump to twist tighter and tighter, wrapping the wires around the poly pipe until they break. And if all this isn’t enough, there’s the ever-present danger of crimp-on wire connections corroding and failing in the wet environment way down in the well. These are the typical weak areas in submersible pump installations, and it’s exactly where my extra-diligent installation procedure differs from what’s usually done. But before I give you details, you need some technical background.
The Physics of Pumping Water
Submersible pumps, jet pumps and piston pumps are the three most common electric options for making water flow under pressure in a household system, and each has unique strengths and weaknesses. To understand why, you first need to realize two crucial facts about the physics of water. The first is that water can’t be drawn up by suction from anything deeper than about 22 feet. The second fact is that water pumps can’t move air. That’s why some pumps require a process called priming.
Priming involves the often-troublesome job of filling intake pipes and pump casings with water before operation, and priming can be one of the most challenging parts of getting a water system to work. Water pumps can’t pull water up through an empty pipe because these pumps aren’t designed to move air. As you’ll see later, the need for priming is also significant in ways that affects the pump you choose.
The farther the level of water is below the surface of the ground, the more suction is required inside the pipe to pull that water upwards against gravity. When a water draw situation requires an overall vertical lift of a little more than 20 feet or more, the vacuum inside the pipe becomes so great that water boils at ordinary room temperatures. You won’t notice this boiling, but it’s happening within the intake pipe just the same. All you’ll see is that your pump isn’t able to pull water up from these depths because pumps can’t move the vapourized water (just like they can’t move air). No matter how well the pump is primed, it simply won’t work. Depth of water below the surface is crucial because it determines the kind of pump you can use to bring running water to your home and the way it’s configured.
Submersible pumps are more expensive than the common jet pump, but they work better in two ways. Since they’re installed below water level, they never need priming. Submersibles can also operate from great depths. Since they never suck water up, but always push water up, there’s never any problem.
So, does this mean submersible pumps are the only way to get water from a well where the static water level is more than 20 feet below the surface? No. Jet pumps can also be configured to draw water up from greater depths as well as shallower ones. A jet pump gets its name from a part called a “jet”. This is a kind of nose piece that comes bolted onto the front of the pump when new. If you’re drawing water from less than 20 vertical feet, then you simply install a single intake pipe onto the end of the jet and go down into the well. If you’re drawing water from more than 20 vertical feet, there will be two pipes leaving the jet pump, not one.
Start by unbolting the jet from the front of the pump as the first step in reconfiguring for a deeper-than-20-feet application. Install two threaded pipe fittings onto the front of the pump where the jet used to be, then connect the jet to the pump with two pipes. The video up next shows how a jet pump can be configured to operate in a single-pipe shallow mode, or a two-pipe deep mode.
