Small-Scale Grain Production

There’s a reason that grain (and in particular wheat) has been a staple human food since recorded history began. Grain provides the highest concentration of energy of any non-meat, grow-it-yourself food product. Grains like wheat are also enormously storable.
Like a lot of basic skills, growing grain is not complicated. I know from experience that doing it without machines of any kind is certainly labor-intensive, but it’s also enormously sustainable. Using the methods I’ll show you here, you’ll be able to grow grain, harvest it with nothing but the simplest of hand tools, separate the grain from the straw and chaff, then grind that grain into flour for baking using just your muscles. The photos coming up are from a hands-on wheat harvest at our place.
The first thing to understand is that grain is a kind of grass. It looks like grass when it’s growing, but it’s a whole lot easier to grow than regular ornamental lawn plants from seed. The reason is because each kernel of grain is like a little food storage unit for the inner, living part of the wheat. This is why germination rates and growth success are very high for grains. In fact, grain might be the easiest of all crops to grow. Okay, radishes are pretty easy, but grain is just as easy as radishes.
The main small grains in the world are wheat, barley, oats and rye, and of all these types wheat makes the most sense as a survival food crop. Wheat is the king of grains because you can do so many things with it. It grinds nicely into flour (more on this later), it grows vigorously, and it contains more energy per volume than any of the other small grains. Growing wheat is a different process than any gardening you might have done, and in many ways it’s easier.
Click below to listen to an audio message from me about growing wheat.
AUDIO: Grow Your Own Wheat by Hand
There are five main steps to growing your own machine-free wheat:
Step#1 – Plant Clean Wheat Seed
There are two main types of wheat in the world: spring wheat and fall wheat (also called “winter wheat”. The names refer to the season for planting. Spring wheat is planted in spring and matures by late summer or early fall. Spring wheat yields the hardest kernels that have the best baking qualities.
Fall or winter wheat is planted early enough in the fall that it grows 3” or 4” high before winter arrives. The living plants stay dormant until spring, then they start growing again as soon as it gets warm, yielding grain in mid-summer. Fall wheat lets you get a harvest earlier in the year and it’s less susceptible to drought. Although fall wheat isn’t as good for baking bread, it’s better than spring wheat for pancakes, pasta and non-yeast baked goods.
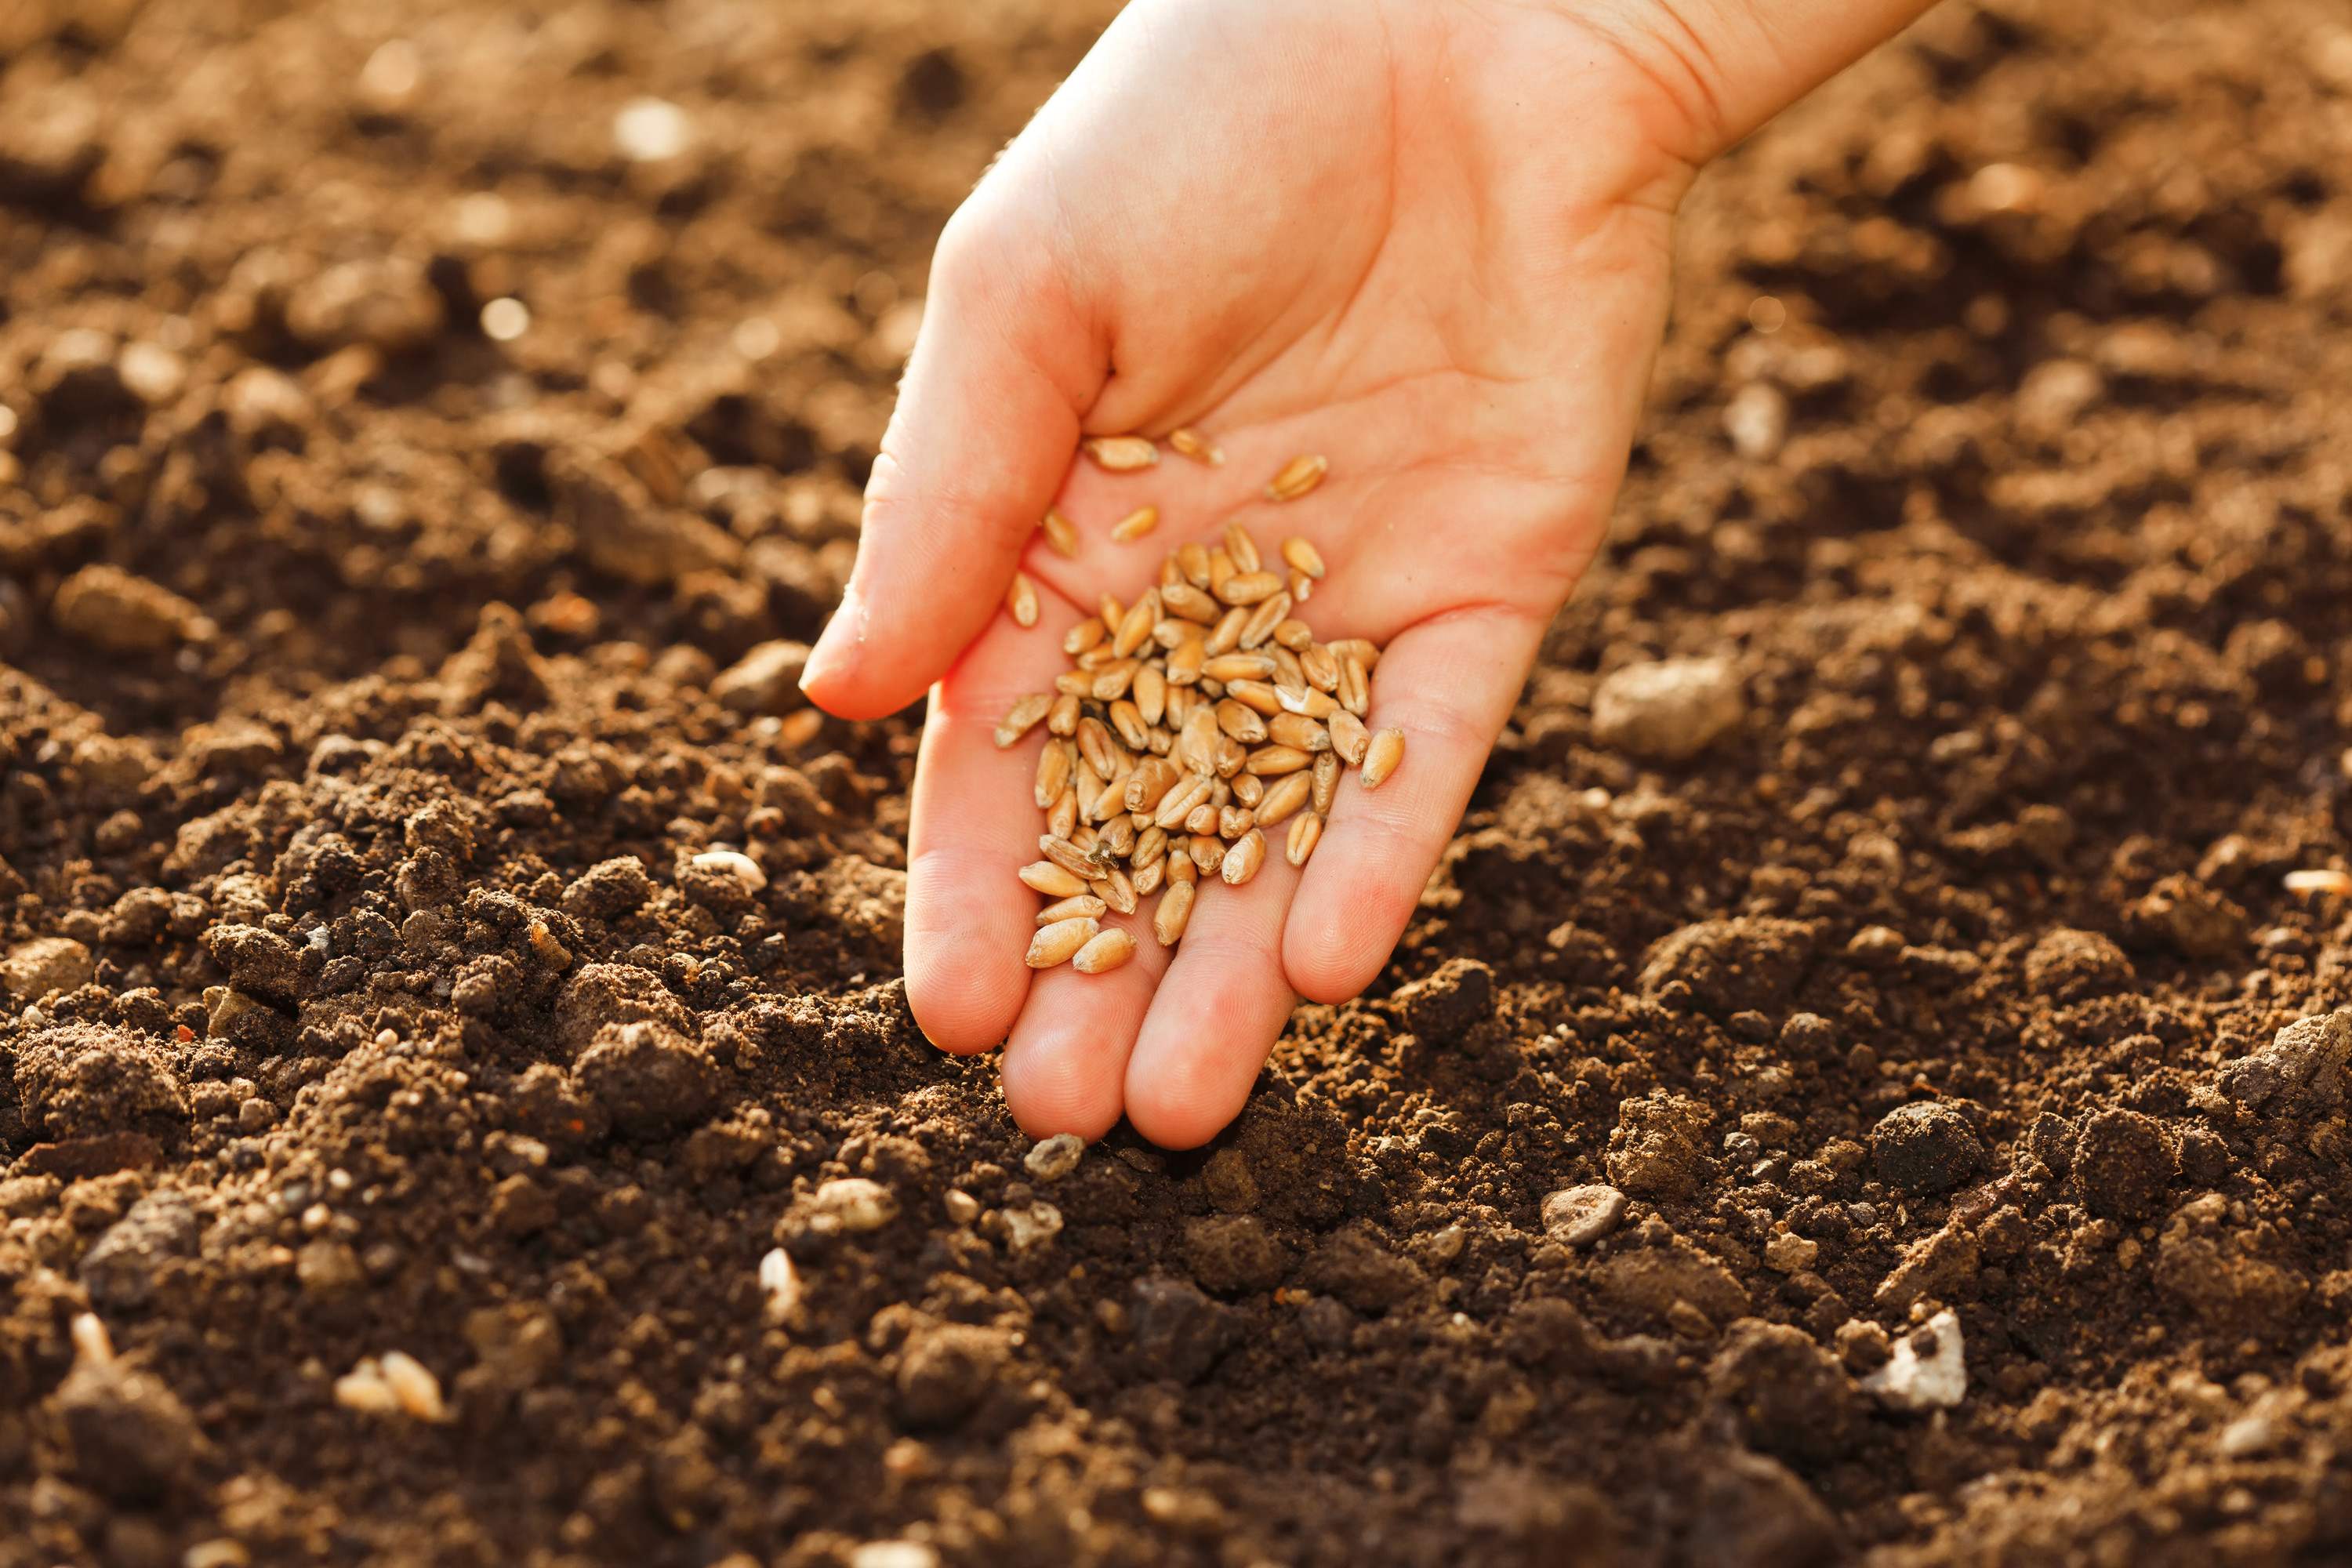
Over the years I’ve bought wheat seed from a local agricultural supply outlet, but wheat is not typically a hybrid crop. This means you can save your own seed from year to year, planting and replanting forever. All that matters is that your wheat seed be as completely free from weeds as possible before planting.
The hardest part of growing wheat by hand is preparing the ground. Since you can’t do much weeding after the crop has started to grow, you need to begin with clean soil that’s free from weeds. My favourite strategy is to start preparing soil the year before if I’m dealing with established sod. Work the soil every couple of weeks using a rototiller or horse-drawn equipment. Just keep beating back the grass and weeds until the soil is clean enough that it won’t grow anything if left alone for two or three weeks.
Planting wheat is simple. Just grab handfuls of seed grain and throw it on the ground. Your aim is to have a single wheat kernel land every 1” or 2” in all directions. Use a rake or your tillage equipment to gently cover the seed. No need to be precise. Green shoots of young wheat plants should pop up out of the ground in a week or two, depending on temperature and humidity.
Step#2: Cut Mature Wheat
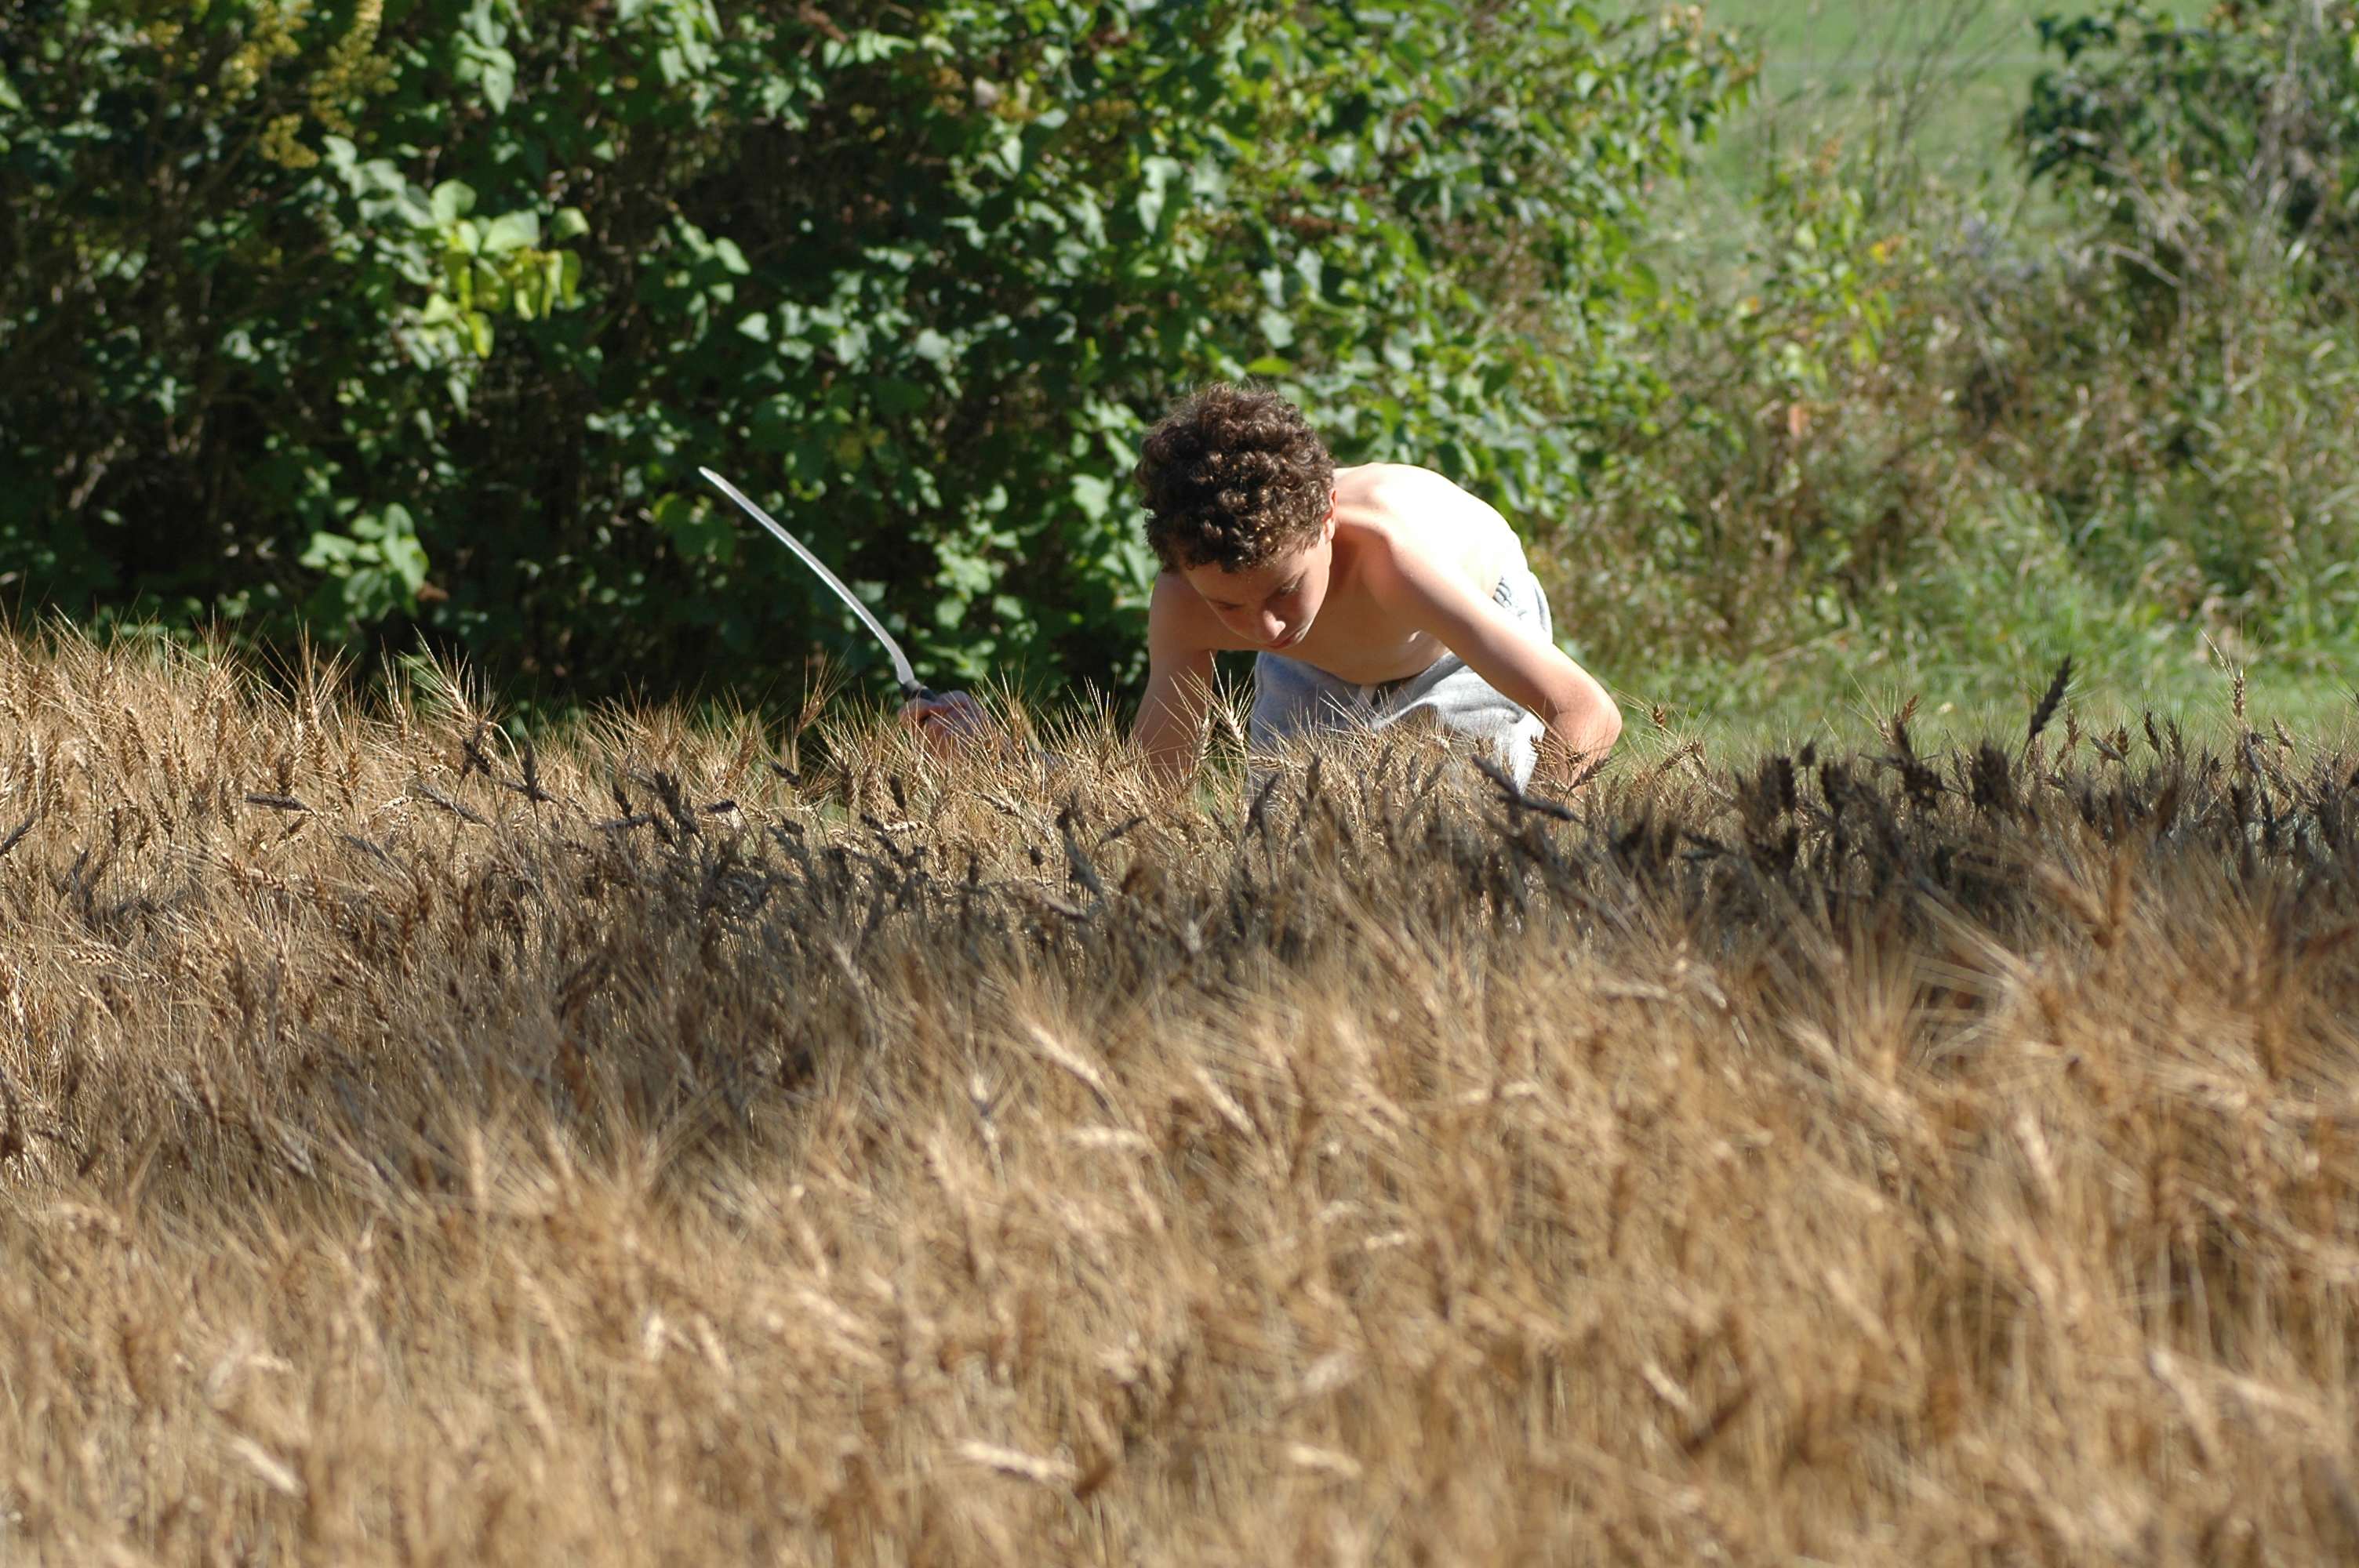
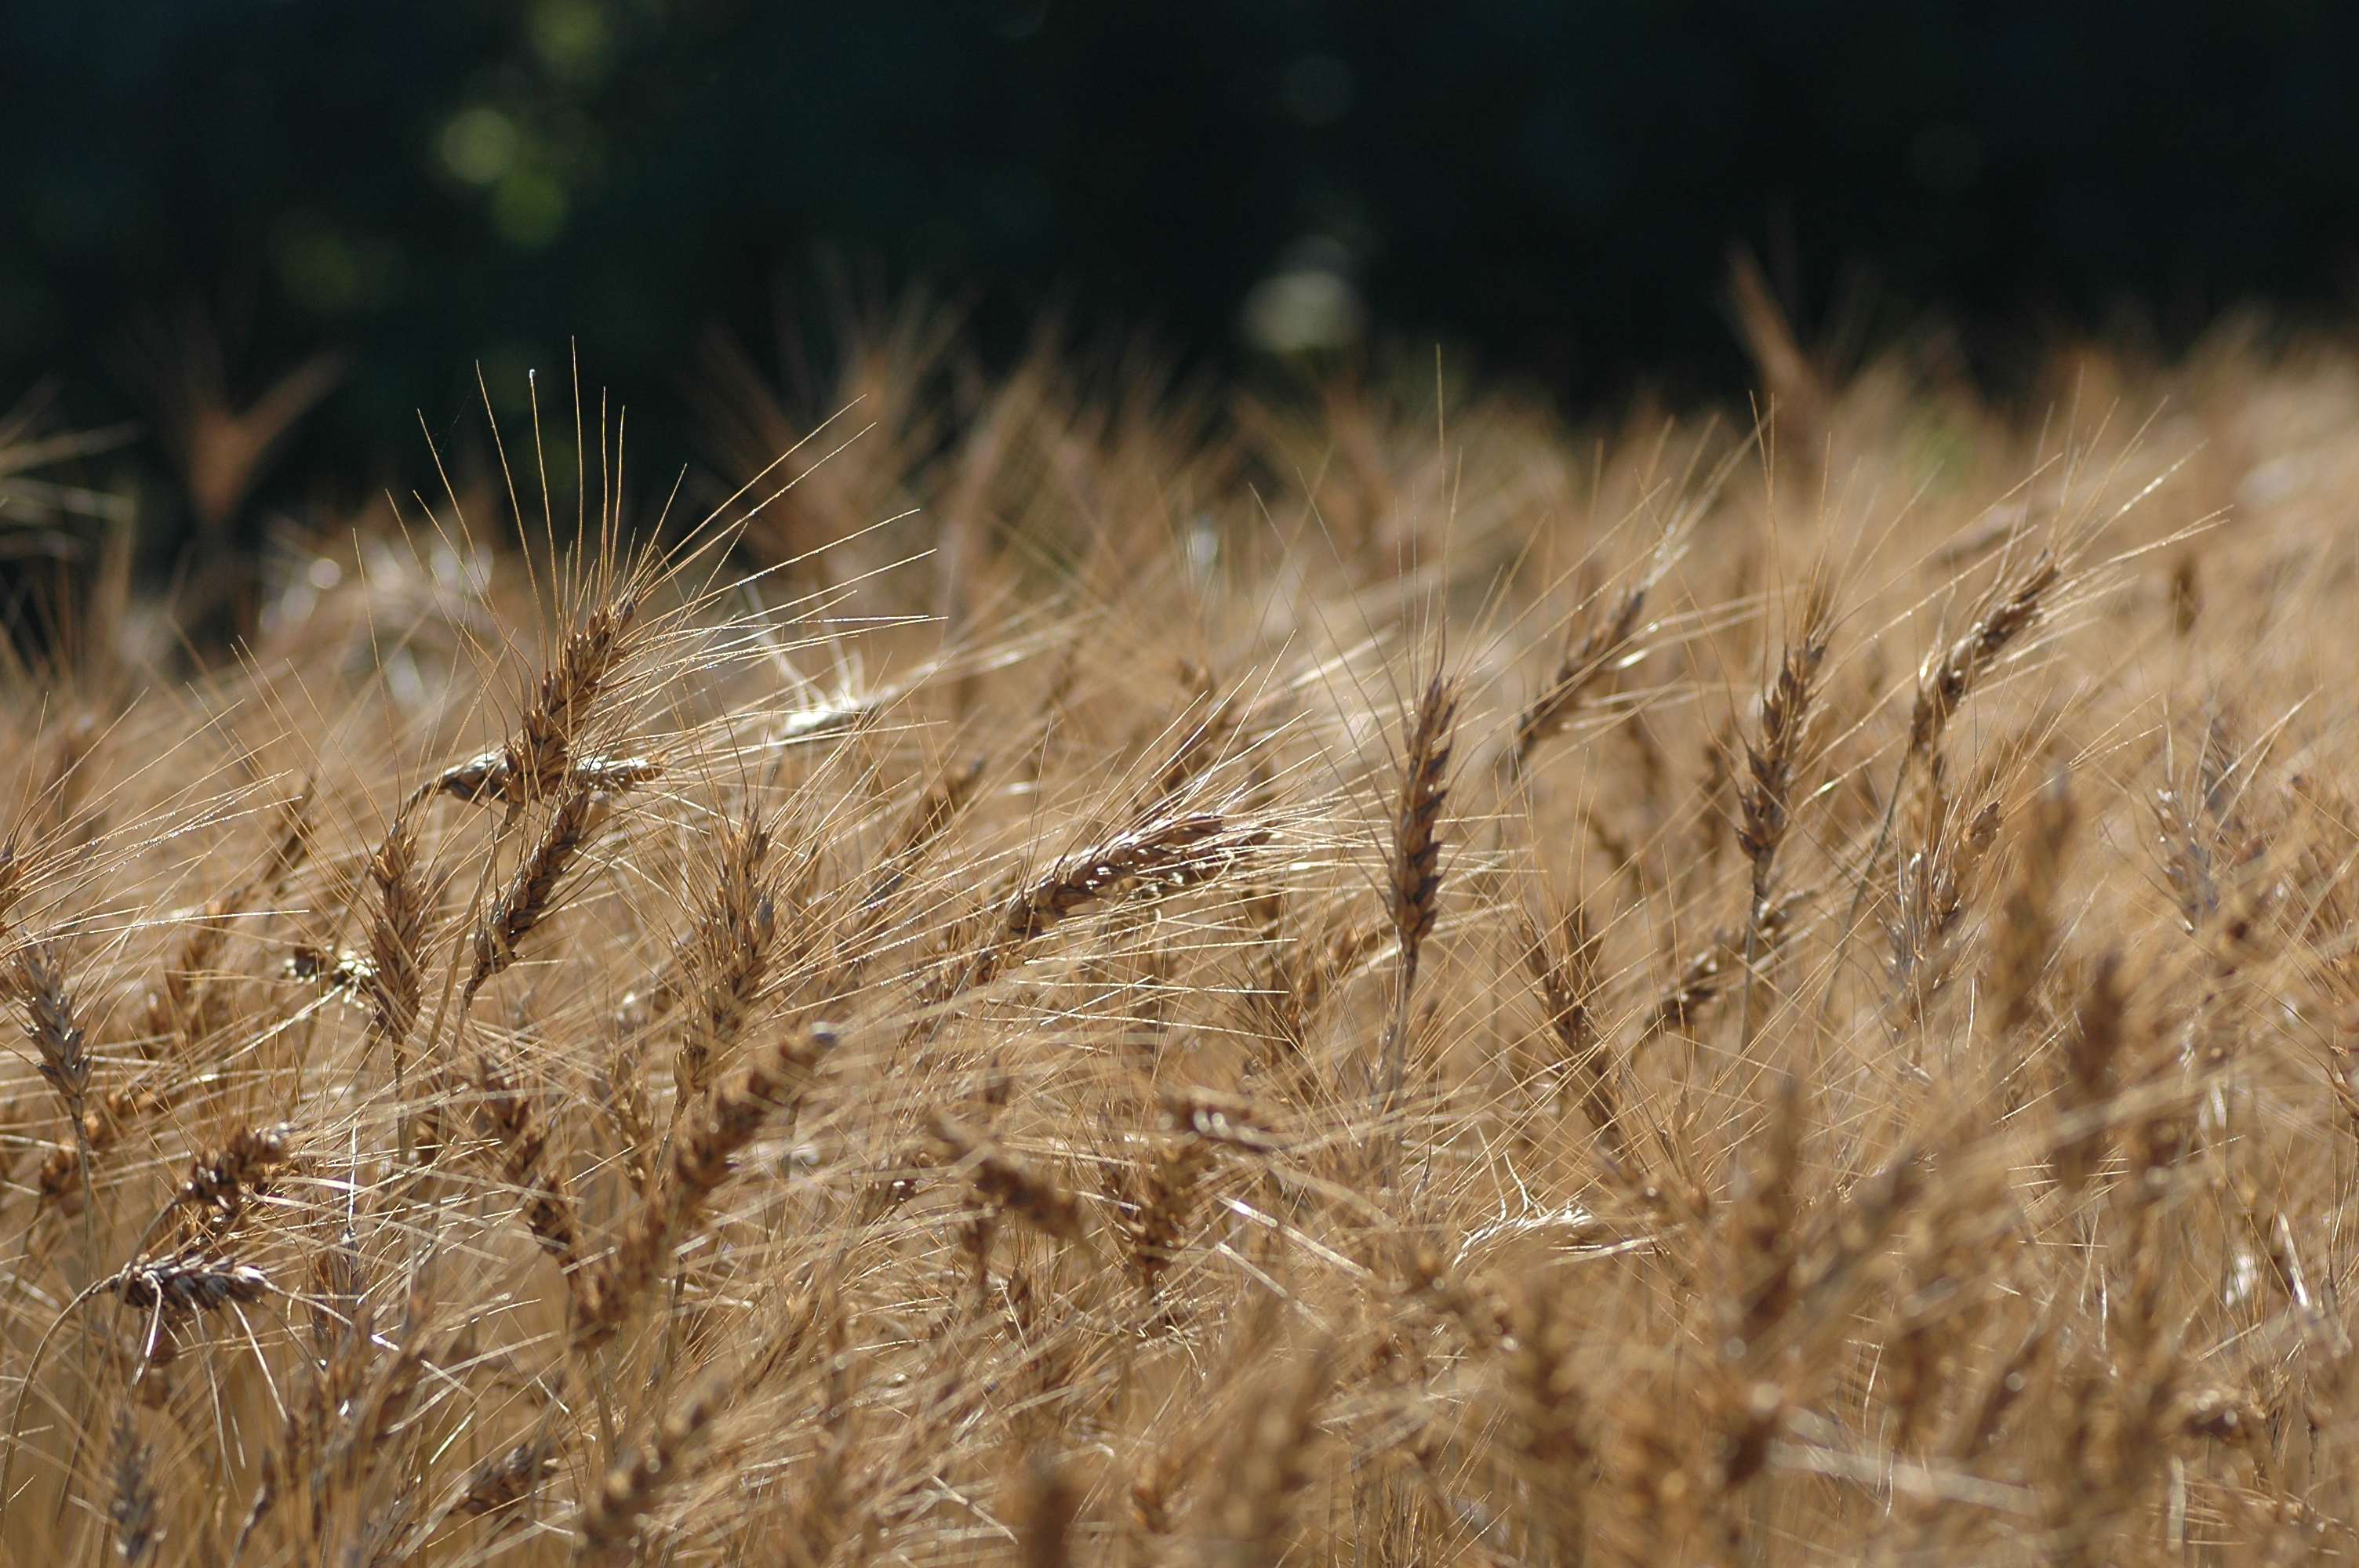
Depending on where you live, wheat takes roughly six to eight weeks to mature. This also varies with rainfall and heat levels in a particular season. You know your wheat is ripe when the kernels at the top of each stalk easily come off in your hand when you rub them. Ripe kernels are also hard when you chew them. Whatever you do, don’t leave your wheat crop standing too long.
Overripe grain will fall off the stalks and drop to the ground if you do, wasting your entire effort. All you’ll have is a crop of standing straw stalks. Even a strong wind or rain can knock the kernels off the stalks if you’ve left things too long. Be careful at this stage. Better to cut a bit of grain too soon, then wait to cut more later rather than lose all your grain because you waited a week too long.
TECH TIP: Sharpening a Scythe & Sickle

Watching someone cut grain by hand, you’d think that the blade of the scythe or sickle would have to be as sharp as a razor blade, but that’s not true. The resistance of the standing grain gives the blade something to push against, and this makes the stalks easier to cut near the ground than you might think. Sure, the blade has to be sharp, but not crazy-sharp. The traditional tool for sharpening a scythe is a sharpening stone lubed with either water or oil, but I prefer a medium file. The file works more quickly than any stone, and it doesn’t need lubrication. The biggest advantage of a file-sharpened scythe is effectiveness. The file leaves behind microscopic serrations on the edge, and if you work the file in the right direction, these can really improve the slicing action of the blade. Angle the direction of file strokes so they slope towards the tip of the scythe and the micro serrations will be pointing in the correct direction. Looked at through a microscope, the edge looks likes a kind of saw.
Watch the video up next to see how I use a file to sharpen a scythe.
VIDEO: How to Sharpen a Scythe with a File
Step#3: Separate the Wheat From the Chaff
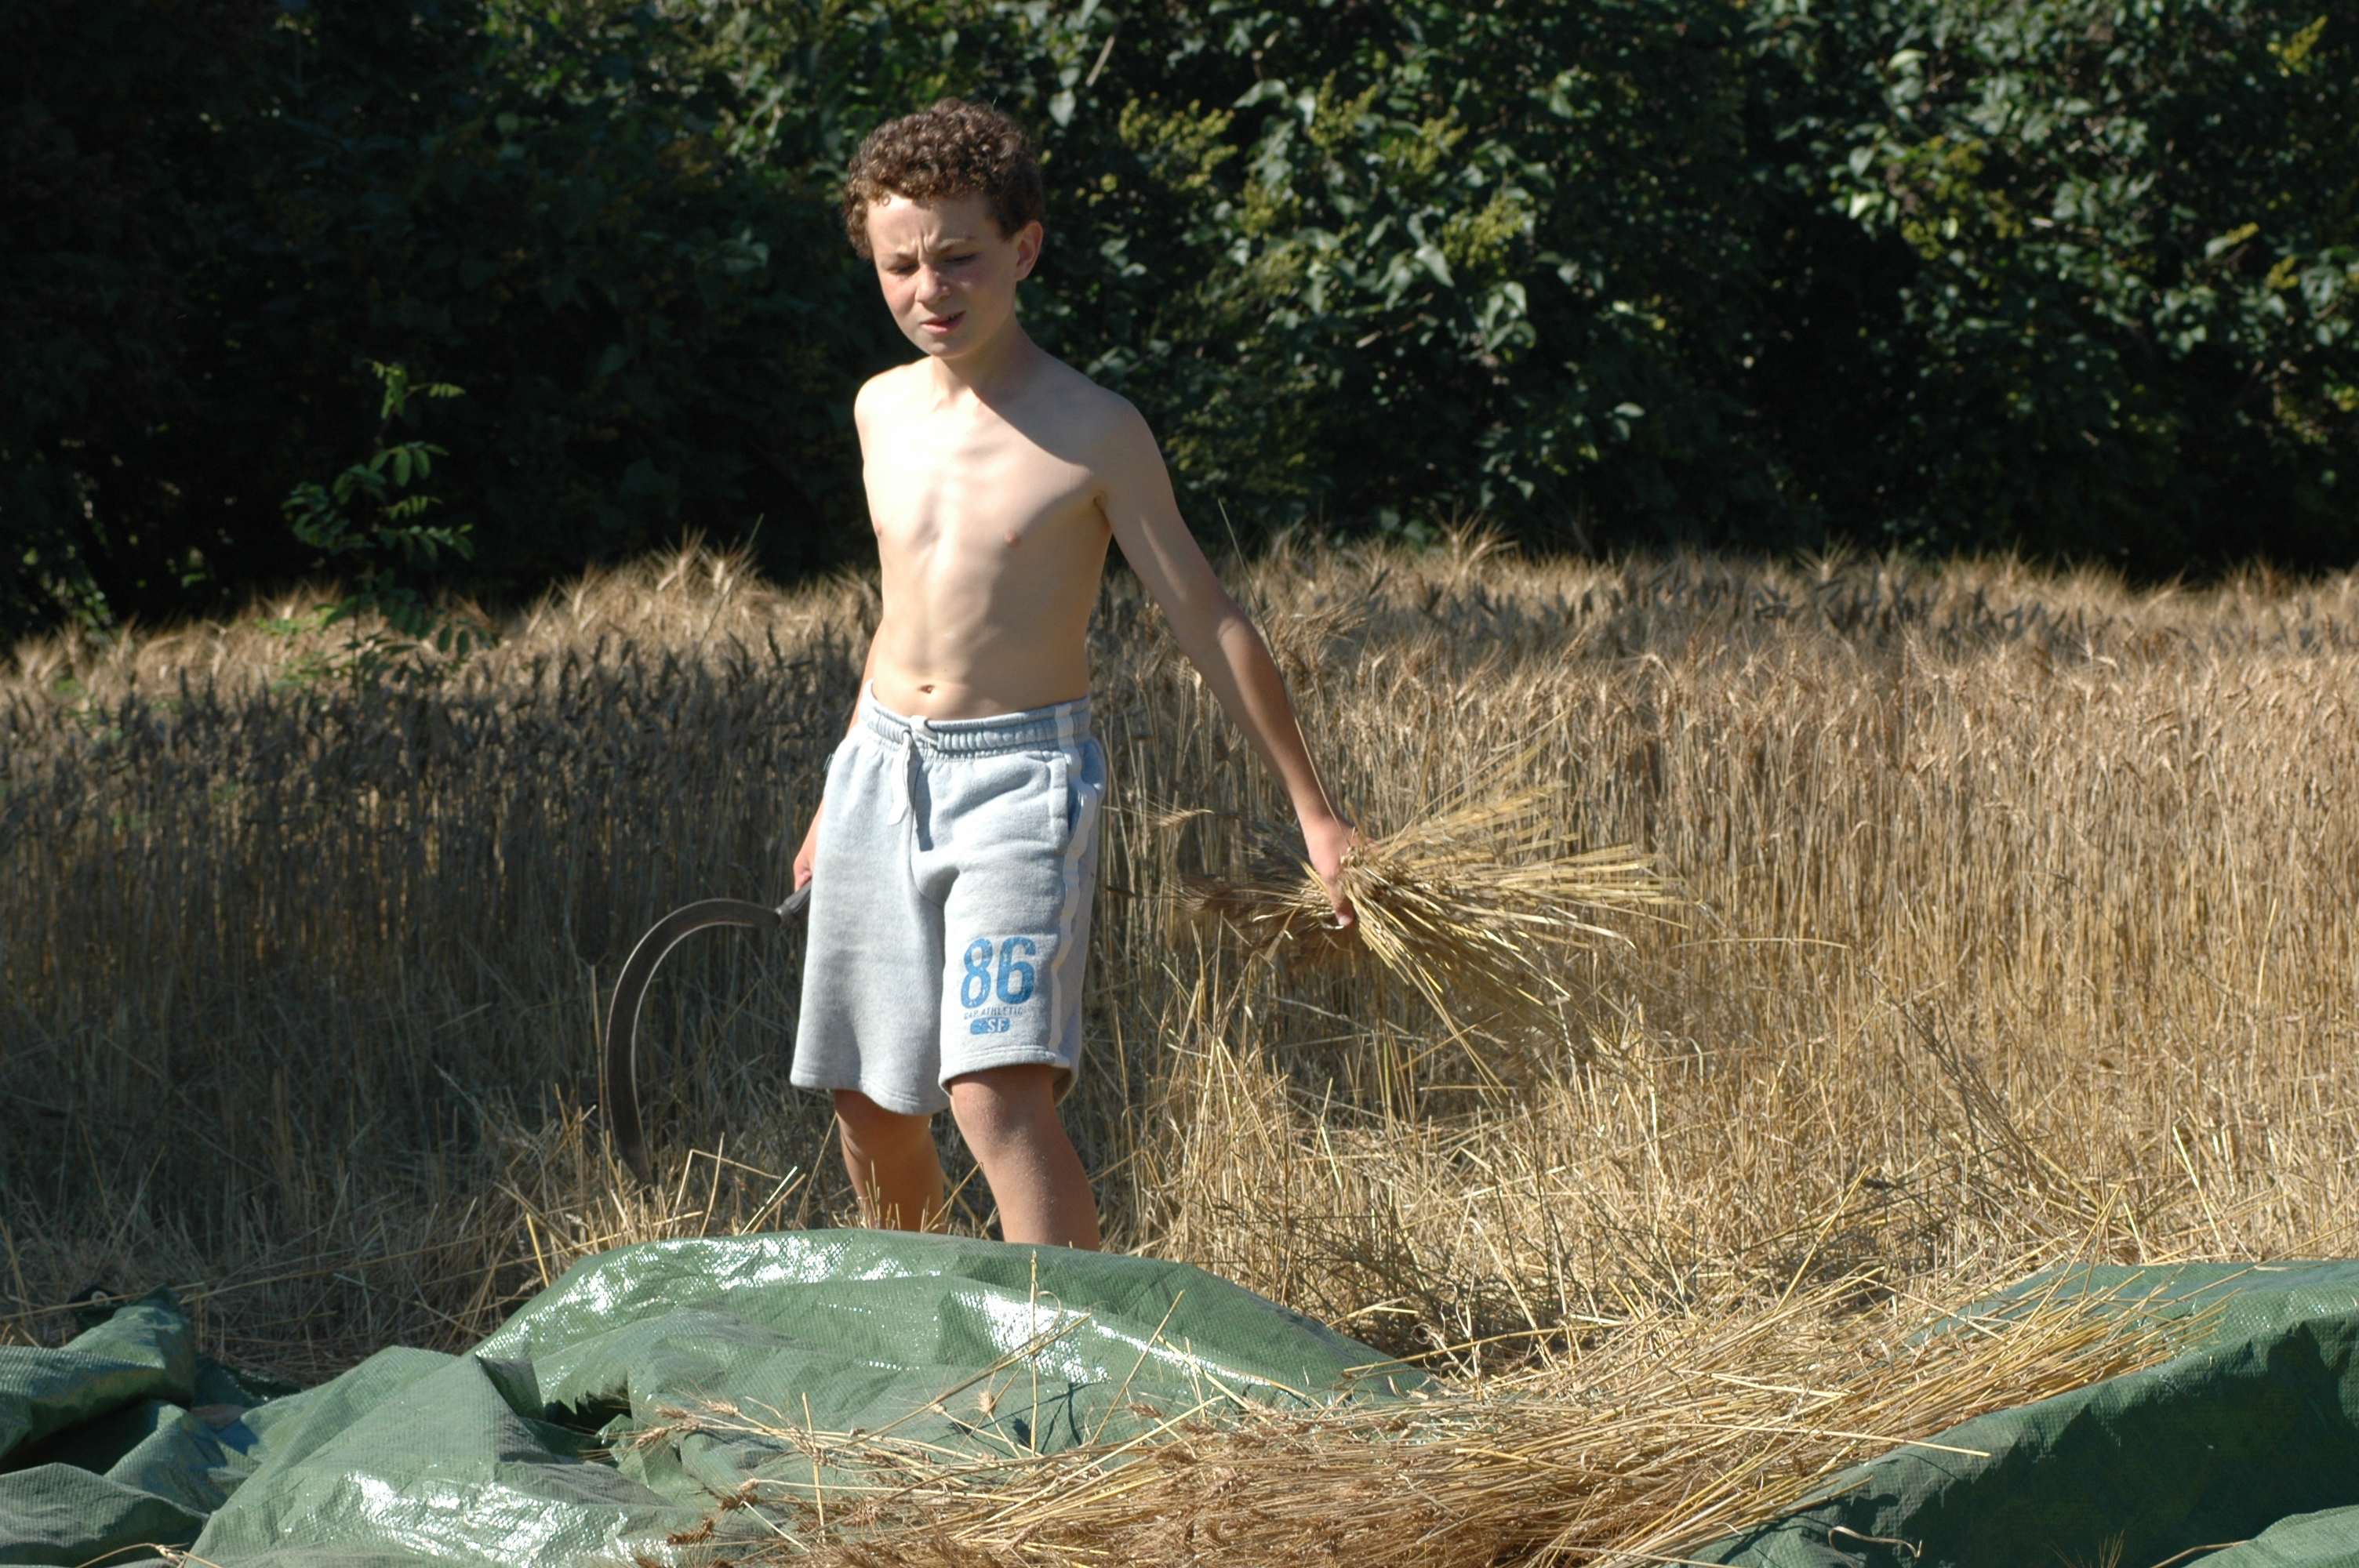
At this stage you’ll have piles of straw with grains attached on top. Your job now is to beat the grain from that straw and from the loose outer coverings (called “chaff”) that hold the grains in place. This job is called threshing (old timers sometimes call it “thrashing”), and it’s best done on a large tarp. Lay a 12”-thick layer of cut grain on the tarp, then grab a stick or a thick rope or a corn broom and hit the pile while you walk on it. Keep on walking and hitting until few wheat grains remain visible. The idea is to knock the grains free from the straw and chaff.
Everything from the grain crop is still going to be sitting on the tarp, but they should all be physically separated now. The straw will rise to the top and the wheat and chaff will settle down at the bottom of the pile right on top of the tarp. Gather the straw off the top with a pitch fork or your hands, and store it somewhere dry where you can use it for animal bedding or mulch. Collect the grain and chaff from the tarp and store it in a bucket or bag. You’re almost finished with the harvesting process at this stage, almost but not quite.

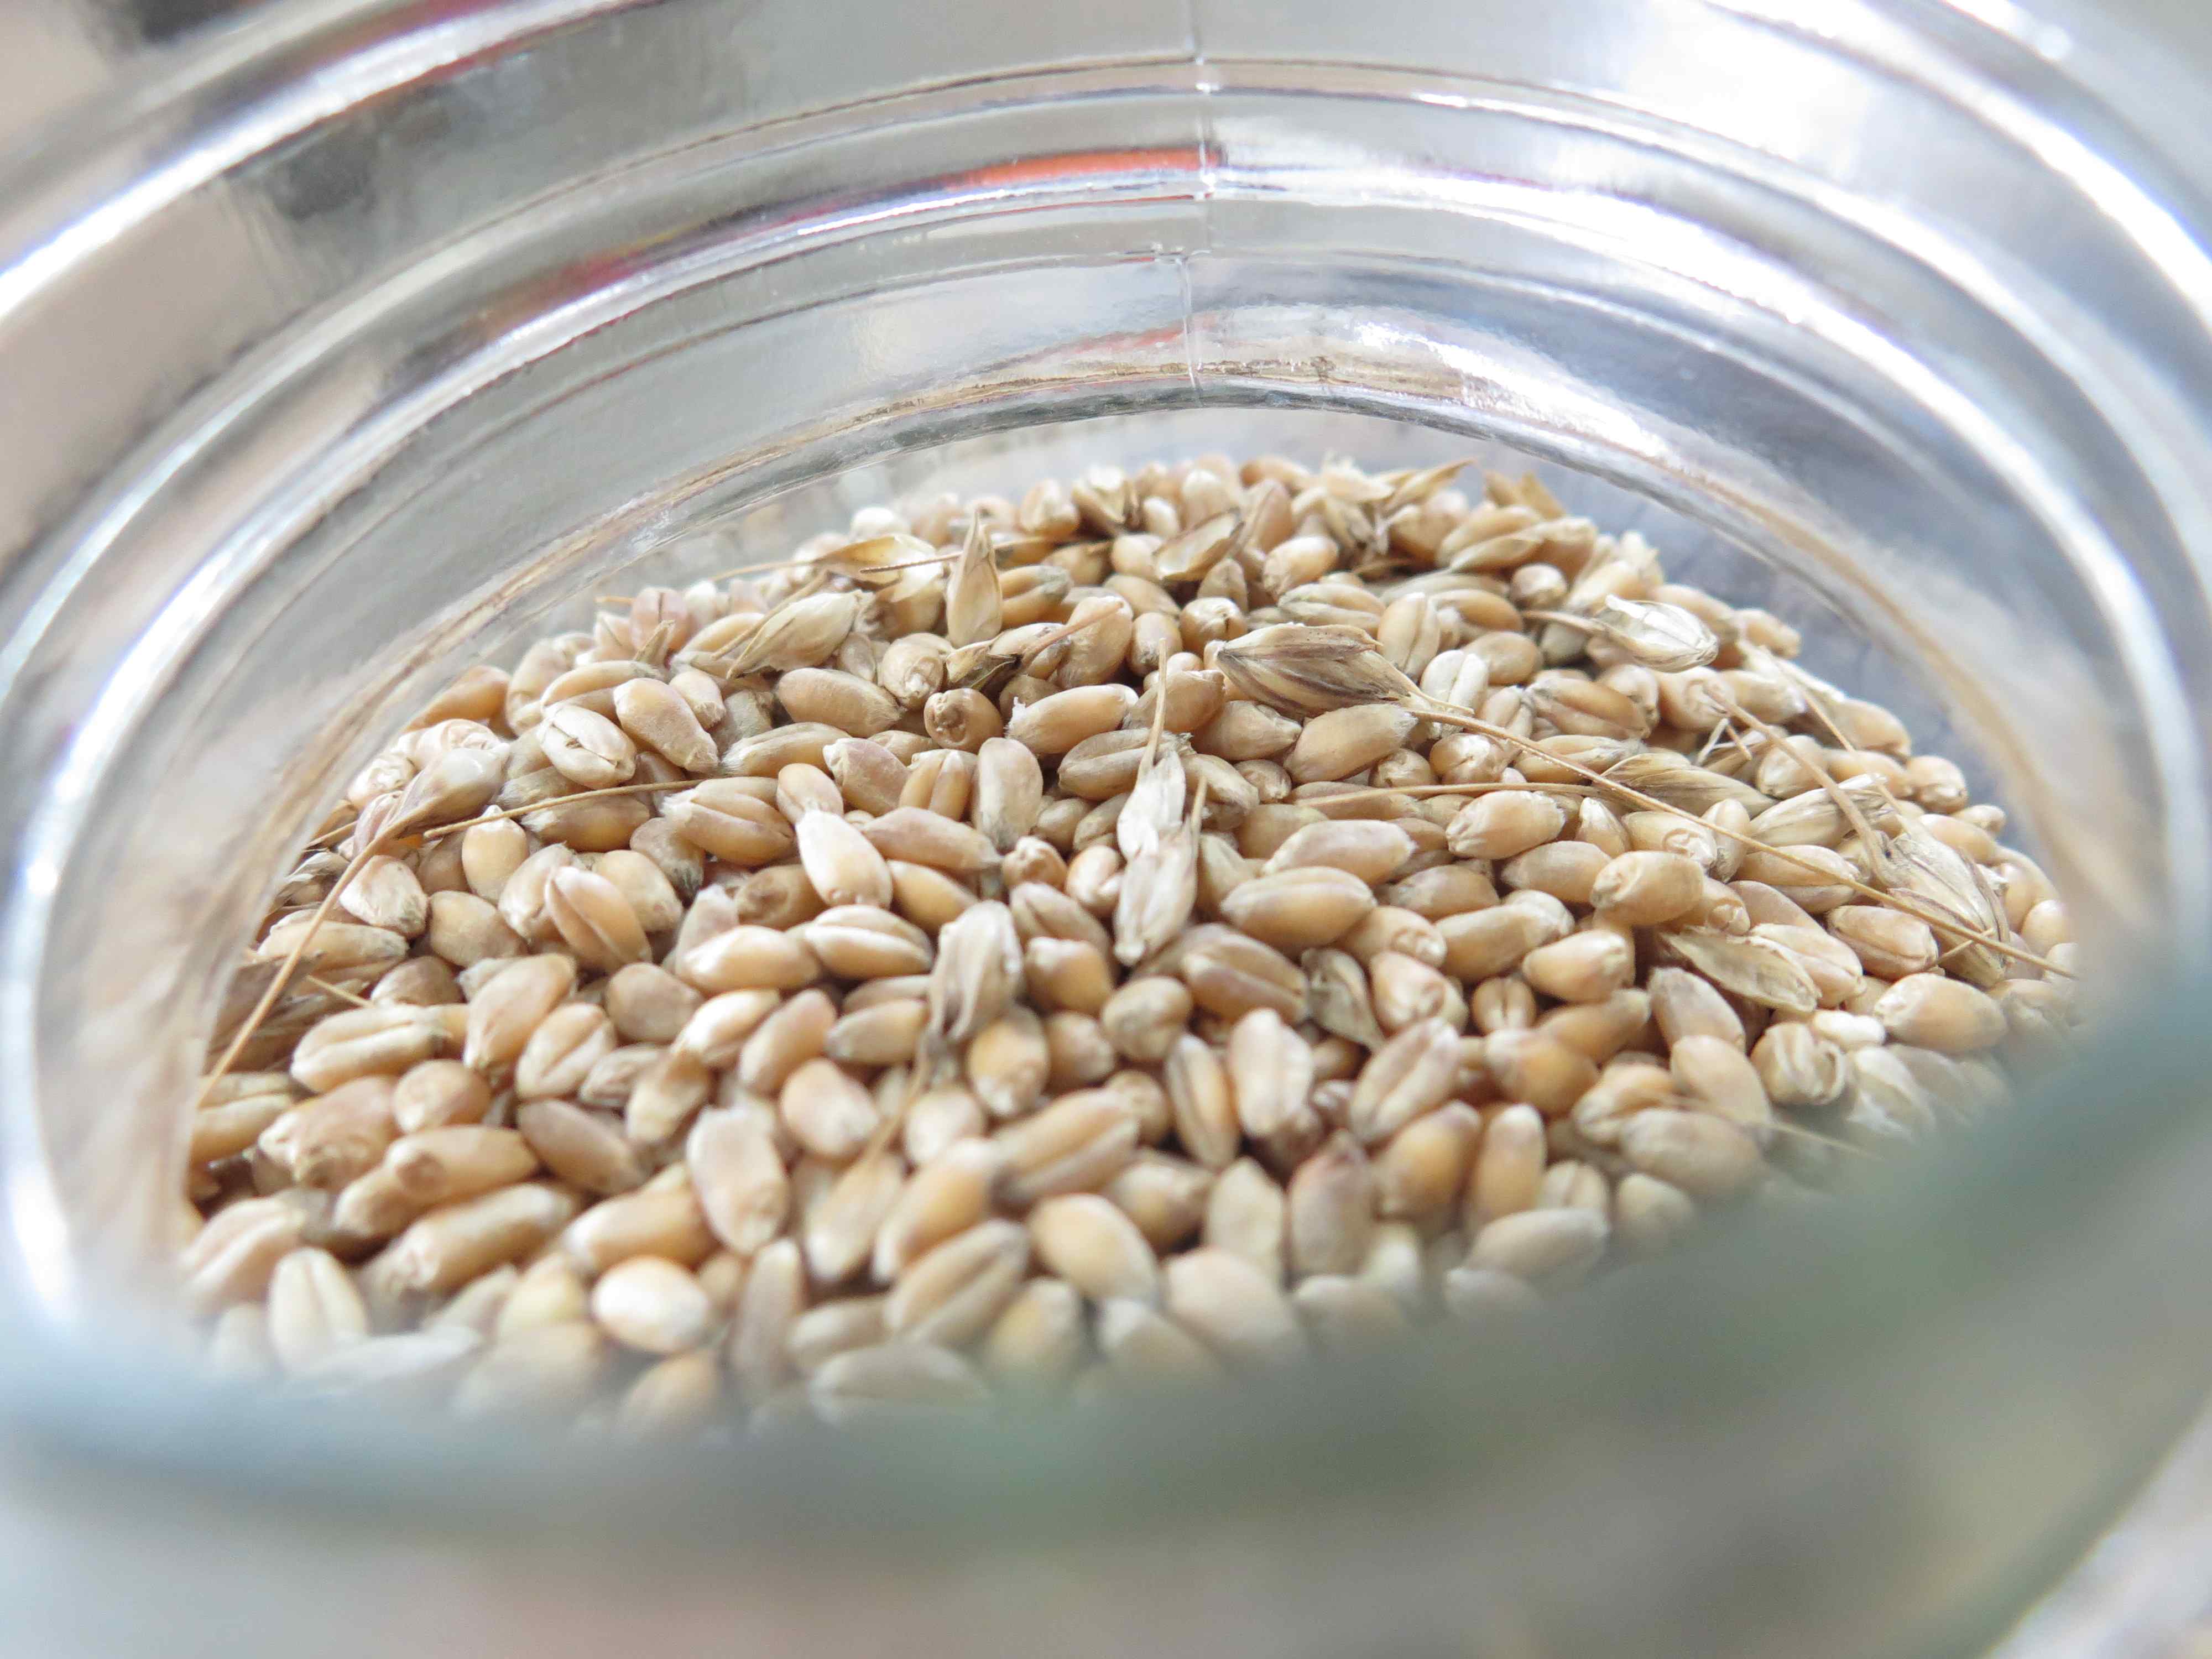
The last stage of separation is called winnowing, and it removes the hard, dry, heavy kernels of wheat from the light fluffy outer husks and bits of straw called chaff. You need a windy day for winnowing, but the process is simple. With a pile of chaff-filled wheat sitting on a tarp, use a shovel or scoop to gently throw it in the air while the wind is blowing. The wind moves the chaff and small bits of remaining straw away, while the heavier wheat grains fall back down onto the tarp again. Keep scooping and throwing, scooping and throwing until you’ve got nothing but clean wheat sitting on the tarp. You’ll never get your grain perfectly clean this way, but it will be 99% clean and ready for eating. If you’re anything like me, you’ll feel a huge sense of satisfaction as you look at your pile of clear, golden grain.
Step#4: Store the Clean Grain
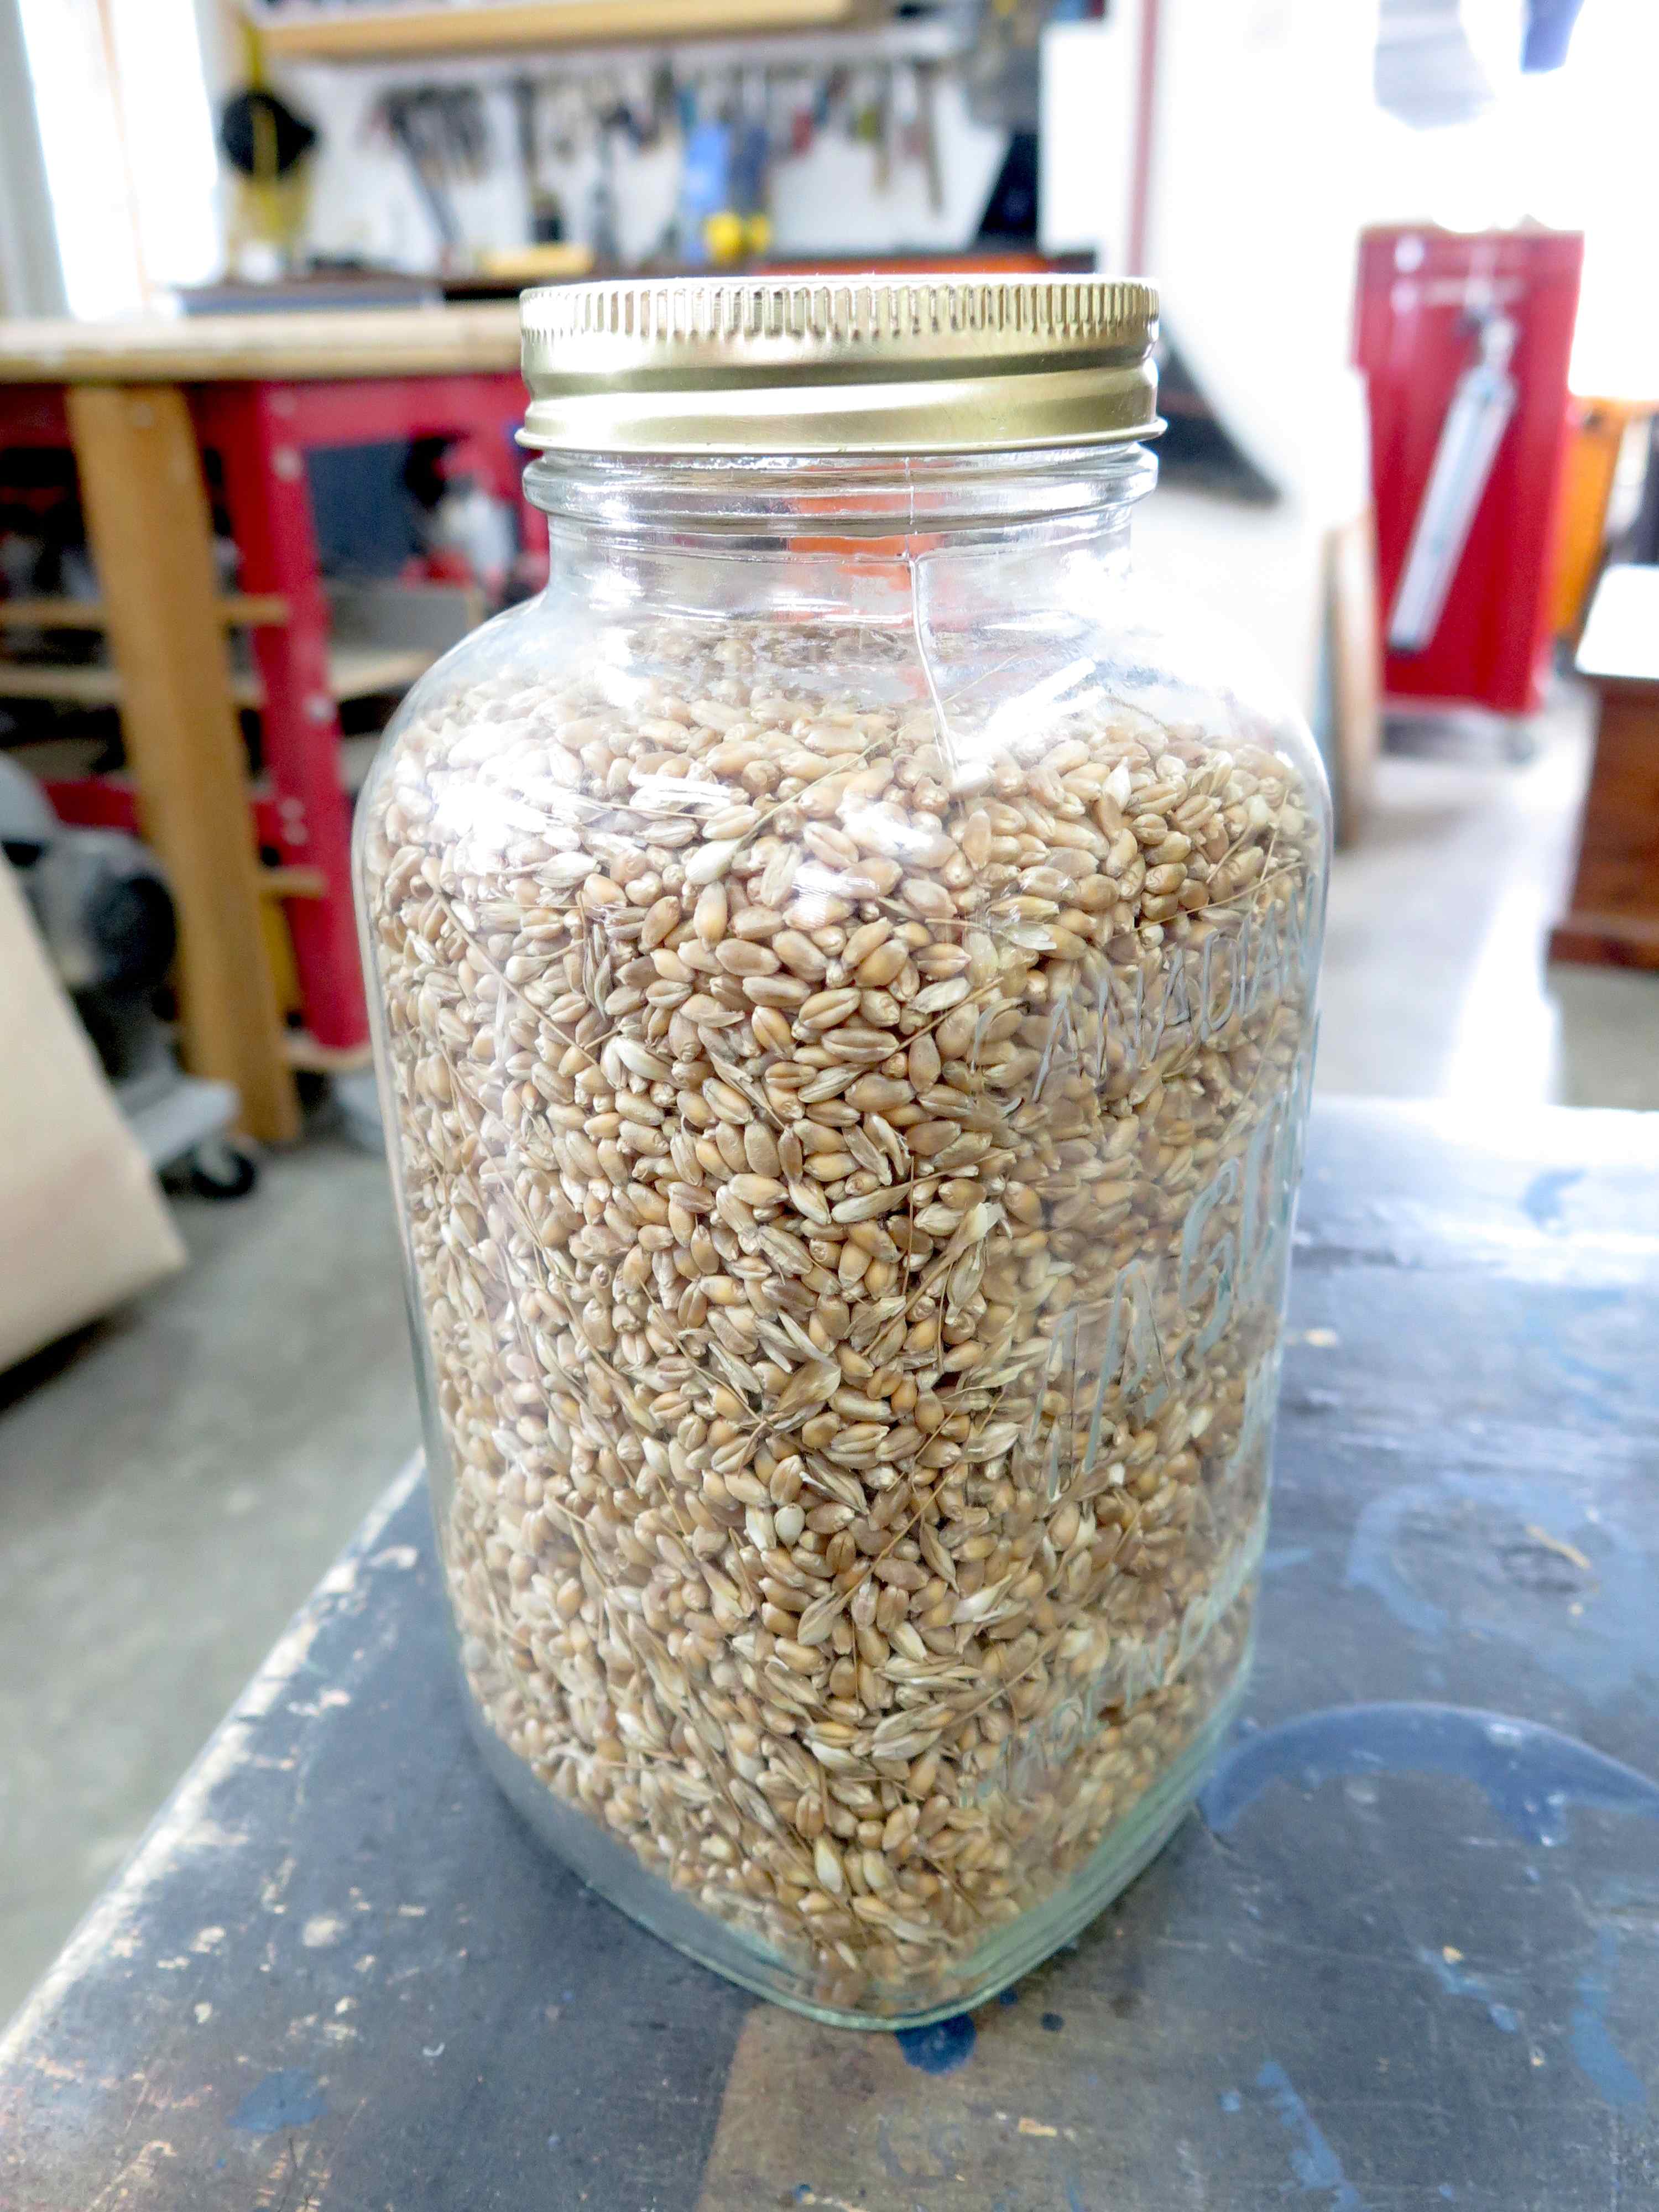
Ripe grain can be stored indefinitely as long as it’s kept dry. Large jars or resealable 5 gallon drinking water jugs make excellent grain storage containers. If you’ve got unused space in a freezer, grain can also be stored in definitely in a bag in the freezer.
One problem with storing grain outside the freezer in bags is rodents. Mice and rats love grain every bit as much as we do. Maybe more. A bag means nothing to them. They’ll chew right through. Even stored in a shed or outdoor building, mice will get to the grain while also fouling it with their droppings. All this is why some kind of sealed container is the best option for long-term storage of grain. Container storage works just as well with grain you buy as it does for grain you grow yourself. Notice how clean the wheat is in the photo. There are a few pieces of stray chaff (nothing to worry about), but you can get excellent results threshing and winnowing by hand.
Step#5: Prepare Your Grain for Eating
Most of us living in the developed world have no idea how to prepare and eat natural grain because we only ever see it in a processed form. But when it comes to eating your own grain, there are two main options. Both are quite simple. I touched on these earlier in the course, but I’ll go over them again here in more detail.
The easiest approach is to dry-roast your wheat. This means heating a dry frying pan (no oil) up to a moderate temperature on your stovetop. I use a cast iron frying pan for this at our place. Pour a single layer of grain kernels on the pan so it covers the whole surface of the pan, but no more. In a few minutes the grains will make small popping sounds and some kernels will spin around as they heat and cook. It’s kind of like popping corn, except without expansion of the kernels.
Roast one pan’s worth of grain like this for a few minutes (remember, just a single layer of kernels), stirring the entire batch constantly to expose fresh sides of each grain to the hot surface of the pan. You don’t want any one kernel to remain touching the hot pan for more than a few seconds. If this happens you’ll get a burned spot on that kernel.
When most of the kernels are slightly browner than they were when you began, the job is done. It takes 3 to 5 minutes of constant stirring in the pan for each batch. Dump the roasted wheat out onto a plate or cookie sheet to cool while you do another batch. Roasting grain like this makes it much easier to chew and improves the flavour. It’s one of my favourite snack foods. Cooling is really important, too. The last of the moisture rises from the kernels as they’re cooling. Whatever you do, give the kernels a few hours to cool before putting them in sealed jars.
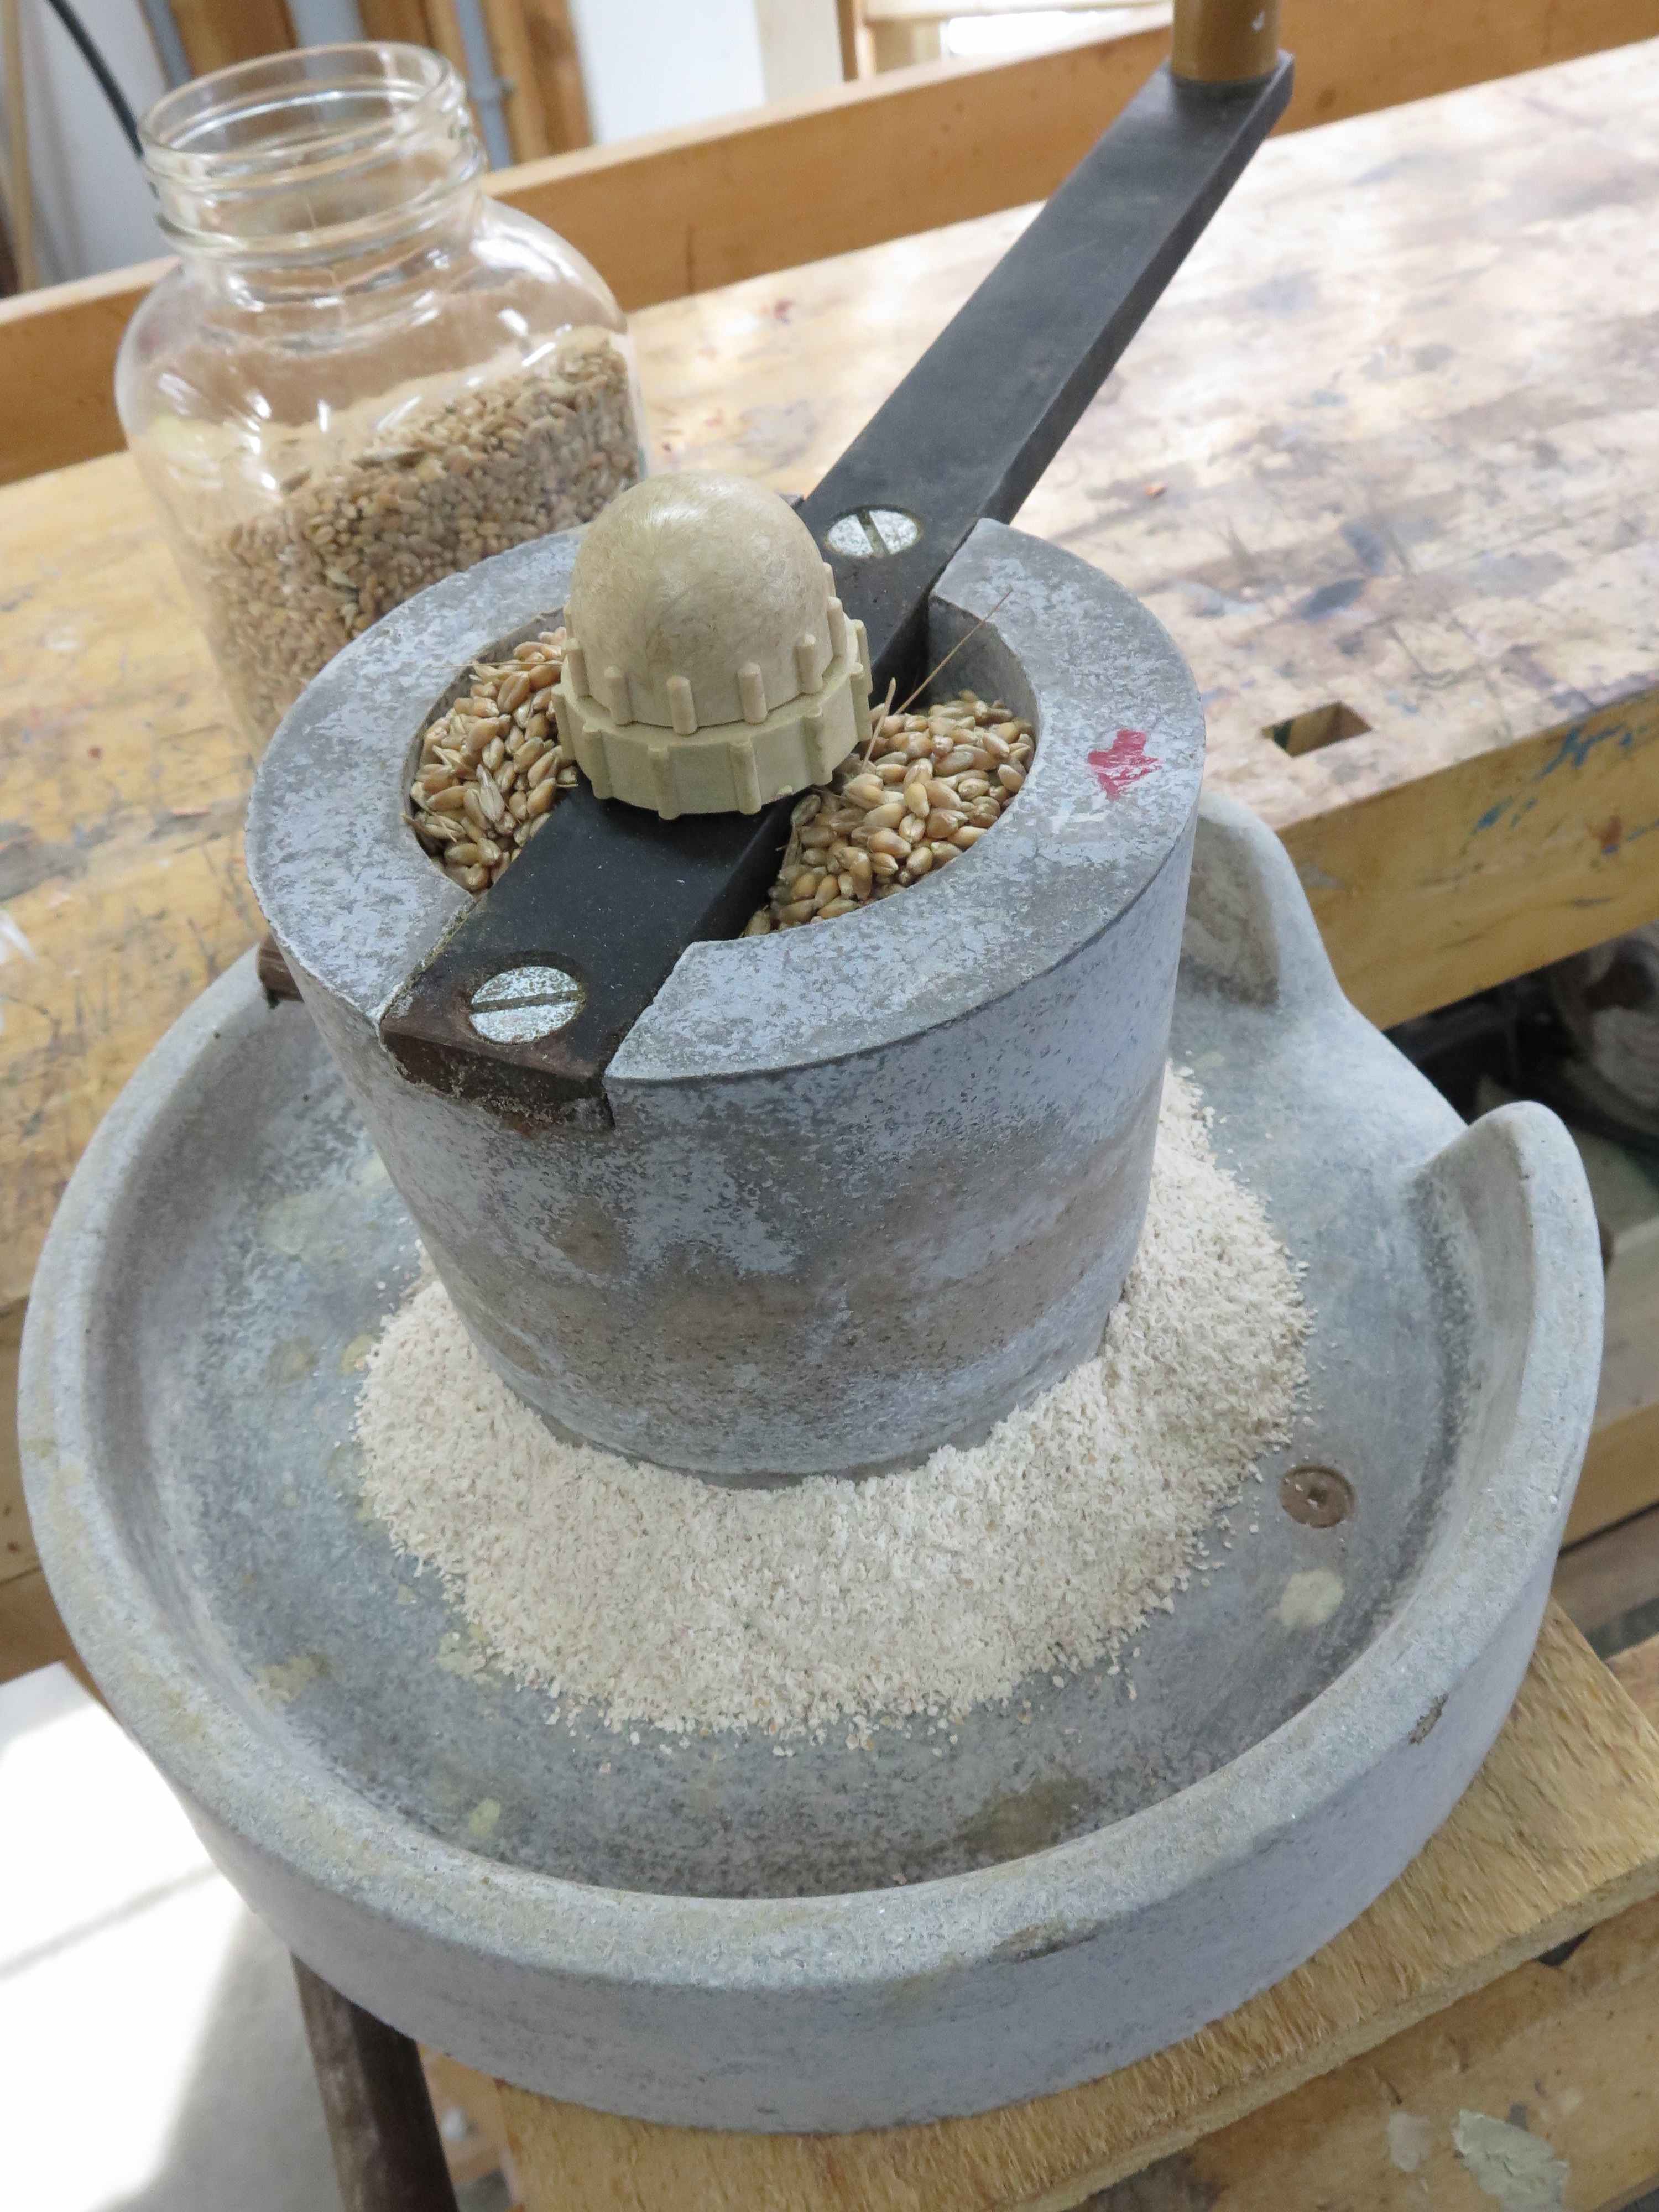
Grinding wheat into flour is another way you can use your hand-grown grain. I’ve used a number of wheat mills over the years, but I find the best by far is a large, simple hand operated, stone-grind model made by the French company SAMAP. I bought mine in 1982 and it still works great. It’s still manufactured and sold today. Just Google “SAMAP Hand Mill Model V” to find retailers.
The nice thing about this model is that it works with two hands. This lets most of your whole body get into the grinding process, yielding faster results than with a simple single-hand crank model. Rather than using the two screw clamps that came on the bottom of this mill, I bolted a wooden base that allows me to anchor the mill in my woodworking bench vise. It’s much more solid than clamping to a kitchen counter or table. The Model V is nice because it adjusts to grind all sizes of small grain, including buckwheat, rice and oats. You can also find many electric grain mills on the market. They work faster, but they rely on energy and have more parts to break than my hand mill. Also, hand grinding never overheats the flour, so you get maximum nutrients and optimal quality.
TRUE FACT: Whole Wheat – Not What You Think
Almost everyone believes that “whole wheat” flour that you buy in the store has everything you get by grinding whole kernels of wheat, but that’s not true. Commercially available whole wheat flour (and by extension all baked goods sold as “whole wheat”) actually have one big thing missing. Most of the wheat germ is gone. The germ is the living part of the wheat kernel, and it’s the thing that grows when wheat germinates. The problem is, each wheat germ also contains a little bit of oil that goes rancid in storage. To keep commercial whole wheat more stable in storage, most of the germ is removed. Wheat you grind yourself, by contrast, really is whole wheat. Grind only what you need that day and you’ll enjoy a healthy wheat experience that’s almost impossible to get with store-bought “whole wheat” that’s not quite whole. You’ll see exactly what I mean when you grind your first batch of wheat into flour. It will be excellent.