If you’re a purist, and want to build the kind of authentic stone foundation piers we did, then the easiest way involves a technique called slip forming. The process begins with plywood forms made from 5/8” plywood assembled into square or rectangular tubes using #8 x 1 1/2” deck screws driven every 6 inches along each corner. Foundation forms for the corners of this cabin measure 18 inches x 18 inches (inside dimensions), with the porch piers measuring 18 inches x 24 inches. Take a look at the plans for more details.
Why piers so large? Two reasons. The reality of traditional stonework is that it’s always easier to build big than it is to build small. Larger piers also appear more visually pleasing and proportional under the overall cabin. In fact, if we were building again, I’d probably go larger than we did with the piers – perhaps 24 x 24 inches for corner piers and 24” x 36” for the porch piers. Regardless of your exact foundation pier size, there’s no need for separate footings if you’re building with stone. The footprint of these traditional pillars is large enough that they gain lots of support from the soil. Just to be sure this is true in your location, discuss your plans with the building inspector. Explain what you plan to do, then get an answer to a simple question: “Is the footprint area of the pier enough to support the cabin on the soil conditions where you’re building. In our case we didn’t need to worry about that because bedrock was just a foot or so below ground level.
Three Steps to Building Stone Piers
1. Dig down far enough to create poured concrete footings below frost level in your area or go down to bedrock, whichever comes first.
2. Build plywood forms somewhat taller than needed to extend from the bottom of your pier holes to the top of where you want the piers to end at the cabin floor frame. The extra height is so you can trim the tops all to exactly the same height later.
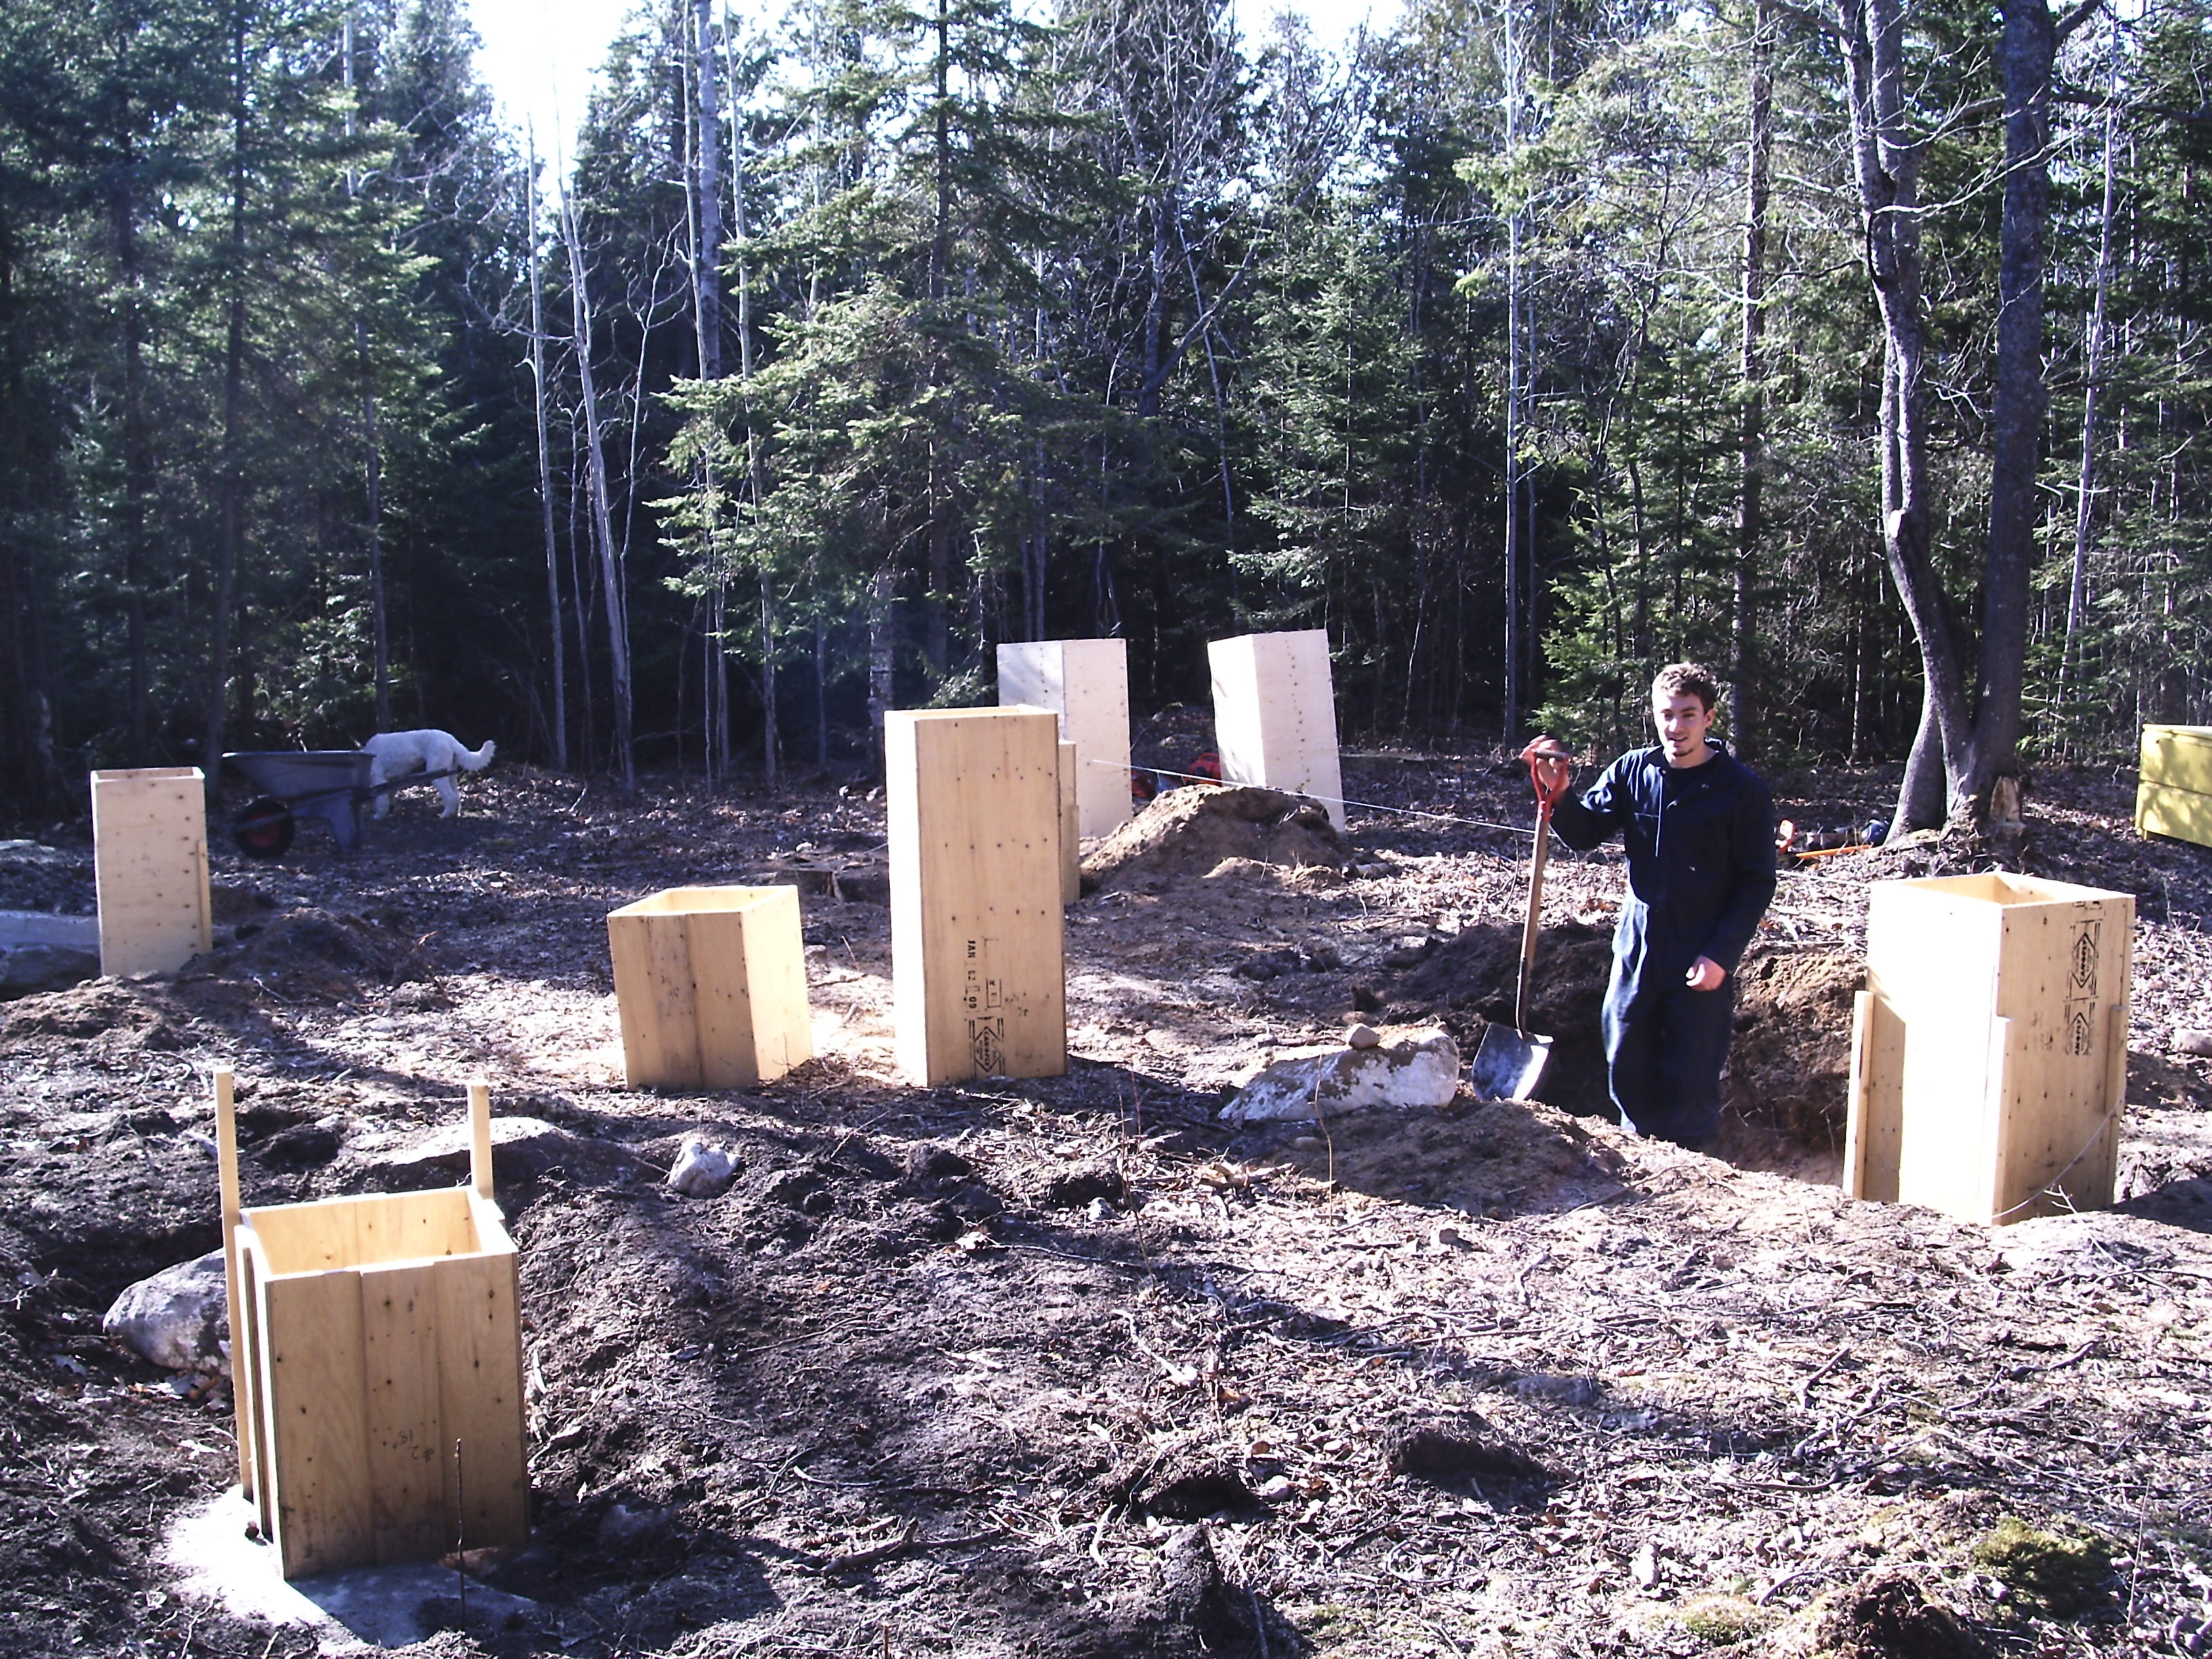
3. Place the forms in position. If necessary, use angled 2×4 braces screwed to the outside to hold them solid, straight up and down, and in alignment with each other. This is trickier than it sounds. Use strings to guide form placement as you’re aligning and securing them. Review and follow the approach in the Geometry is Useful video as you position the forms in final position. As you do, focus on the outer corners. These denote the outer corners of the cabin and it’s here where precision is required.
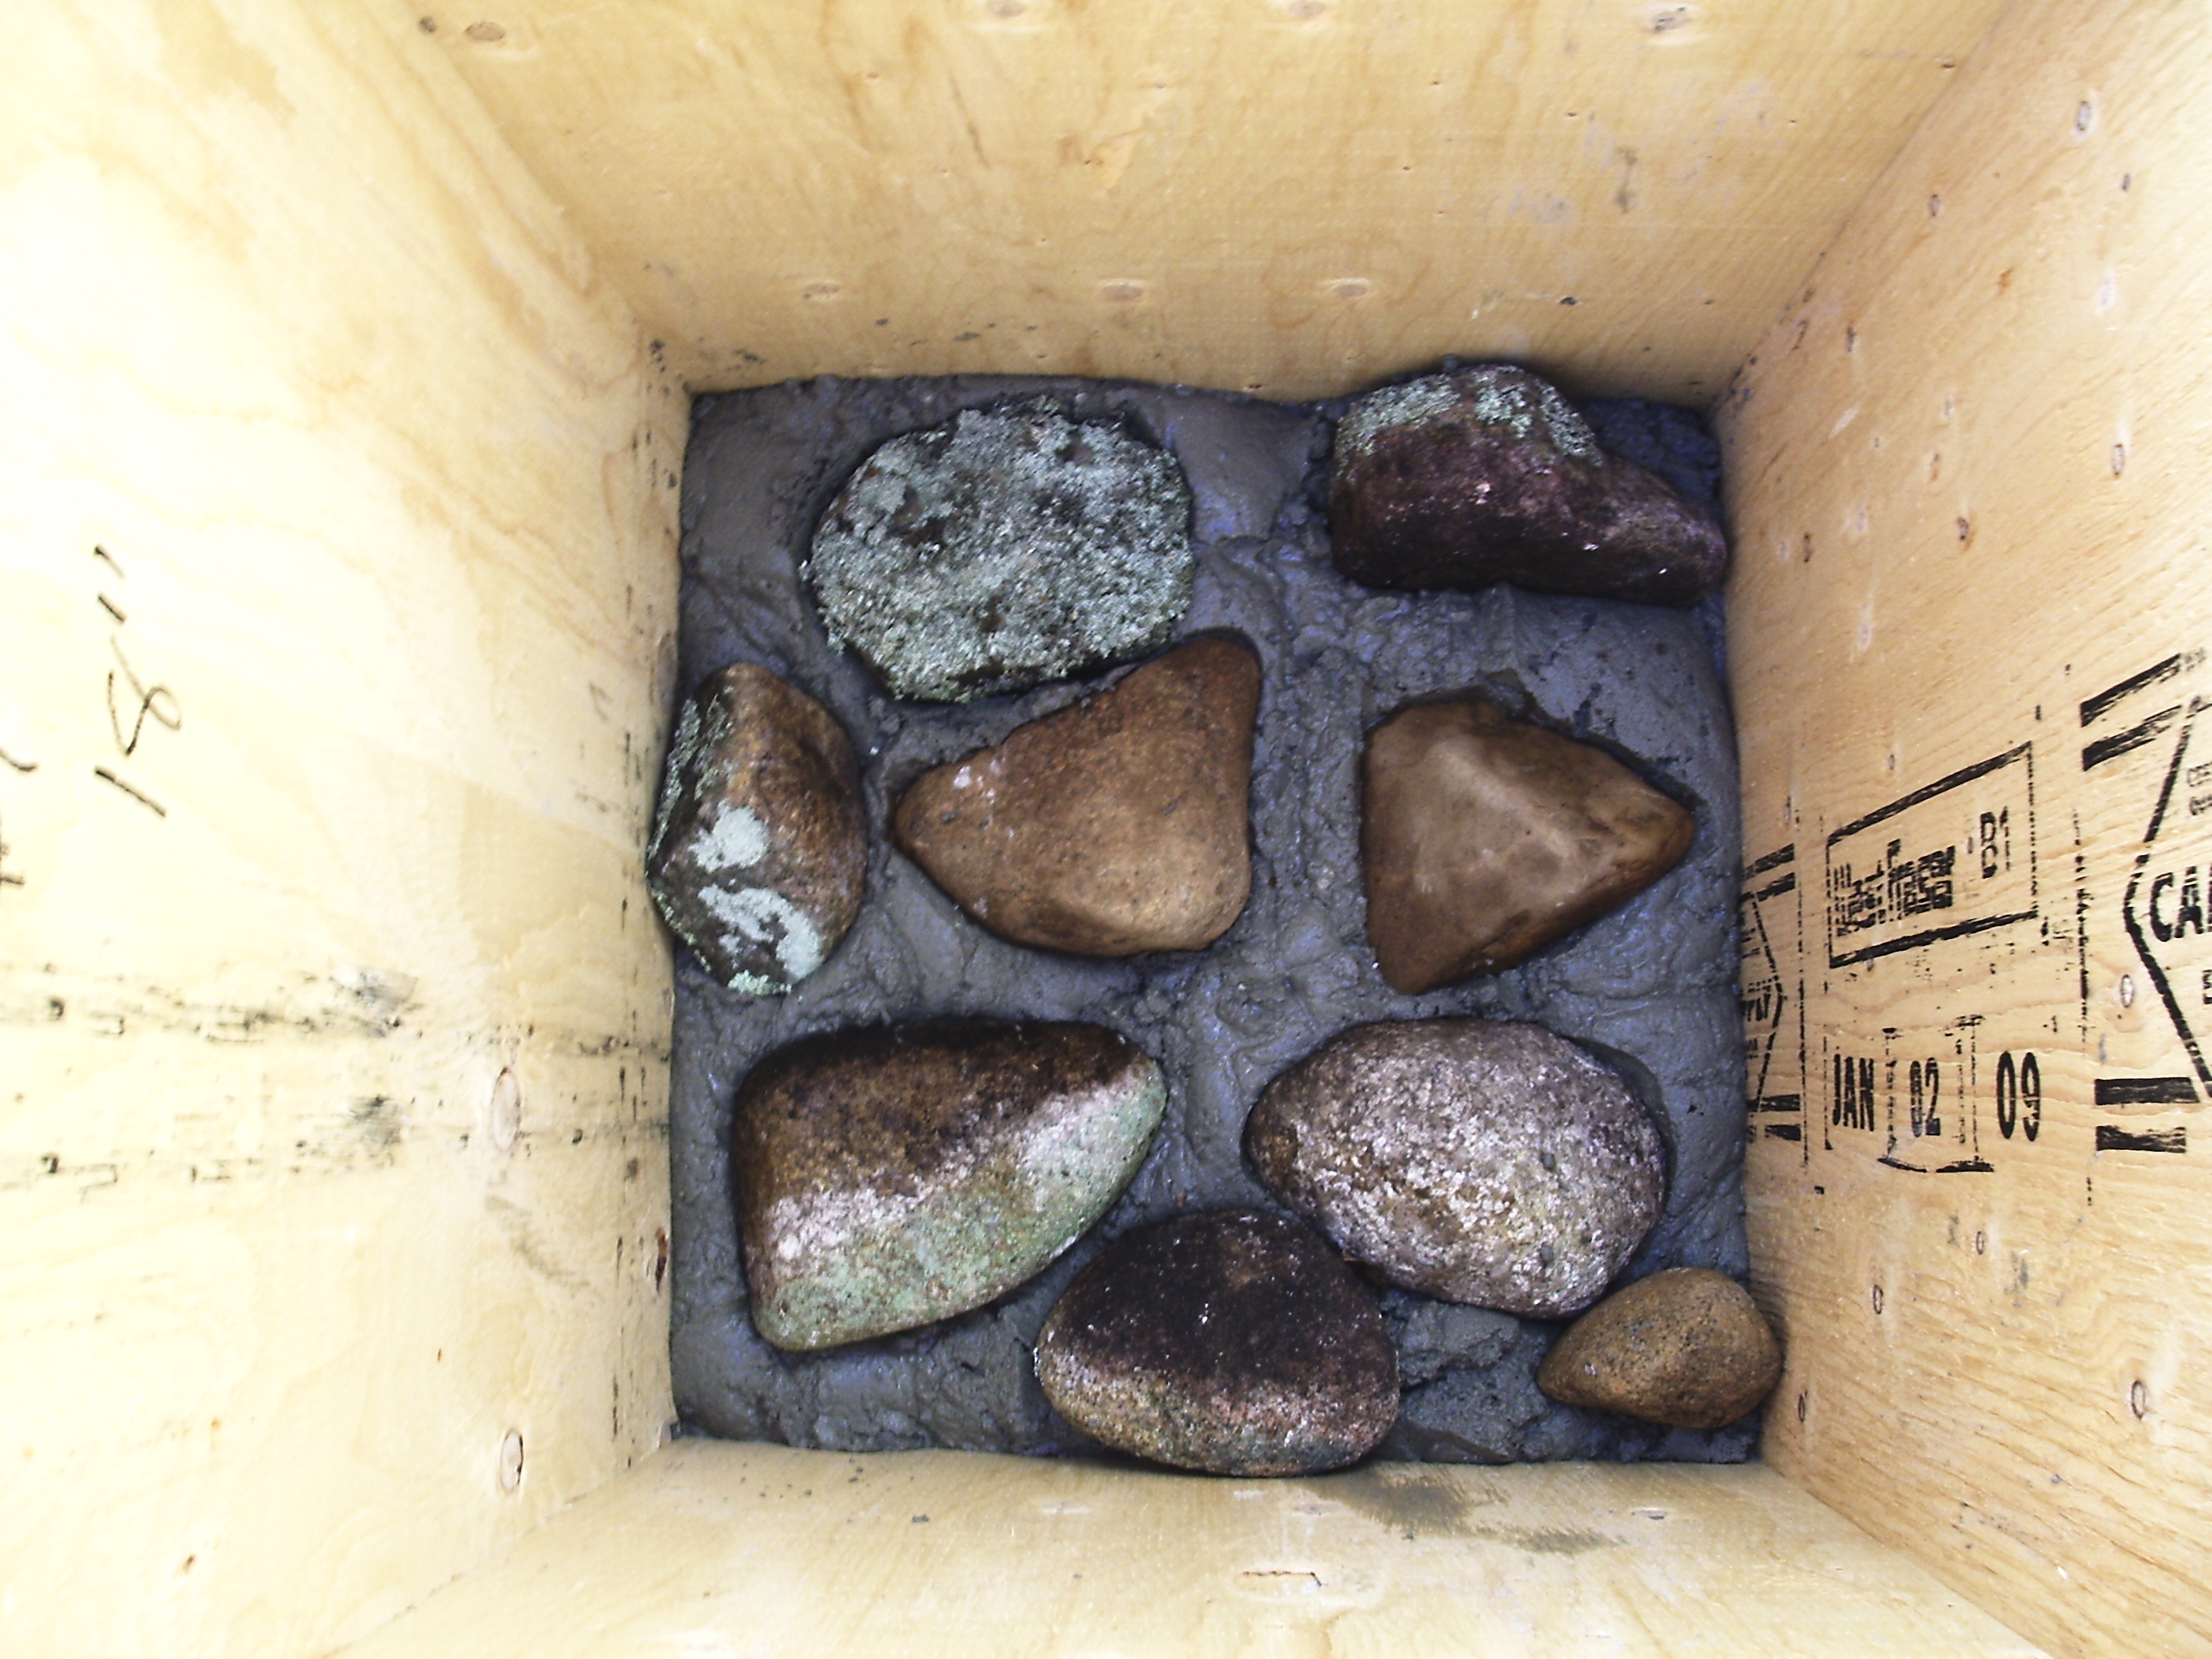
4. Fill the forms up to ground level with concrete and random stones, then let things harden. Later on you’ll be adding the visible stones on top of this, but this below-ground stuff doesn’t need to look great. It just needs to be strong.
Simply fill the forms with strong concrete and rocks to bring the level up to the surrounding ground. Besides getting you up to ground level for the visible stone work later, pre-pouring concrete like this locks each form into position firmly. Just be sure to have the forms located correctly before you pour, then check for location and plumb immediately after the concrete and random rocks go in. Let the concrete harden before you start fitting the actual foundation stones into the plywood forms. You want everything very solid before moving on to that.
VIDEO: Leveling Plywood Foundation Forms
5. Use a laser level or water level to mark a level reference line all around the perimeter of each plywood pillar form. This is the height where your foundation beams will rest, so all marks must be in exactly the same level plane. Use a spirit level to extend level lines all around the perimeter of each plywood form, then cut the plywood to this exact height using a circular saw. Be careful, since consistent pillar height determines the levelness of your foundation.
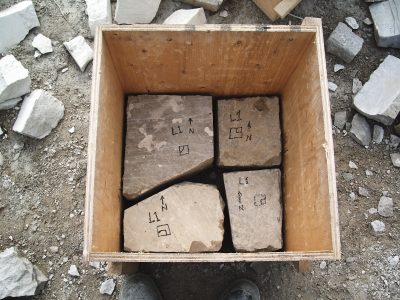
6. Shape stones to fit into the forms, one layer at at time. Each layer is typically made of 3 or 4 stones.
7. Dry-fit the first layer of stones into one form, then if all looks good pull the stones out and reset them with stiff mortar underneath. The aim is to create a solid bed of mortar, with minimal squeeze out reaching the edges of the stones. Mortar should be as stiff as peanut butter as you use it, and placed no closer to the edges of stones than 1 1/2”. You’ll add more mortar later as pointing, applied to the visible spaces between stones after the plywood comes off.

8. Repeat the process for the first layer of stone on all the pier forms, then continue by adding additional layers of stone until you reach the top of the forms.
9. Remove the screws holding the form part together, then use a reciprocating saw or old saw chain on a chainsaw to cut the plywood just below ground level. Peel the plywood off, revealing your stone pillars.
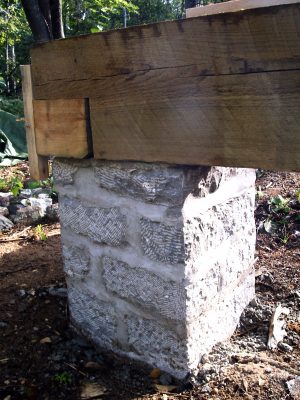
10. Use a hammer and chisel to remove any mortar that oozed closer than 1” to the edge of the stone, making room for the pointing mortar you’ll add next.
11. Use a trowel and 3/4-inch-wide slicker to force mortar into the open joints, completing your pillars. Fill each joint full, then smooth off the soft mortar so it’s flush with the face of the stones.
Concrete and Mortar Recipe
A small, electric drum-style cement mixer is an ideal tool for mixing the concrete and mortar you need for foundation pillars. You can certainly do this mixing by hand in a wheelbarrow, too. The concrete recipe I use for below-grade work is 1 part Portland cement, 2 parts sand and 3 or 4 parts crushed stone. The recipe for mortar is different in that it doesn’t contain crushed stone, just sand and cement.
I’ve laid hundreds of tons of stonework over the last 25 years, and I’ve always used the same recipe for successful mortar: 1 part Portland cement, 1 part masonry cement and 6 parts sand.

Start with a gallon or so of water in your mixer drum, then add 1 shovel full of Portland, followed by 3 shovels of sand. Add more water if this mix isn’t soupy, followed by 1 shovel of masonry cement and 3 more shovels of sand. Depending on the size of your mixer drum and the moisture content of your sand, add more cement, sand and water as needed to create a butter mix. You’ll get best results if you raise one side of the mixer with wooden blocks, so the drum is almost horizontal when it’s in the mixing position. This causes the mortar to flop around more in the drum, creating a more thorough mix. Propping the mixer up on an angle is only necessary when mixing mortar. The crushed stone component in concrete makes it flop properly without help.
Don’t want to bother with stone piers? I can understand why. They’re more work than modern options, and not everyone values the look of natural stonework like I do. In regions where frost isn’t an issue, site-poured, 6”-thick x 24” x 24” shallow-depth concrete pads work just fine as a footing for more conventional masonry piers. If this is similar to the approach they use on new houses in your area, then it’s okay for use under your cabin. Cold climates, on the other hand, are an entirely different matter. You’ll need to create footings below the deepest point that frost penetrates the soil. Check with your building inspector for specifics.
One of the simplest, non-stone cabin foundations you can choose is easily created with minimal tools and time. Concrete blocks don’t look all that great, but they do work as well as stone piers. Fill the hollow center of each set of blocks with concrete after they’ve gone up and let it harden before building the floor frame on. The result is just as strong as a stone foundation, it’s just faster, easier and less good looking.

Concrete piers poured into 12” diameter cardboard form tubes offer another foundation option, though it’s my least favourite. They may be strong enough if placed on foundation pads of the right size, but round piers either look too thin and spindly visually, or they look too modern if they’re larger. If you go ahead with cardboard form tubes and are disappointed, don’t say I didn’t warn you.
Regardless of the style of foundation you choose for your cabin, the best way to mark your foundation outline on the ground initially is with 12-inch-long spikes pushed into the earth and connected with stout nylon string. This will get you digging in the right place. If your building site has bedrock not far from the surface, drilling holes in the bedrock is a great way to make reliable marks on the rock.
Rock Solid Start
It’s not unusual for cabin sites to be on or near bedrock, and you can’t drive spikes into rock for foundation layout strings. If you’re building on bedrock, as we did, layout your cabin footprint and mark the corner points with a stout felt-tip marker, then grab a hammer drill. Boring holes in the rock is the best way to establish key anchor points for the strings that define the walls of your structure Bore holes large enough to accept plastic anchors and deck screws, then tie mason’s line to these screws as a reliable guide for foundation work.
Regardless of the foundation design you choose, the main construction challenge is the same: how to get the top of the foundation pads or piers level?
A homemade water level is a low-tech tool that’s also highly accurate for determining foundation elevations like this. Using male and female hose repair couplings, install 16 inches of clear vinyl tubing on each end of a garden hose. The video up next shows what I mean.
VIDEO: Using a Water Level
Fill the hose completely with water, then take a look at the clear tubing. Wherever the water level comes to rest in one tube is exactly level with the water as seen at the other clear tube. A laser level is another alternative to achieve the same results. These are less expensive than ever these days, and allow even a single person to layout foundation elevations precisely. You might not want to buy a laser level for this project, but they’re definitely worth borrowing if you can.
Cylindrical cardboard form tubes are often used to make foundation piers. And though they don’t look as nice a stone foundation, they make for an easier foundation.
VIDEO: Concrete Pier Foundation
If you’re setting cylindrical cardboard forms in the soil to create concrete piers, be sure to dig holes large enough to allow room for side-to-side adjustment of location. The outside edges of these piers should align with the edges of your building. As cheap insurance against frost jacking of concrete foundation piers, wrap the outside of the cardboard form tubes with black polyethylene plastic before setting them into holes and packing soil around them. This way frost won’t be able to grip the outside surface of your piers and lift them during winter.
Milestone#2
Your foundation piers are built and ready to accept the timbers, joists and subfloor that come next.
