Cedar Shingling Basics
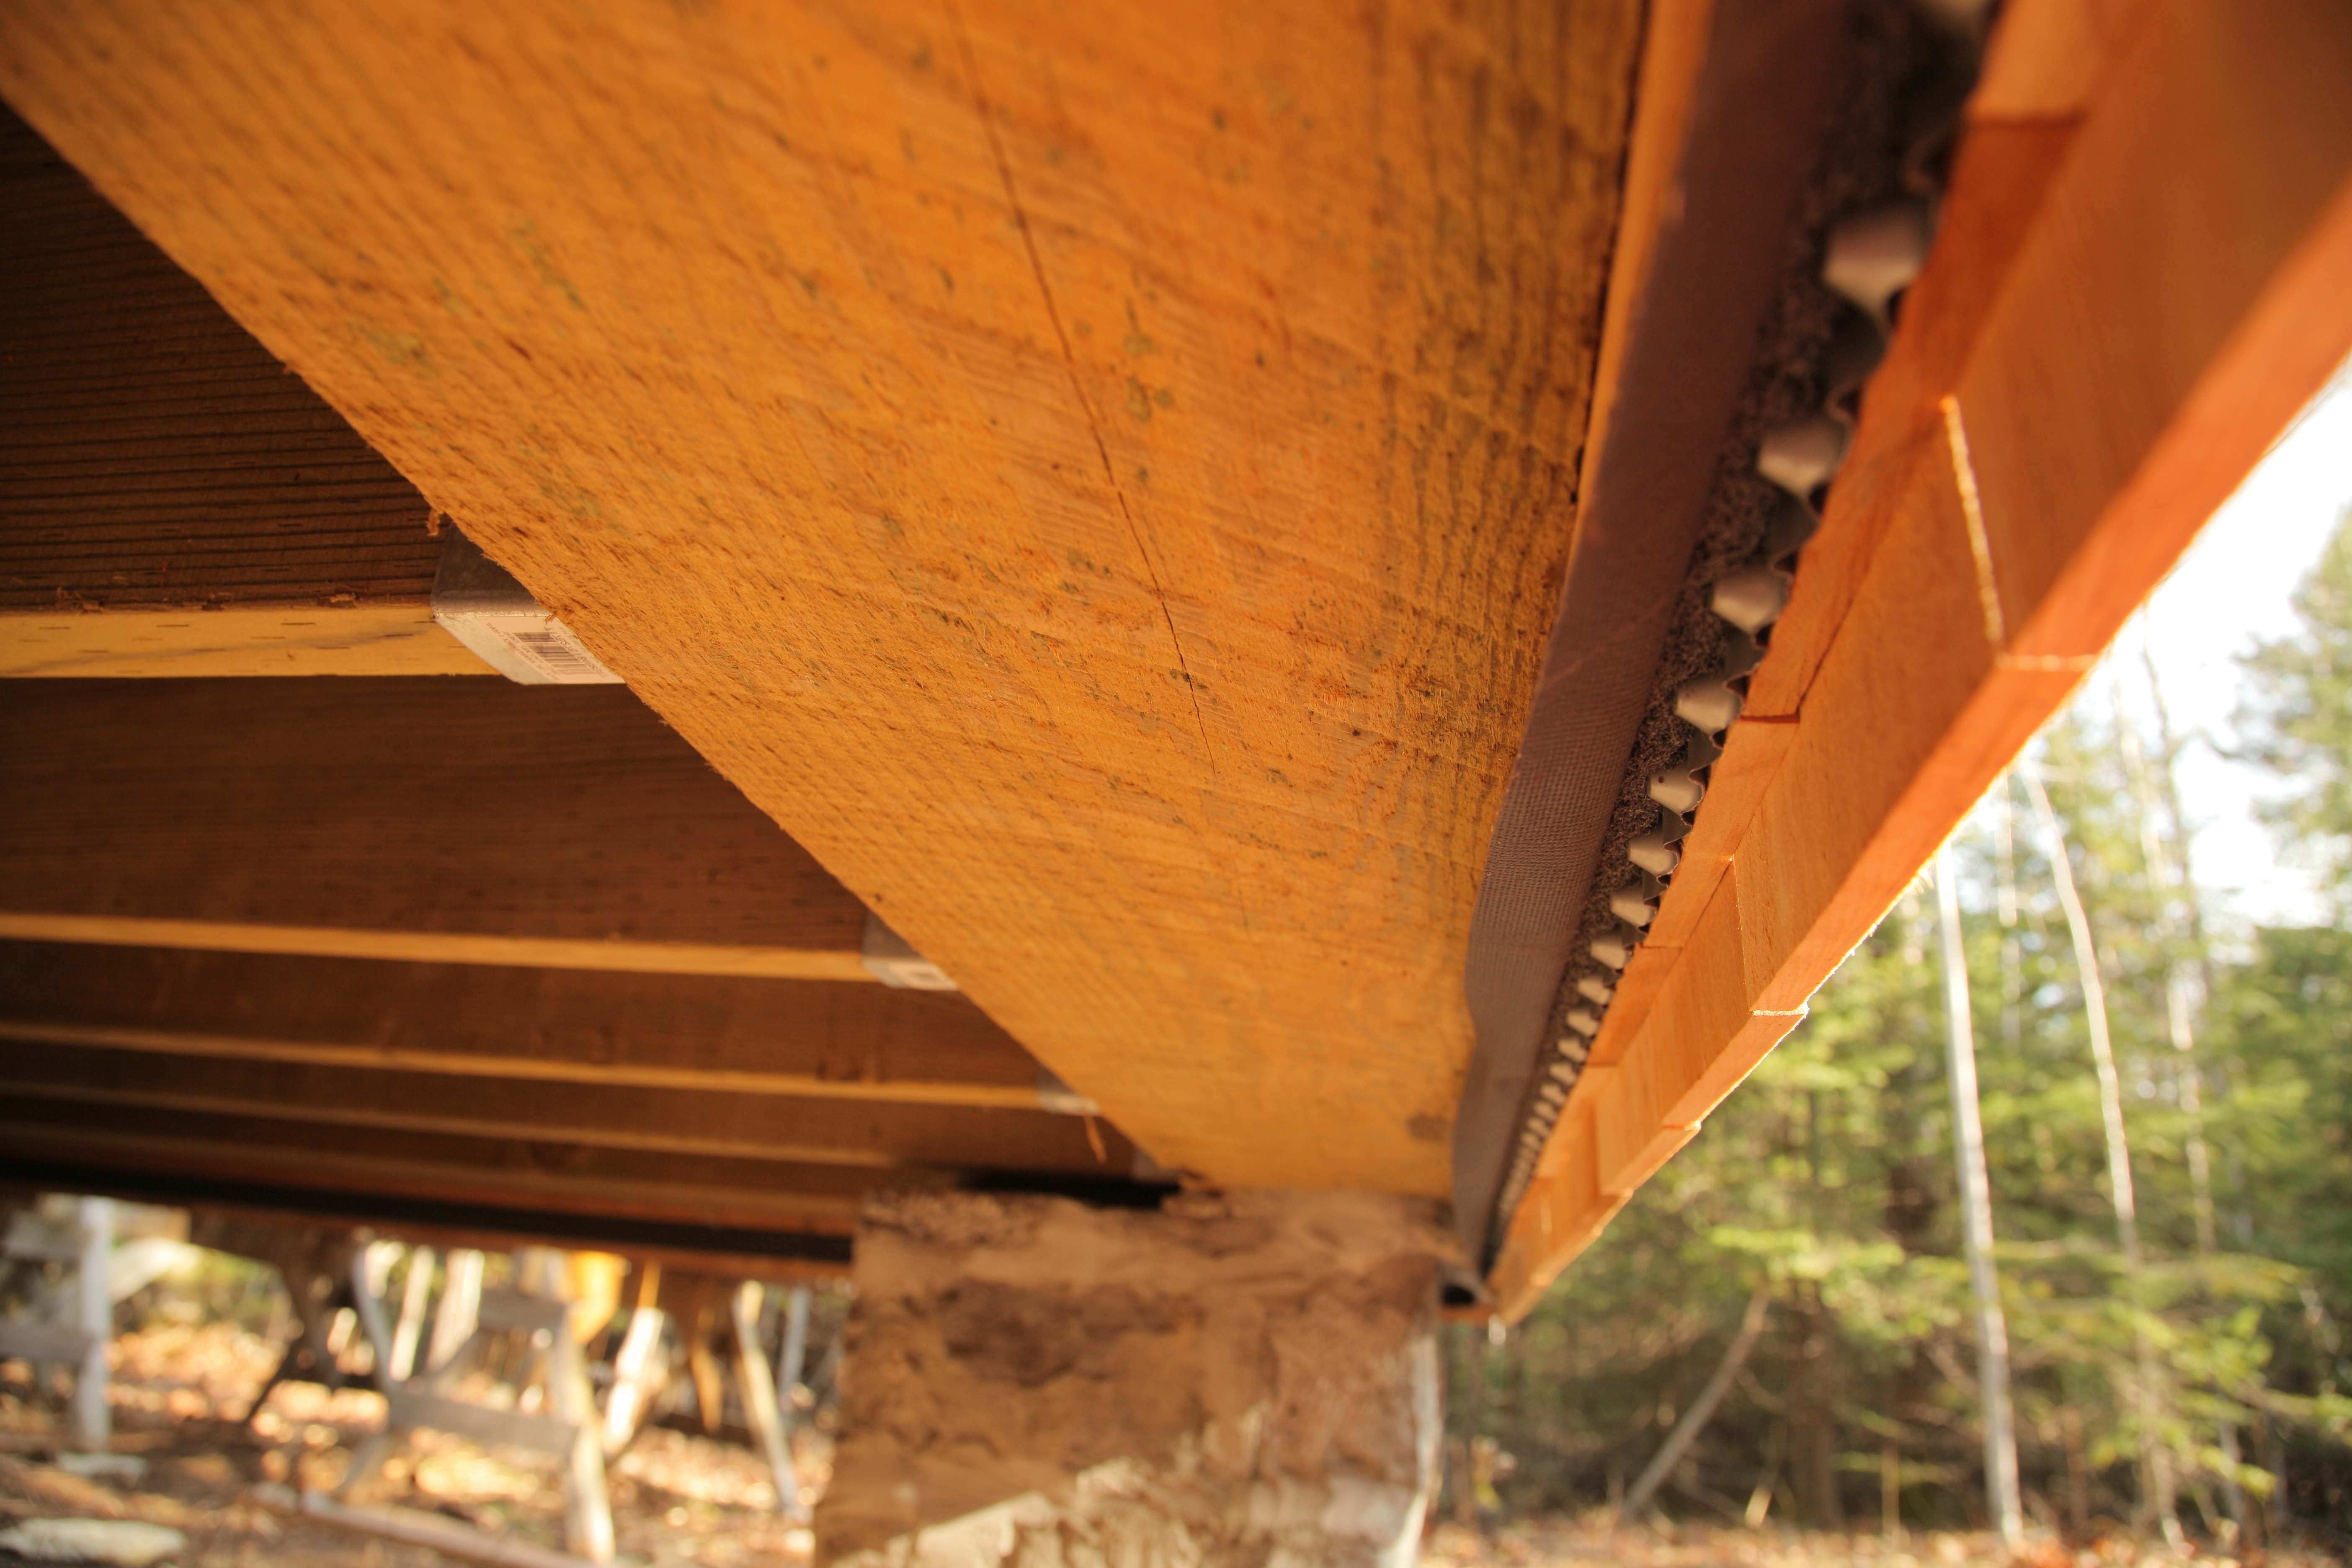
Now you’re ready to start the real work of shingling. The main thing to keep in mind is that each horizontal layer or “course” of shingles should be as close to level as possible. Your first course should be fastened with the shingle butts extending about 1” to 1 1/2” below the bottom of your wall sheathing. This ensures that rainwater drips completely away from the wall frame, instead of curling around as it drains down and getting the frame wet. That’s what you can see here.
 Also, as you install this first course of shingles, eyeball each individual shingle and orient the cupped side against the wall before fastening. This applies throughout the installation. Cup always goes inwards so it will get flattened by pressure against the wall.
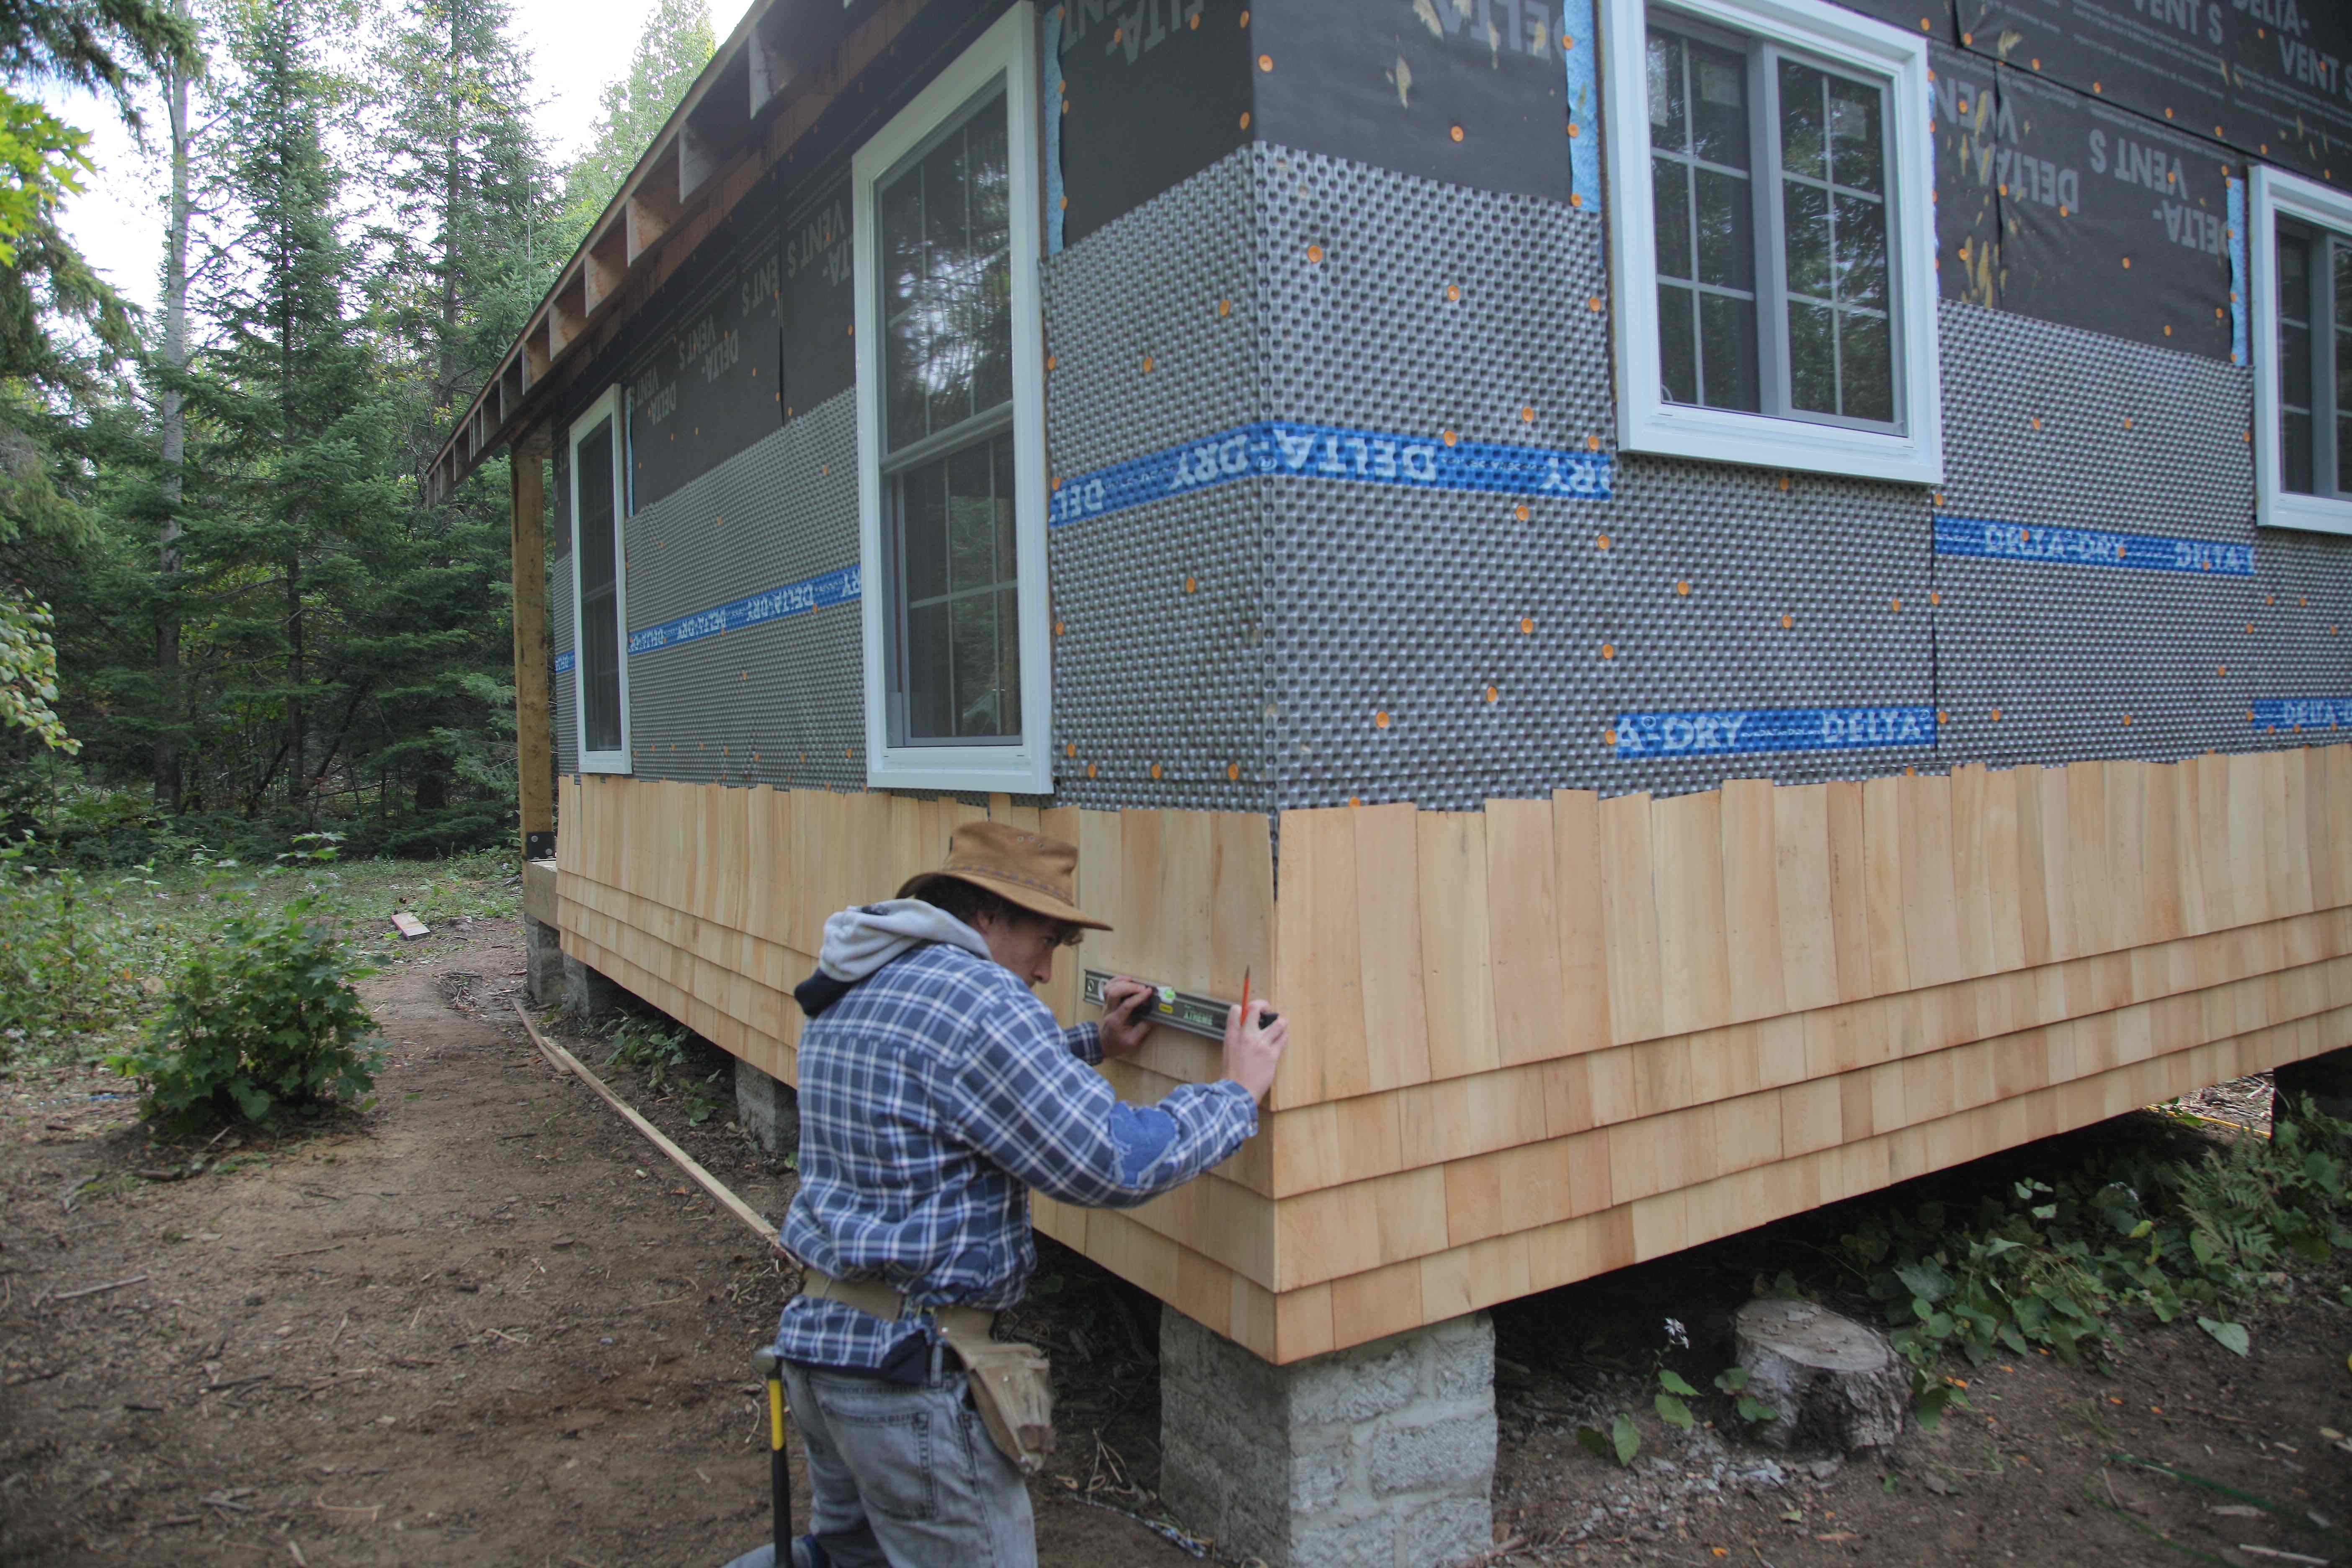
 Put two nails or staples in each shingle, about an inch in from the left and right sides, and roughly 6” above the bottom edge of your wall sheathing as you’re installing this first course. Hold a 6” level against the first shingle and every fourth or fifth shingle as you work, checking to make sure the shingles are oriented straight up and down. Also be sure to push each shingle tight to its neighbor before fastening. When you reach the outside corners of your cabin, you can proceed in one of two different ways.
Tackle Outside Corners
 One way of tackling corners involves vertical 1×6 cedar boards that butt against each other in the corners, extending from the top of the wall to the bottom. Cedar shingles butt up against these corner boards during installation. And while this approach is simple, it leaves the corners more open to rain water penetration. It’s also a little cluttered looking to my eye. That’s why we followed another approach that’s more weatherproof and cleaner looking.
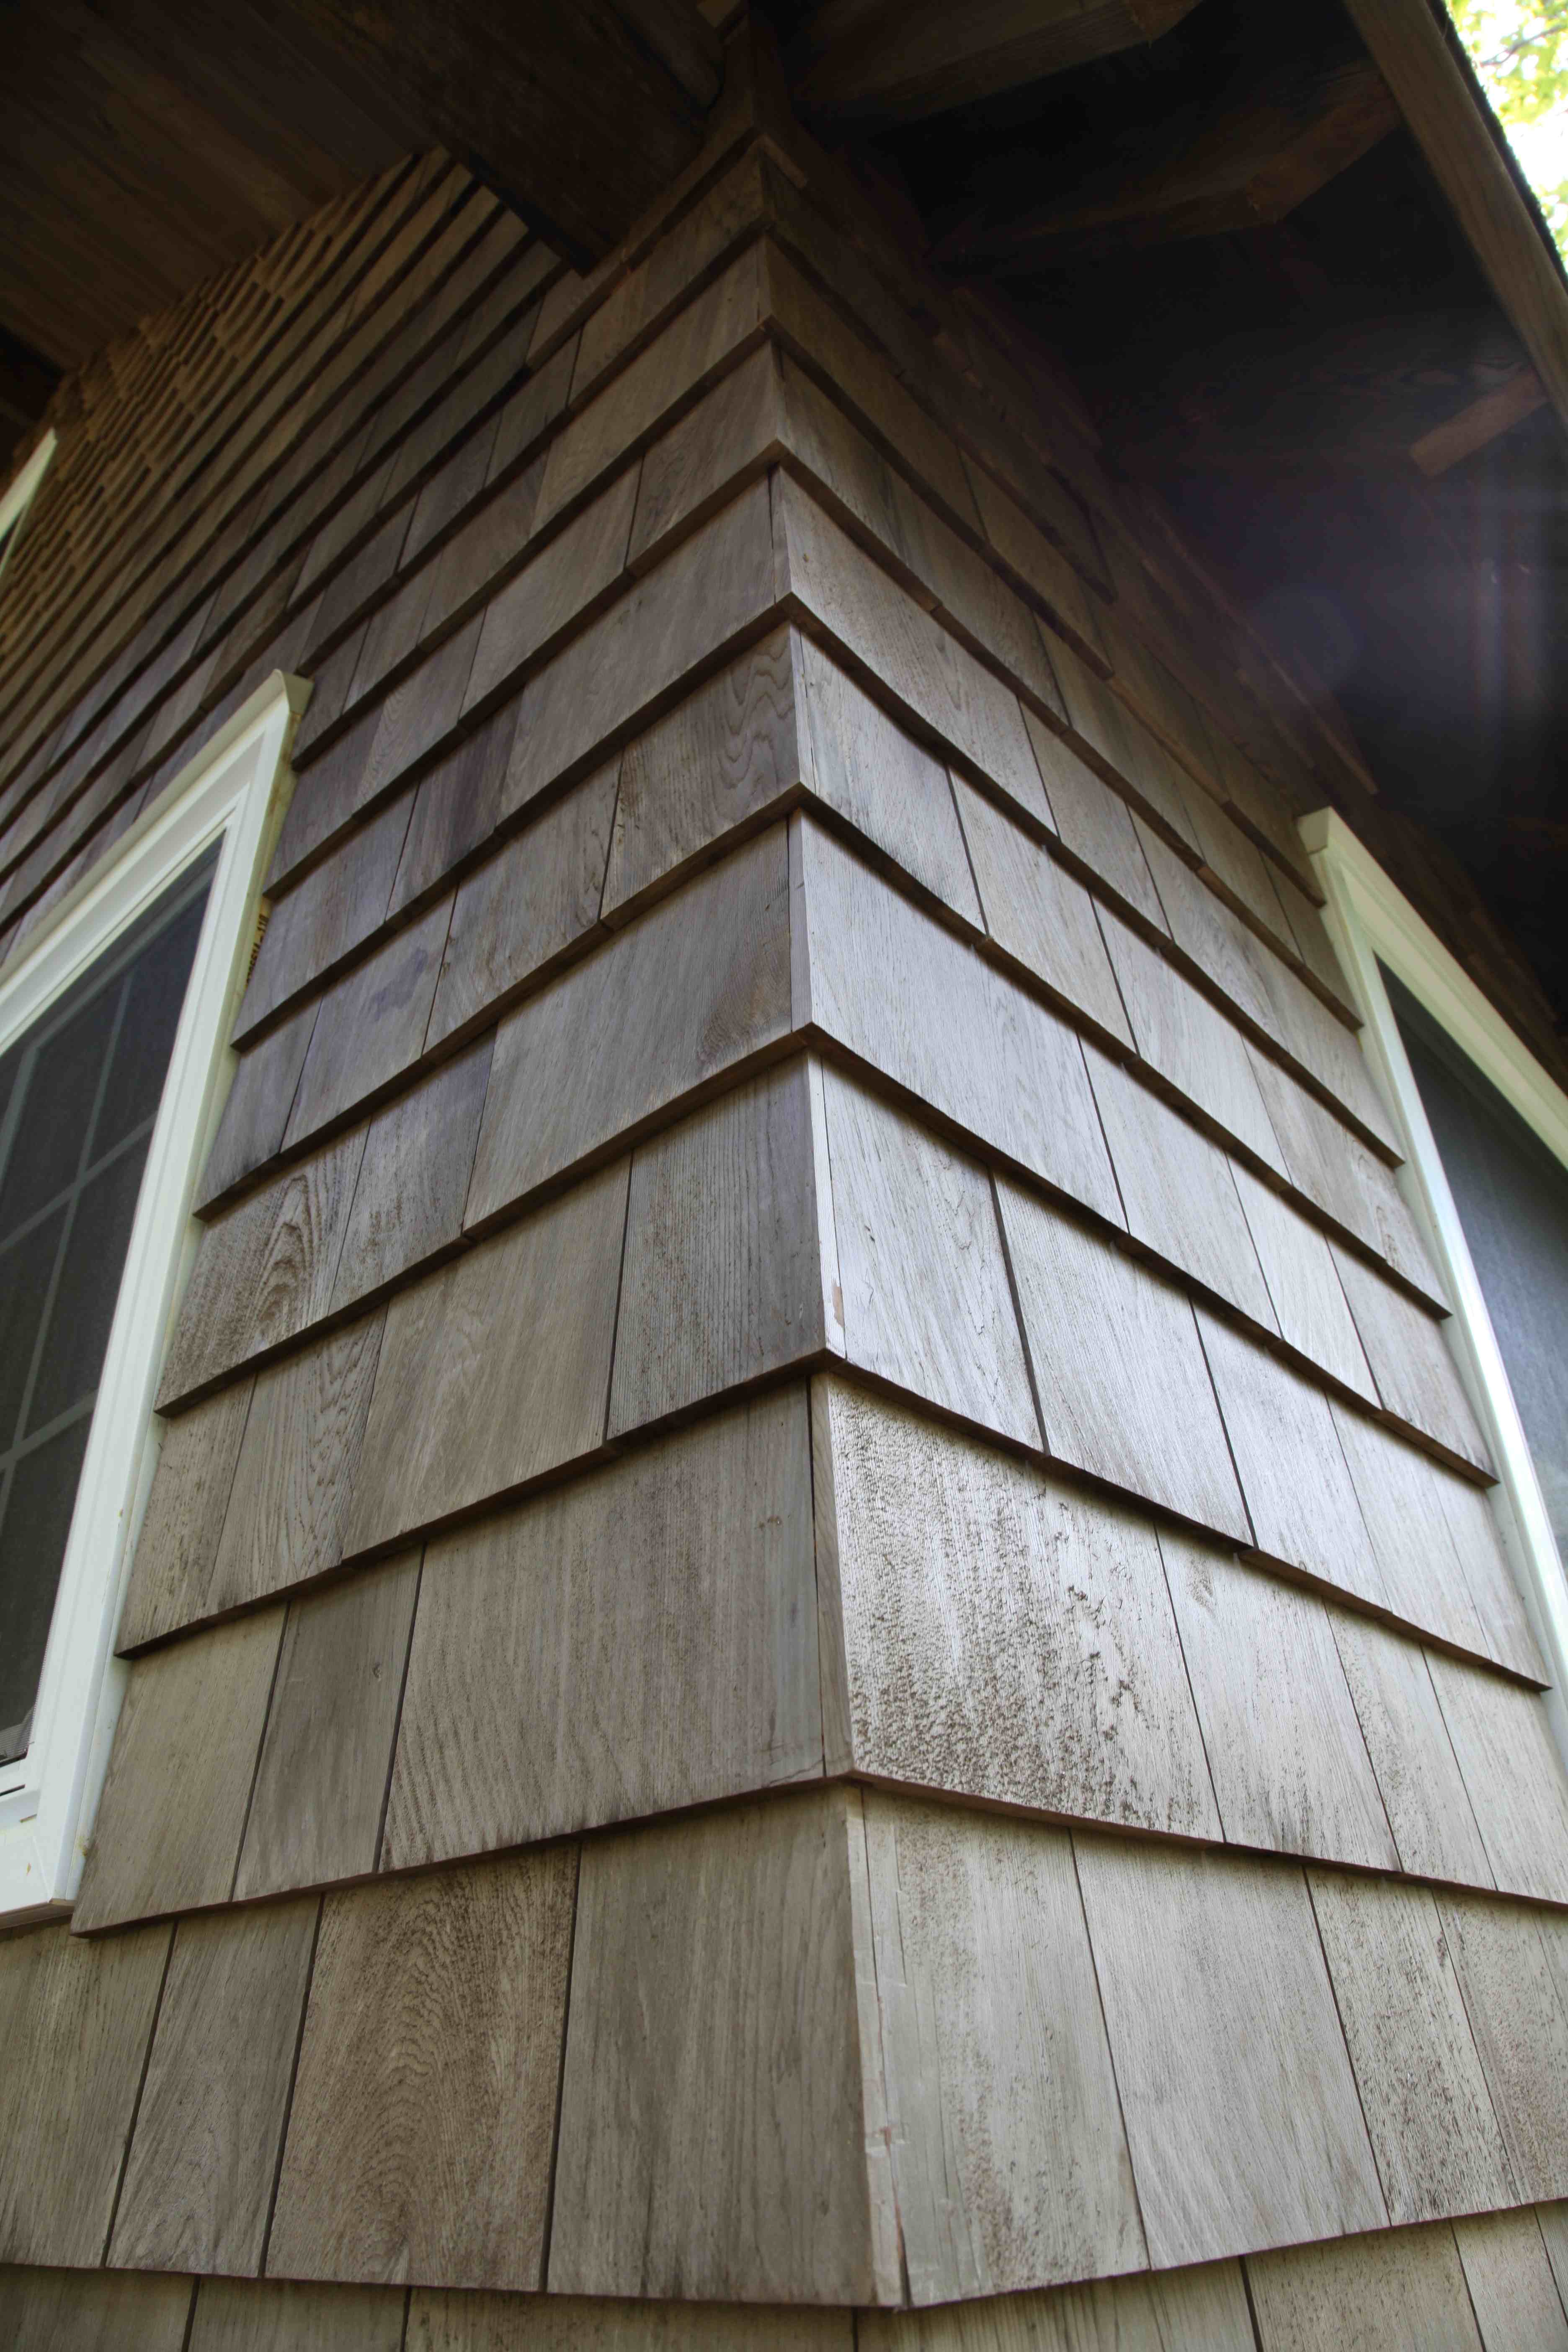
I prefer weaving shingles over each other in a clean, neat outside corner joint. Naturally enough this is called a woven corner, and to make them happen, continue shingling along one wall until your last shingle sticks beyond the corner of the building by 1” or so. Place another shingle on the adjoining wall against the first shingle’s edge, flush with its bottom and plumb. Trace the profile of the adjoining shingle of the second wall onto the protruding shingle of the first wall. It’s easy to use a handsaw or a block plane to trim away the excess wood. You’re good to go when both shingles fit snugly together in the corner. As a final step before fastening the second shingle to its wall, bloop a little construction adhesive onto the 90º joint between the two shingles and secure it with a couple of 23 gauge pins. These hold the shingles together until the adhesive dries, yet they’re almost invisible.
 You can chisel off any excess glue once it’s hardened, then use a block plane to remove any excess wood that extends beyond the corner. You’ll be repeating this corner process for every course as you advance up the building, alternating the side that the joint appears on each time.
Cover the Main Walls
When you finish your first course, start another one directly on top. It’s important you understand that this second layer of shingles is unique in that it’s no higher than the first course. It’s sole purpose is to overlap the joints of the first course by at least 1 1/2”, but not to rise higher on the wall. This overlap minimum applies to every course you install, too. At least 1 1/2” of overlap on each joint underneath. More is better.
 As you’re fastening this second layer of course of shingles, position your nails or staples roughly 7” above the bottom ends of the shingles, to avoid hitting the fasteners holding up the first course of shingles 6” up. Tackle the corners of the second course in the same way you did the first, making sure the joint line is on the alternate side of the building this time. Once your second course is complete, it’s time to decide how much shingle you want exposed on each course.
 The usual practice is to leave anywhere from 4” to 6” of exposure per course, depending on the look you’re going for. Try different options by holding shingles up and see how they look. Once you’ve roughly settled on exposure, measure up from the corners of your first course, marking a line on each corner where the bottom edge of the second course will rest. Snap a chalkline on the wall across your marks, then repeat the process for the other three walls. The bottom edges of the corner are level with each other, so measuring up from there for chalkline placement will yield level shingle courses.
Next, cut a bunch of straight-grained, knot-free wood guide strips about 1/2” thick and 1 1/2” wide and eight or ten feet long from whatever construction lumber you have on hand. These strips will guide shingle placement by automatically holding them up along a horizontal line, and they really speed things up. The image up next shows this strip used to support fancy shingles up near the peak of the cabin.
 Use a pin nailer (or small finishing nails driven by hand) to secure this strip to the wall temporarily, with the top level of the wood aligned with your chalkline mark. As you secure however many strips required to extend over the length of one wall, bend the wood strips as required to line up with your chalkline. These strips will almost certainly have some kind of warp to them, but the chalk line mark is your guide.
Before you start using a string to hold your shingles against the wall, drive shingle nails partway into the wall at each end, 7” above the top of the strip, then tie a length of mason’s line tightly between these two nails. This string helps you in two ways. First it keeps shingles in place and upright as you lay them out on the straight edge before nailing. You’ll save a lot of time plunking all the shingles tentatively in place without nails, then rearranging them as needed to achieve the minimum 1 1/2” joint overlap along the sides. When you’re done this, the string also shows you the ideal location of nails or staples. You want them to be located about 1” to 1 1/2” above the bottom of the next course of shingles. Watch this video to see how a string and guide strip is used to make your shingling go faster and better.
VIDEO: Using a String to Hold Shingles
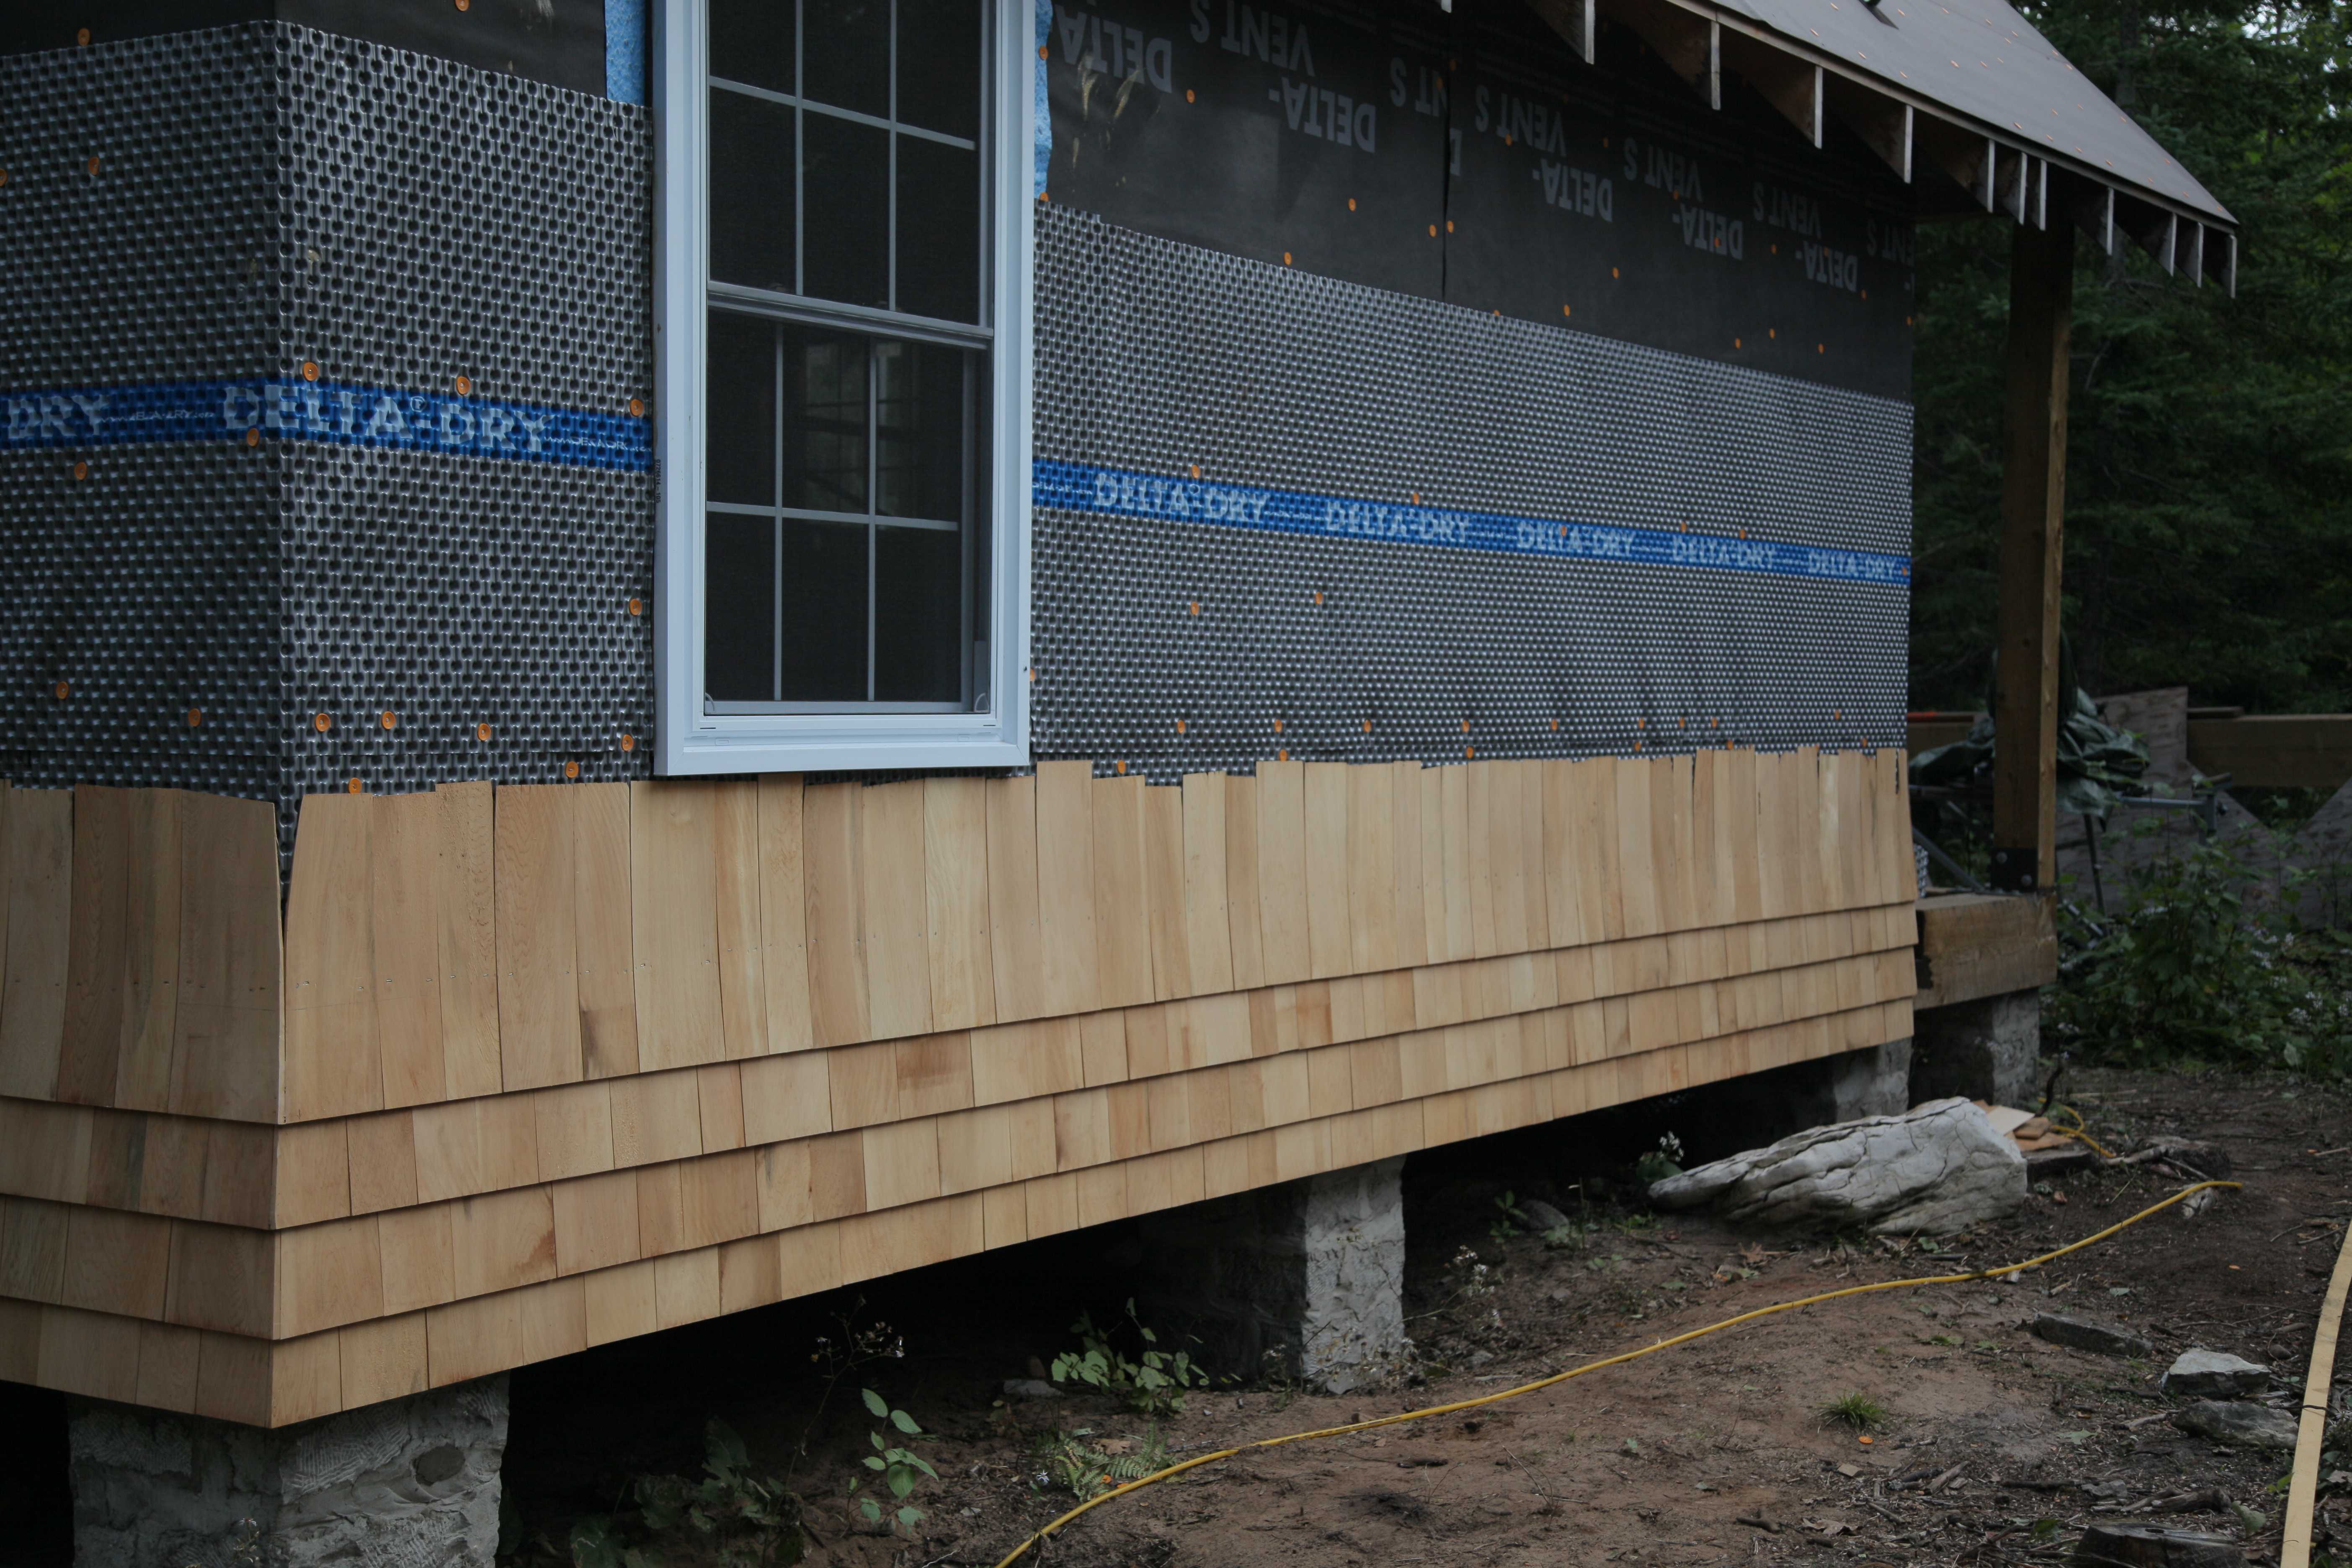 Whatever exposure you choose, keep it consistent as you advance up the first few courses of the wall. We chose 5 3/4”. You’ll soon need to vary the exposure slightly, but more on that later. For now, just keep each course the same height, measuring up from the previous course and snapping a chalkline. I find it easiest to install the woven corners of each course first, then fill in between. When it comes to installing the last shingle in a course it’s sometimes necessary to trim it to width to fit the remaining space. Cedar shingles saw easily by hand, or you can saw them to width on a tablesaw. This is what your wall should look like as shingles are starting to rise.
QUICK TIP: How Long Will They Last?
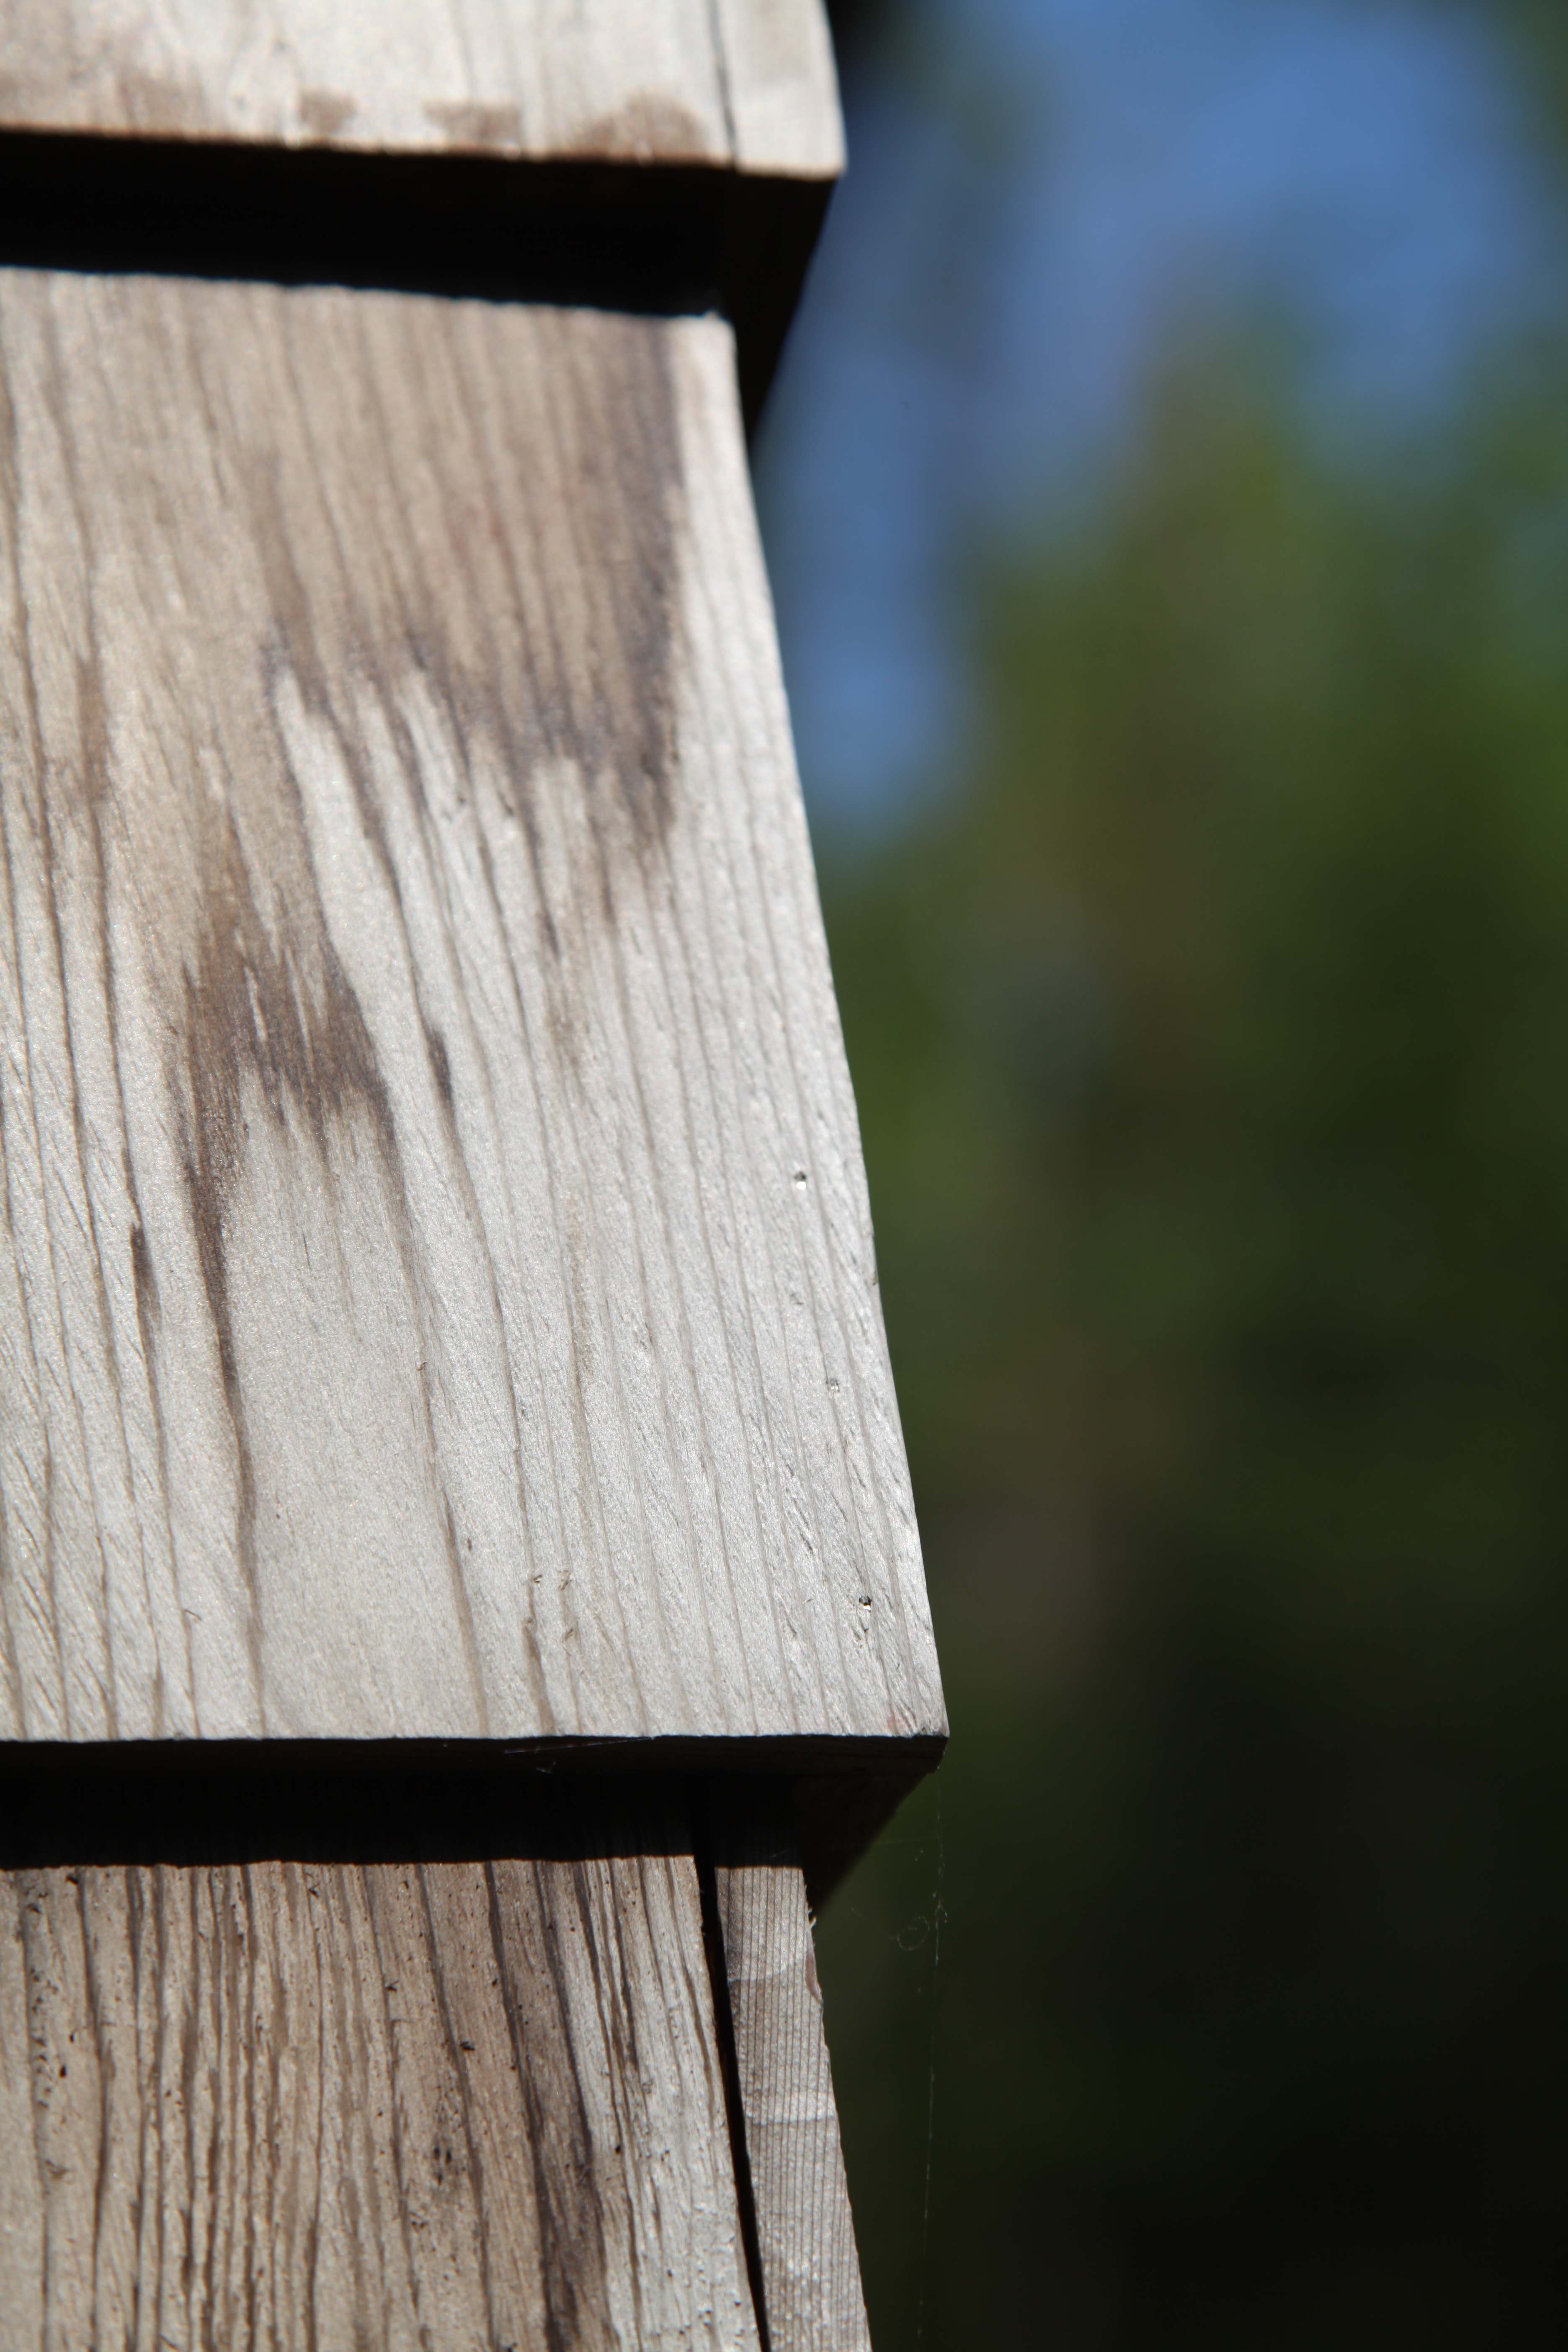
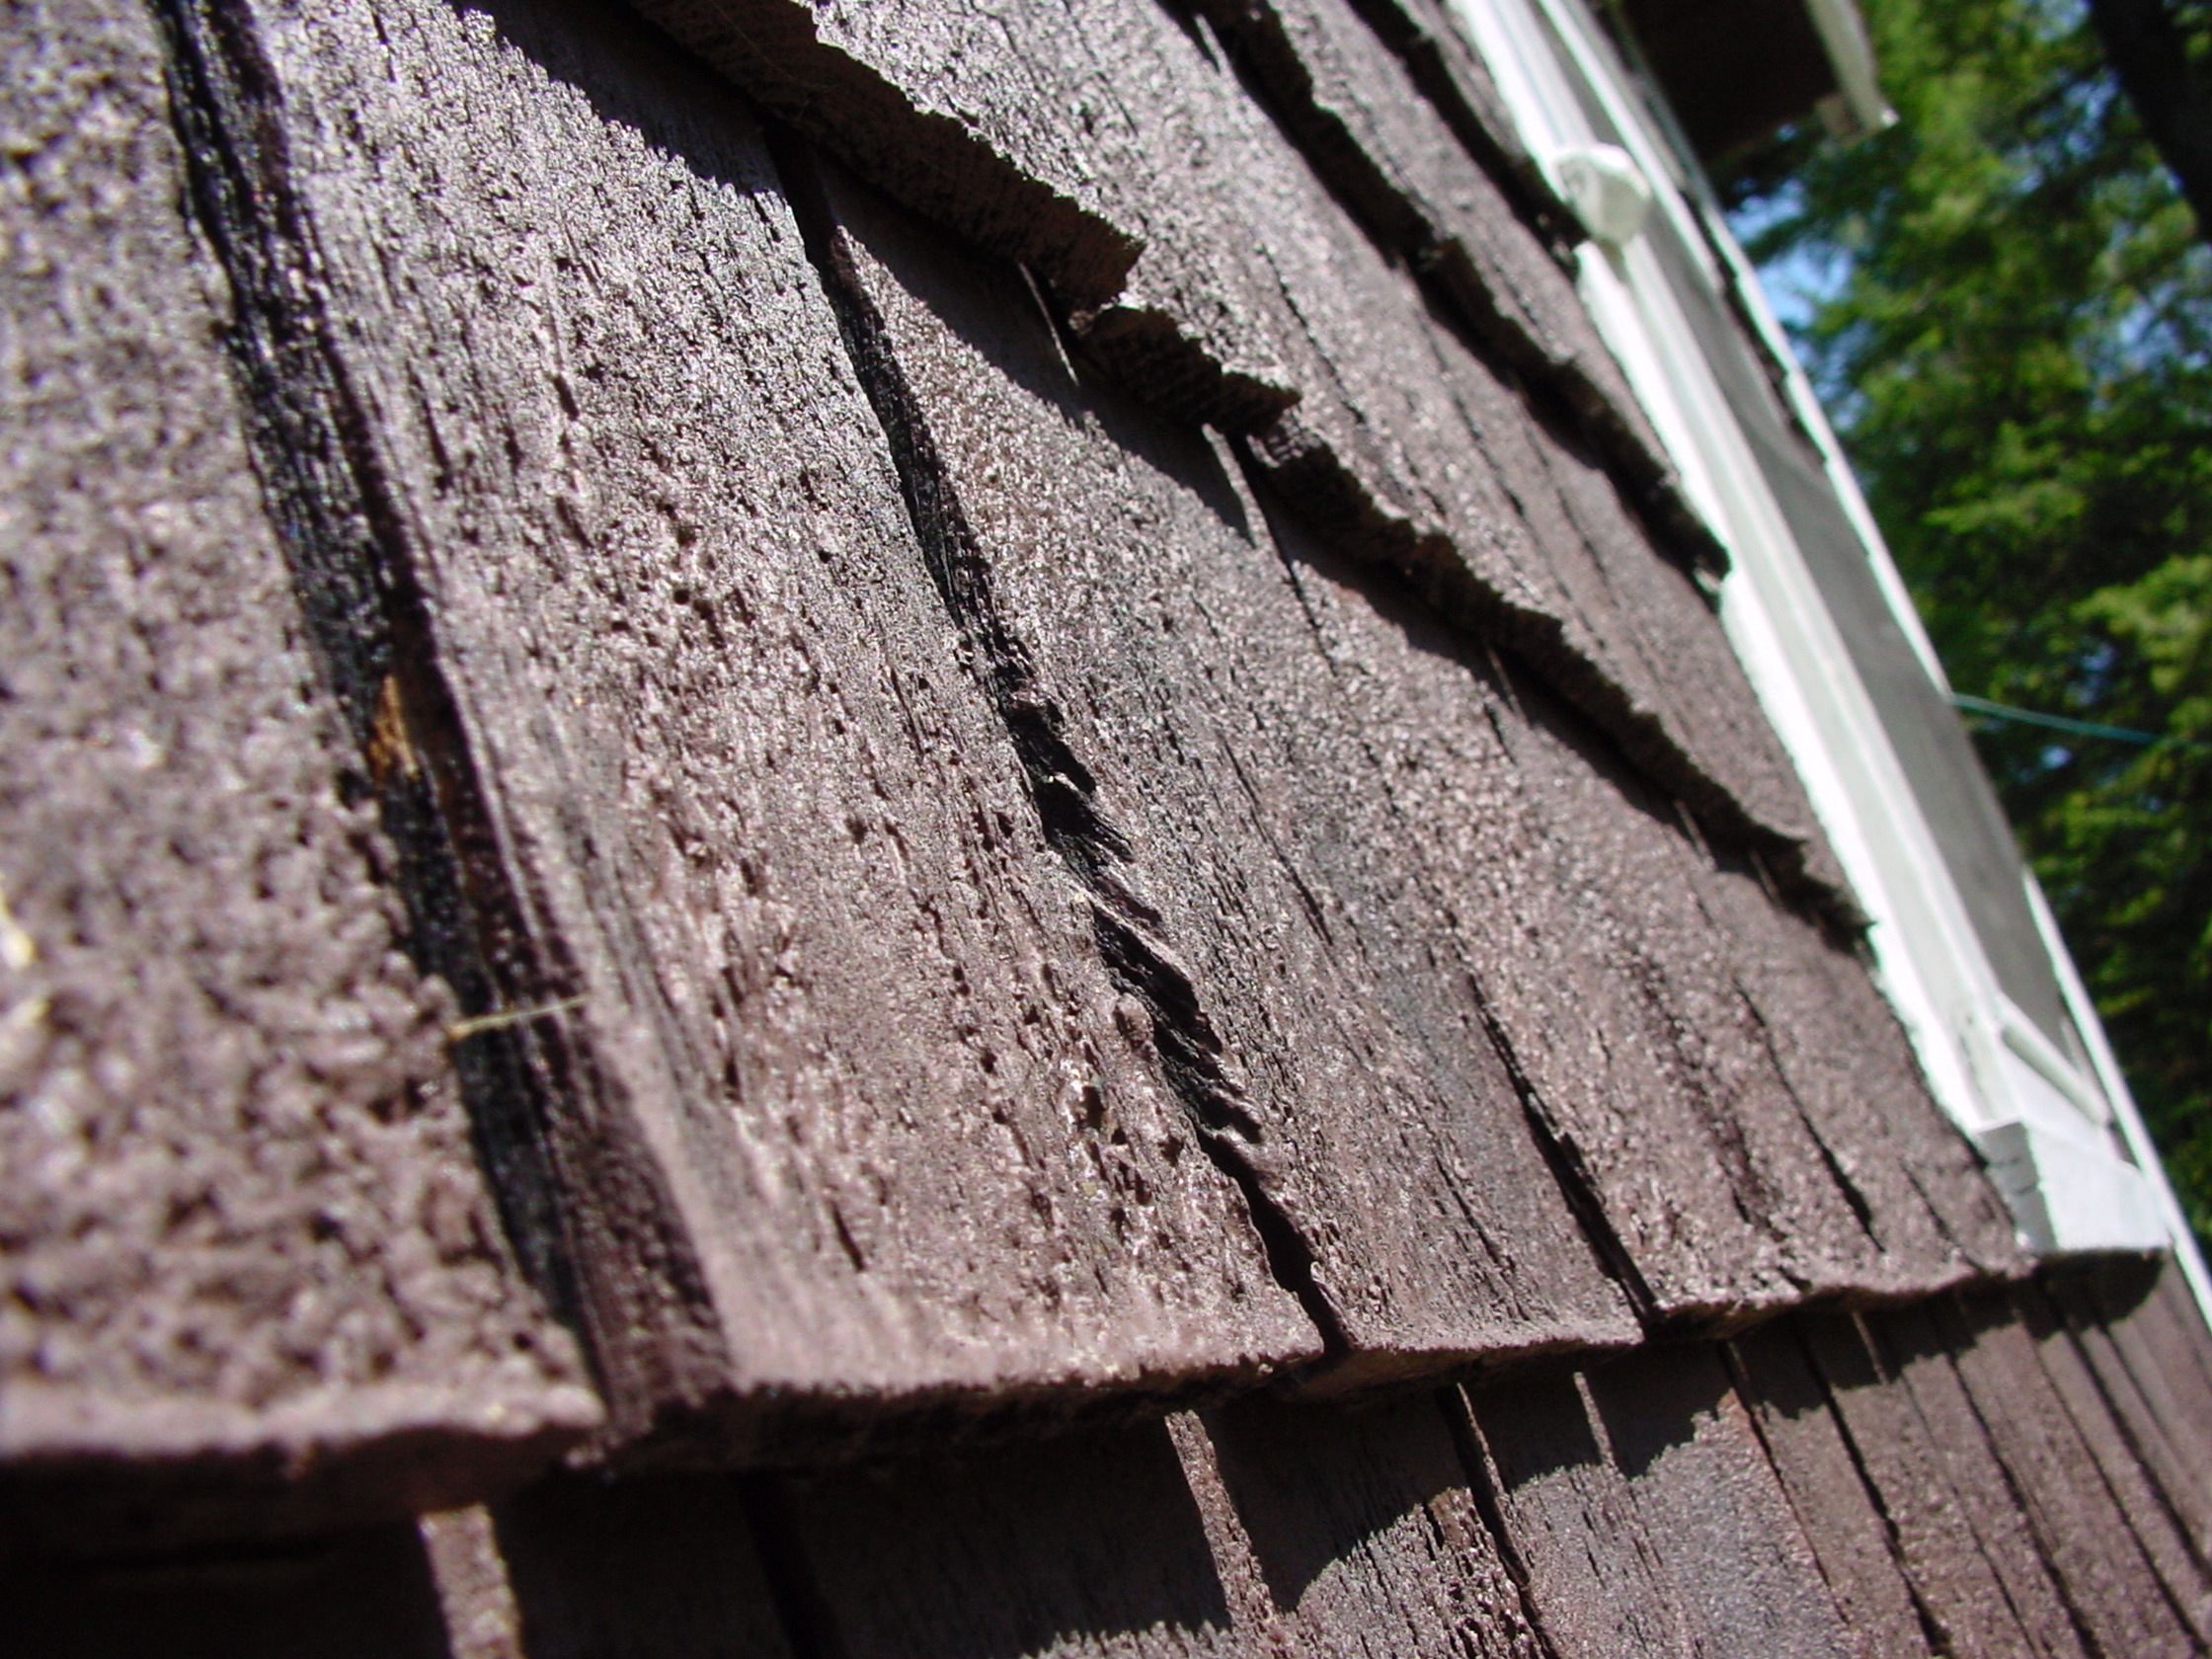 The white cedar shingles you see here were installed 70 years before this photo was taken, and they still keep wind, weather and water out. Occasionally colored with dark brown deck stain over the years, this finish did nothing to help preserve the wood. It just changed the look for a time. The long working life comes from the cedar these shingles are made from, and their vertical orientation. If you do decide to color your shingles, always use a penetrating stain. Never use any kind of film-forming paint or sealer. This will inevitably peel, making your cabin look terrible.
Shingling Around Doors and Windows
Since this cabin isn’t a windowless, doorless box, you’ll have some obstacles to work around as you advance upwards with your shingles. The main challenge is to plan your work so the tops and bottoms of doors and windows line up fairly closely with the bottoms of the nearest shingle courses. This isn’t essential, but it’s a whole lot better than having little strips of shingles fastened below or above windows and doors. The trick is to determine how many courses you’ll need to reach the various critical heights, and how much or little exposure is necessary so the bottoms of shingles align with the top and bottom of windows once they get there. Measure the total height of unshingled wall ahead of you, then use a calculator to experiment with different numbers of courses and how much exposure they require so the bottom of shingles will land in alignment with critical tops or bottoms of the door or windows. To get fuller idea of why this is important, check out the next video.
VIDEO: Shingle Spacing Issue
Let’s say you started with 5 3/4” of exposure on each shingle, but you find that if you keep going like this the top of the shingle course will be 2” above the top of the door. What you really need to do is reduce the total height of the next eight courses of shingles by 2”. Reducing the exposure of each course down to 5 1/2” will do the trick, and you can make that kind of change without it being visible. If you’ve got larger changes to make to get shingle bottoms to align with the top and bottom of windows and doors, phase them in over a larger number of courses. Installing cedar shingles skillfully like this is like safe driving. You need to look ahead and make allowances for what’s coming up. It sounds complicated but it’s really simple.
Leave a Gap
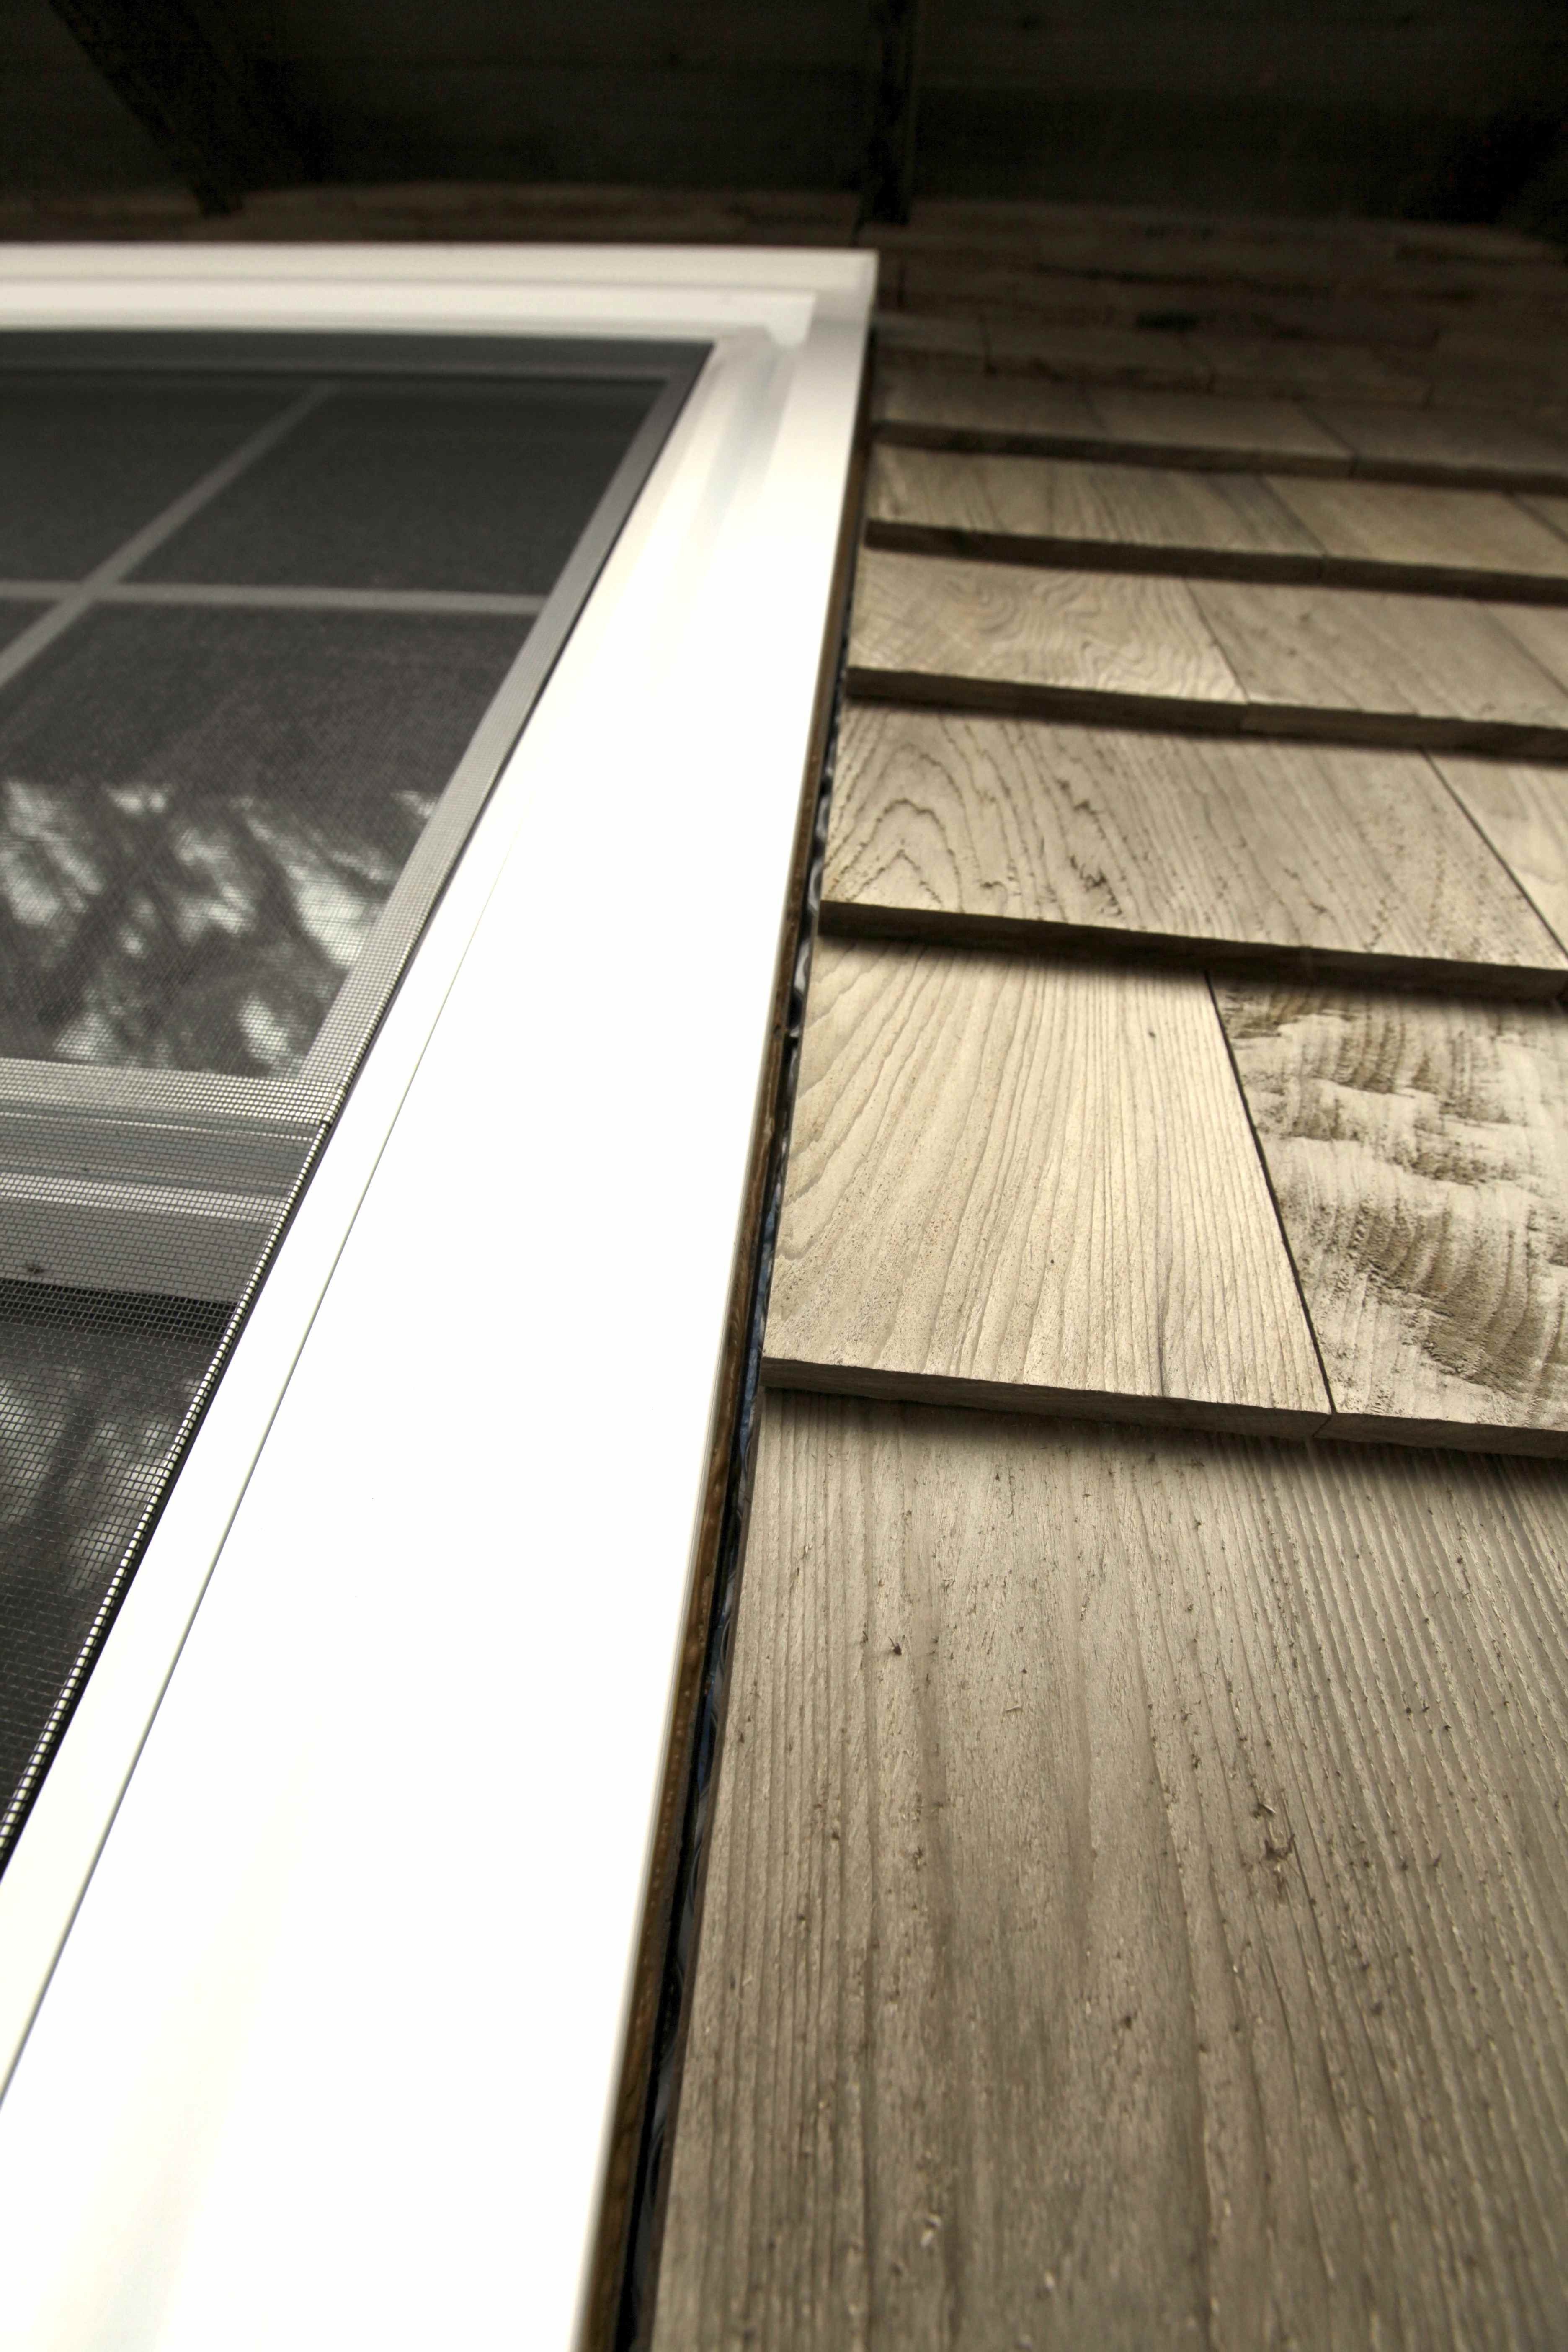 Most new builders have the mistaken idea that tight is right when it comes to all things constructional. That’s not necessarily so, and cedar shingles flanking windows and doors is a case in point. An intentional gap is much better here than a tight fit because it allows caulking to endure. Use a 1/4”-thick spacer when installing shingles next to windows and doors and it allows a substantial thickness of caulking to be neatly applied within the gap. Seasonal expansion and contraction has a large area of caulking to occur within, and this means the caulking is never stressed. By contrast, if cedar shingles are installed tight against window frame, the same amount of seasonal expansion and contraction of wood and vinyl would happen over an extremely narrow span of caulking, stressing the caulking and causing even the best formulations to crack.