 My approach in all this is unusual, but I figure it’s worth the eccentricity because roof insulation is the precise place where most cabin designs fall flat, usually in one of two big ways.
Since an important part of the visual attraction of a good cabin is the sight of rafters and real wood roof boards above you, one typical approach is to build an open roof structure, with nothing more than shingles on top. You get a great look inside, but the loft area becomes stinking hot in summer, and the whole cabin is impossible to heat properly in winter. Without some kind of roof insulation you’re also likely to get frost and condensation build up during long periods of very cold weather when you are heating.
VIDEO: Problem with Regular Roofs
Erring on the side of comfort, some cabin builders stuff the space between rafters with fiberglass or rock wool batts, then covering everything over with wood or drywall. Besides being a ton of work, the results are bad at best and disastrous at worst. You lose sight of that great looking roof, your roof structure becomes susceptible to internal condensation and rot, plus mice, bats and insects like nothing better than to move into a fiber insulated roof structure and make a big, stinking mess. These are the reasons I developed a completely different method of roof insulation.
The plans show how insulated panels on top of the roof boards let the traditional look of a rafter roof show through below, while providing a continuous layer of surprisingly effective and vermin-proof insulation on top. The video up next goes into more detail about what this involves and how to make it happen.
VIDEO: Top of Roof Insulation
Extruded polystyrene foam is ideal for this application, and the approach I’ll show you here involves a specialized version of this product installed in a particular way. Technical details are important, and that’s why I’m going to be careful to explain every last detail that matters.
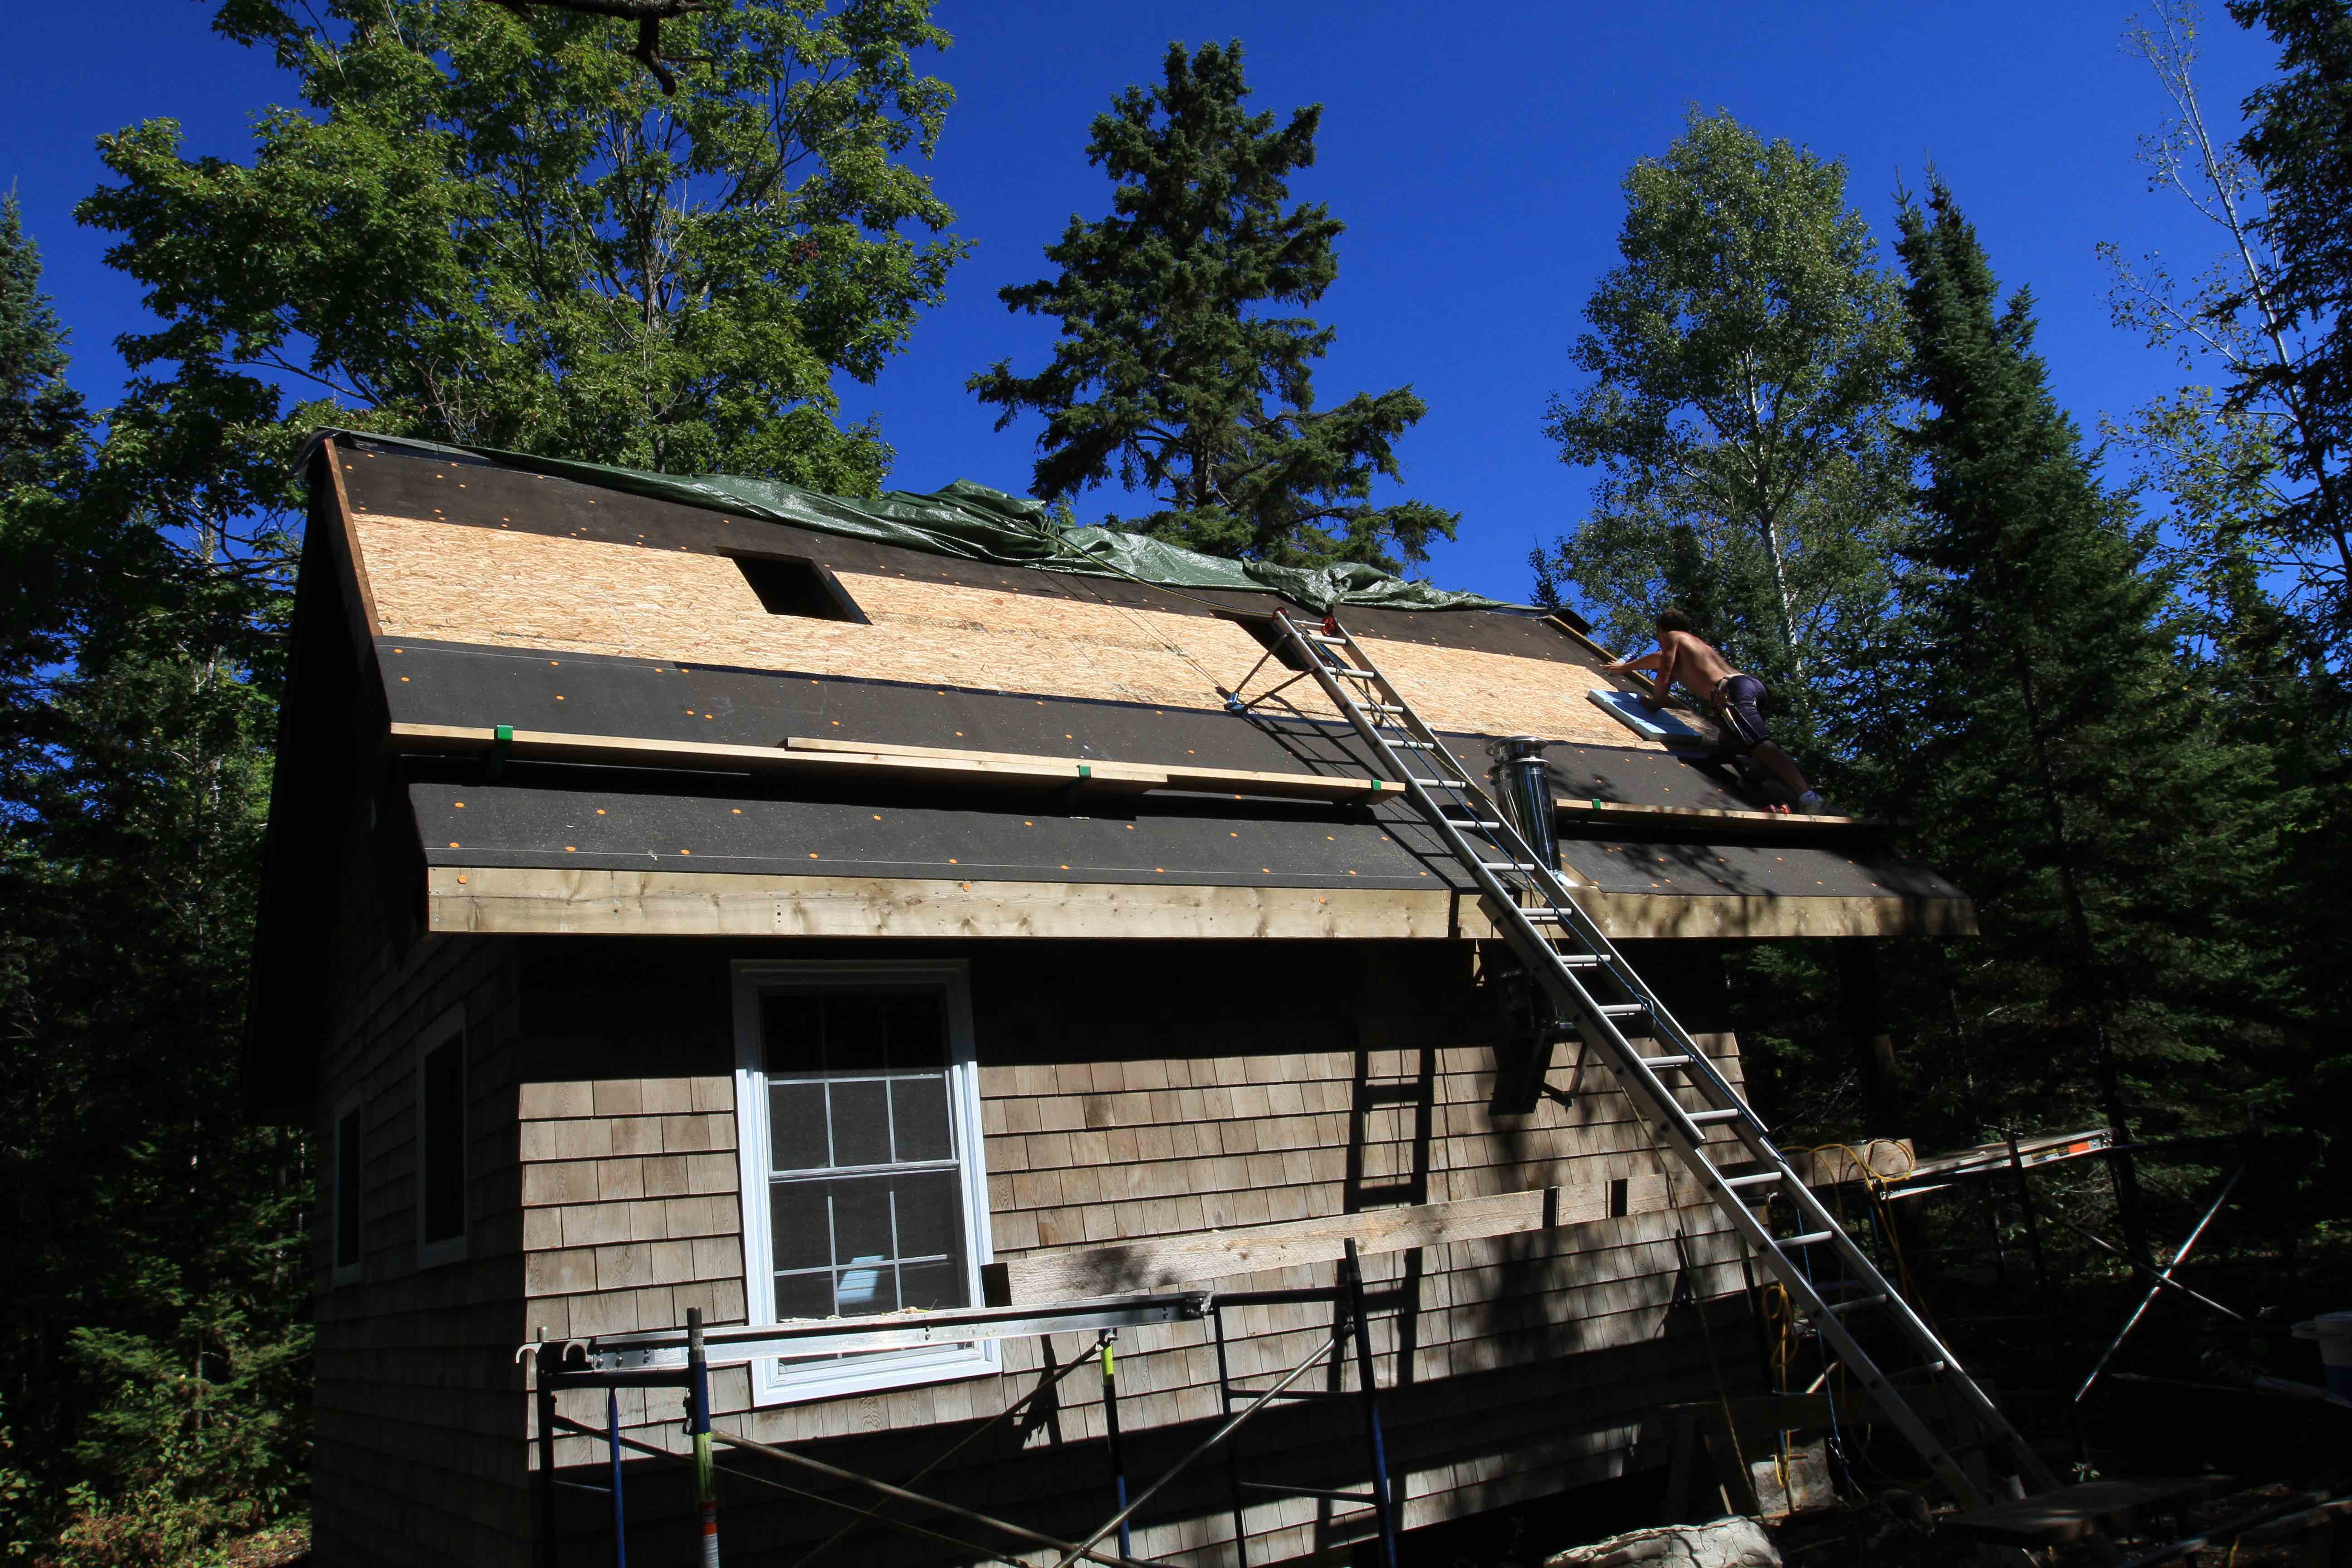
Just to recap where we are so far in the construction, the cabin roof is framed with 2×6 rafters, with visible edges chamfered using a 45º bit in a hand-held router. The roof is sheathed with thicker-than-usual 2×8 boards, since exposed plywood or waferboard on the inside of a cabin roof looks horrible. The whole roof is covered with a waterproof membrane, as I explained earlier, and extra-wide fascia boards are in place along all roof edges. To learn more about this simple but unusual detail, be sure to watch the next video.
VIDEO: Eaves Insulation Detail
The best foam product I know of for adding insulation to the top of a framed roof is actually made for insulating basement walls from the inside. It’s called Barricade wall panels (www.ovrx.com), and each piece that we used measures 2 feet x 8 feet, with 7/16”-thick layer of waferboard factory-bonded to one face of 2-inch-thick foam. Interlocking tongue and groove details milled into the edges help connect the joints. The panels go on to of the roof, with the joints between each piece sealed using spray foam.
Insulation Installation
More tar paper or ice & water shield goes down later, after the panels are up, for the usual reasons of offering secondary water protection underneath the roof shingles, followed by whatever roofing material you choose. We used fiberglass asphalt shingles, but metal is an option, too. Whatever you do, don’t use organic asphalt shingles, as I’ll explain in the next chapter.
 You could use sheets of ordinary extruded polystyrene foam and separate plywood or waferboard instead of the panels, but the pre-laminated Barricade panels go up faster, more easily and more safely than the unwieldy 4×8 sheet goods you’d have to buy and wrestle into place in two steps. Barricade costs somewhat more than foam and wood bought and installed separately, but the convenience, safety and durability of a glued panel seem worthwhile to me.
Unbonded sheathing poses the risk of creeping downwards relative to the foam over time because of gravity, even when secured with screws. Barricade panels won’t do this because the foam and OSB are bonded together at the factory.
When you completed installing the roof boards a while back, you probably made the decision to cut holes for skylight. If decided not to install openable skylights in your cabin but have changed your mind (and I sure hope you do), it makes sense to cut holes through your roof sheathing now, before the insulation goes down. The plans show exactly where to cut the holes you’ll need. With that work done, it’s time to get busy with the insulation. Begin by sawing one edge of seven Barricade panels on a tablesaw to match the angle of the roof slope at the eaves. In the case of this cabin, that’s 45º. In short, here’s how the roof panel installation process works:
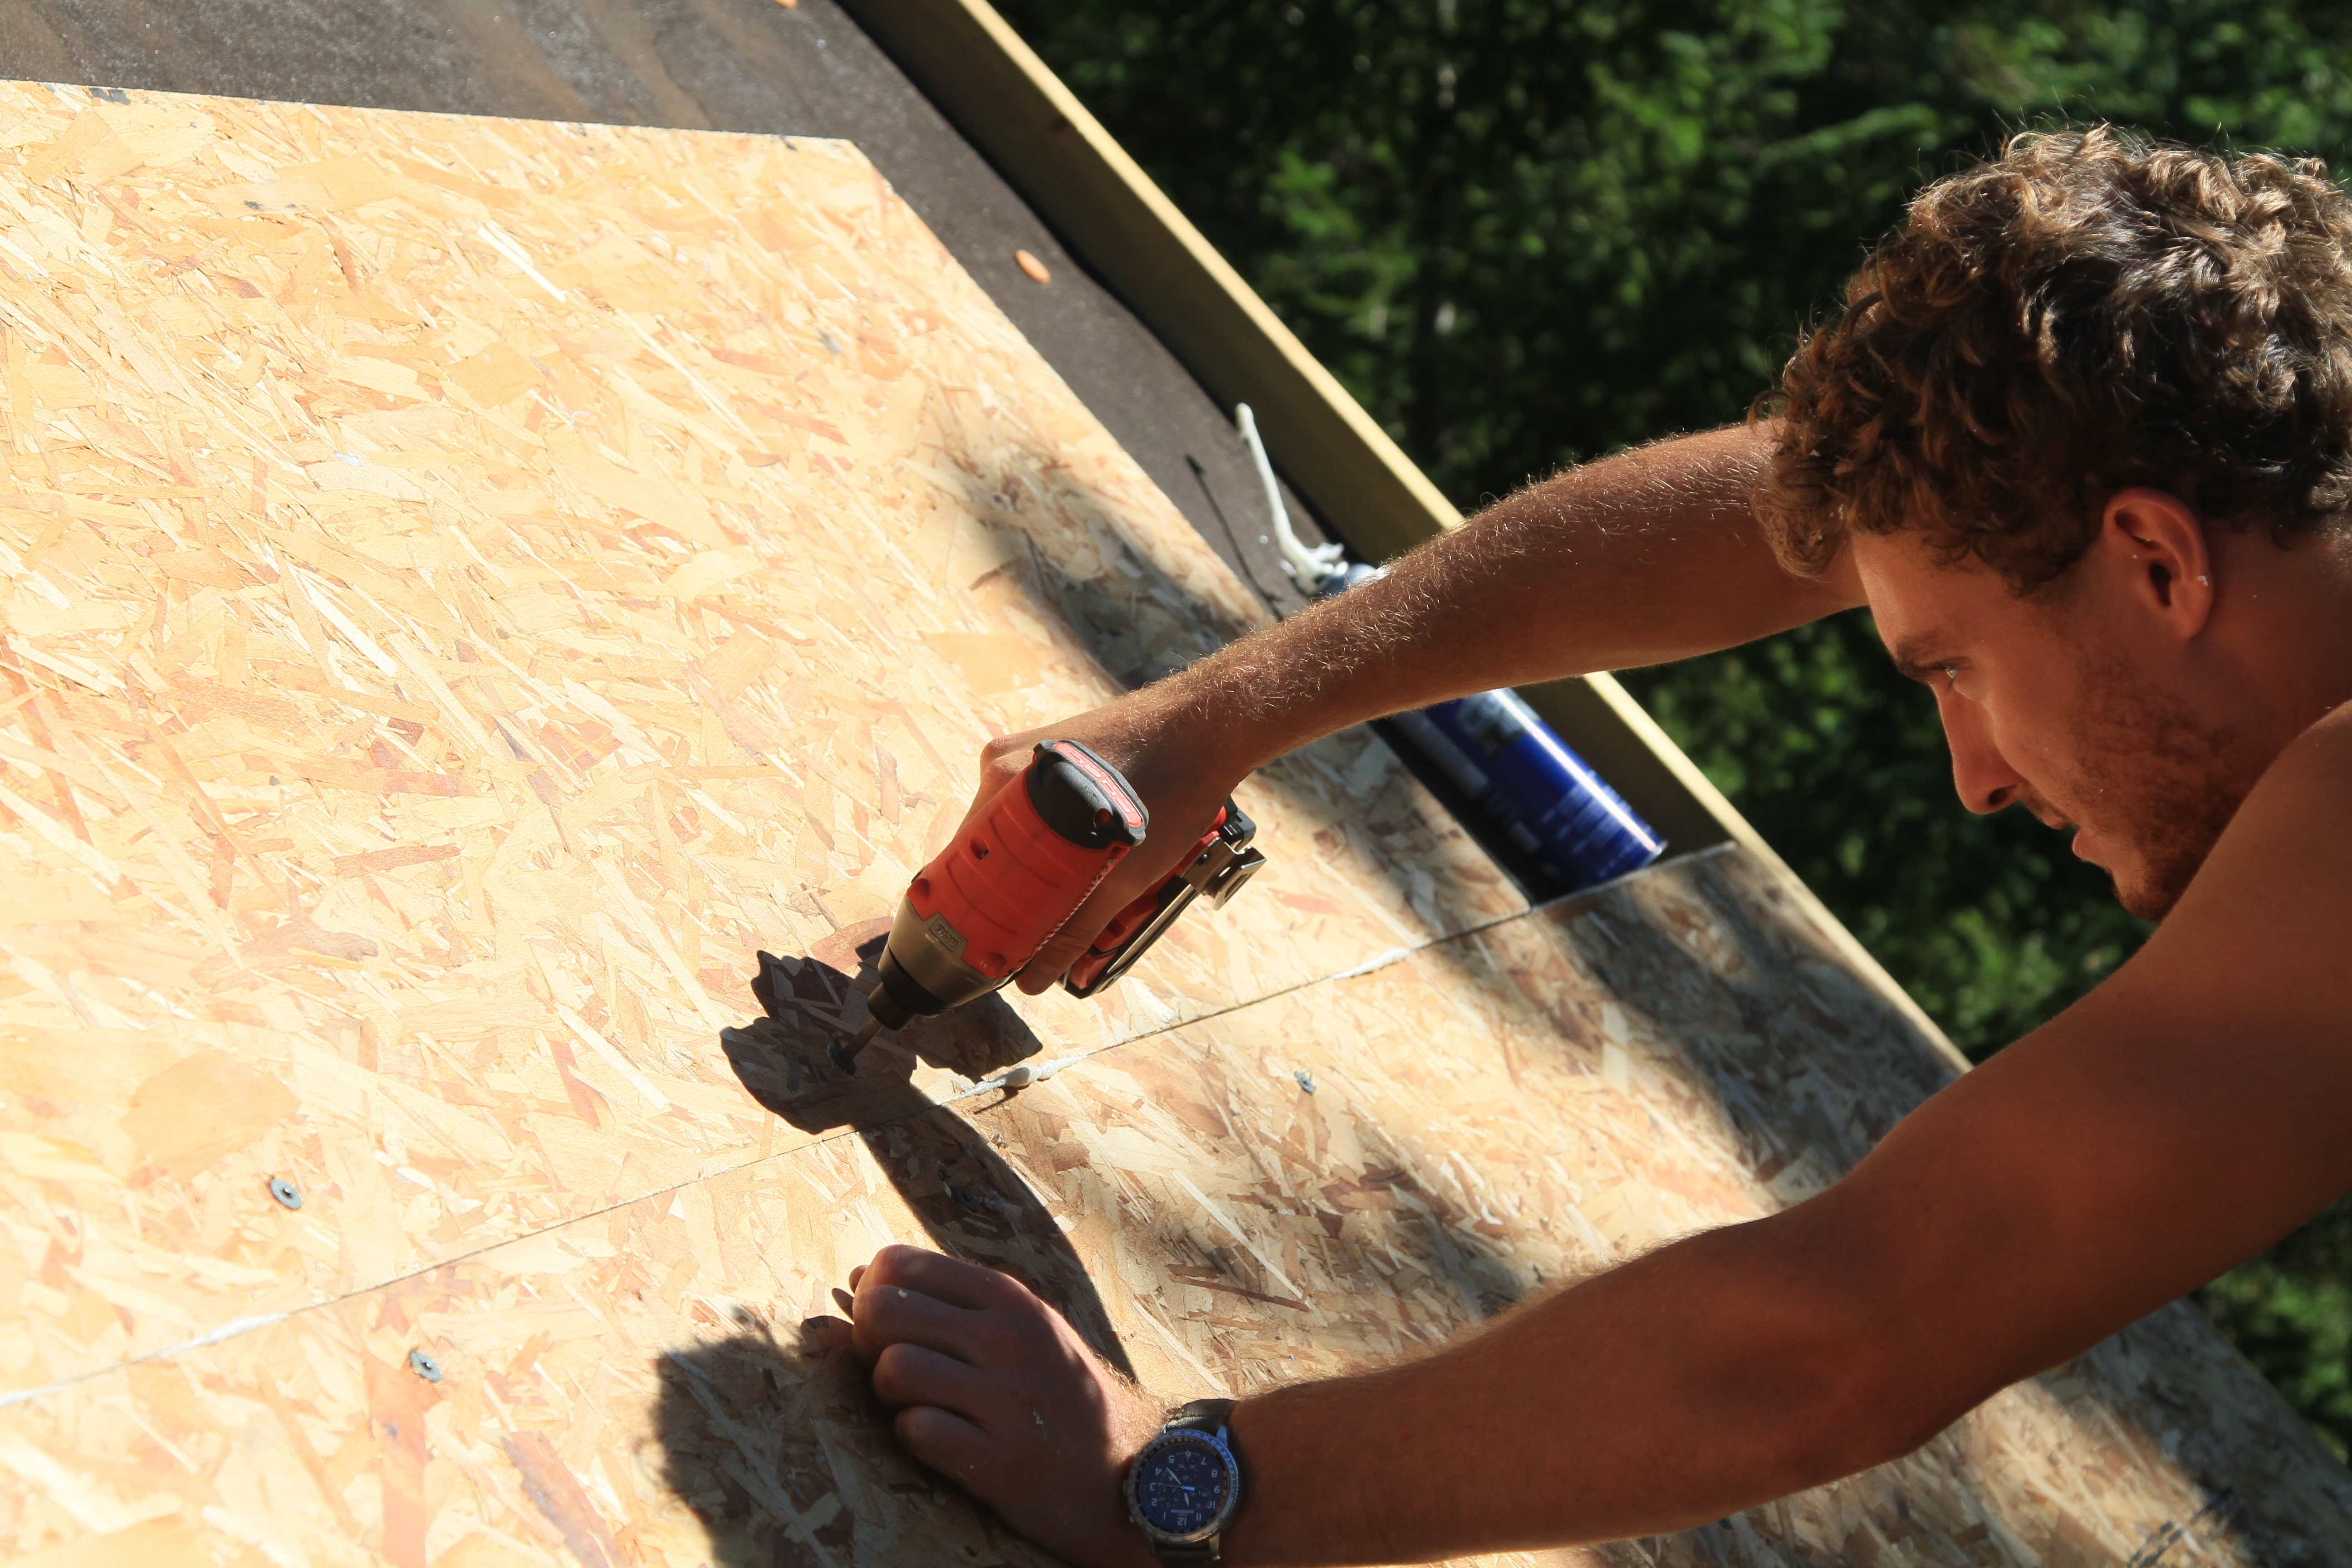
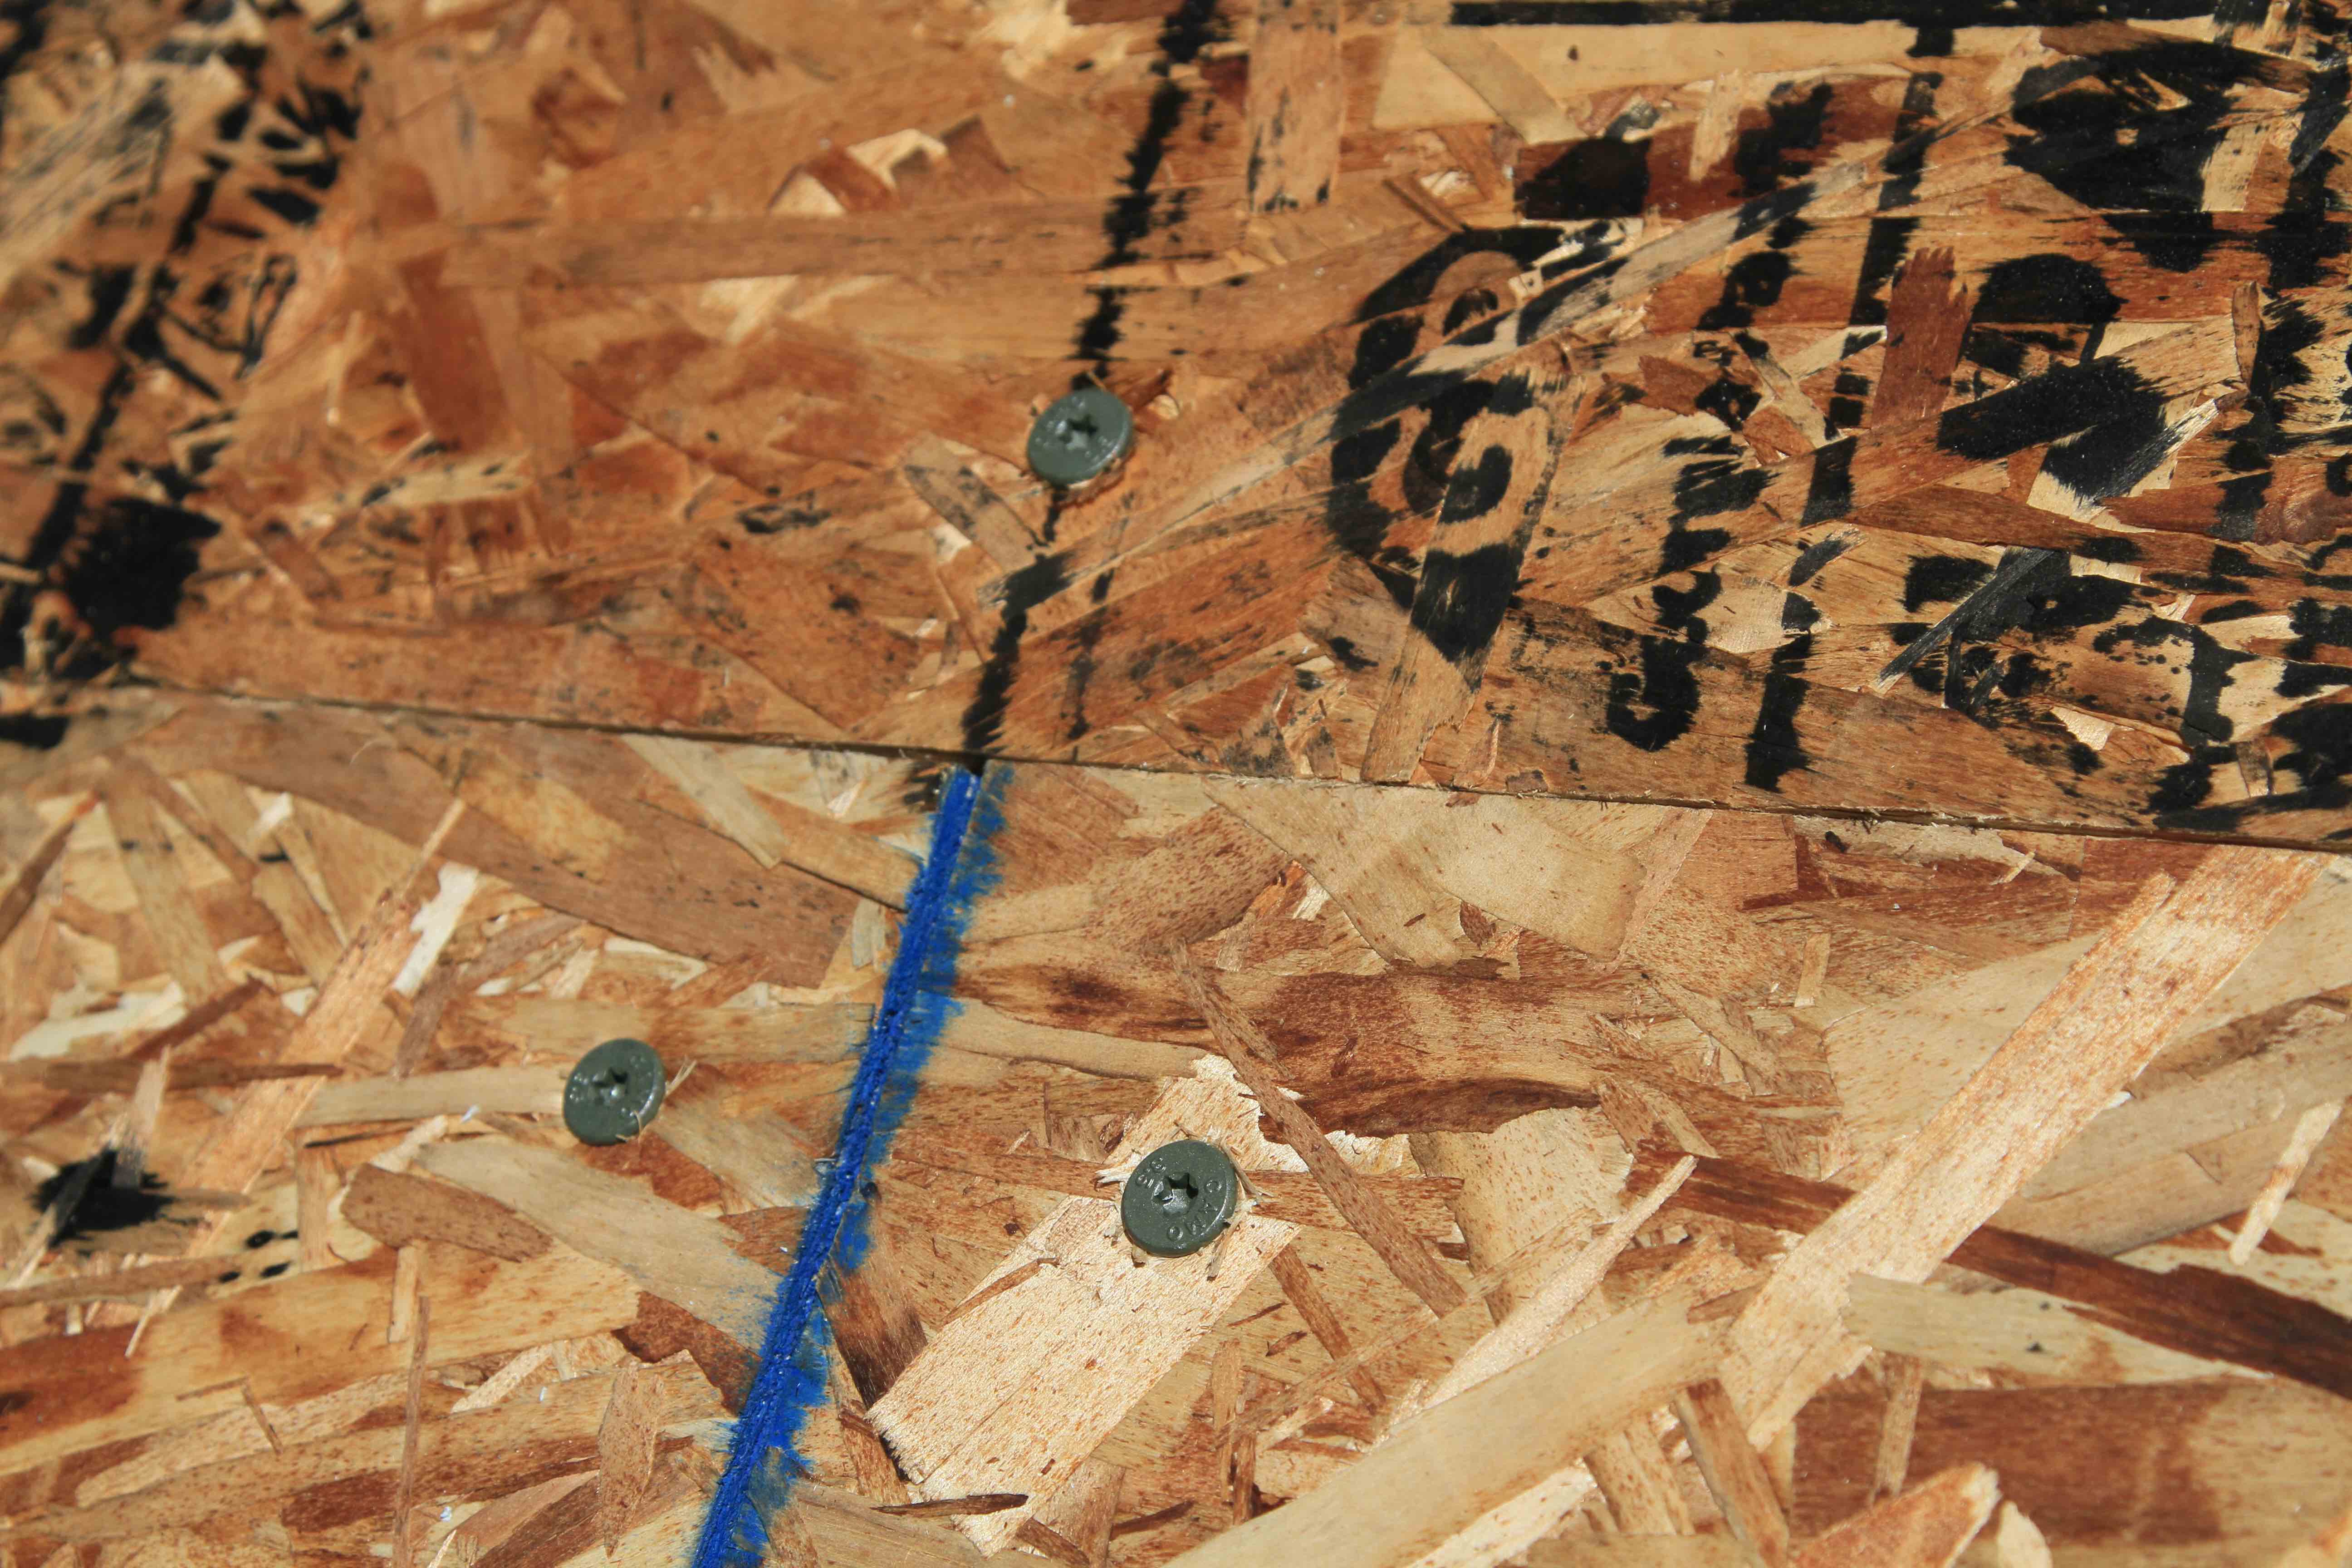
1. Panels get anchored with 3 1/2”-long structural screws driven down into underlying roof sheathing. Orient the panels horizontally across the roof, at 90º to the rafters, secured with screw spaced a couple of inches from each edge, and one screw in the middle. This means you’re aiming for vertical groups of three screws across the width of each panel, located more or less where every rafter is. It’s not essential that the screws hit rafters though, since the 1 1/2”-thick roof sheathing is thick enough to anchor the 3 1/2” screw without the tips popping through. You can see structural screws in action here.
 2. Apply a bead of polyurethane spray foam along the edges of panels where they meet neighbouring ones as they come together. This ensures continuous insulation, and helps ensure that no condensation will occur between insulation sheets during winter deep freezes. Take a glimpse of the foam of joints here.
 3. Stagger panel joints, but don’t bother cutting the ends to land over rafters. It’s faster and much less wasteful this way. The 2×8 roof sheathing is more than strong enough to support the insulating panels.
4. Cut insulating panels so they go around the skylight openings.
5. Trim excess hardened foam from on top of the panels using a utility knife with the blade extended a lot. A hacksaw blade out of the saw frame also makes an excellent, flexible foam-sawing tool.
Barricade wall panels have an R value of 12, and though this doesn’t seem high enough for a roof in cold climates, it actually performs very well in cabins. As with all foam insulation products, real world energy performance is roughly equivalent to twice the R value of fiber insulation. Small dwellings not meant for full-time living don’t typically have to meet the same building code R value requirements for insulation as full-time homes, but rest assured that this kind of foam on the top of your roof will make it easy to heat your cabin in any weather. If you or your building inspector requires more insulation up top, replace the Barricade wall panels with a structural insulated panel (SIP) of the appropriate thickness.
Milestone#8
Roof insulation is in place, with a weatherproof layer of ice and water shield on top. Fascia boards are installed and the roof is ready for underlay, shingle and skylight installation.