When it comes to this cabin and other structures with a floor over an unheated space, I’ve had excellent results using rigid foam on top of the plywood subfloor, with more plywood or OSB on top of the foam as a kind of second subfloor. Foam-insulated floors like these are at least reasonably warm even in my area where winter temperatures sometimes drop to -30ºF or -35ºC. We used the Barricade walls panels I mentioned earlier for floor. They’re best fastened with 4”-long, large-head structural fasteners such as CAMO or Headlok screws, driven down into the subfloor and floor joists. This system works fabulously well, but before you get to work, watch the video up next to see how the wall framing and especially the door threshold needs to be built up to allow the 2 1/2” of extra height required to accommodate the insulating panels.
VIDEO: Floor Insulation
Start work by cutting some scrap strips of 3/4” wood for use as spacers around the perimeter of the insulating floor panels. It’s essential that no warm, moist indoor air be allowed to sneak underneath the panels during winter. If this happens, there’s a good chance that liquid condensation will form underneath the foam when you get bitterly cold weather. This is definitely not something you want. The 3/4” perimeter air space allows you to inject spray foam to seal the connection between walls and floor after installation. More on this later.
Start by sweeping your subfloor completely clean, then lay down your first row of insulating panels. Orient them along the length of the cabin, at right angles to the floor joists, beginning with one full-size panel and ending with whatever length is needed to finish up that row. Since the subfloor is thick and strong, it’s not necessary to align the ends of the insulating panels with the joists. Just let the panels end wherever they end. That said, you will find it helpful to mark the location of floor joists on the wall, so you know where to drive anchoring screws. Make your marks on both walls, about 3” up from the subfloor so you can still see the marks when the panels are in place. Continue by using a chalkline stretched across corresponding marks and snapped on the floor panel surfaces to show where screws need to be driven down into the joists. As you place neighbouring panels in position, apply spray foam to the joints before pushing the panels together. This creates a seal that ensures cold air stays out, eliminating any chance that warm, indoor air makes its way to cold areas under the insulation and condense.
As you start the second row of floor panels, begin with the partial panel you cut off the end of the last panel in the first row, placed next to the full-size panel you began with on the first row. Although it’s not essential to stagger the end joints like this, it does help to make full use of your material by minimizing waste. To see how all this comes together, watch the video up next.
VIDEO: Installing Floor Insulation
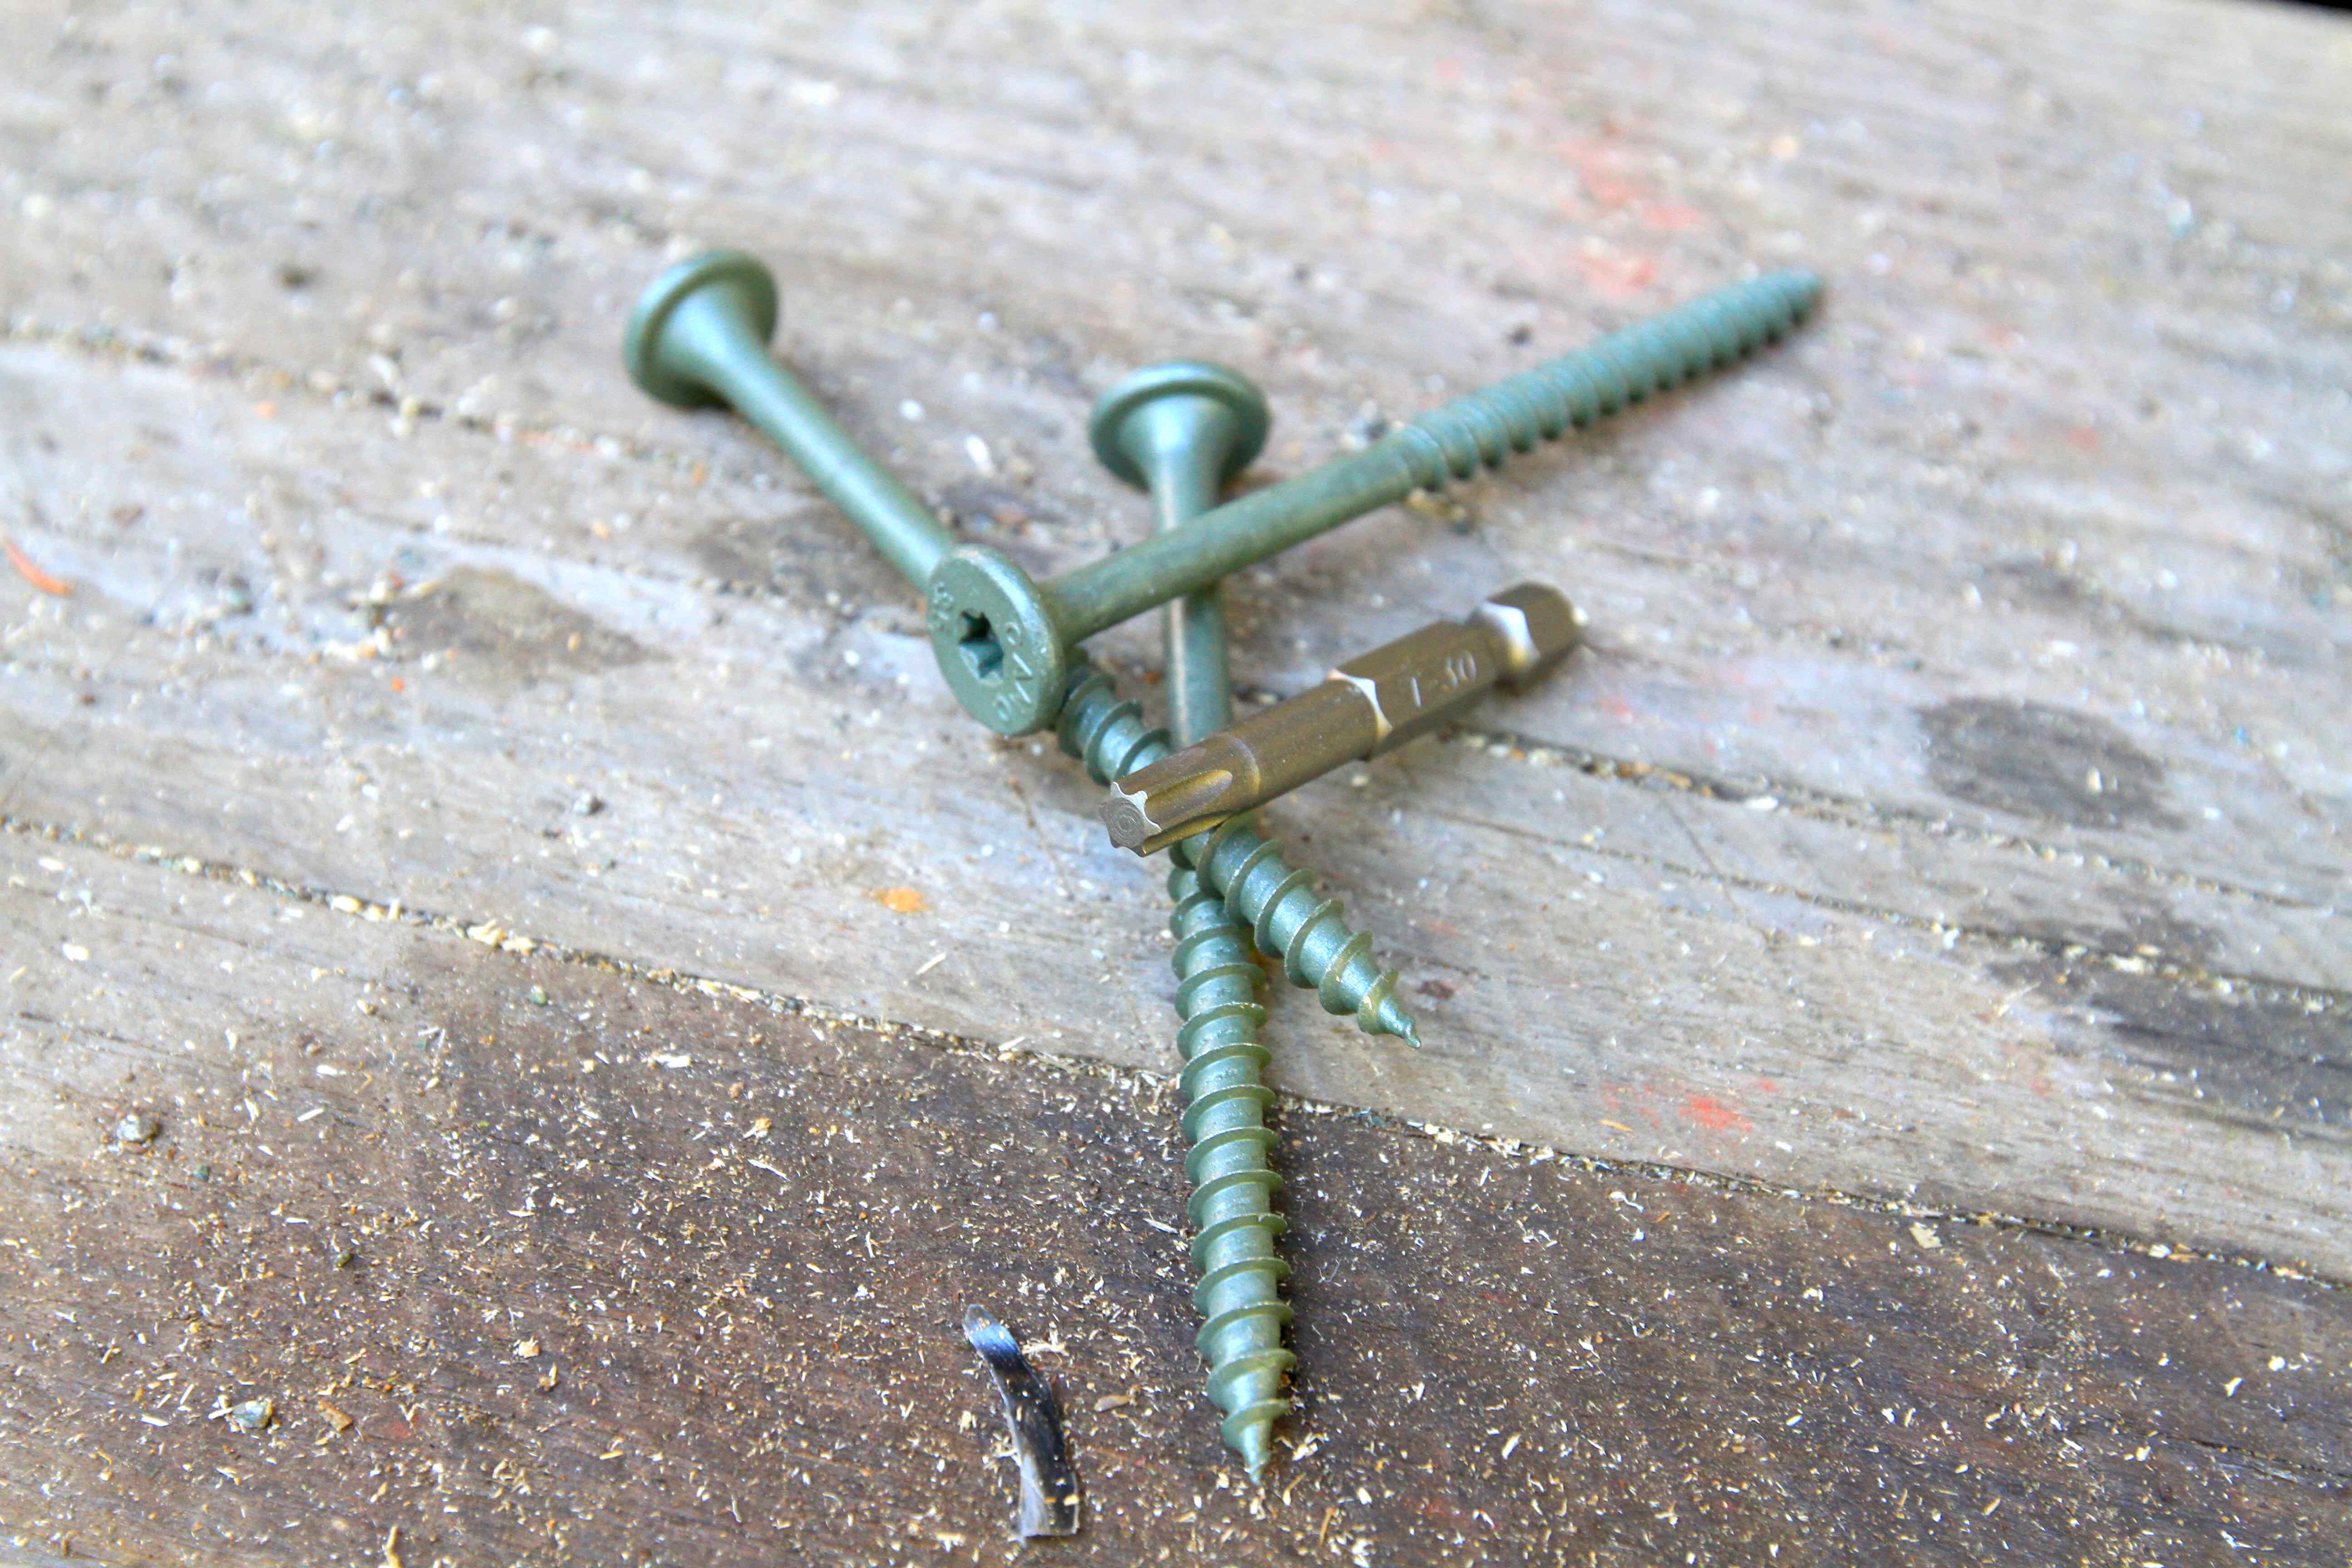 The CAMO or Headlok screws I recommend for this job are better than deck screws for two reasons. First, they have a much larger head, so they hold material down more firmly. Also, the threaded shank is bigger than any deck screw, so they bite and hold the wood more firmly.
The only hitch is cost. Both these kind of structural screws are more expensive than deck screws. Although you shouldn’t use anything other than CAMO or Headlok for anchoring the roof panels, you could use deck screws for the floor panels if you need to economize. Just be sure to use 4” deck screws located so they extend down into the floor joists, not just in the 3/4” plywood subfloor itself.
Finish up by removing the spacers between the wall frames and panels, filling the space with spray foam. Saw the hardened foam off after it’s fully cured. That hacksaw blade taken out of its frame that I mentioned earlier is the ideal tool for slicing off hardened foam. It’s flexible enough to bend for cutting flush with surfaces, but it’s rigid enough to resist buckling. Even though the teeth are fine, they make quick work of hardened foam.
Any holes you’ll need to drill later for pipes and wires are easily made through the insulating panels and subfloor with hole saws. Don’t worry about them at this stage.
Finished Flooring Option
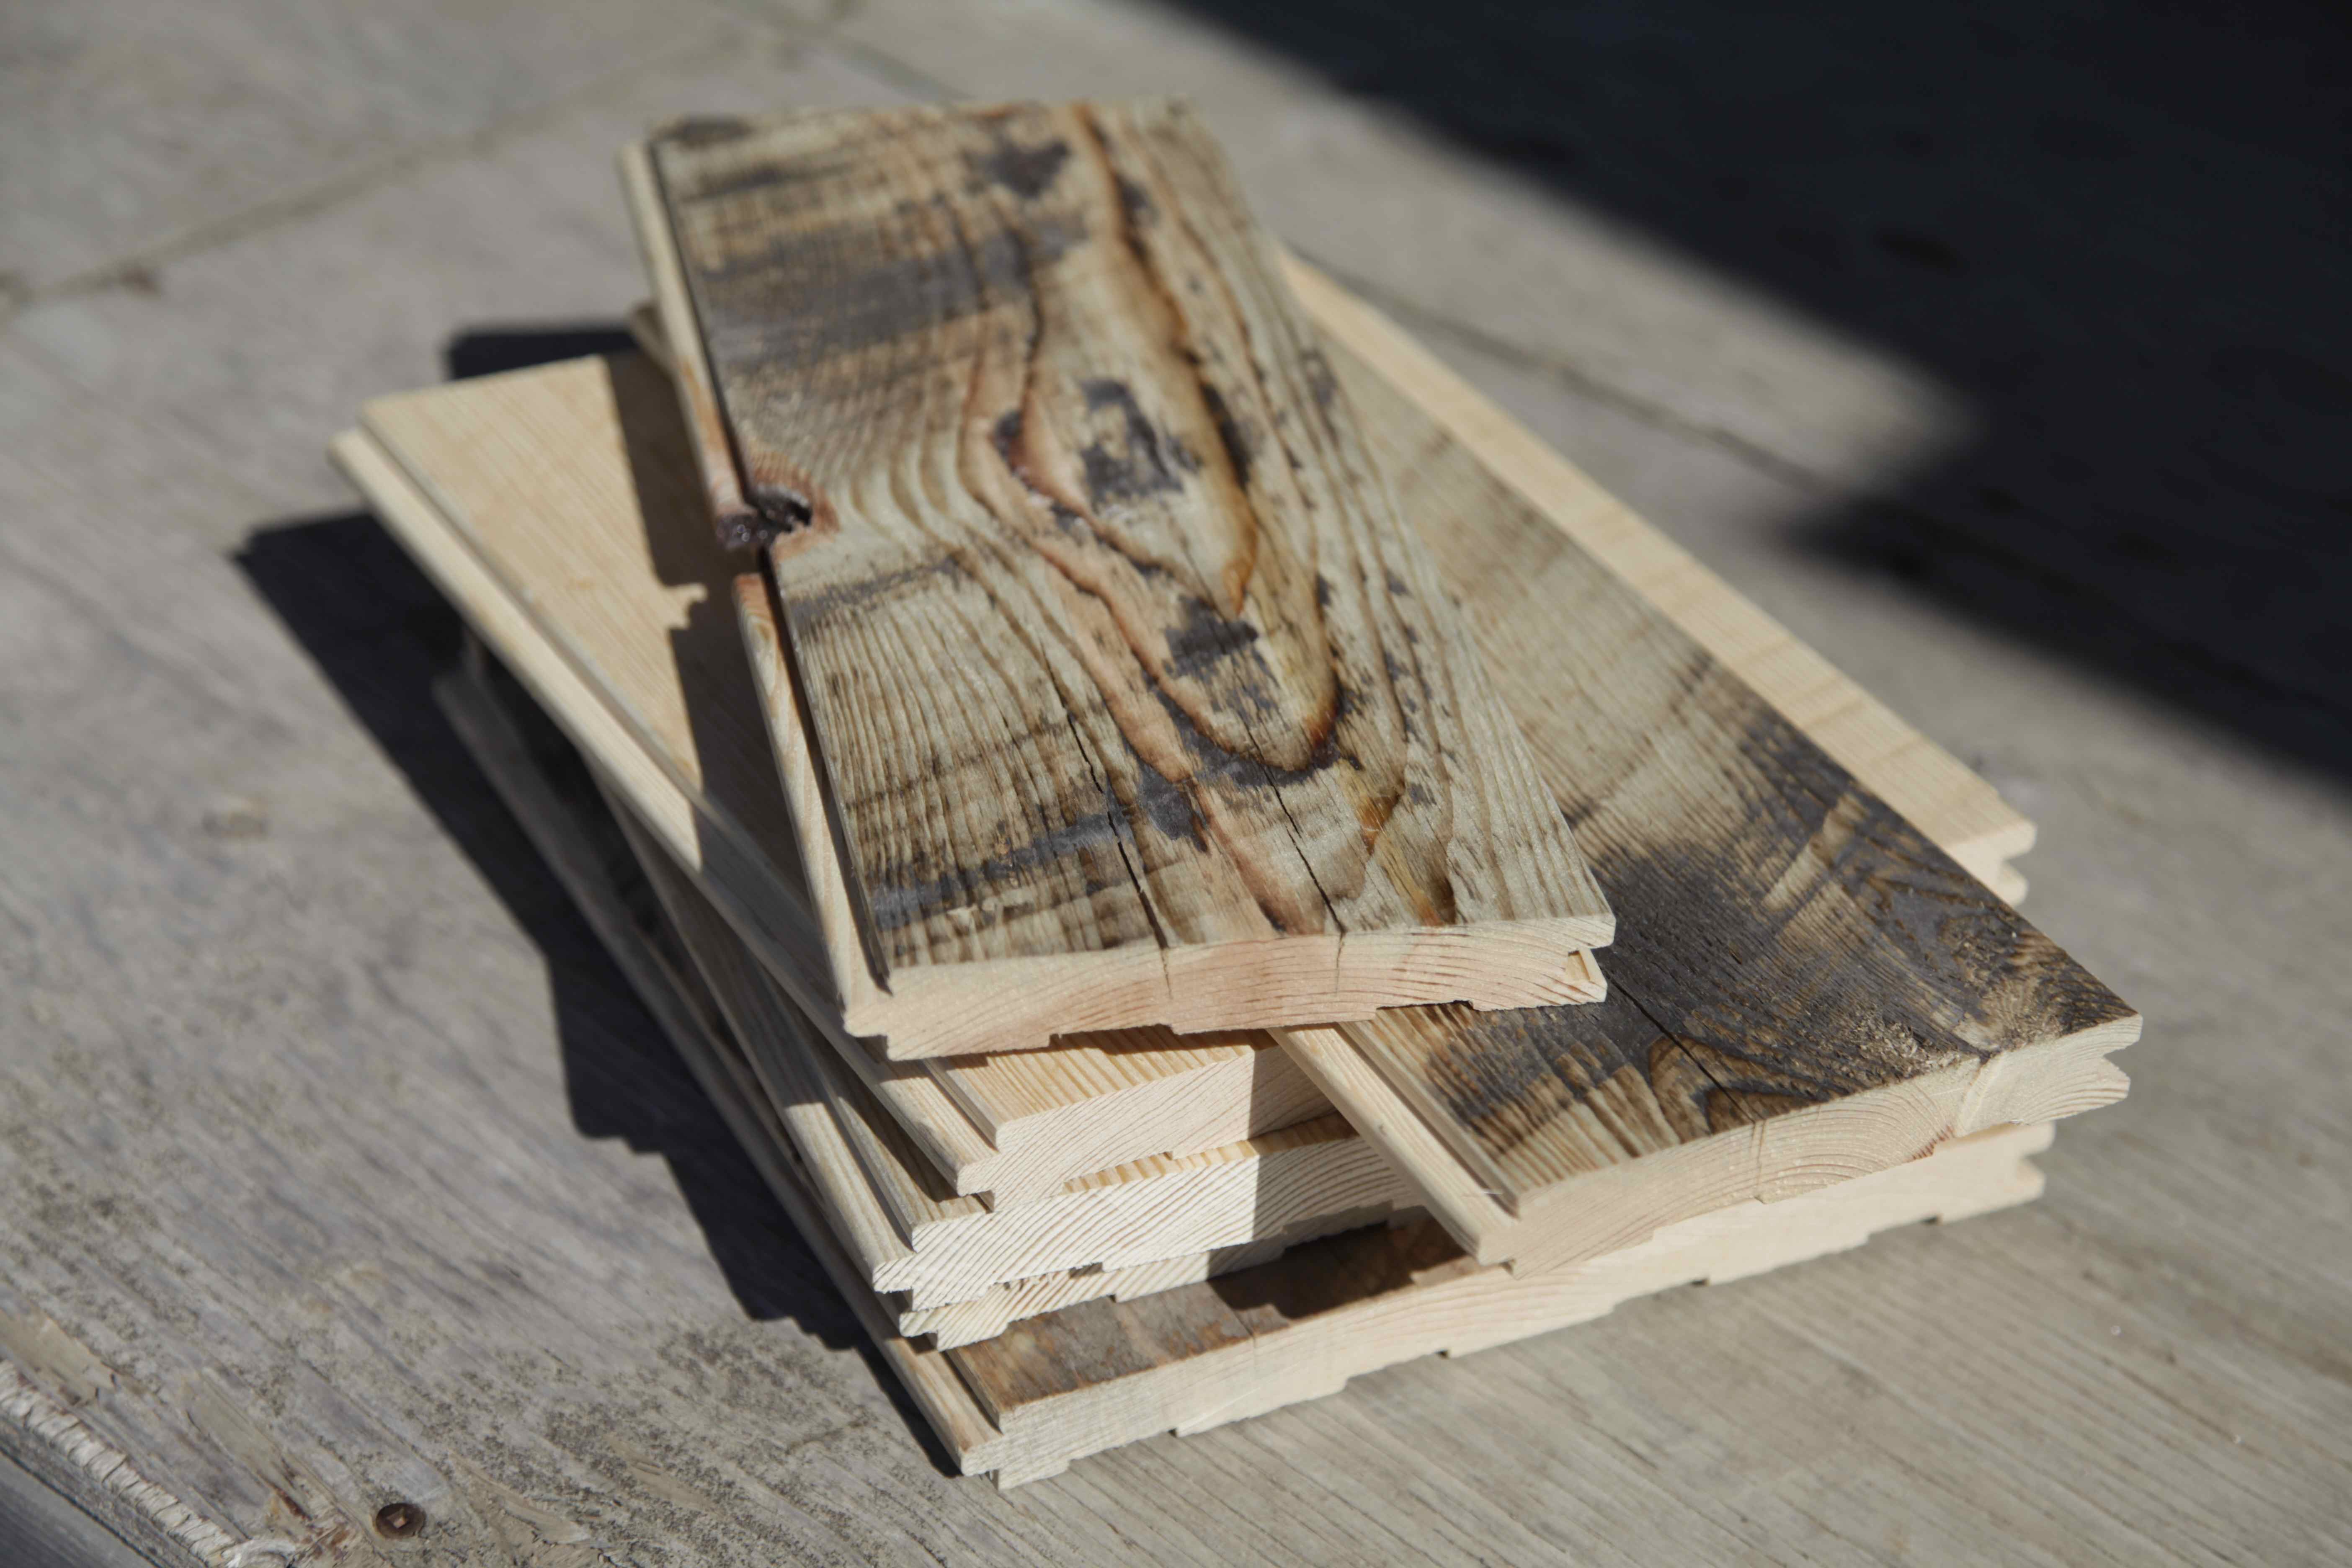 The are many options that make sense for a cabin floor, but rough-sawn pine is one of the best. I like boards that were cut with a circular sawmill, rather than a bandsaw mill, since the circular mill leaves behind those classic, curved marks. Anchor the boards using plug-covered screws and you’re ready for finishing. You’ll get best results if you give the surface a light sanding with an 80-grit disk on a random orbit sander to remove surface fuzz. This leaves those great circular sawmill marks left behind while prepping the surface for a finish. You can use conventional floor urethane, but I prefer polymerized tung oil as a wood floor finish. It takes half a dozen coats to create an initial finish, but tung oil is more easily and seamlessly renewed than urethane as normal foot traffic wears down the surface.
By now you’re pretty well finished the shell of your cabin, and that’s as far as I can take you with this book. I sure hope you’ve found my guidance helpful. There are a few things left for me to explain, but before I do let me caution you against a common pitfall. It has to do with closing in the raised foundation area of buildings set on raised foundation piers like this cabin. Here’s a real-world example that makes the case.
 A friend of mine lives at a lakeside property that includes six small, rustic sleeping cabins next to his main house. Each measures about 10’ x 10’ and all were built in the 1930s, mostly from cedar sawmill slabs. All these cabins are also in exceptionally good shape, except for one. For reasons that remain a mystery, this particular cabin had it’s foundation piers closed in completely some time ago, and this made all the difference. Unlike all five of the other cabins, the siding was extended right down to the ground on this one, and as a result the floor frame was completely rotten out. There’s actually no floor there at all, and it’s a powerful example of how ventilation is one crucial key to durable design. Be sure to let the area under your cabin breath, and never close in the space between your foundation piers at all. Besides trapping dangerous levels of moisture, closed crawlspaces attract the kind of animals that should never live under any cabin.
Milestone#10
Your cabin shell is warm, dry and completely heatable. It’s all ready for wiring, wall insulation, interior finishing and a verandah floor.
