Roof Shingling Success
 Shingling the cabin on top of the insulated panels is the same as any other kind of shingling job, and let me give you some details to get you going in the right direction.
There are many ways to waterproof a roof, and we chose asphalt shingles for several reasons. Good asphalt shingles last much longer than cedar shingles, and as much as I like cedar shingles for wall siding, I’d never use them on a roof. They just don’t last long enough. And while a factory-finished metal roof keeps water out at least as long as the best 50-year asphalt shingles, I have yet to see a metal roof that doesn’t show serious paint failure after 25 years or so. Besides, I like the look of premium asphalt shingles better than metal any day.
If you do opt for asphalt shingles, and you do opt for top-of-roof insulation (strongly recommended), you need to understand something critical that affects the working life of your roof. And this issue has to do with the two main types of asphalt shingles in the world: organic and fiberglass.
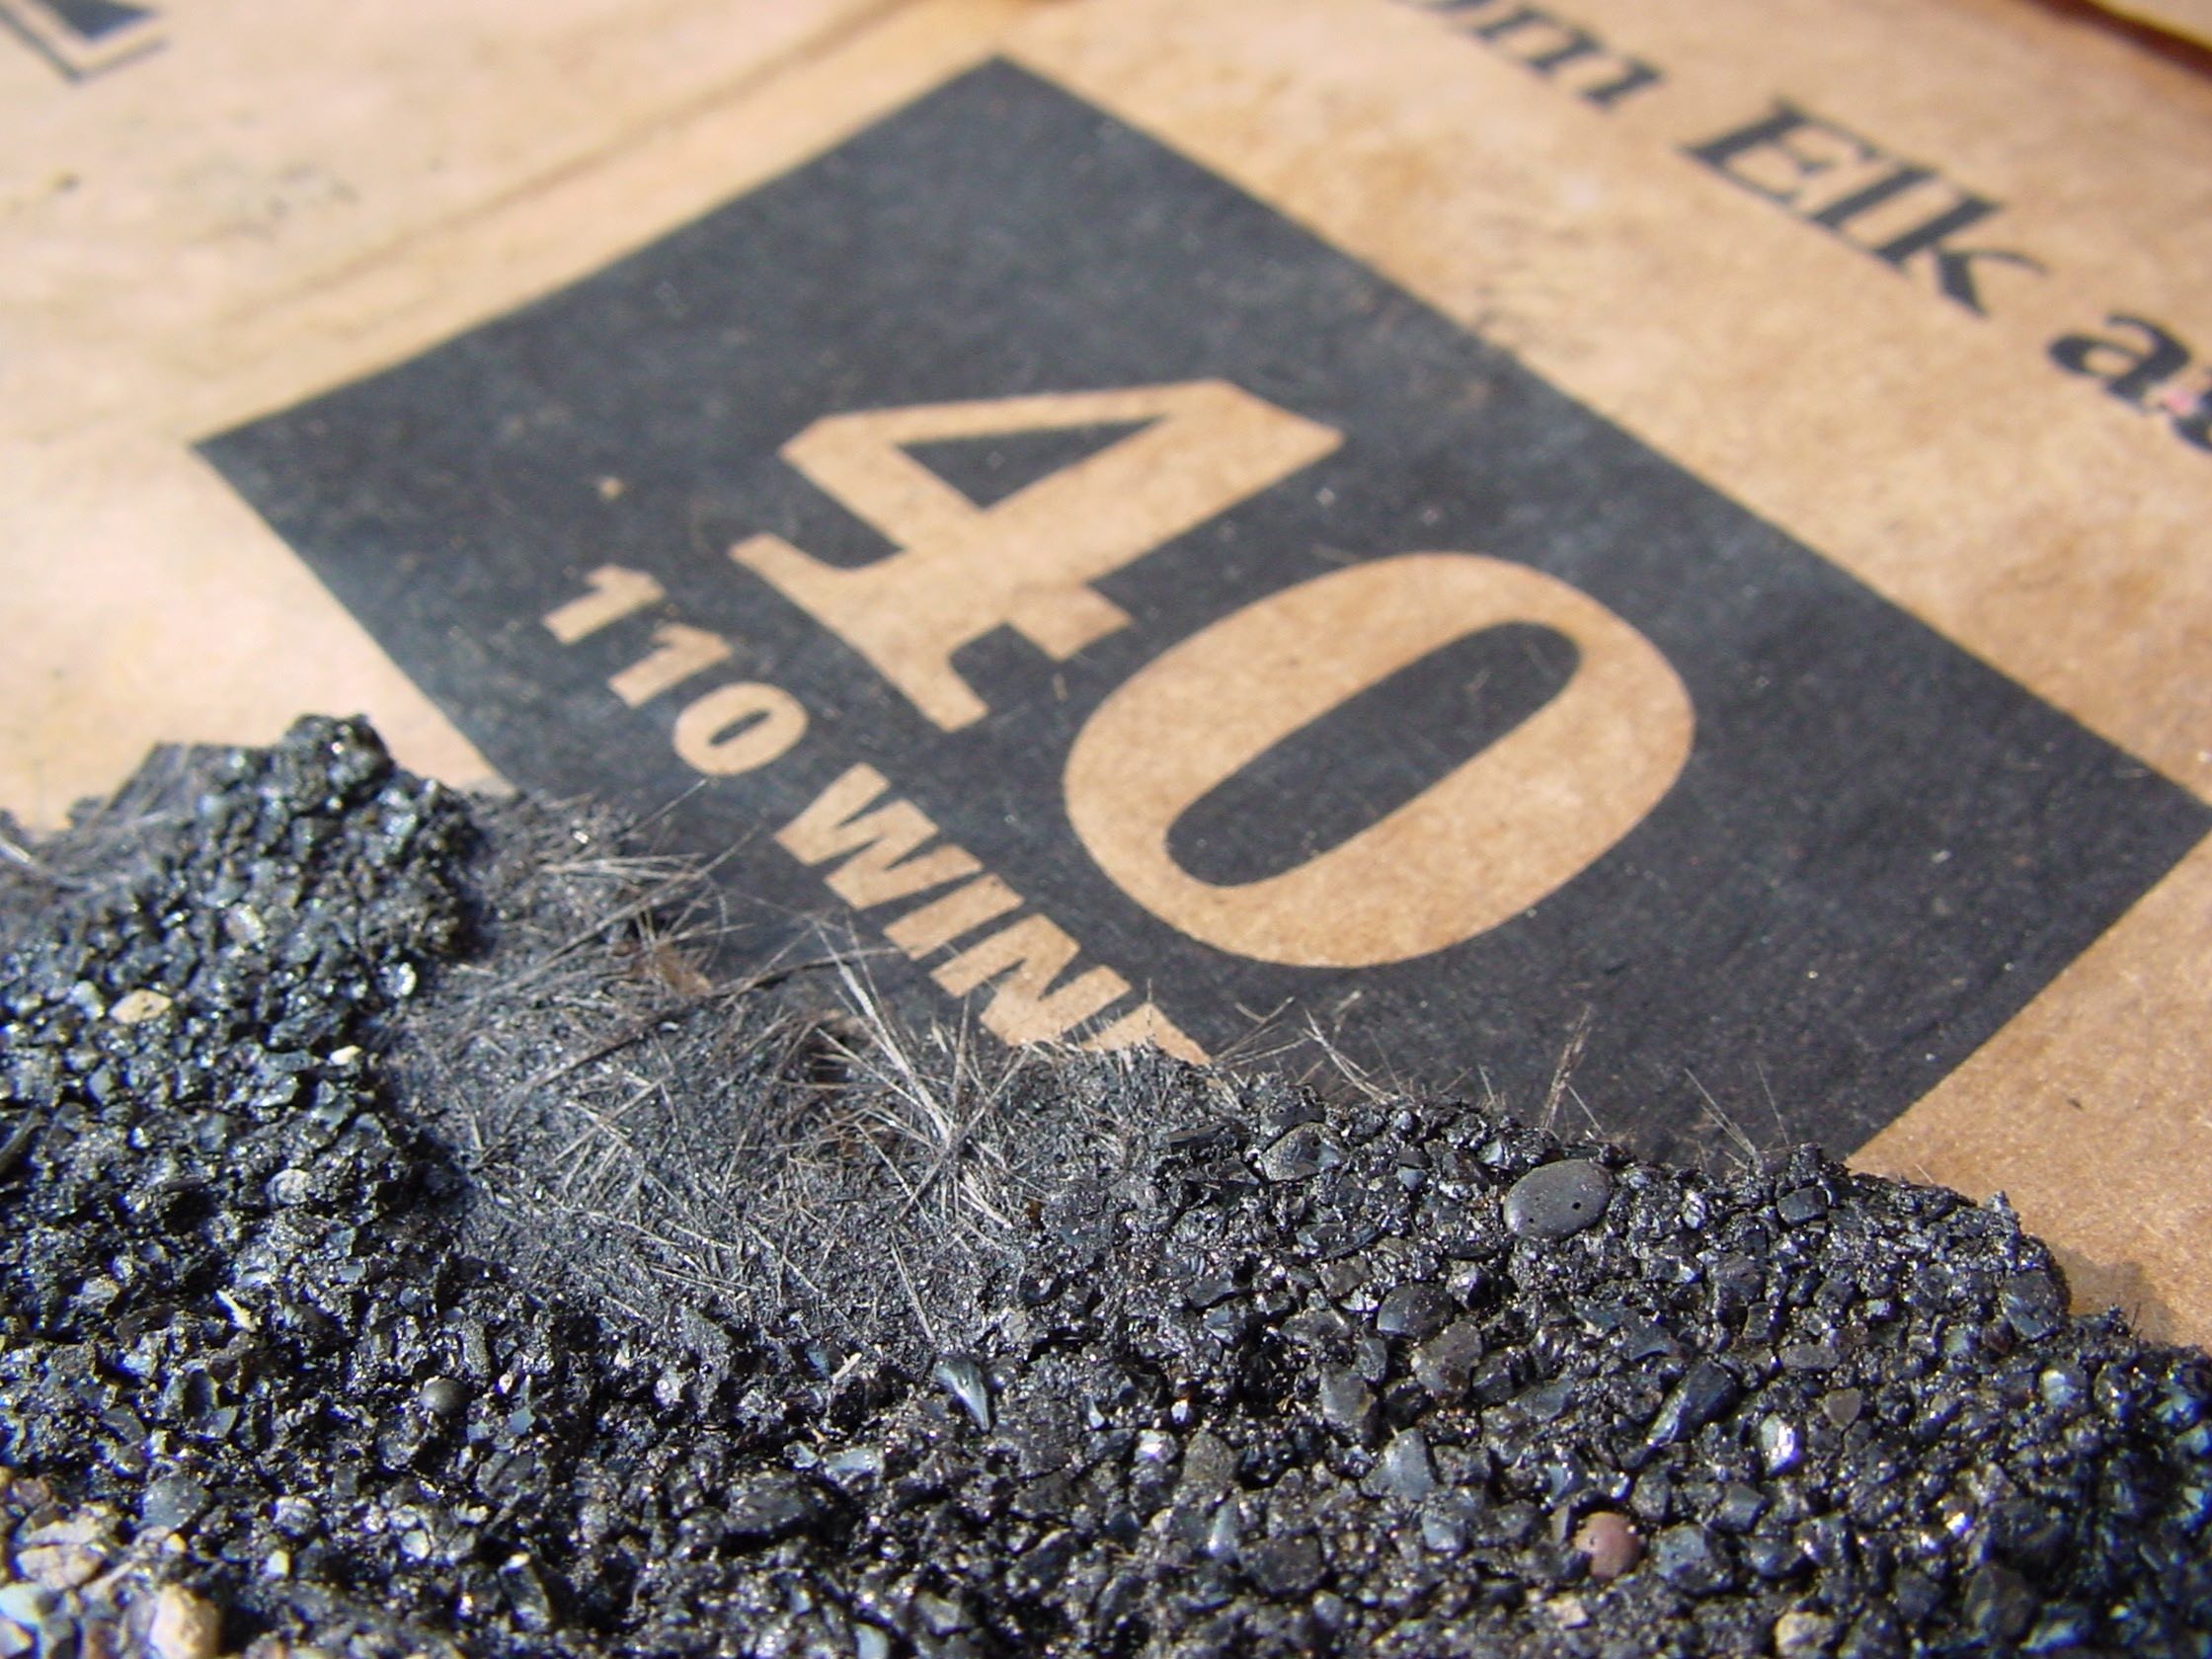 Although both look the same superficially, there are underlying differences between organic and fiberglass that matter. Organic asphalt shingles are built around a heavy felt material that’s saturated with tar and coated in small, coloured granules. Fiberglass shingles have the same coloured granules and tar saturation, but it’s a fiberglass mat that’s underneath it all, not felt. This doesn’t sound like much, but it does result in one enormous difference. Fiberglass shingles can withstand a lot of rooftop heat for many decades, while organic asphalt shingles will curl and fail under the same conditions in less than 10 years. Any kind of non-ventilated, rooftop insulation makes for an extremely hot roof surface during summer, and this is why you’ve got to use fiberglass shingles if you’ll be using shingles at all.
One more thing on shingle selection. There are many different shapes of asphalt shingles on the market, and each creates a different look. The oldest type are called “three-tab” shingles because each piece of shingle is partially divided into three sections. The problem with three-tab shingles is that they require installation with the vertical joints between tabs to follow an alternating pattern. In addition to getting the rows level and evenly spaced, you also need to stagger the vertical joints accurately. This added complication is completely avoided with almost all other patterns of asphalt shingle, so installation is easier. And if this weren’t enough, the more irregular, non-three tab shingles look better, especially on a cabin. They also catch and hold pine needles much less.
When it comes to actually installing shingles, the basics are pretty simple and I’ll explain them here. If you need more help understanding the installation of asphalt shingles, check out Roofing With Asphalt Shingles by Mike Guertin. It’s the best book I know on the subject.
Start work by installing factory-finished aluminum strips around the perimeter of the roof to stop rain from seeping onto the wood at the joints. This kind of metal is sold as “drip edge” or “drip cap”. Ideally it goes down over top of the tar paper or ice and water shield installed on the insulation panels on the gable ends of the cabin, but underneath the ice and water shield at the eaves. One shingle nail driven every two feet or so into the strip, near the inside edge, holds it perfectly.
Next, nail down your first row of shingles along the eaves, securing each shingle with four to six nails. The paper or plastic packaging that surrounds every bundle of asphalt shingles on the planet includes instructions for nail placement. Take a look and follow what you see. It’s not complicated.
TECH TIP: Roofing Nailer a Big Help
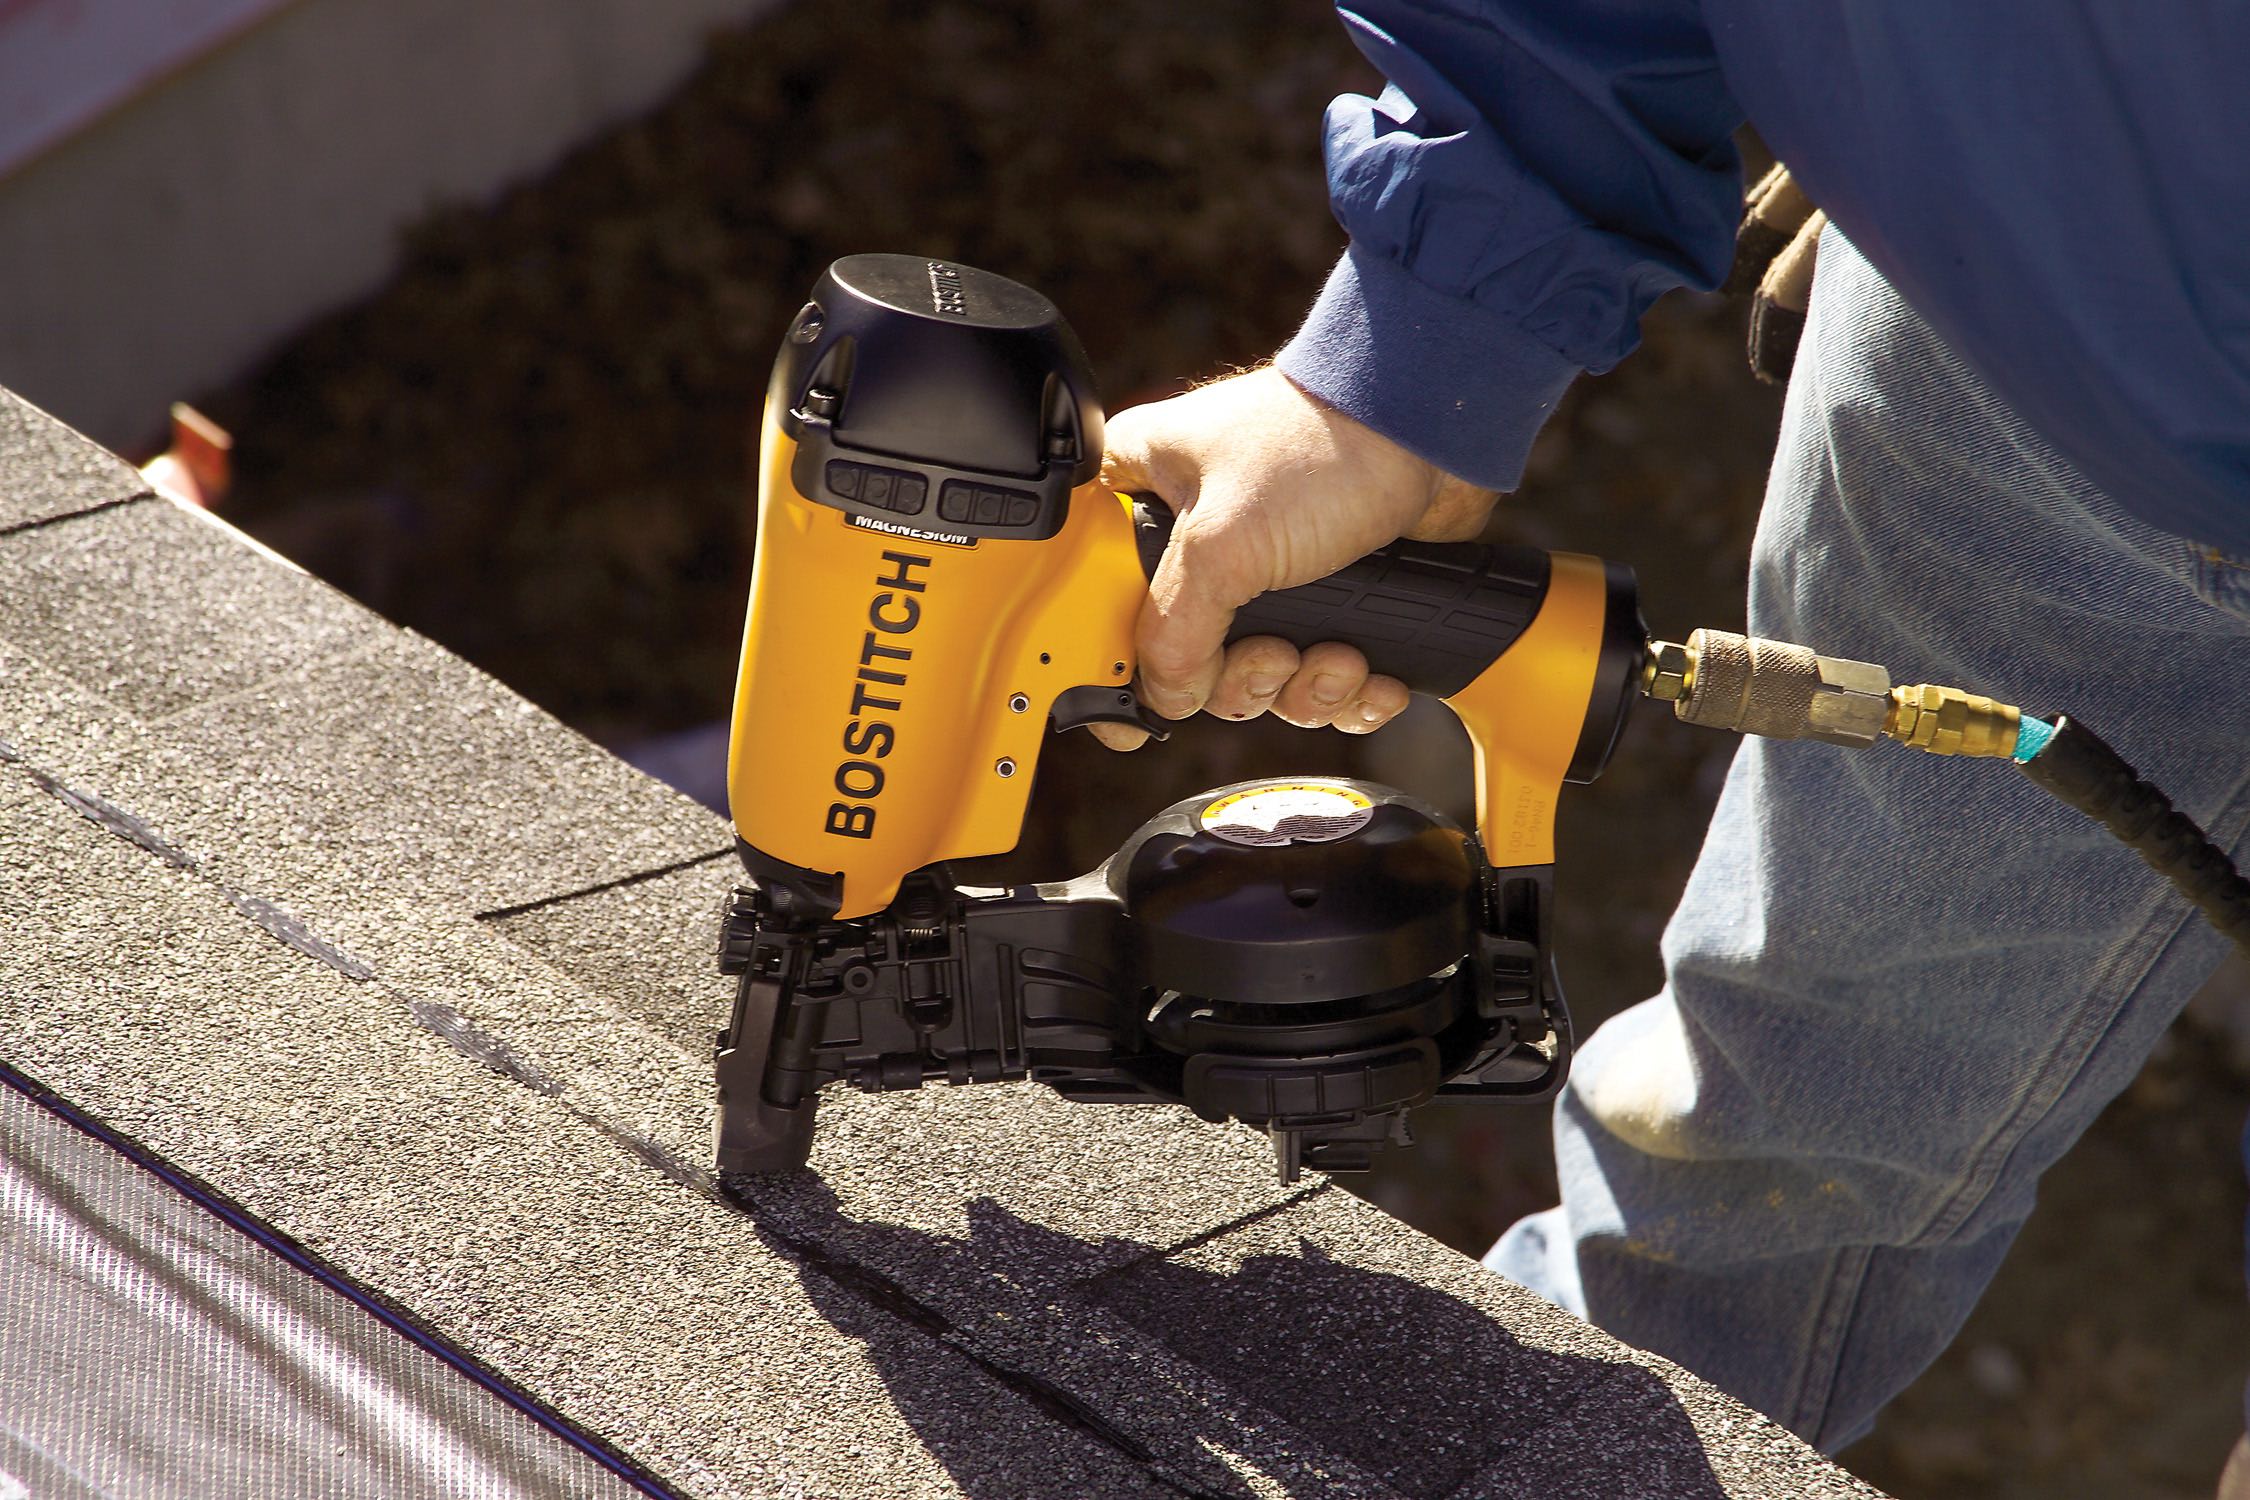 Of all the construction tasks that compressed air can help with, nailing down asphalt shingles is the most useful. It adds so much speed to the job and it makes the work more pleasant. If ever you thought you might like to borrow or buy a small compressor for use on your cabin project, it pays off the most when roofing. Just be sure you and everyone working on the roof wears safety glasses. All collated roofing nails of the sort that work in roofing nailers are joined together with thin wire. These wires break and fly with every shot. It might be a one-in-a-million chance that some wire hits your eye, but that’s still too much risk when eyesight is concerned.
Continue with another row of shingles directly on top of the first one and no higher, but with end joints overlapping by at least 6”. The purpose here is to overlap all bottom joints in the same way you did with the double layer of cedar shingles along the bottom of the walls. After your double bottom layer is in place, continue adding more rows of shingles progressively further up the roof, also maintaining the minimum 6” of end joint overlap. You’ll find it far easier, more productive and safer if you erect scaffolding along the eaves where you’re working. After installing three or four course of shingles, you’ll need to install triangular metal brackets that support boards that create a work platform for shingling further up. These are called roof jacks, and any good book on roofing will show you exactly how to install them safely. That said, in the case of this cabin, there’s something unique you need to know. Be sure to read on to see what I mean.
Anchoring Roof Jacks
 If you’ve opted for top-of-roof insulating panels, then the only wood you’ve got on top is 7/16” OSB, with no rafters immediately underneath to hold the roof jack nails solidly, as in the typical installation shown above. Although this OSB will feel completely solid under foot, it’s simply not enough to hold metal roof jacks in place on its own, with no rafters directly underneath. To ensure you’re jacks stay solid and don’t tear off the roof under load, anchor them with 3 1/2”-long roofing nails, instead of the 1 1/4” nails usually used for this job. The longer nails will go through the 7/16” OSB, and also hit the 2×8 roof sheathing underneath. This two-part grip secures the roof jacks very reliably. And when it comes time to remove the jacks, simple pound the longer roofing nails flush with the roof surface just as you would normally do with shorter anchor nails.
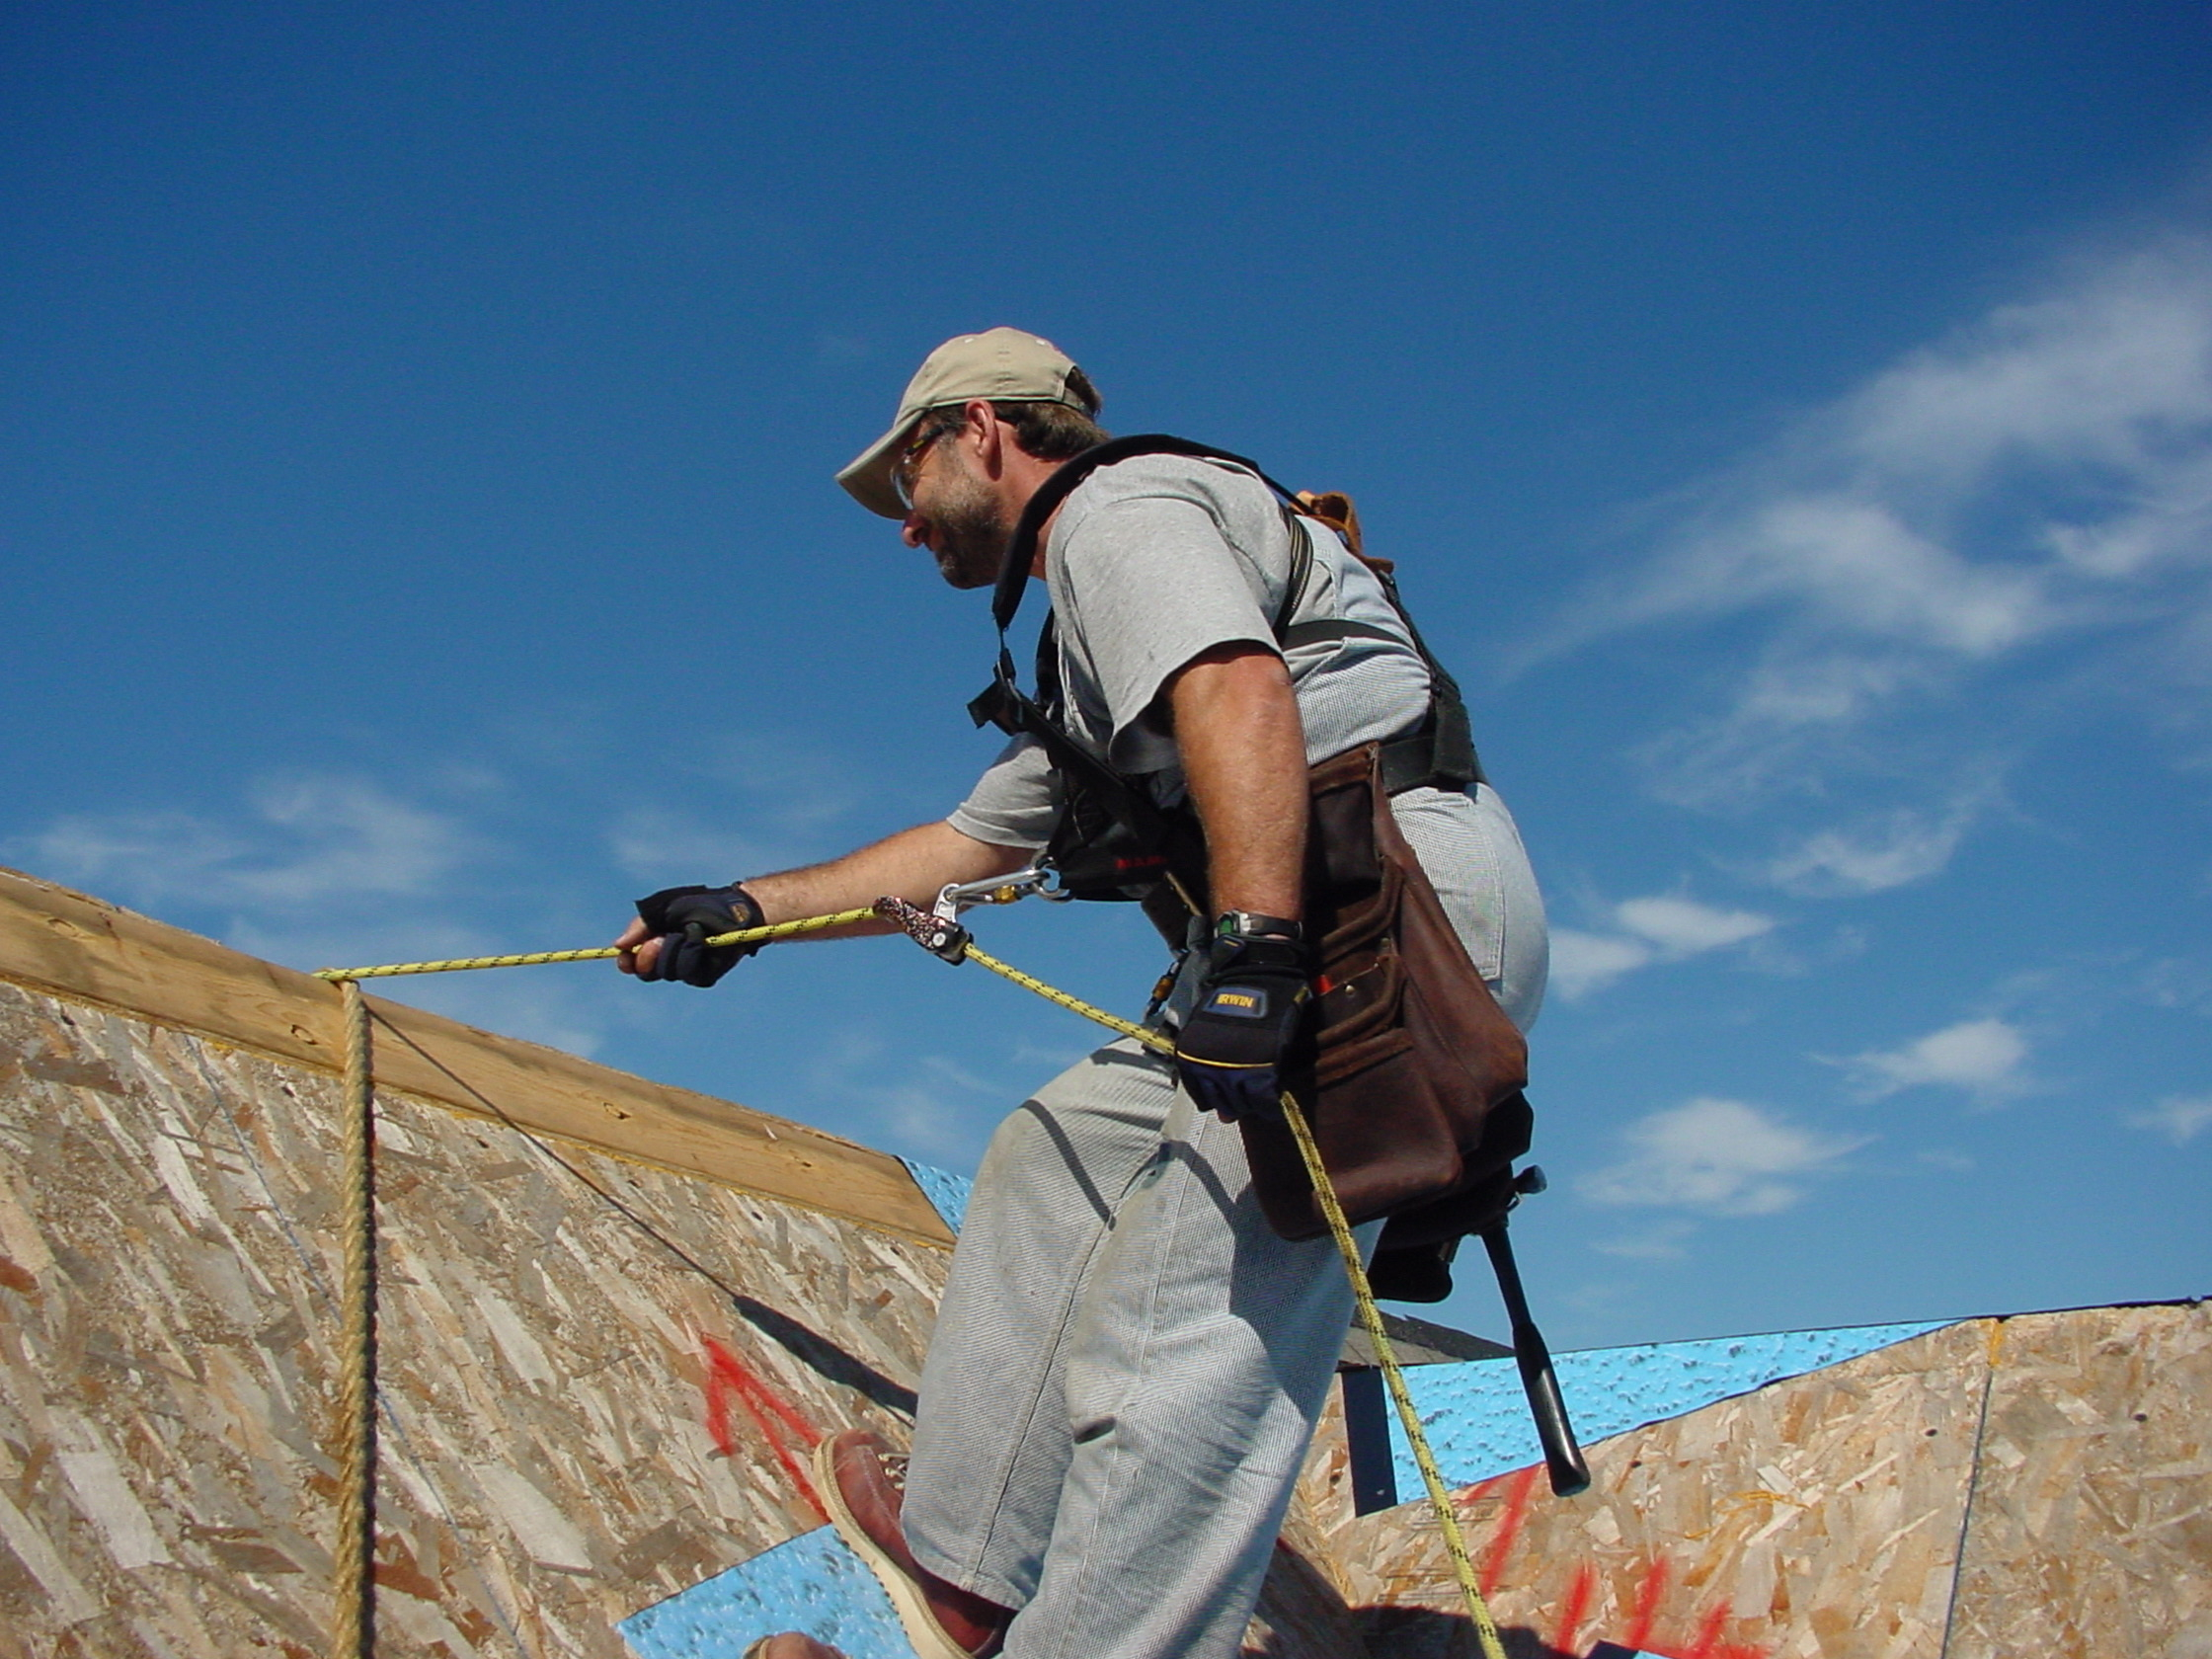 Once you’re working on the roof itself, and you’ve progressed high enough up so you’re not standing on the scaffolding any more, be smart. Strap yourself into a safety harness and tie off. The roof of this cabin is steep, and any slip that leads to a fall will be much worse than you imagine. Throw your safety rope over the peak of the roof and tie it to the base of a stout tree on the other side. It’s simply smart.
The final step in any asphalt shingling job is to install the cap shingles. These are sometimes made from regular shingles cut into thirds, but more commonly these days they’re offered as special cap shingles you buy separately. Either way, cap shingles bend over the peak of the roof after both sides are shingled, with each cap shingle held in place with two nails at one end only, covered by the next cap shingle to go down. The last cap shingle is held on with roofing tar only, so no shingles can be seen.
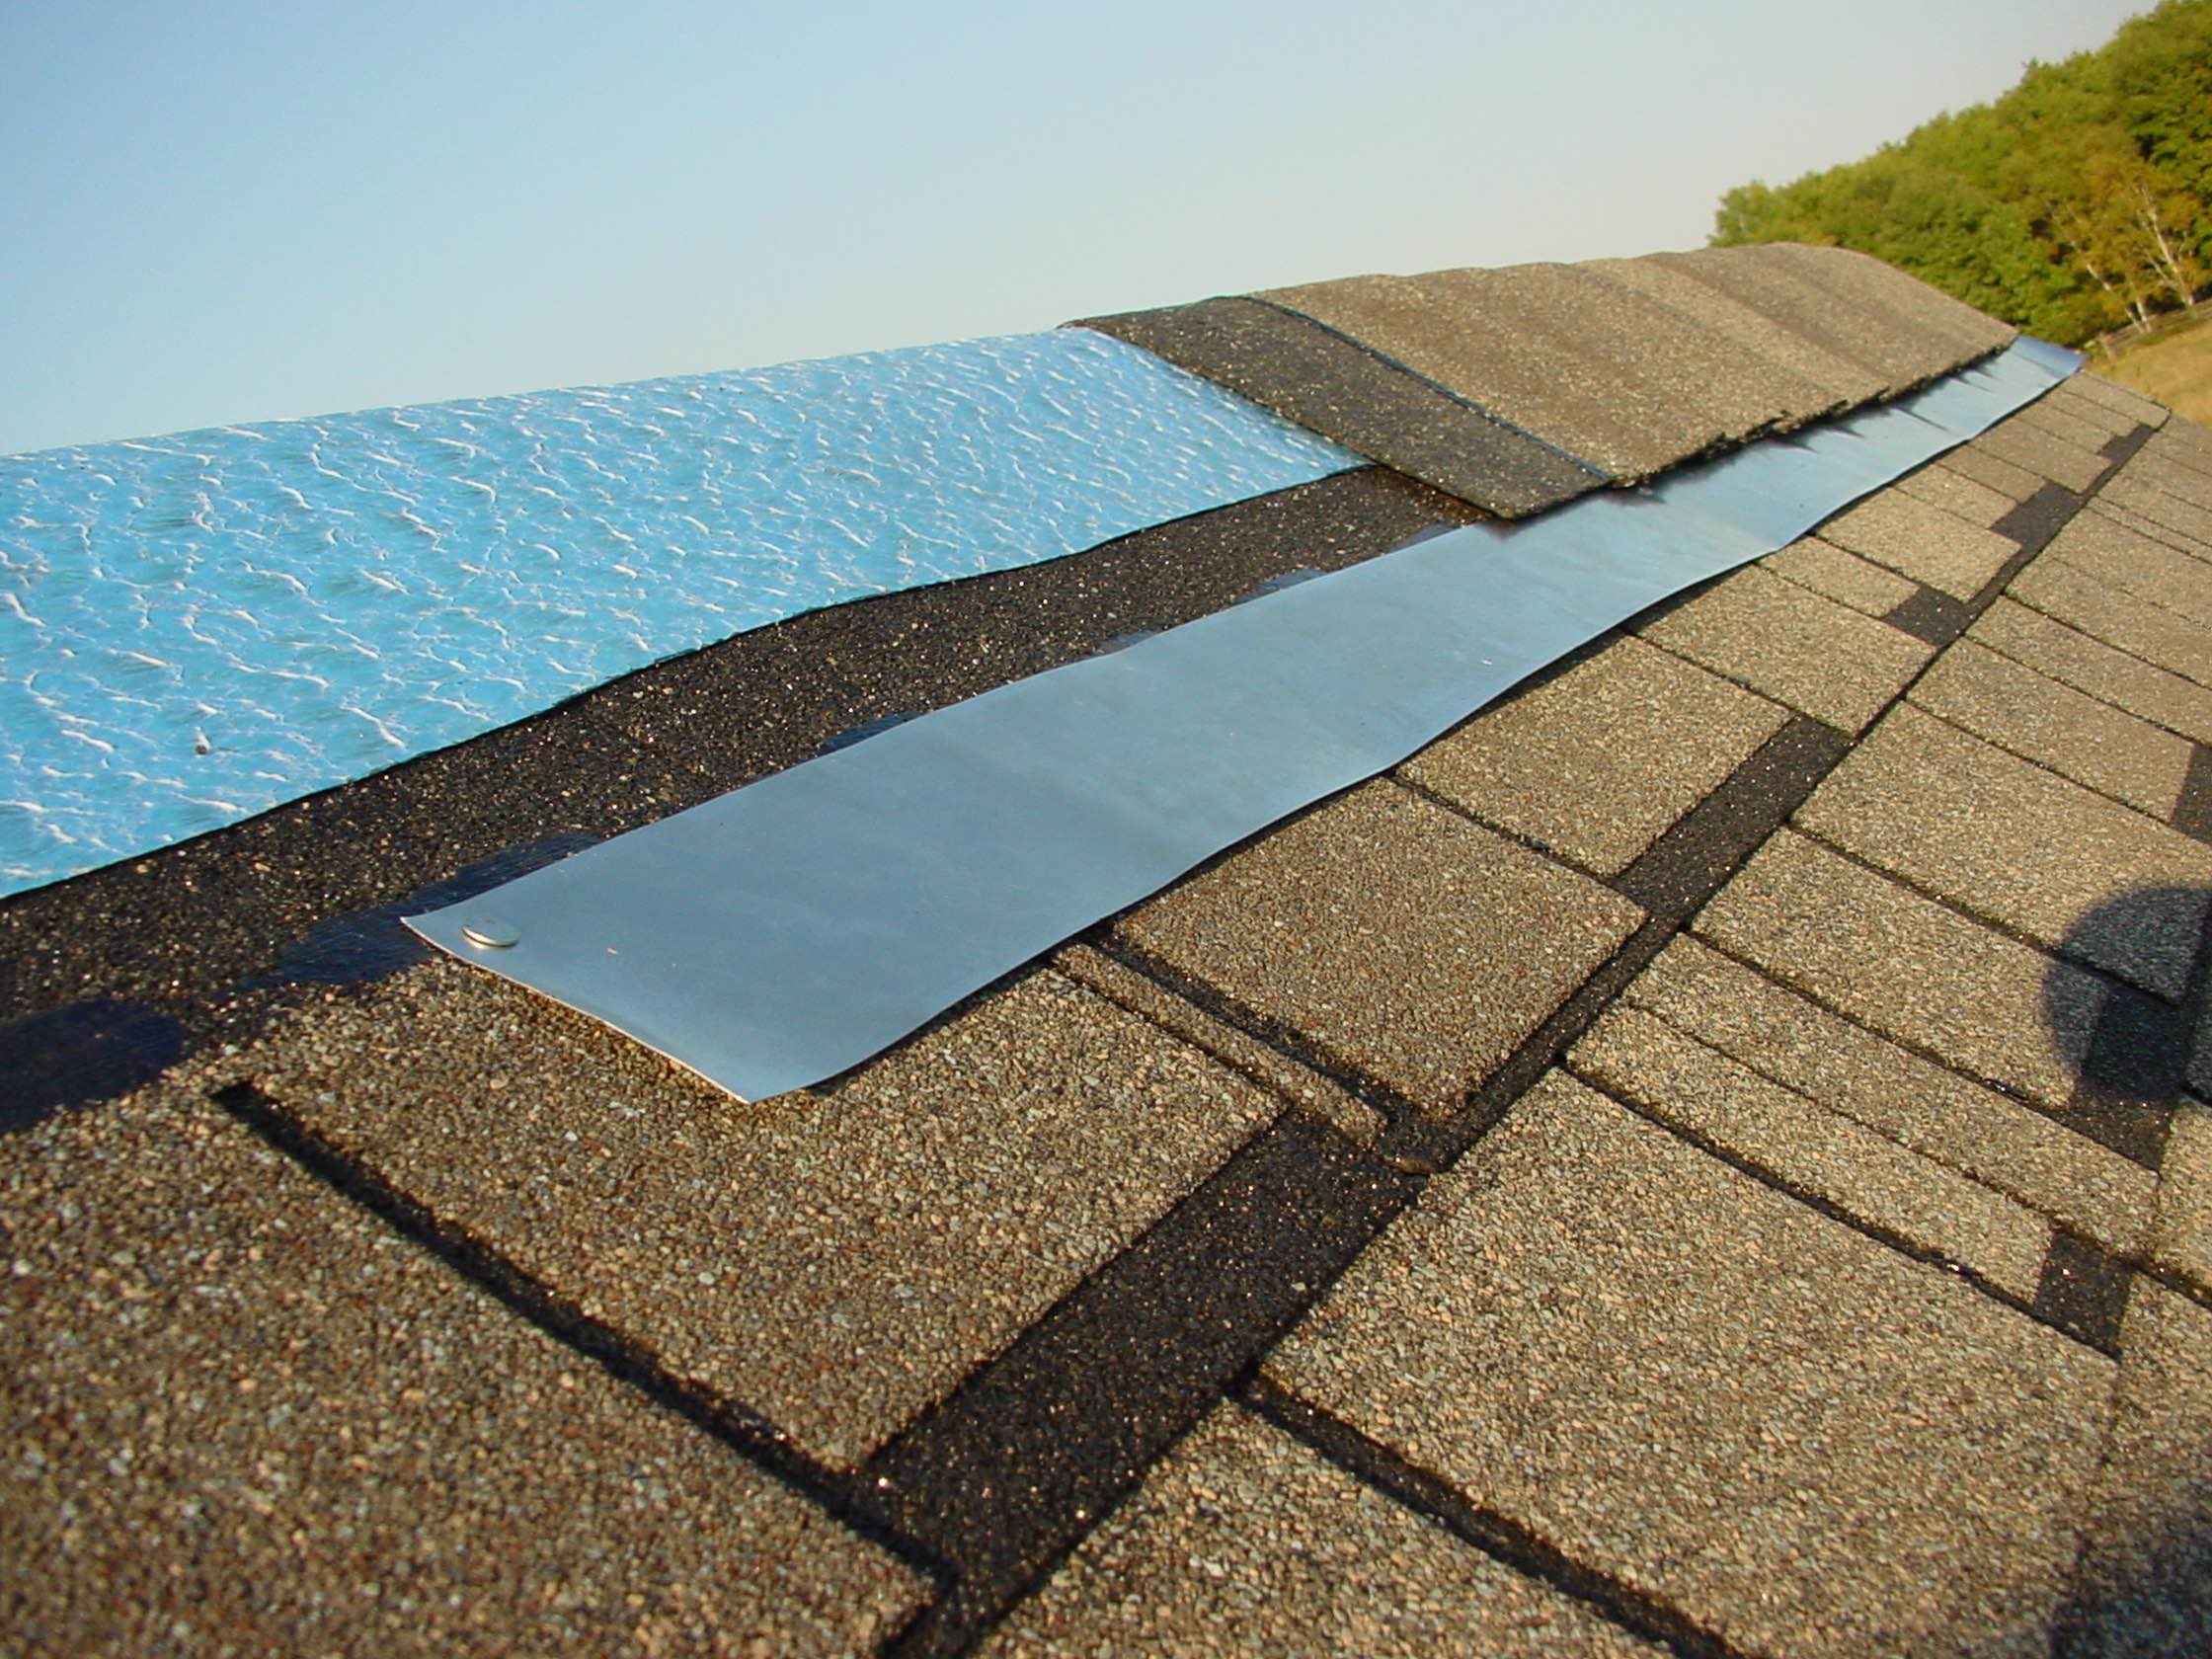 All of this is straight forward enough, but before you install cap shingles, consider installing strips of thin zinc just below the peak of the roof on each side. It’s a little thing, but it can easily add ten years or more to the life of your cabin’s roof. Narrow strips of zinc sheet metal are sold at building supply outlets for rooftop moss prevention and they work very well. Install them under the top course of shingles so two inches of metal remains exposed to the weather after the caps are applied. Simply use roofing nails to secure the metal just before cap shingles go down. Each zinc strip protects 20 downhill feet of roof from the formation of life-sapping moss or lichen growth, which is more than enough for this cabin. If you’re ever installing zinc strips on roofs that are longer than this, install a second strip halfway down, protruding from underneath a row of shingles.
Milestone#9
Your roof is shingled and ready for any weather, with openable skylights in place and operational.
