Loft Floor Installation
You’ll find it easier to install the roof boards if the loft floor is installed first, allowing you a place to walk around while hoisting roof boards aloft. And you’ll also find the outer boards of the loft floor much easier to install before the roof boards go on. With the roof open you’ll have the space you need to get your impact driver in place to drive screws to secure the outermost floor boards.
VIDEO: Loft Floor Details
The loft floor is made from 2×8 construction lumber, just like the roof sheathing you’ll be adding next. The loft floor boards run from the back wall forwards, at 90º to the loft beams, with each board/beam joint secured with two deck screws. Start by filling the floor space between the rafters with 1 1/2”-thick blocking. This blocking needs to be cut to a 45º on the outside edge (to match the angle of the roof), and 45º on the inside edge (to match the angle of the inner edge of the rafters). After you fill the spaces between rafters, you’ll also need to cut the outer edge of the first full-length floor boards to 45º. After that, all loft floor boards have square edges.
Even supposedly dry construction lumber can be wet enough to shrink quite a bit after installation, so you should wait to fasten all floor boards with screws until the first heating season is over. Go ahead and fully fasten the blocking and the outer full length boards, but only use minimal screws to fasten the others. Later, after the boards have shrunk all they’re going to, you can remove the screws, eliminate all gaps in the floor boards, then custom-cut the last floor board as wide as needed to fill the gap. You still might end up with some gaps developing in the loft floor after a few years, but they’ll be minimal and won’t matter much. The end of the loft is open to the main floor anyway, so it’s not like the floor has any role in blocking sound transmission.
Installing Roof Boards
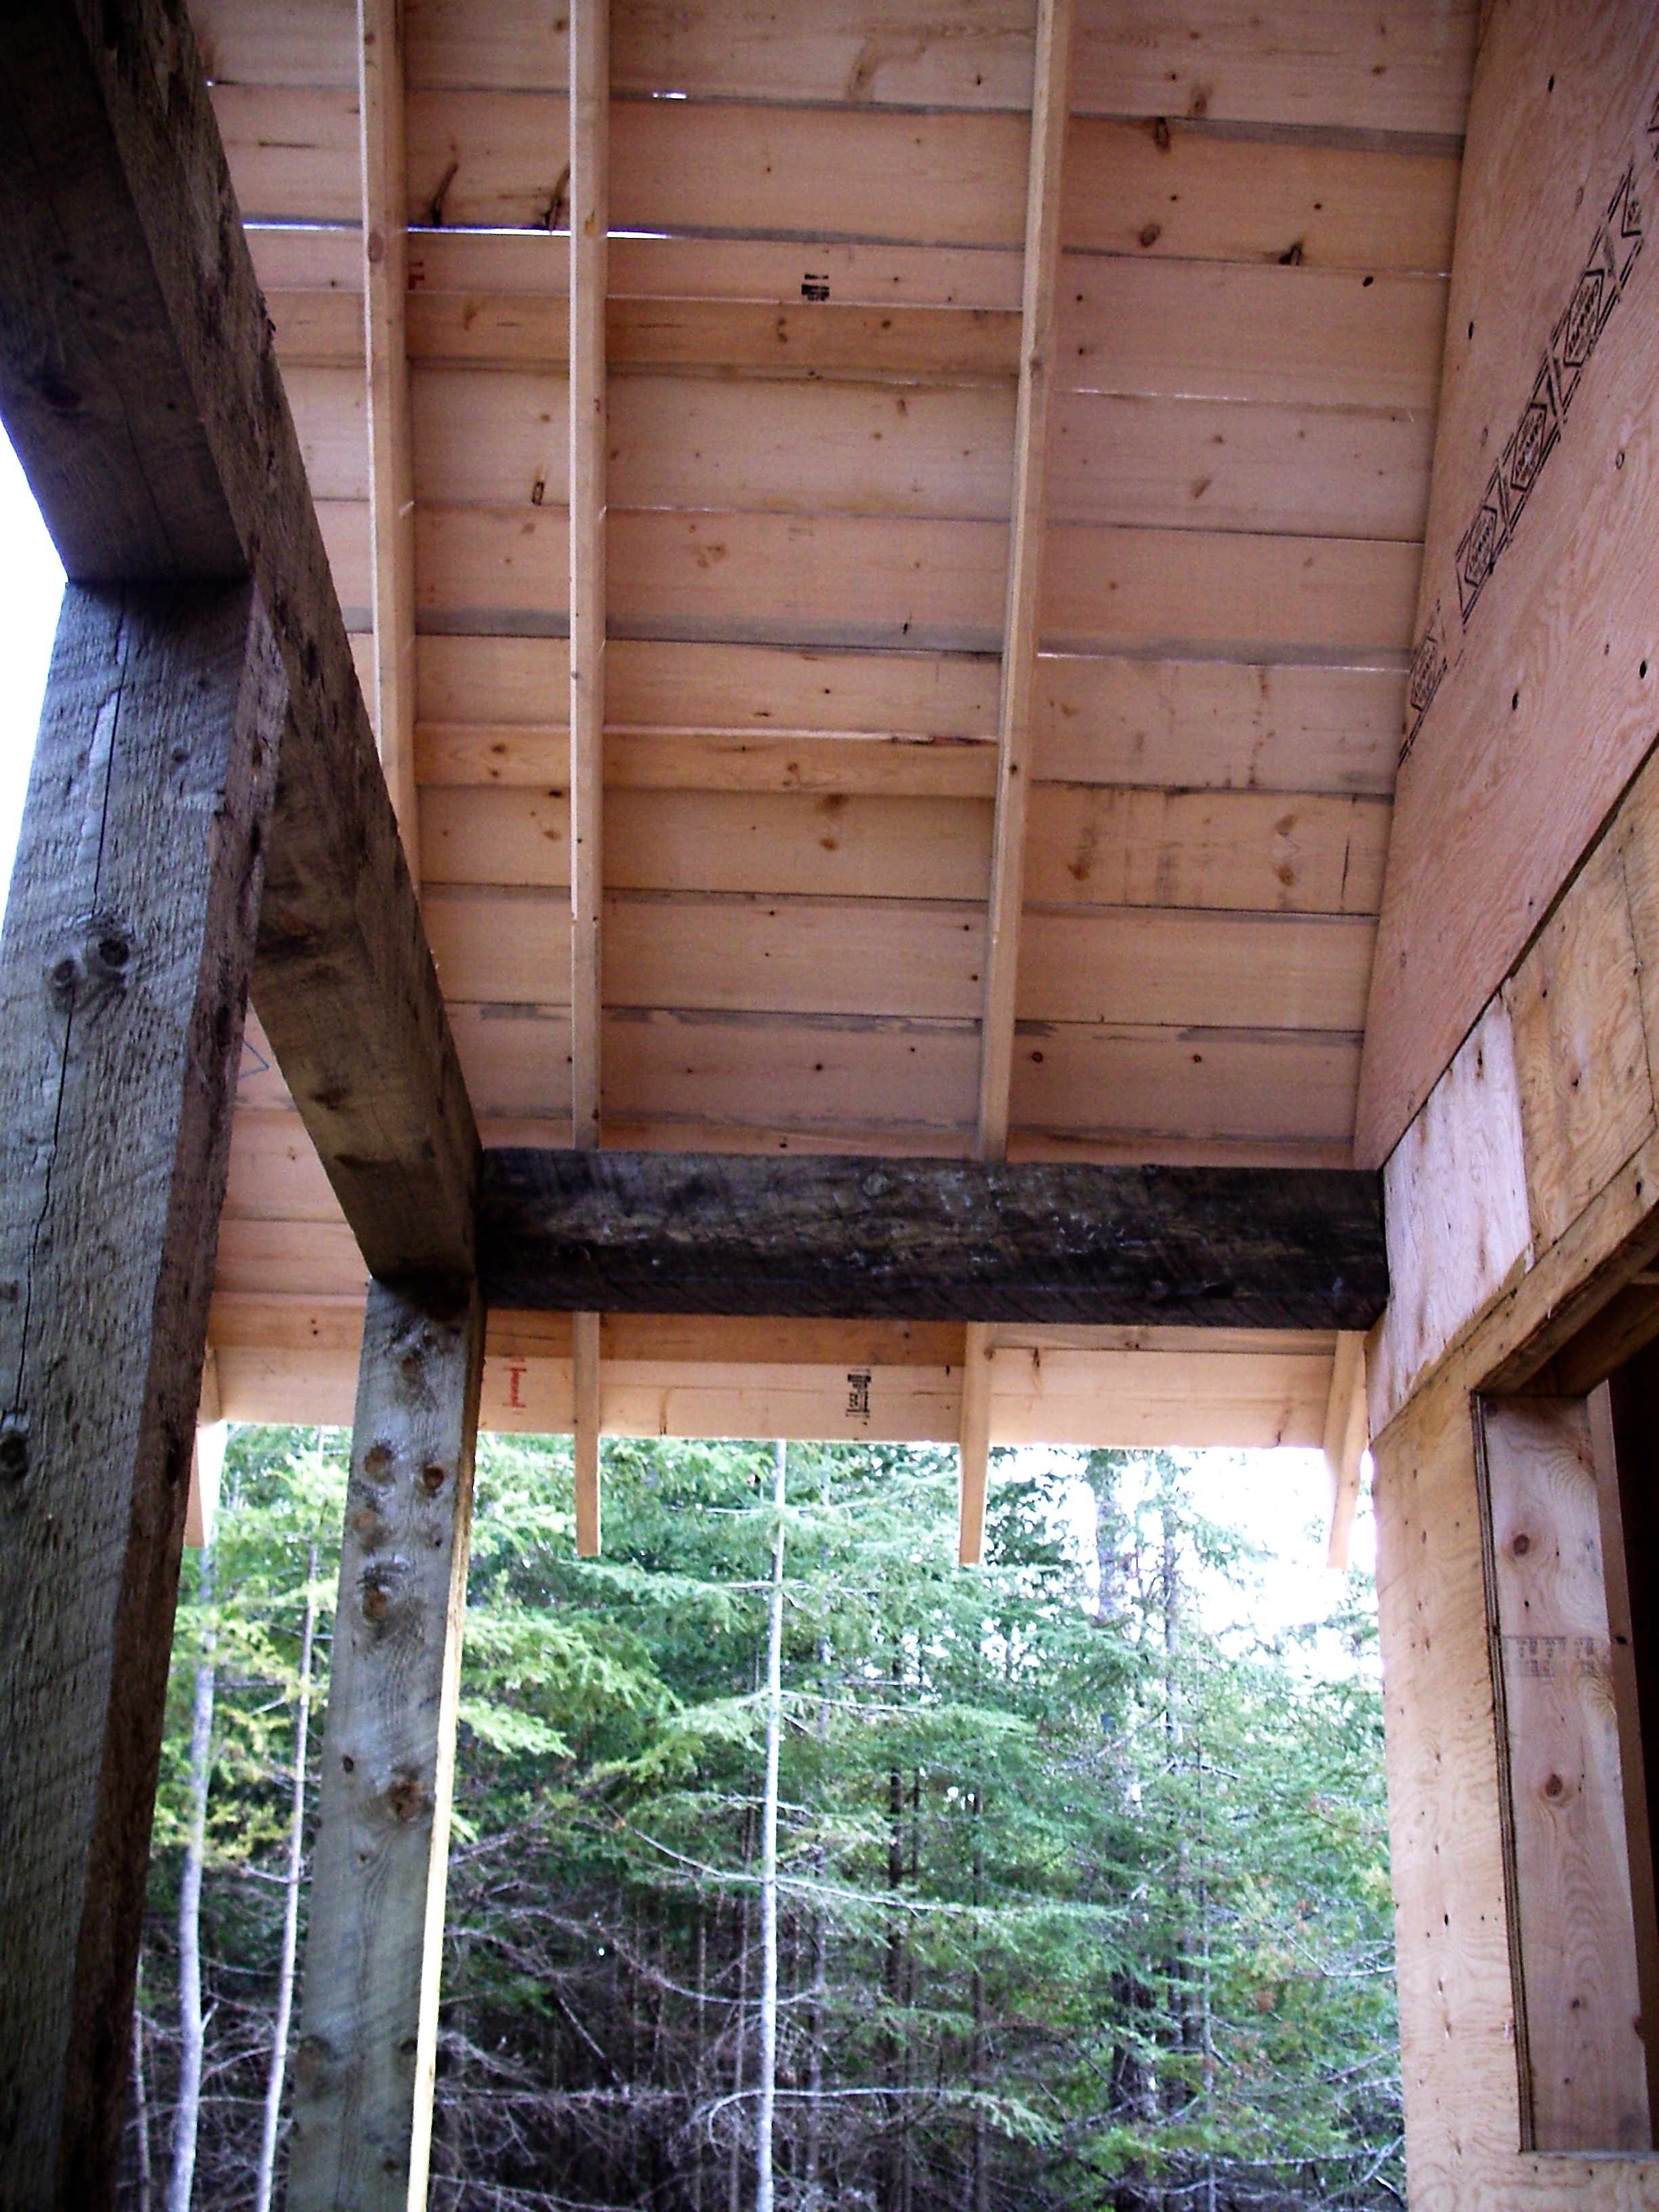 The plans show 2×8 roof sheathing and this seems like overkill until you understand a couple of important things. As I mentioned before, the underside of the roof plays a large visual role in this cabin, and plywood or particle board looks terrible if you could see it from inside the cabin. This means that solid plank roof sheathing is the only way to go in my book. Although we could have used 3/4” softwood planks for the roof, the 1 1/2”-thick construction-grade 2x8s actually cost less per square foot than any source of 3/4”-thick pine lumber we could find. Larger economies of scale for producing construction grade 2x8s are probably the reason why. Also – and this is important –the thicker sheathing means you can drive 3 1/2” structural screws anywhere you want in the roof while securing the 2 1/2”-thick insulating panels later. Thinner roof sheathing would require you to locate panel-anchoring screws only over rafters – and hitting those rafters without error – a difficult and error-prone approach. You can certainly use 3/4” roof sheathing on your cabin if you want, but 2x8s made more sense for us. Either way, as you install the roof boards, start at the bottom, after sawing a 45º bevel on one edge of the bottom-most boards. Since the ends of the rafters were cut after rafter installation, you can count on them forming a straight line. While some of your roof boards will no-doubt be bent, you can confidently pull them up or down into alignment with the bottom ends of the rafters as a guide.
Not All Handsaws Created Equal
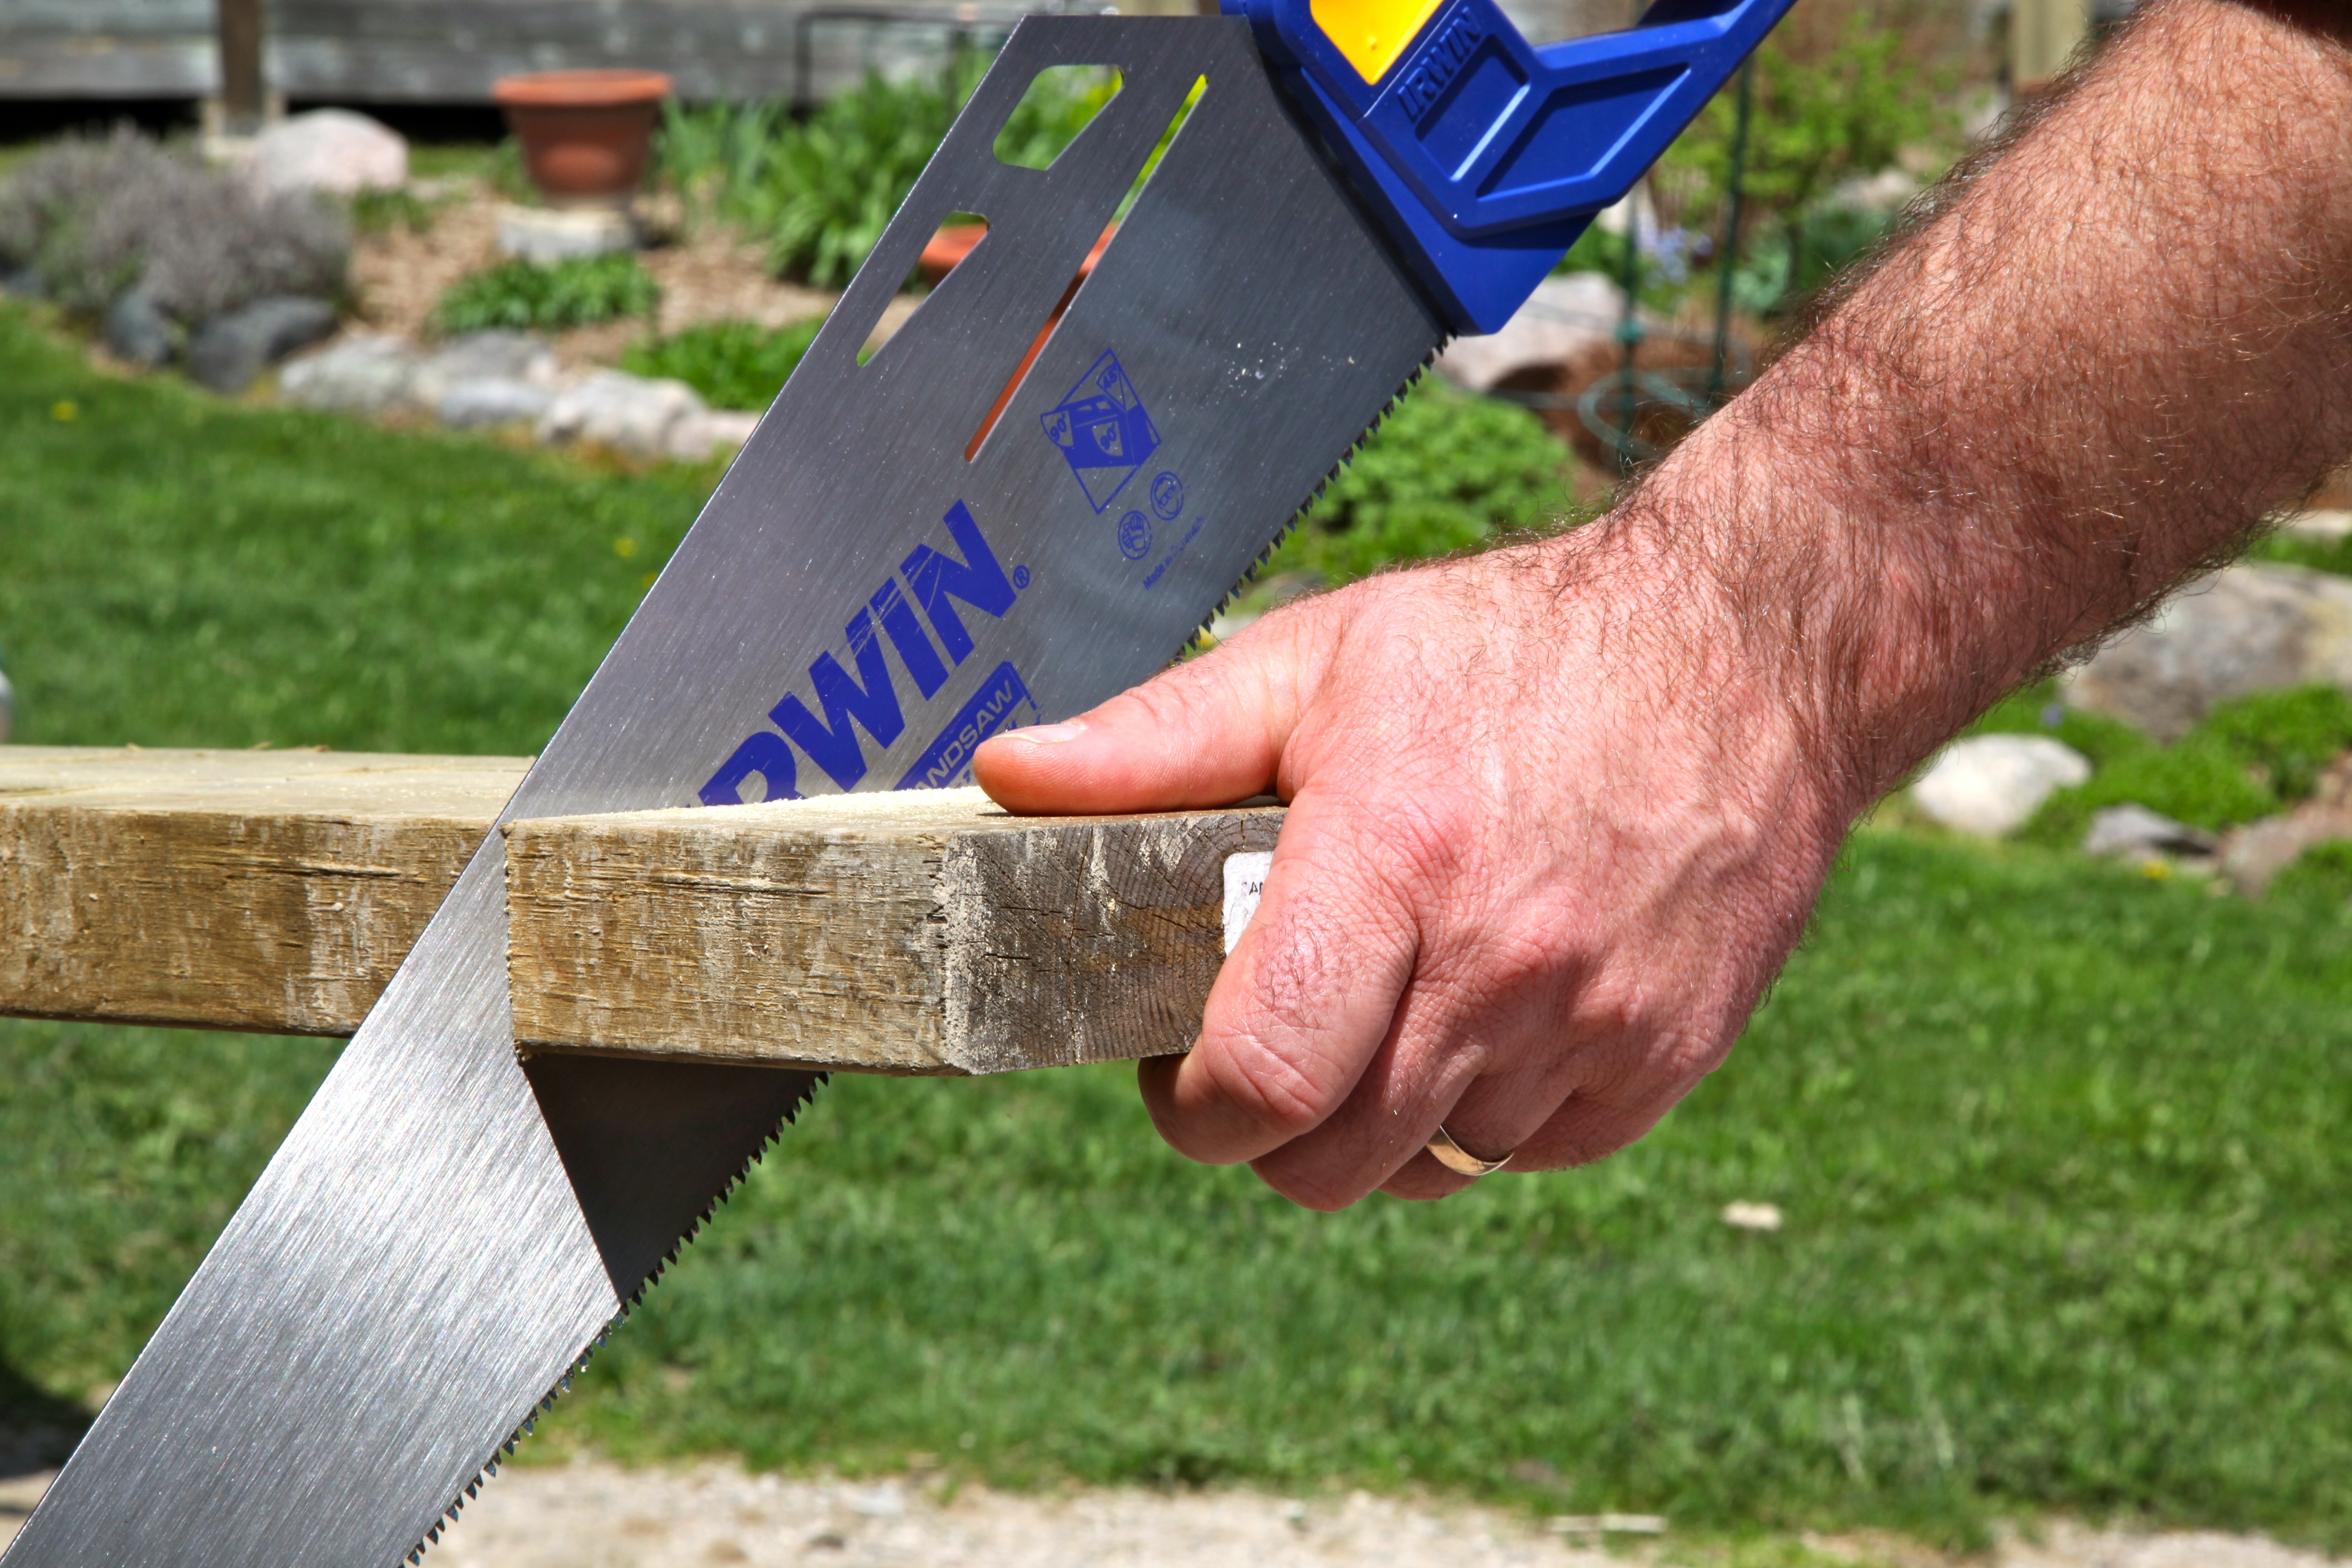 Even with all the power tools available these days, a handsaw is still a useful thing for some jobs. It works without a power cord, there’s never a battery that needs charging, you can get into tight spots with a handsaw where nothing else can, and the best models are extremely fast. The Irwin Universal Handsaw is currently my favourite. It cuts a 2×12 in 15 seconds or so, costs less than $25, and keeps working for a long time.
