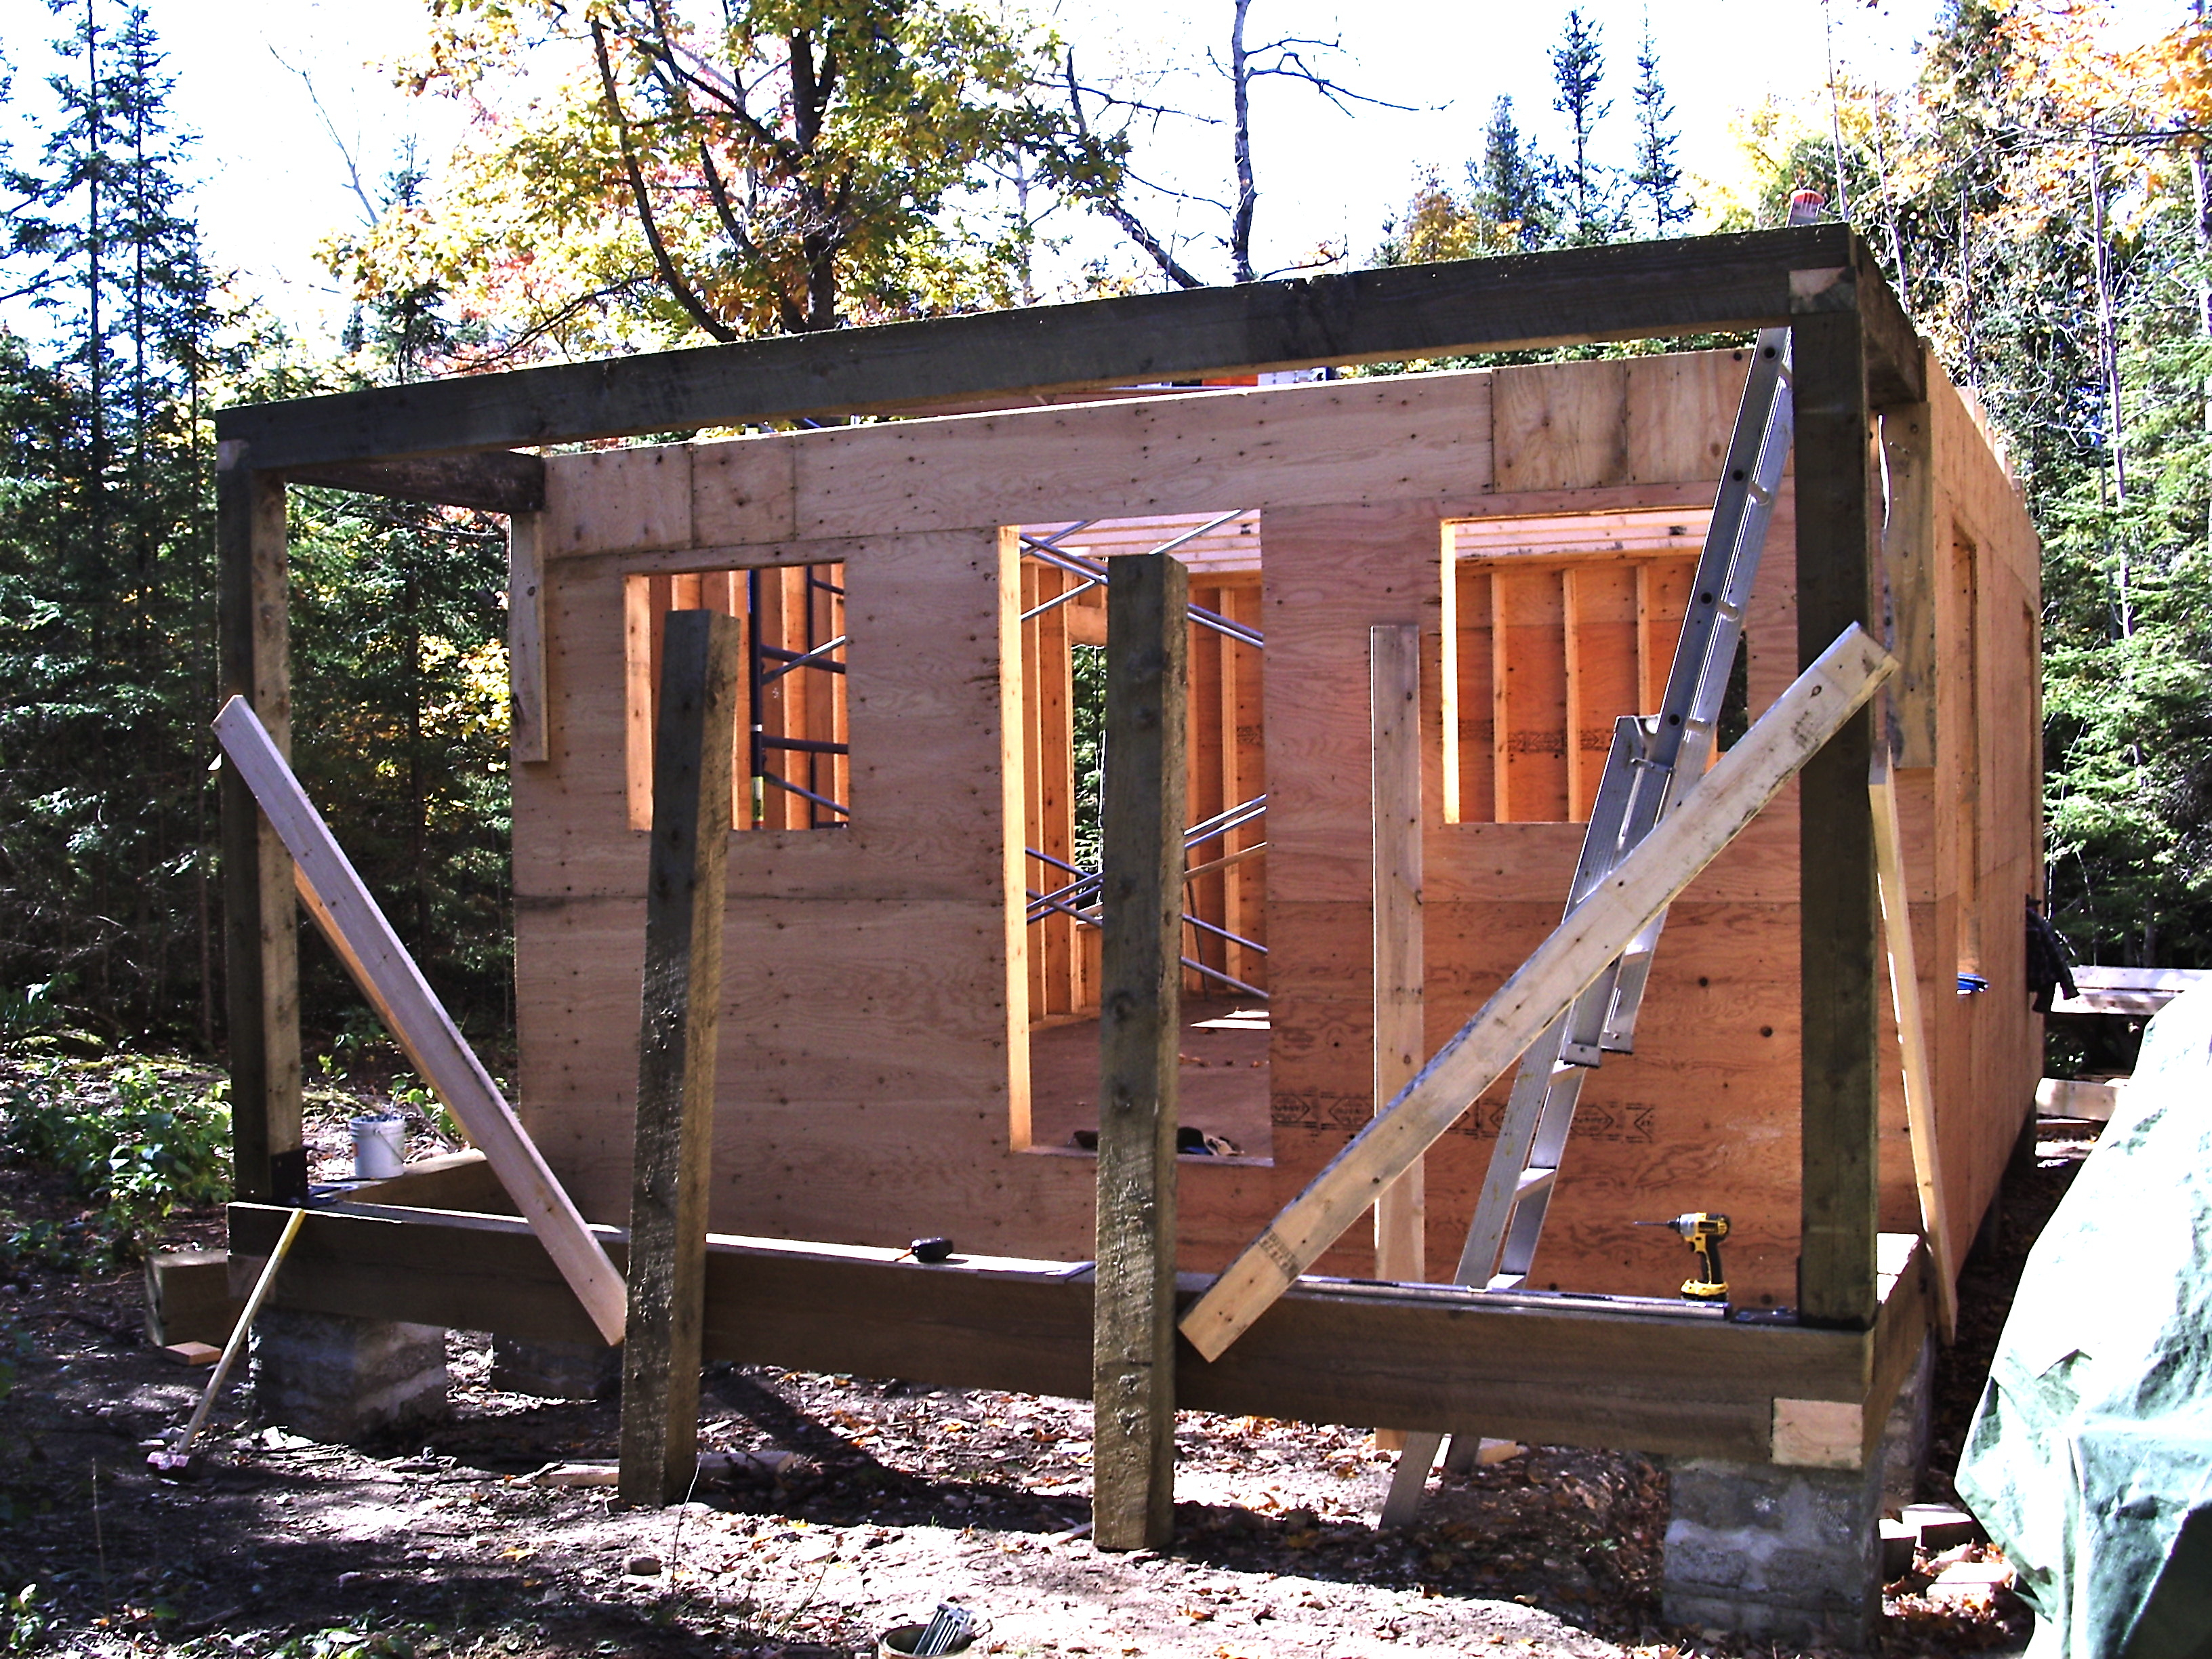
The plans show how 6×6 posts and beams create a structure to support the roof as it extends out over the porch. Essentially these posts and beams form an extension of the walls, and though they’re built differently than stud frame walls, you need to make them now before moving on to the next step.

We used rough sawn pine 6x6s for porch timbers, sanding the rough surface of the wood lightly to remove fuzzy wood fibers while retaining the rustic circular saw mill marks. The plans also show the custom-made 1/4” steel brackets we had fabricated to secure the bottom of the posts to the porch floor beams. Any welding shop can make these for you following the cardboard pattern you can see here.
The trickiest part of erecting the porch beams is the way the short porch beams interlock with the stud frame walls at the corners. It’s not a big deal, and you did some preliminary work earlier to make this happen when you framed the front corners of the side walls. That said, this is an unconven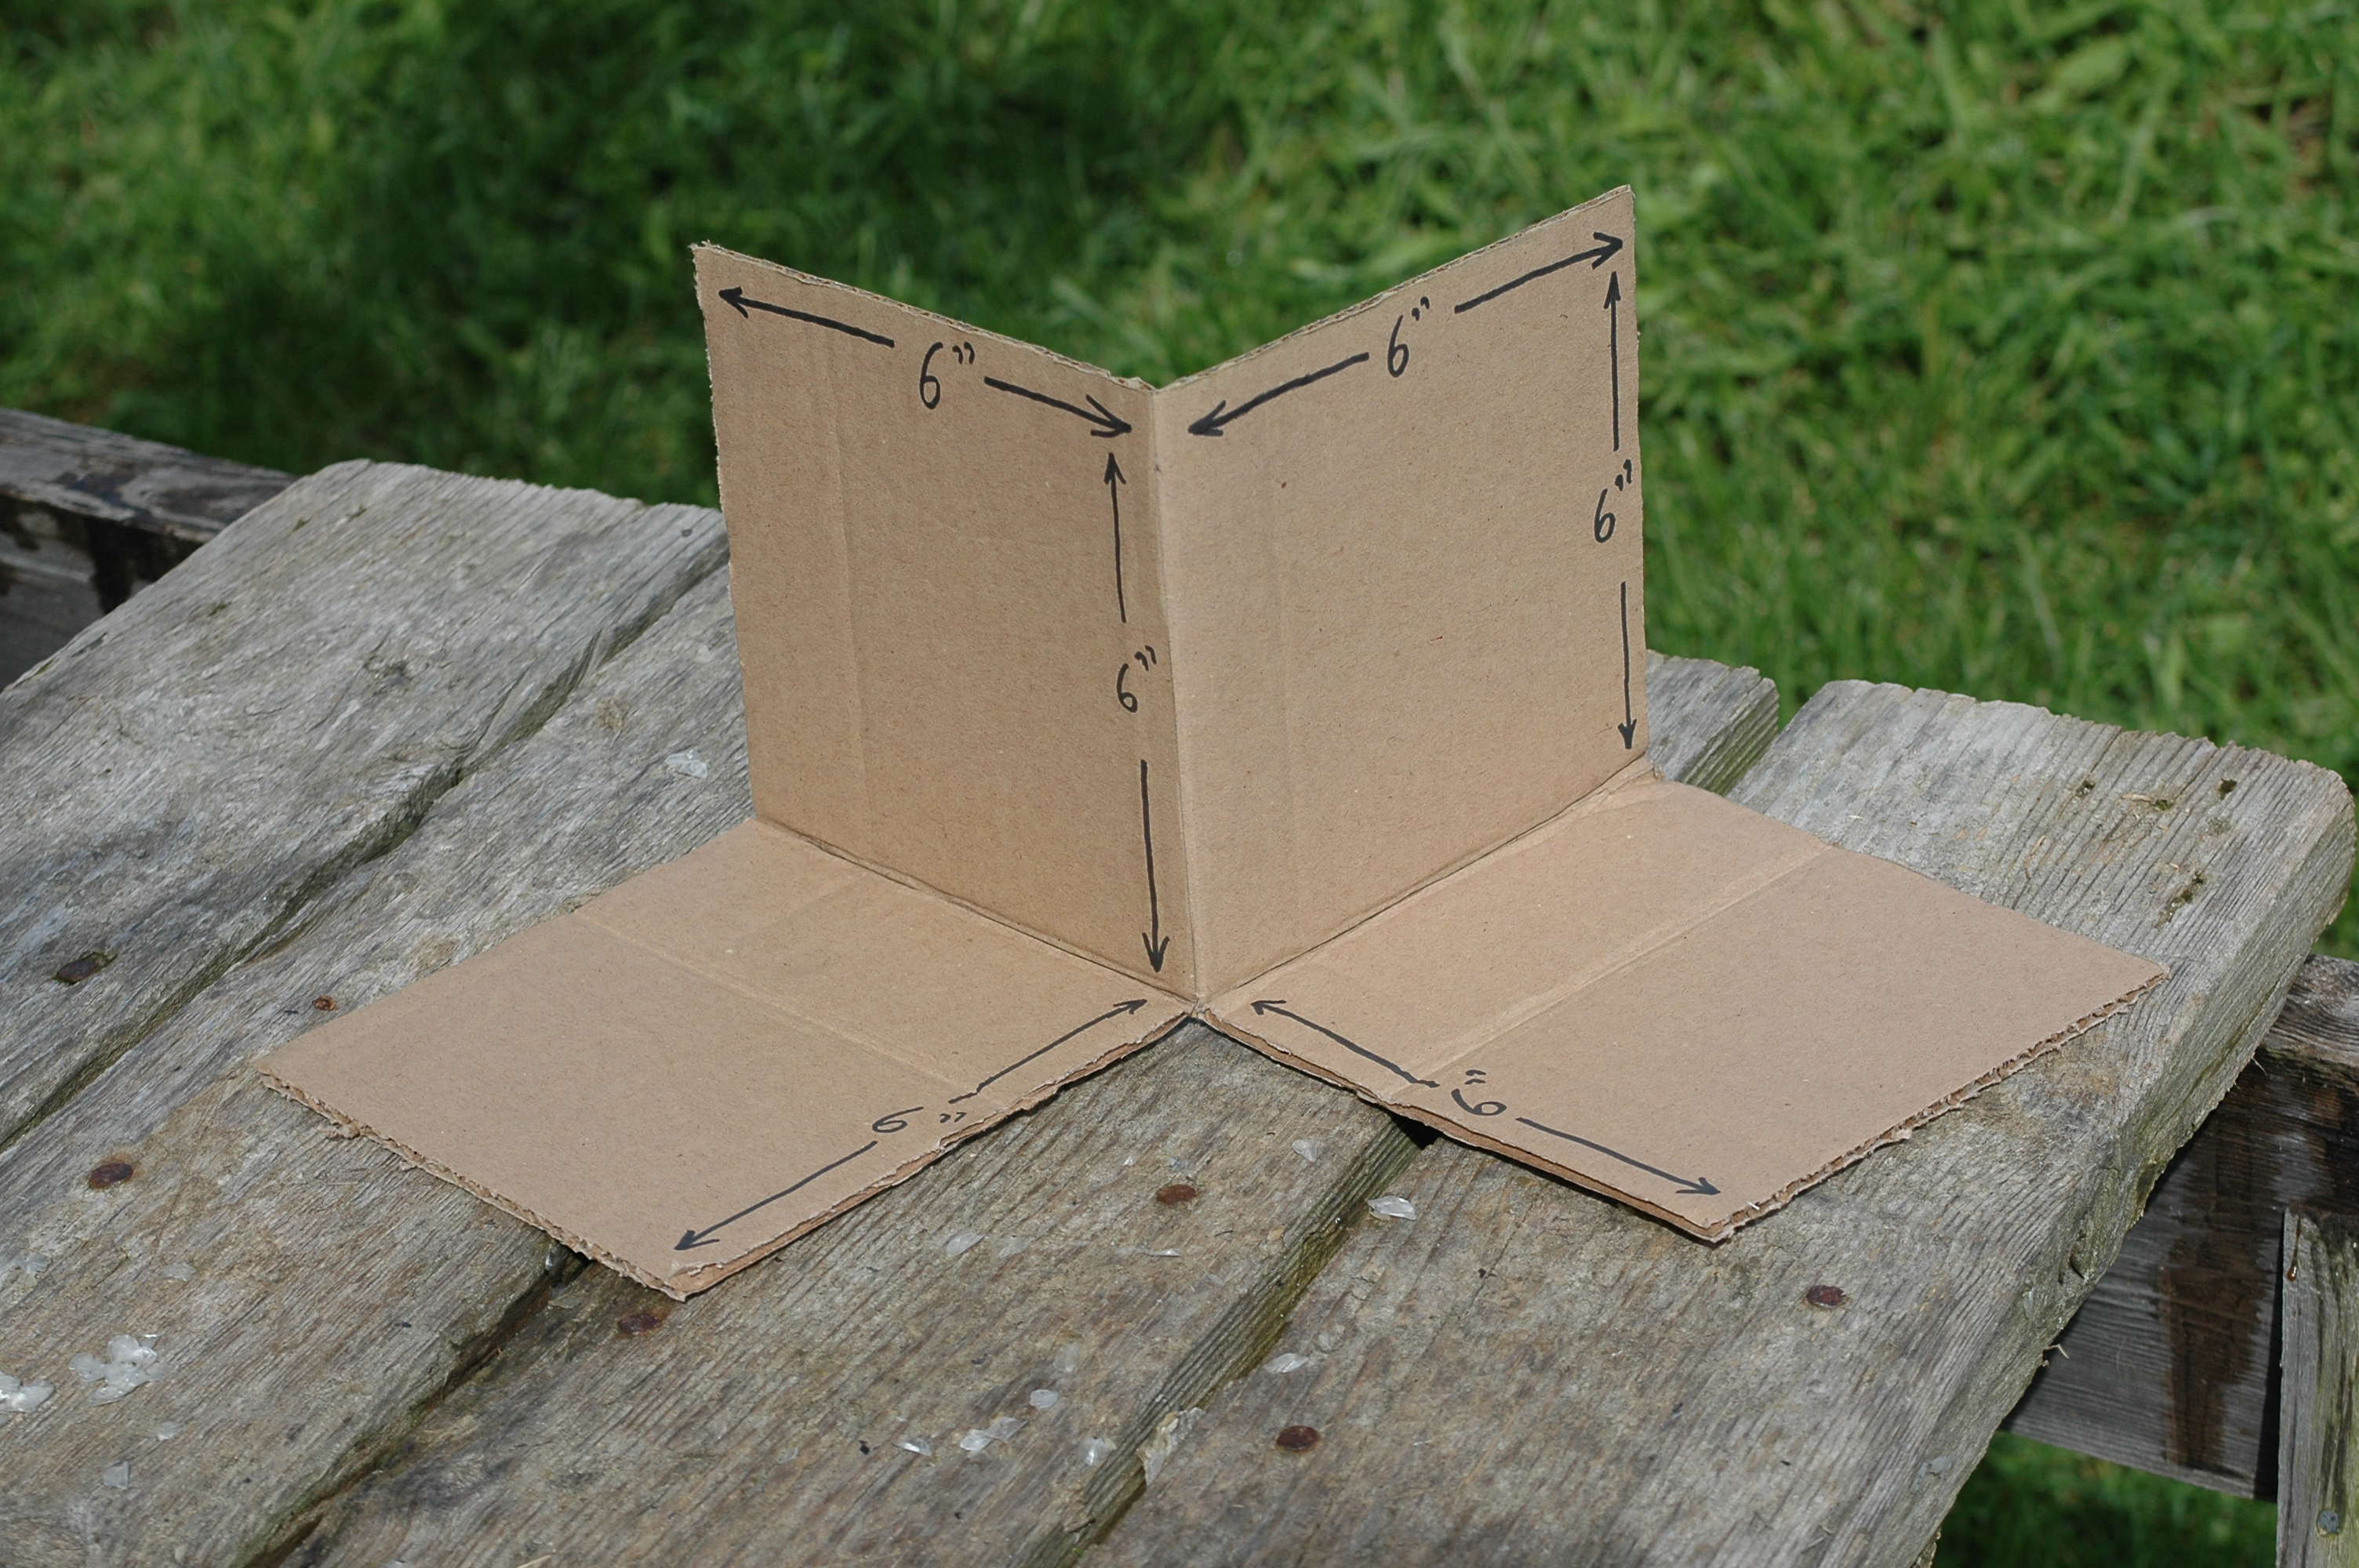 tional arrangement just the same, and now’s the time to continue this work as you raise the porch beams. Watch the next video to help get things straight in your mind.
VIDEO: Overlapped Stud Top Plate Details
Begin by fastening 6×6 vertical posts to the front corners of the porch timber frame using your metal brackets. These posts won’t be strong at this stage, so use temporary angled 2×4 props to steady the posts and hold them plumb. Next, use a level to extend a horizontal line from the bottom of the beam pockets in the walls to the 6×6 posts you just secured, as you can see in the previous video. Cut the posts to length, either with the posts still upright or after taking them down.
Joining the Porch Timbers
The short and long beams connect with each other using a lap joint in the corners. Cut these beams to length now, prepare the lap joints, then raise the beams up temporarily, sitting on the porch posts and the wall pockets. Trial assembling like this does take a little extra time, but it pays off by alerting you to errors before parts are fastened together and difficult to correct. Another reason for trial fitting in this case is that it allows you to precisely measure the length of the inner porch posts needed to support the long porch beam. Cut these now in preparation for final assembly of the porch structure.
The only thing left to decide is how you’ll be joining the porch frame parts together. The plans show a pair of 12” galvanized spikes driven through each corner lap joint and down into the top of the porch posts. This is simple and effective. It also works well for securing the top of the inner porch posts to the long porch beam. Just remember to predrill 1/4” holes for these spikes using a long twist bit. Big spikes driven without some guiding holes often go astray or cause splitting.
The thing you might find puzzling at this stage is how to fasten the bottom of the inner porch posts to the long porch beam. It’s not immediately obvious. We used invisible connectors here made by a company called Timberlinx. Alternatively you could also have a 90º mild steel bracket fabricated, similar to the one that holds the corner porch posts.
Install the Upper Top Plate
All that remains now is to finish installing the upper top plate on the walls, overlapping the corners. This is simple enough but you will need to prepare a notch in the end of the short porch beam to make it happen. The detail view in the 3D drawing shows how it needs to look, but don’t miss the previous video, either.
VIDEO: Porch Beam Detail
Milestone #4
All four walls of your cabin are raised and covered with sheathing. There’s also an additional set of timber frame posts and extending out to define the porch area.
