INTRODUCTION: Is Your Basement Really Dry?
A reliably dry basement is a completely non-negotiable starting point for any plan to finish the space. You may have terrific ideas for a great space down there, but the entire basement needs to be 100% completely dry, 100% of the time before finishing should ever happen. If your basement “leaks a little”, or “leaked the last time we had a really hard rain”, or “sometimes gets a bit damp when the snow melts quickly”, forget about finishing until you get the place reliably dry. And I mean bet-your-life dry. It’s that simple. It always surprises me how many people let an excess of hope and enthusiasm get the better of them in this regard. They go ahead and finish a basement that they know gets “a little wet” or fail to observe a seemingly dry basement long enough to know that it really isn’t all that dry. Heartache always ensues, along with harmful indoor air quality.
TRUE STORY: Finishing a Wet Basement
For about ten years I had regular Sunday afternoon visits from a couple of well-dressed religious men. A guy named Bill was always one of the team. Living in a small rural community as I do, my visitors knew that I was involved in construction and renovation. This sometimes gave the conversations an unusual turn. We might start with questions about home improvement projects or power tools before my guests abruptly made the leap to things above. One day the topic of basements came up . . .
“What can I do to stop the waferboard in my basement from swelling and going moldy”, Bill wondered.
“How long has this been happening?”, I asked.
“Ever since I finished the basement 6 years ago. I knew we usually get a little water in the basement in the spring, but this year’s worse than usual. Is there something I can kill the mold with?”
Bill was genuinely surprised when I explained that there are no easy solutions. Some problems in life are easy to fix, but a chronically leaky finished basement filled with moldy wood isn’t one of them. He never should have finished his basement until he got the leaks fixed and at least one year of dry performance had happened. Bill bought and installed tens of thousands of dollars of materials to build what amounts to an active compost pile under his house. I wish he had asked me before he built. He wishes he had, too.
How to Check for Basement Moisture
So, how do you know your basement is REALLY dry? It takes time to do a proper job because water leaks or damp conditions don’t usually show up all the time. It also takes attention to detail and a little detective work to properly assess the waterproof status of a basement. If your basement is already finished, your nose may tell you if moisture of some kind is a problem. If the basement smells musty at any time of the year, you’ve got a moisture issue hidden somewhere, guaranteed. This might be liquid water leaks (visible or hidden), but it could also be internal condensation developing within exterior walls and floors. If your basement is currently unfinished, before you get your basement-finishing hopes up, complete the following two-step procedure. You don’t want to end up like “wet-basement” Bill . . .
Basement Moisture Check#1: Watch Your Basement Carefully for at Least a Year
Longer is better. This sounds crazy to some people, but even a year isn’t always long enough to spot serious moisture problems. Why bother? Mostly because water can only leak into a basement if enough of it exists outside your house. You might get lucky and your basement really turns out to be dry even without you proving it to be so. That’s great, but you can’t count on it. Enthusiasm is no reason to gamble tens of thousands of dollars of materials and labor – plus your family’s health – finishing a basement that shouldn’t be finished in its current state at all. You need to see if your basement really has what it takes to stay dry when the going gets wet outdoors. Regularly inspect your basement with a flashlight looking for damp patches or outright liquid water. A good LED headlamp is even better than a flashlight. You’ve got to be a Sherlock Holmes about the issue of basement wetness to avoid coming to grief.
Click below for a video tour of my favourite LED headlamps. Simple as it sounds, I consider LED lights like these to be a small but highly useful basement finishing tool. A headlamp lets you do a much better job identifying moisture and mold issues, and it’s also handy during construction when you need to see things in less-than-ideal light.
VIDEO TUTORIAL: LED Headlamp Tour
TECH TIP: A Moisture Meter Can Help
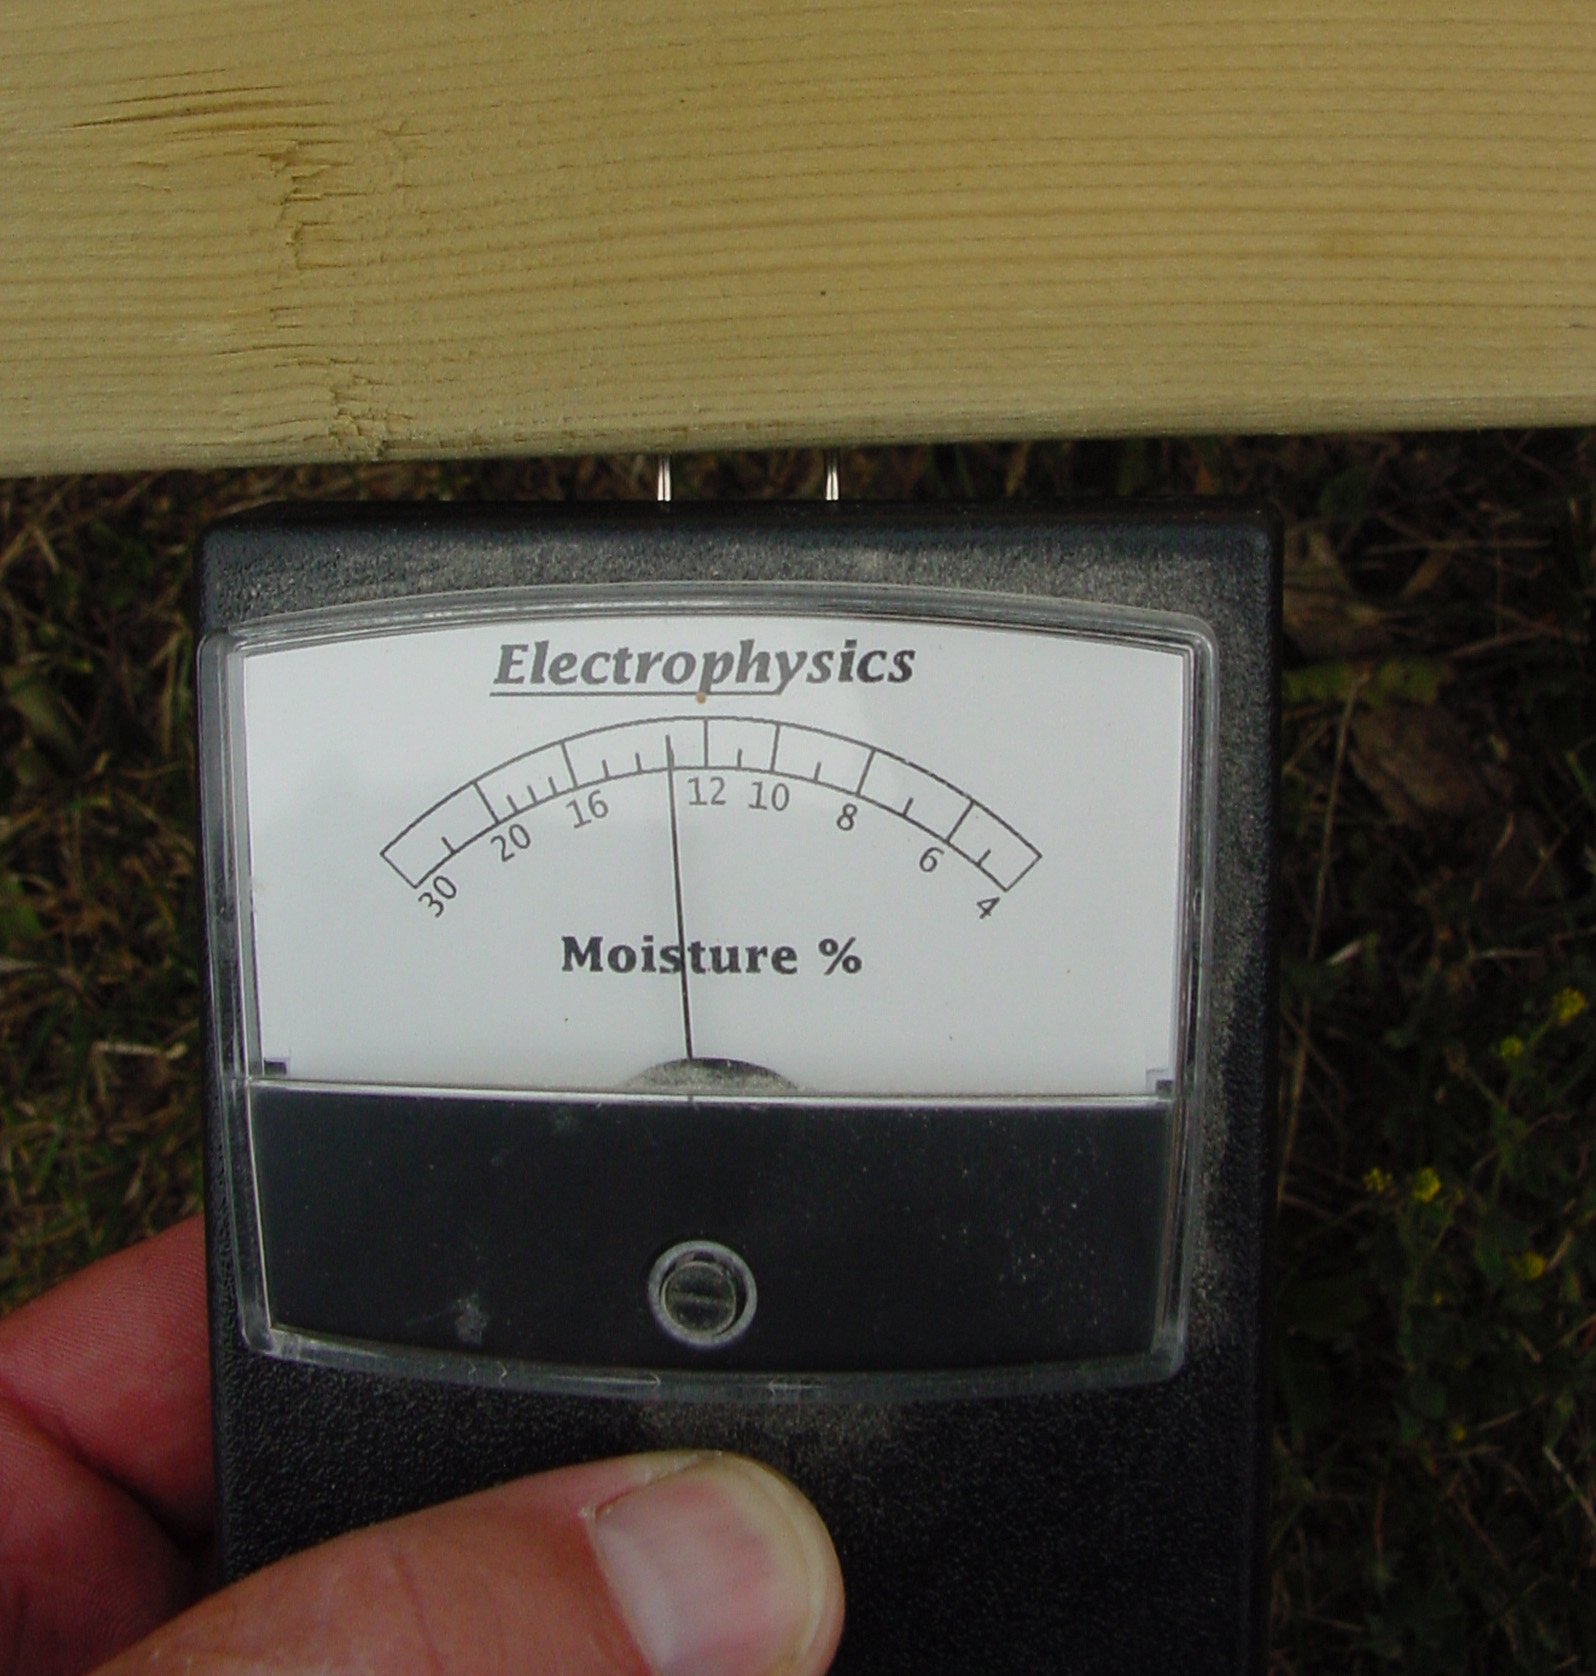
If you have an old basement that’s currently finished, analyzing the wood is worth doing before tearing it out. This is where a moisture meter can help. These small, economical, hand-held electronic devices are used by woodworkers to measure the % moisture content in wood. Stick the prongs of the moisture meter into the wood, hit the button and the meter will tell you how wet the wood is. If there’s old wood framing in your basement, it’s definitely worth checking with a moisture meter. Anything more than 12% to 14% moisture content is too high (especially in wood near the floor) and shows that you have a moisture issue that needs addressing.
Basement Moisture Check#2: Monitor Water Vapour Infiltration
While you’re monitoring your basement for signs of liquid water leaks, you need to keep your eye on something else, too. Damaging levels of water can enter your basement in the form of invisible water vapour as well as liquid water. Cut three or four 24” x 24” pieces of clear plastic (the kind used as vapor barrier works great), then fasten these pieces to walls and floor with duct tape. Brush the masonry surface clean to remove dust or loose particles before the tape goes down, then check to make sure it hasn’t come loose. Look at the plastic every few days for a couple of weeks. You’re looking for signs of condensation or water droplets on the INSIDE surface of the plastic. If moisture is coming in through the masonry (and it’s entirely possible), it’ll show up inside this plastic.
I often hear from homeowners by email who build typical wood stud frame walls on the inside of exterior basement foundation walls as part of their finishing campaign “the way it’s always been done”. They fill the cavities with insulation batts, then cover the frame with vapour barrier plastic before eventually applying some kind of interior wall finish. Drywall or wood panelling is popular.
If the homeowner doesn’t happen to install drywall right away, it’s not unusual for condensation to be visible on the inside face of the clear vapour barrier plastic. This is especially common in summer. In a sense, they’ve created a moisture vapour infiltration test the hard way. “What can I do to fix this problem?”, they ask me, concerned. “Turn back the hands of time and prepare your basement walls correctly” is all I can say at that stage. I know it sounds harsh, but it’s true. Better to put some small pieces of plastic on your walls to monitor them right at the beginning of the process rather than discover the need for moisture control after your walls are up.
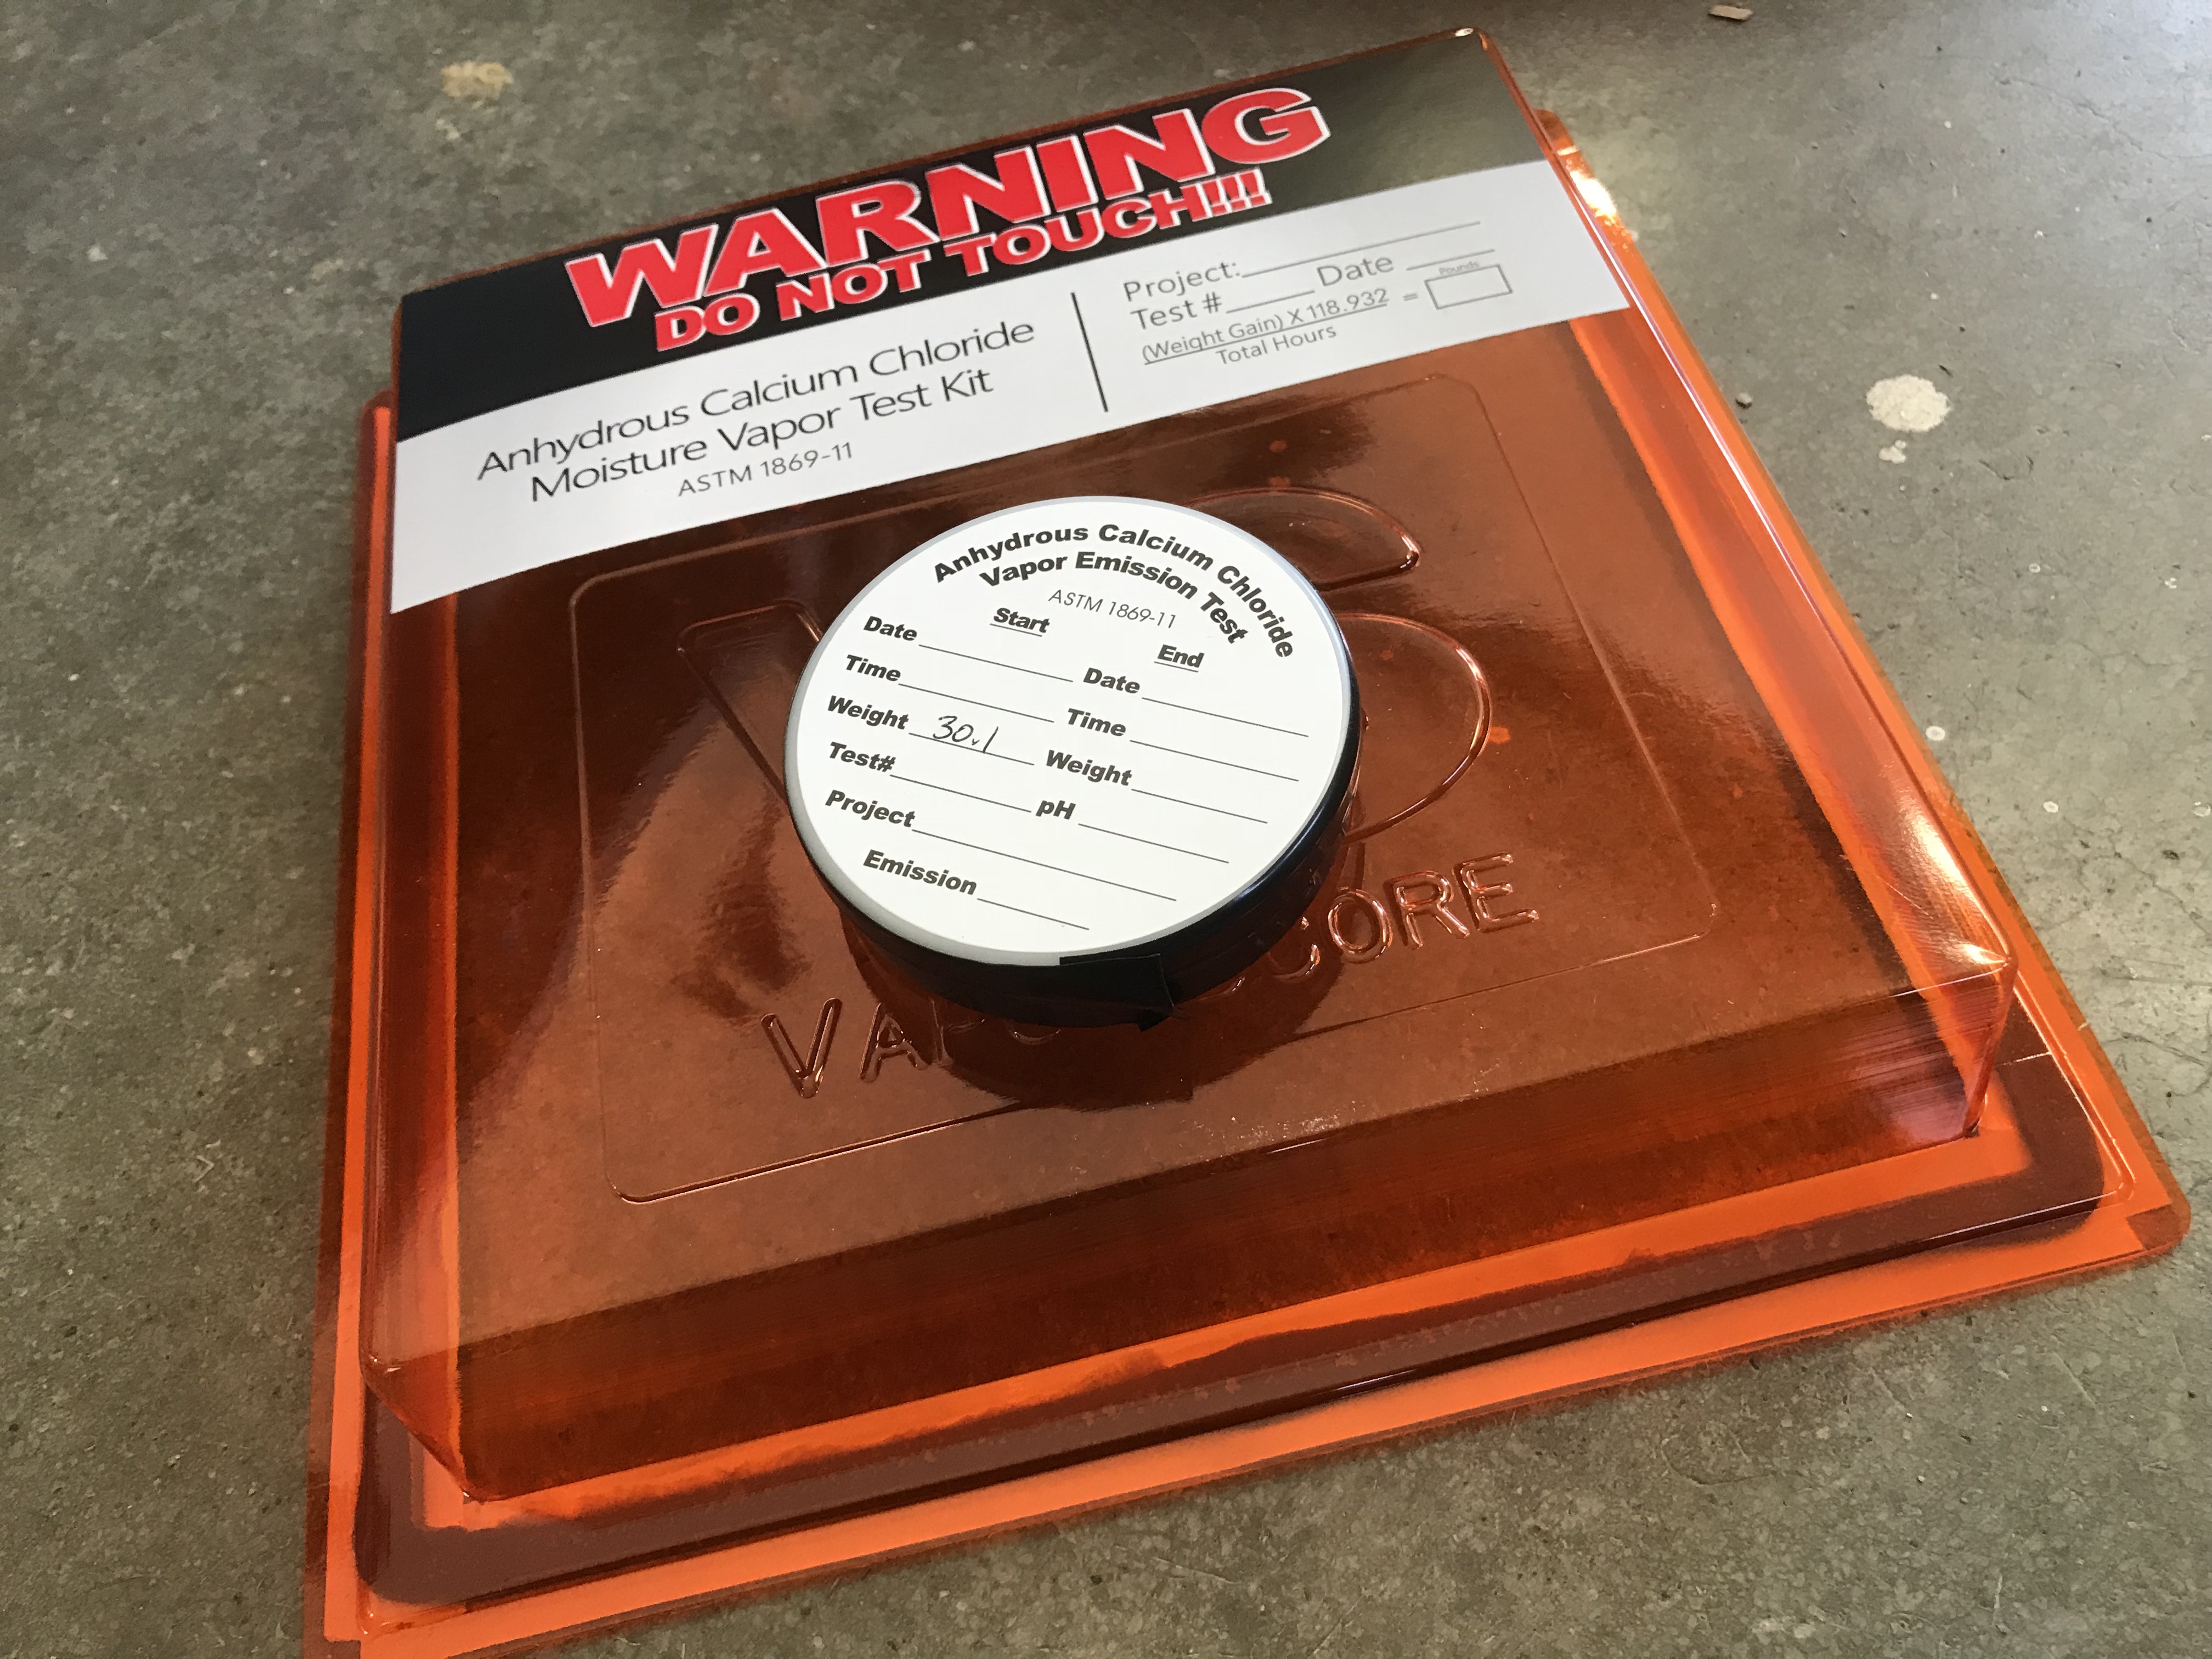
The painting and floor coating industries have developed sophisticated tests to determine the moisture levels of concrete floors and you’d be wise to make use of these tests yourself. One long-standing moisture test for concrete involves something called the ASTM 1869 standard. It was developed in the 1950s and uses a container of dry calcium chloride underneath a plastic cover sealed over the concrete floor. Prepare the concrete so it’s clean and bare, open the pre-weighed container of moisture-hungry calcium chloride powder, write the date and time on the container, then use tape to seal the plastic cover to the concrete with the calcium chloride inside. The more moisture this white powder absorbs in a given period of time, the more moisture’s in the concrete. At least that’s the theory. Weigh the calcium chloride after 60 to 72 hours with some kind of sensitive scale such as a postal scale (great digital ones are available cheaply on Amazon for less than $35), then plug the weight figure into the formula that came with the kit to determine the moisture content of the concrete in pounds of moisture emitted per 1000 square feet.
Most coating manufacturers allow no more than a 3 pound moisture rating on concrete for warranties to apply. Some coating and flooring manufacturers even require moisture testing results be recorded for warranty coverage to kick in. This is fine except for one problem. The calcium chloride test only measures moisture levels in the very top part of the concrete slab. You can get a superficial reading on a fairly new concrete floor that’s dry enough, but still have problems later because moisture migrated up from deeper in the slab over time, causing issues. Allowing one year to observe your basement before finishing is especially useful when you’re dealing with a new concrete floor that needs time for interior moisture to escape.
So, what can you do if your basement proves to be less than perfectly dry? Finishing may still be possible, but only after steps have been taken to ensure year-round dryness. And to be honest, most of the big things that need to happen to make a wet basement dry aren’t things ordinary homeowners can do. Sure, you can get downspouts, eavestrough and properly sloped grading in place, and this might solve a wet basement problem. If it doesn’t, then your basement needs some heavy duty help. More on this in week#2.
TRUE STORY: Toxic Basement Air
For about 8 years, my kids and I grew pick-your-own raspberries for sale, and sometimes we’d pick berries for elderly people who couldn’t pick their own. One July afternoon I knocked on the side door of a house in town, the home of a woman who I knew had serious breathing issues. I was there to deliver 8 quarts of raspberries we’d picked for her. Over the years I’d seen this woman around town with a rolling oxygen tank and clear plastic tubes fastened under her nose, and I saw the same thing when she came to the door a long time after my knock. As she opened, I could immediately see she was pleased with the berries but I also gained an immediate insight into her health condition. The door was located on a landing, a few steps down from the main floor of the house, and more than a few steps up from the basement. Some of the strongest odours of mold and mildew I’ve ever smelled came rolling out of the door when she opened it. I knew she had a classic and very serious case of moldy basement syndrome.
This is the kind of thing that affects the healthfulness of an entire house. Was this the cause of her chronic breathing issues? I don’t know for sure, but it certainly could have been. Why wouldn’t it? Thick and pungent odours of mold have consequences. I’ve seen people completely cured from lifelong asthma and ineffective drug treatments after I helped them improve the quality of indoor air in their homes. Bottom line: Indoor air quality matters much more than most people realize, and basements have a lot to do with that air quality.
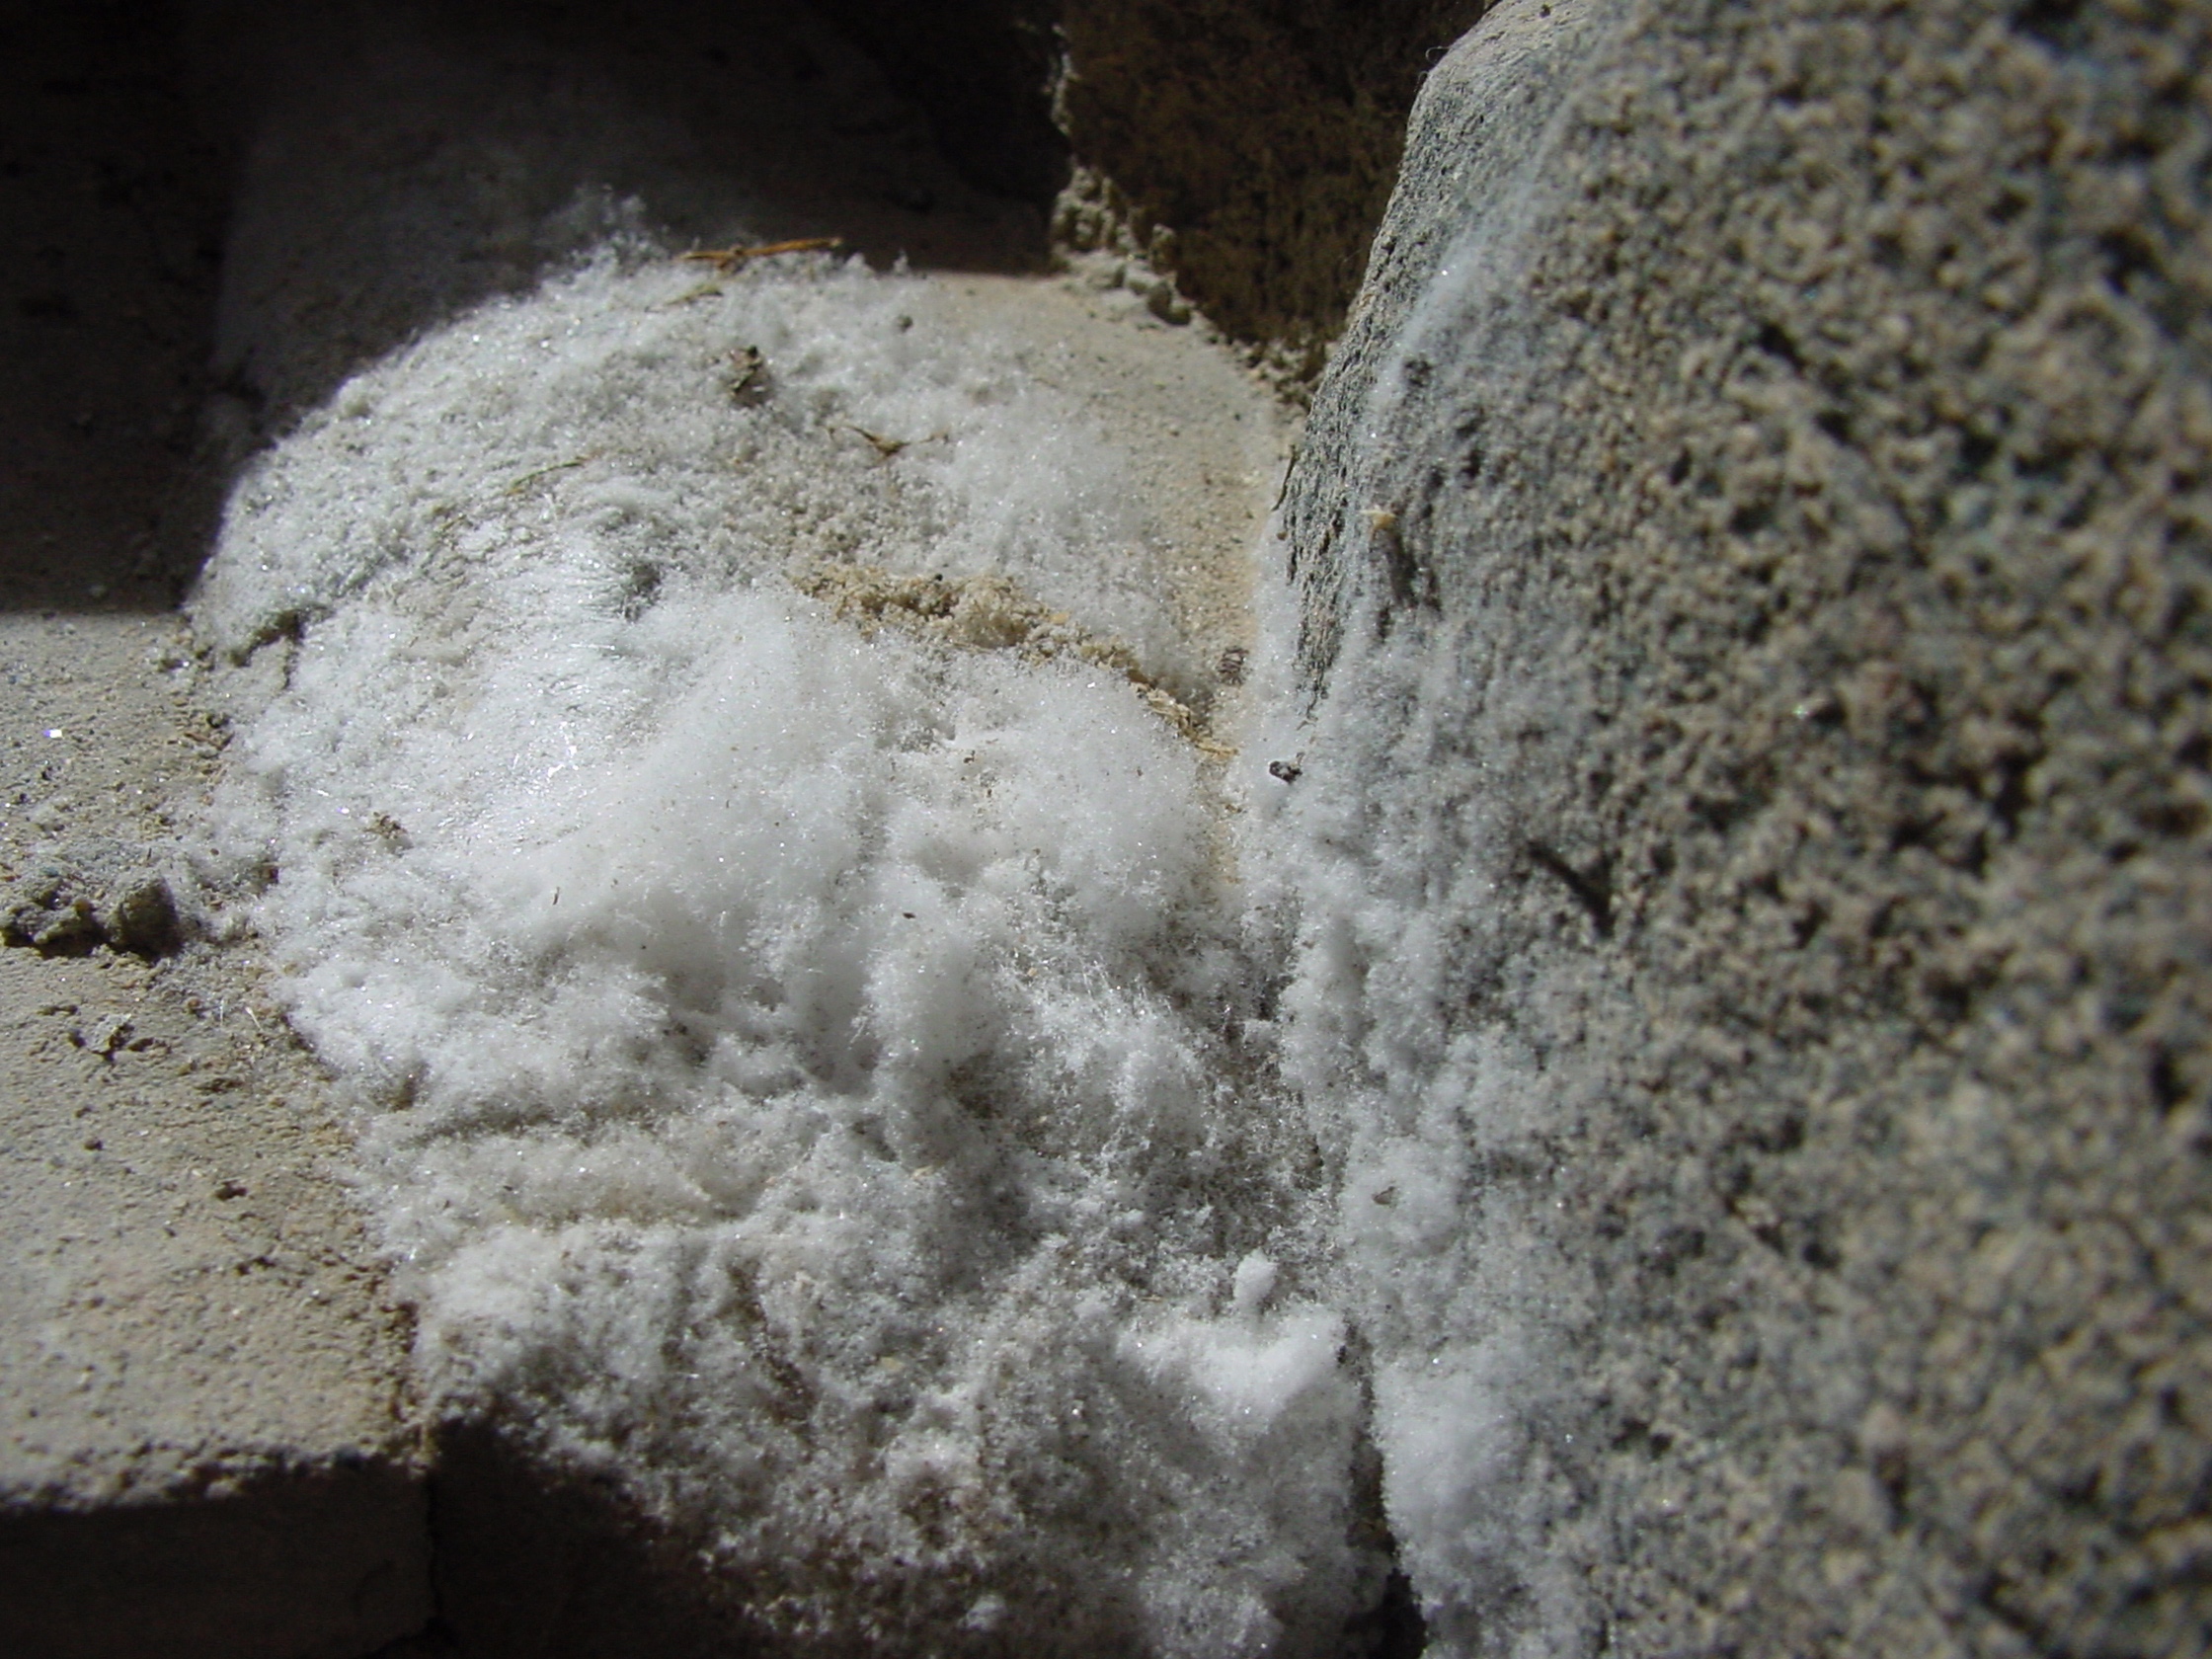
Have you found white, fluffy growths on the inside of your basement walls? This may look like mold, but it’s what they call efflorescence. This is a deposit of minerals (not mold) that’s harmless health-wise, but quite significant as far as moisture investigations go. Efflorescence is a strong indication of a moisture situation that will cause you grief unless it’s dealt with property before basement finishing work happens. Efflorescence can happen in new basements and old ones, and it’s something you don’t want to ignore. Waterproofing is what needs to happen, but it can probably happen indoors.
Listen to the audio lesson coming up to see what efflorescence is and why it’s different than mold.
