Tools & Techniques for Building Partition Walls
If you’ve never framed a wall before, you might be daunted by the idea of building the partitions in your basement. Relax. Framing simple basement partitions is easier than it looks. Much easier. It all comes down to a handful of strategies that ensure things work out fine. If you’ve done some woodworking, you might as well make your partitions from wood studs if they’re commonly used where you live. Metal studs work just as well as wood studs for partitions, but building them requires a somewhat different set of skills. There’s really no advantage to using steel studs for partition walls if you follow the designs you’ll find here. The situation is different than with the perimeter basement walls built against the foundation of your house.
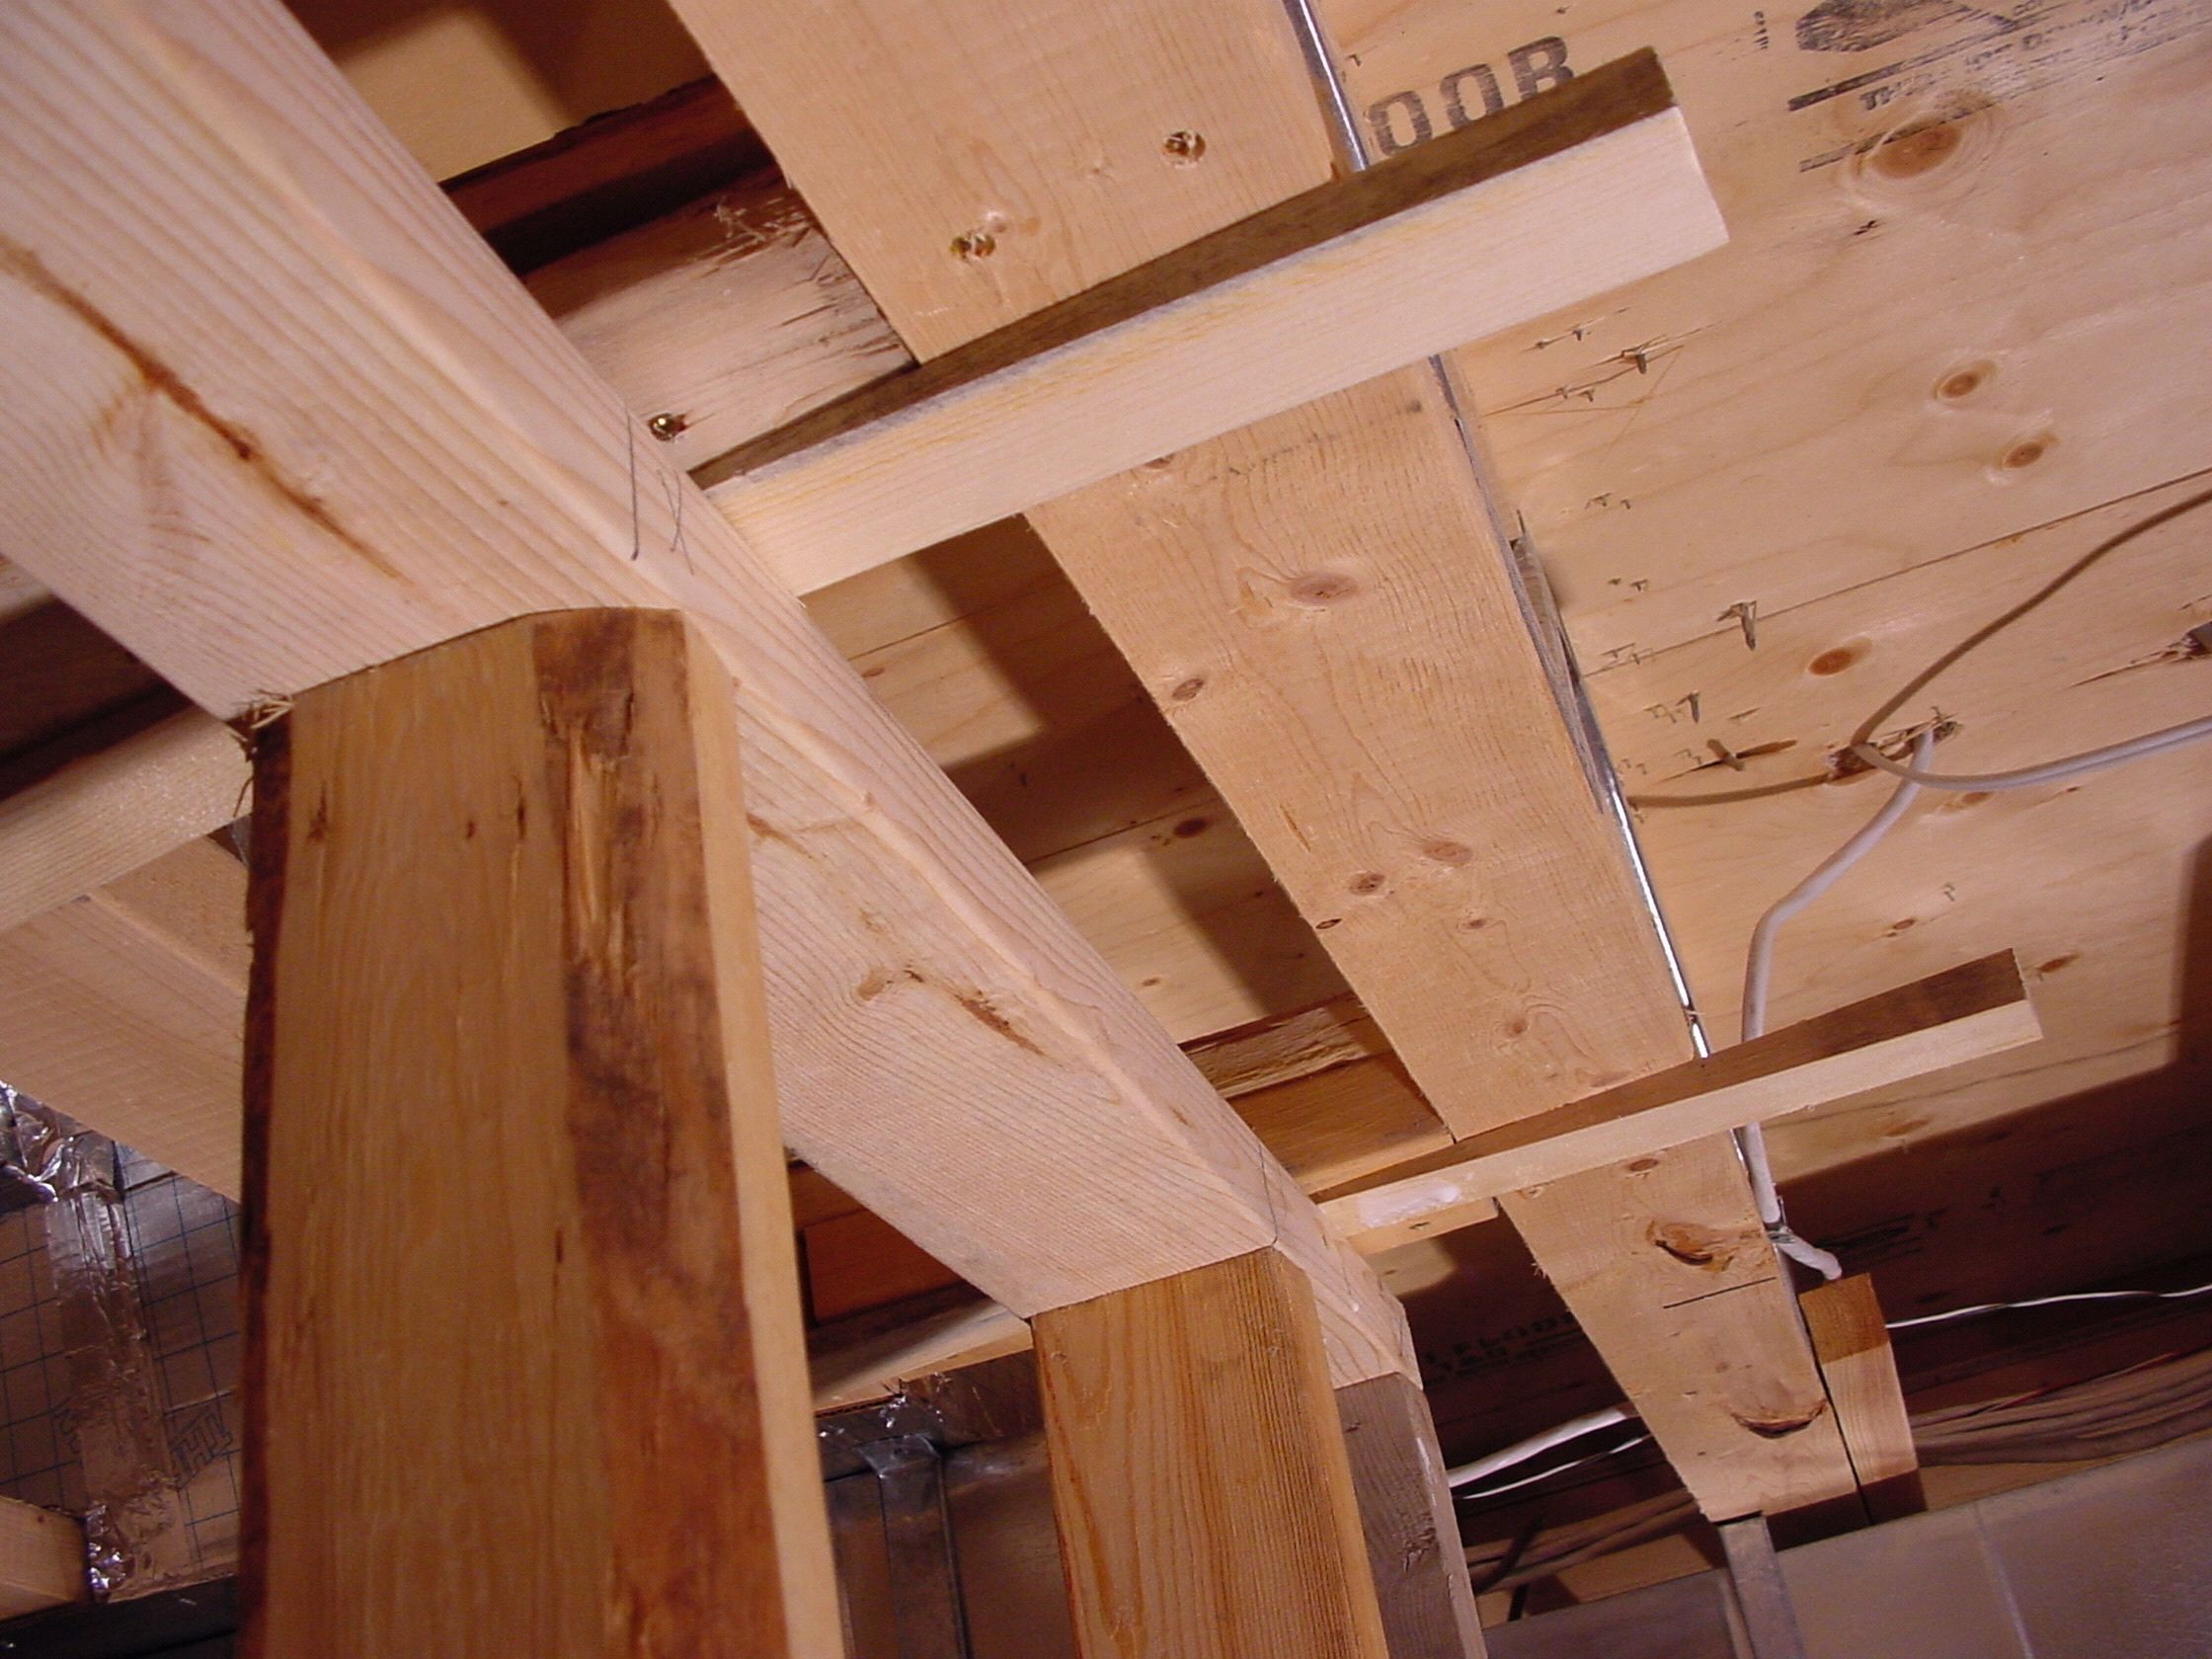
In it’s simplest form, the steps below show how to frame a wood stud basement partition wall. Detailed instructions and tips coming up later in this lesson via video. Since partition walls are being erected in a space that’s already fully supported by beams and posts, they’re non-load bearing. They just sit there, they hold up wall board, and they divide one room from another, but they don’t bear any weight. There’s nothing complicated or risky about building partitions. I’ll provide more details later, but here are the basic steps for building basement partition walls:
Step#1. Measure and record the length of wall required from your floor layout. You need to know how long the wall must be.
Step#2. Measure the height of wall required to fit between the bottom of the wood framing at the ceiling and the floor, then subtract 1/2”. Measure every two or three feet, then use the smallest measurement.
Step#3. Cut the top plate, bottom plate and rot-proof base plate to the length of wall required.
Step#4. Cut wall studs to length considering thickness of all three plates.
Step#5. Mark top and bottom plates for stud locations.
Step#6. Nail top and bottom plates to studs as the floor frame sits flat on the floor.
Step#7. Secure rot-proof non-wood base plate to floor.
Step#8. Tilt wall frame upright and secure it to the base plate and joists.
+++++++++++
Before I explain the detailed instructions for each step, these are the main tools you’ll need for building and raising partition basement walls:
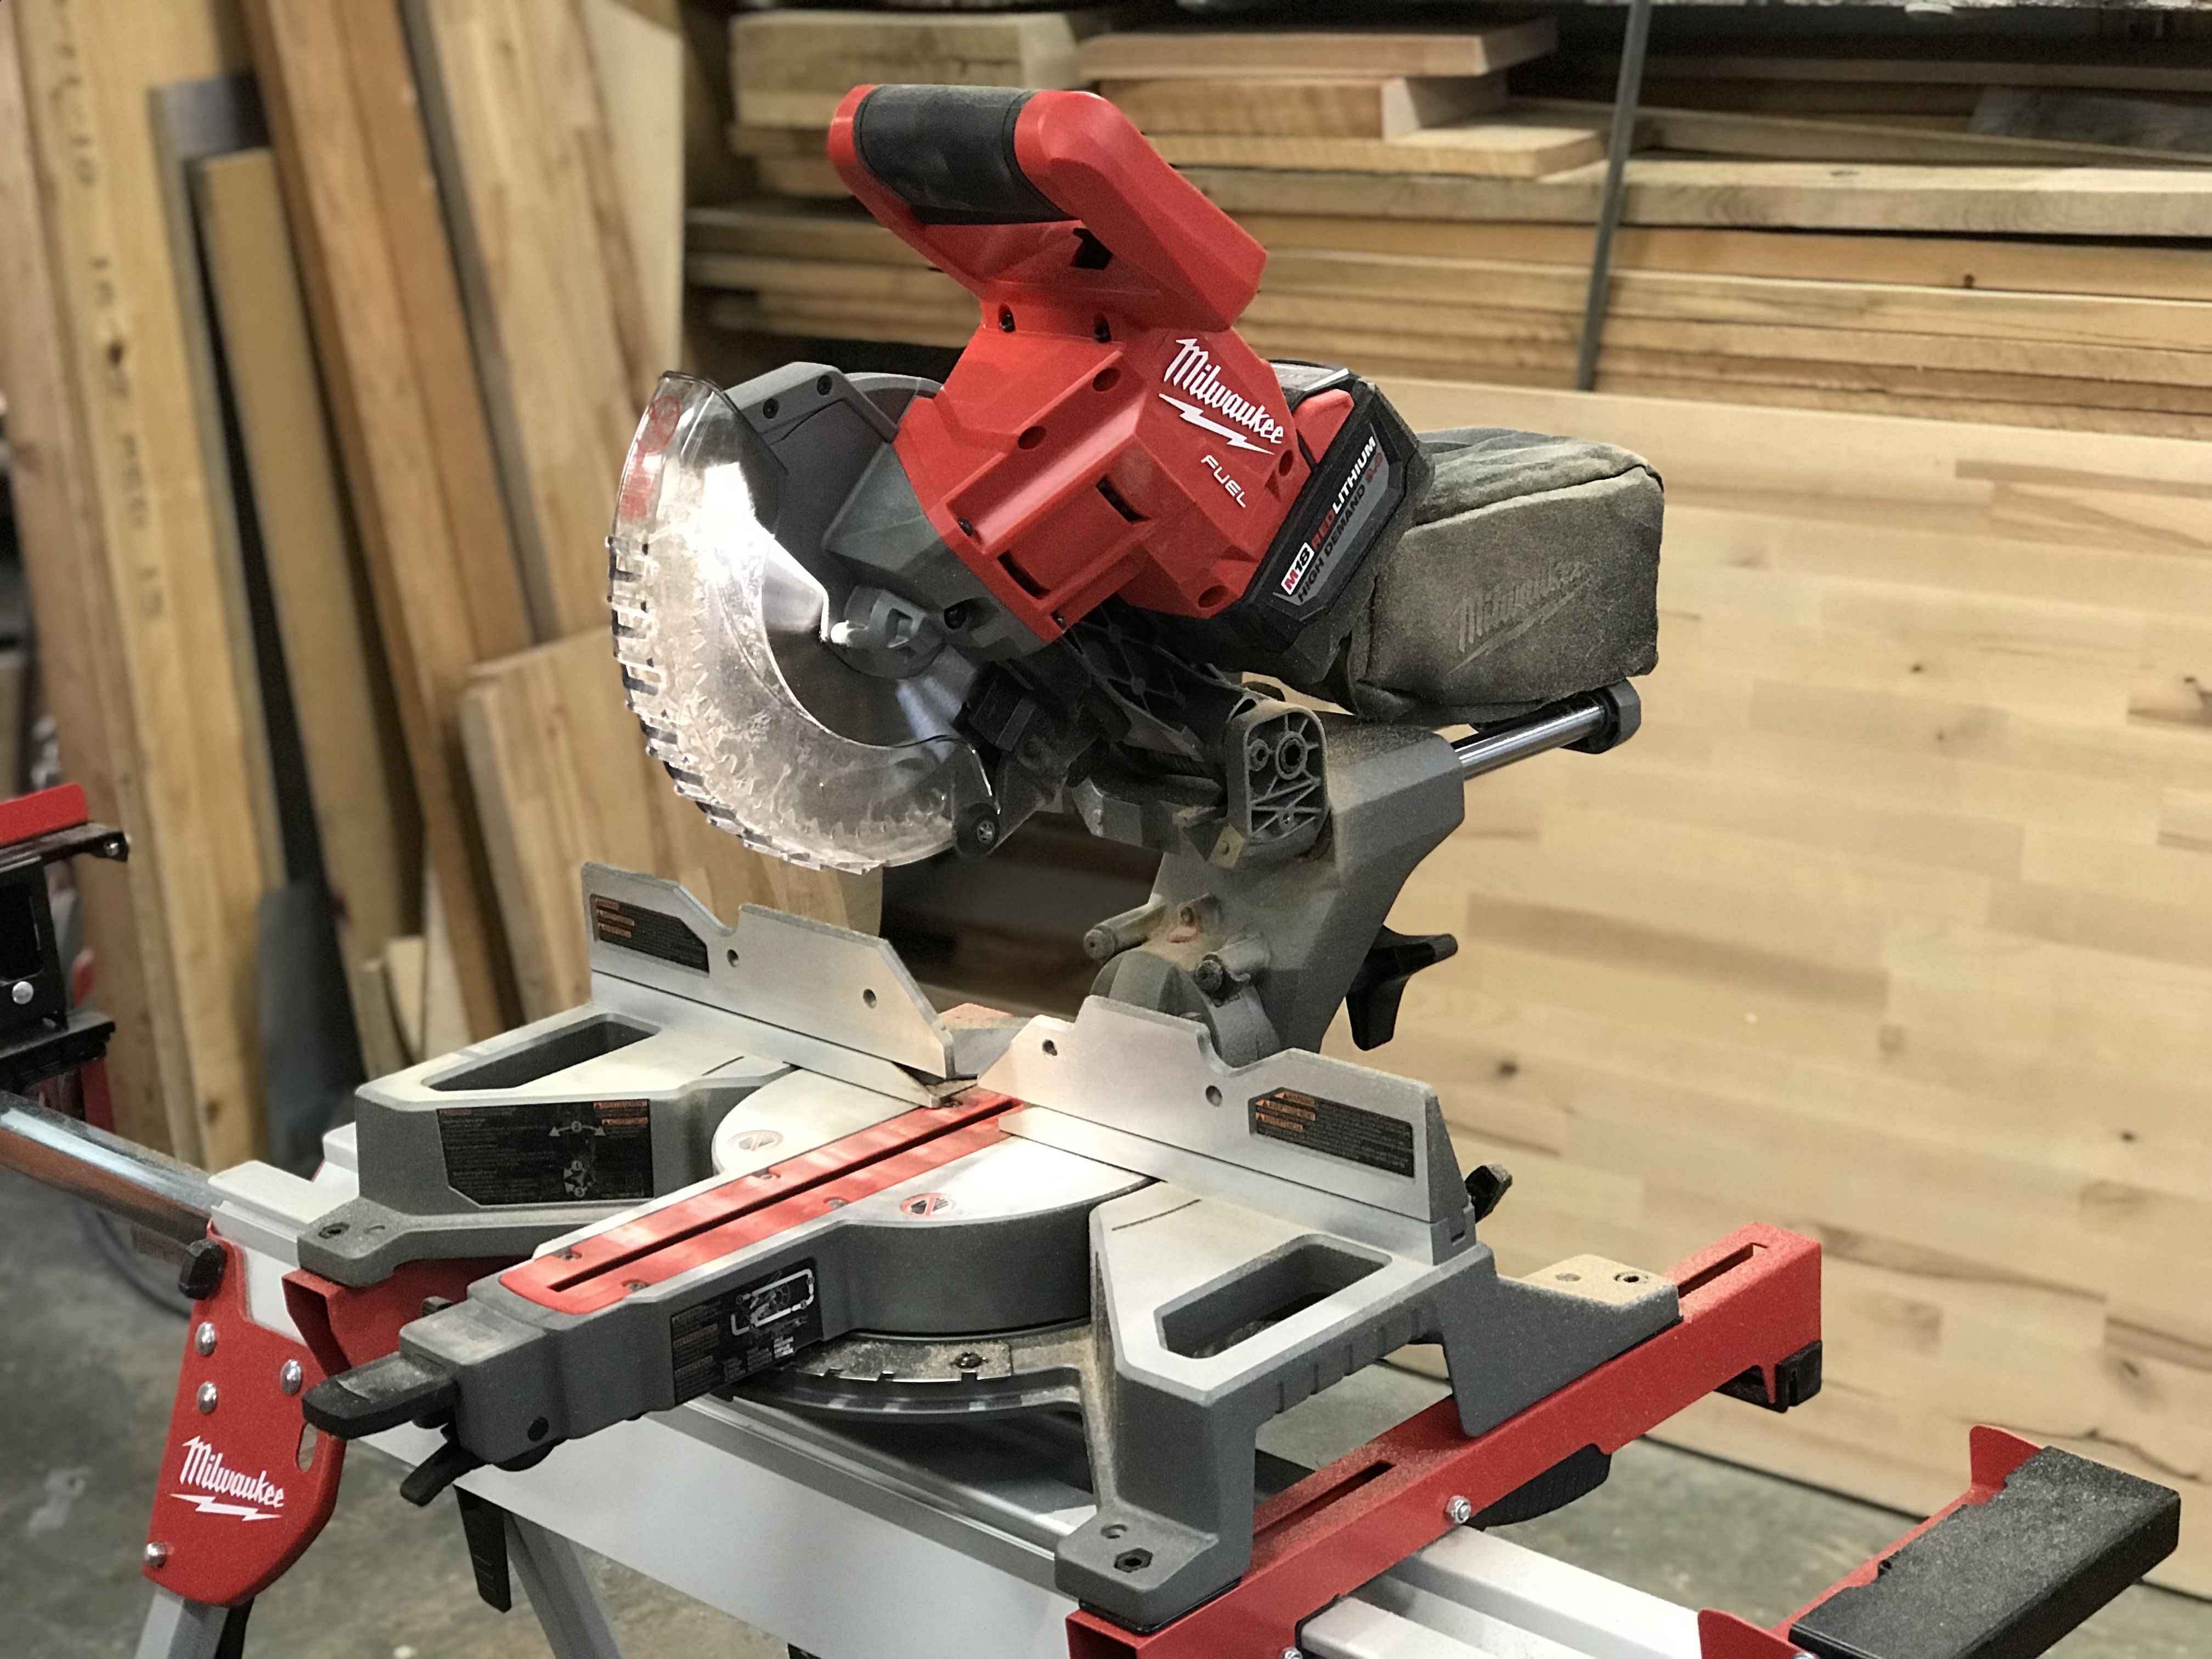
Chopsaw: Also sometimes called a mitre saw, this benchtop power tool makes it easy to accurately crosscut lumber at all angles. Although you could use a good handsaw, circular saw or even a jigsaw to cut wall parts, a mitre saw is the most foolproof by far because it always makes square, accurate cuts. A mitre saw is especially indispensable for cutting trim, so you might as well get one now. If you intend to do your own trim work later, there’s no bigger advantage you can give yourself. Chopsaws can look intimidating, but they’re effective and safe when used properly, as you’ll see in the video coming right up. Any reasonably handy person can learn to use a chopsaw safely and effectively.
VIDEO: Chopsaw Tour
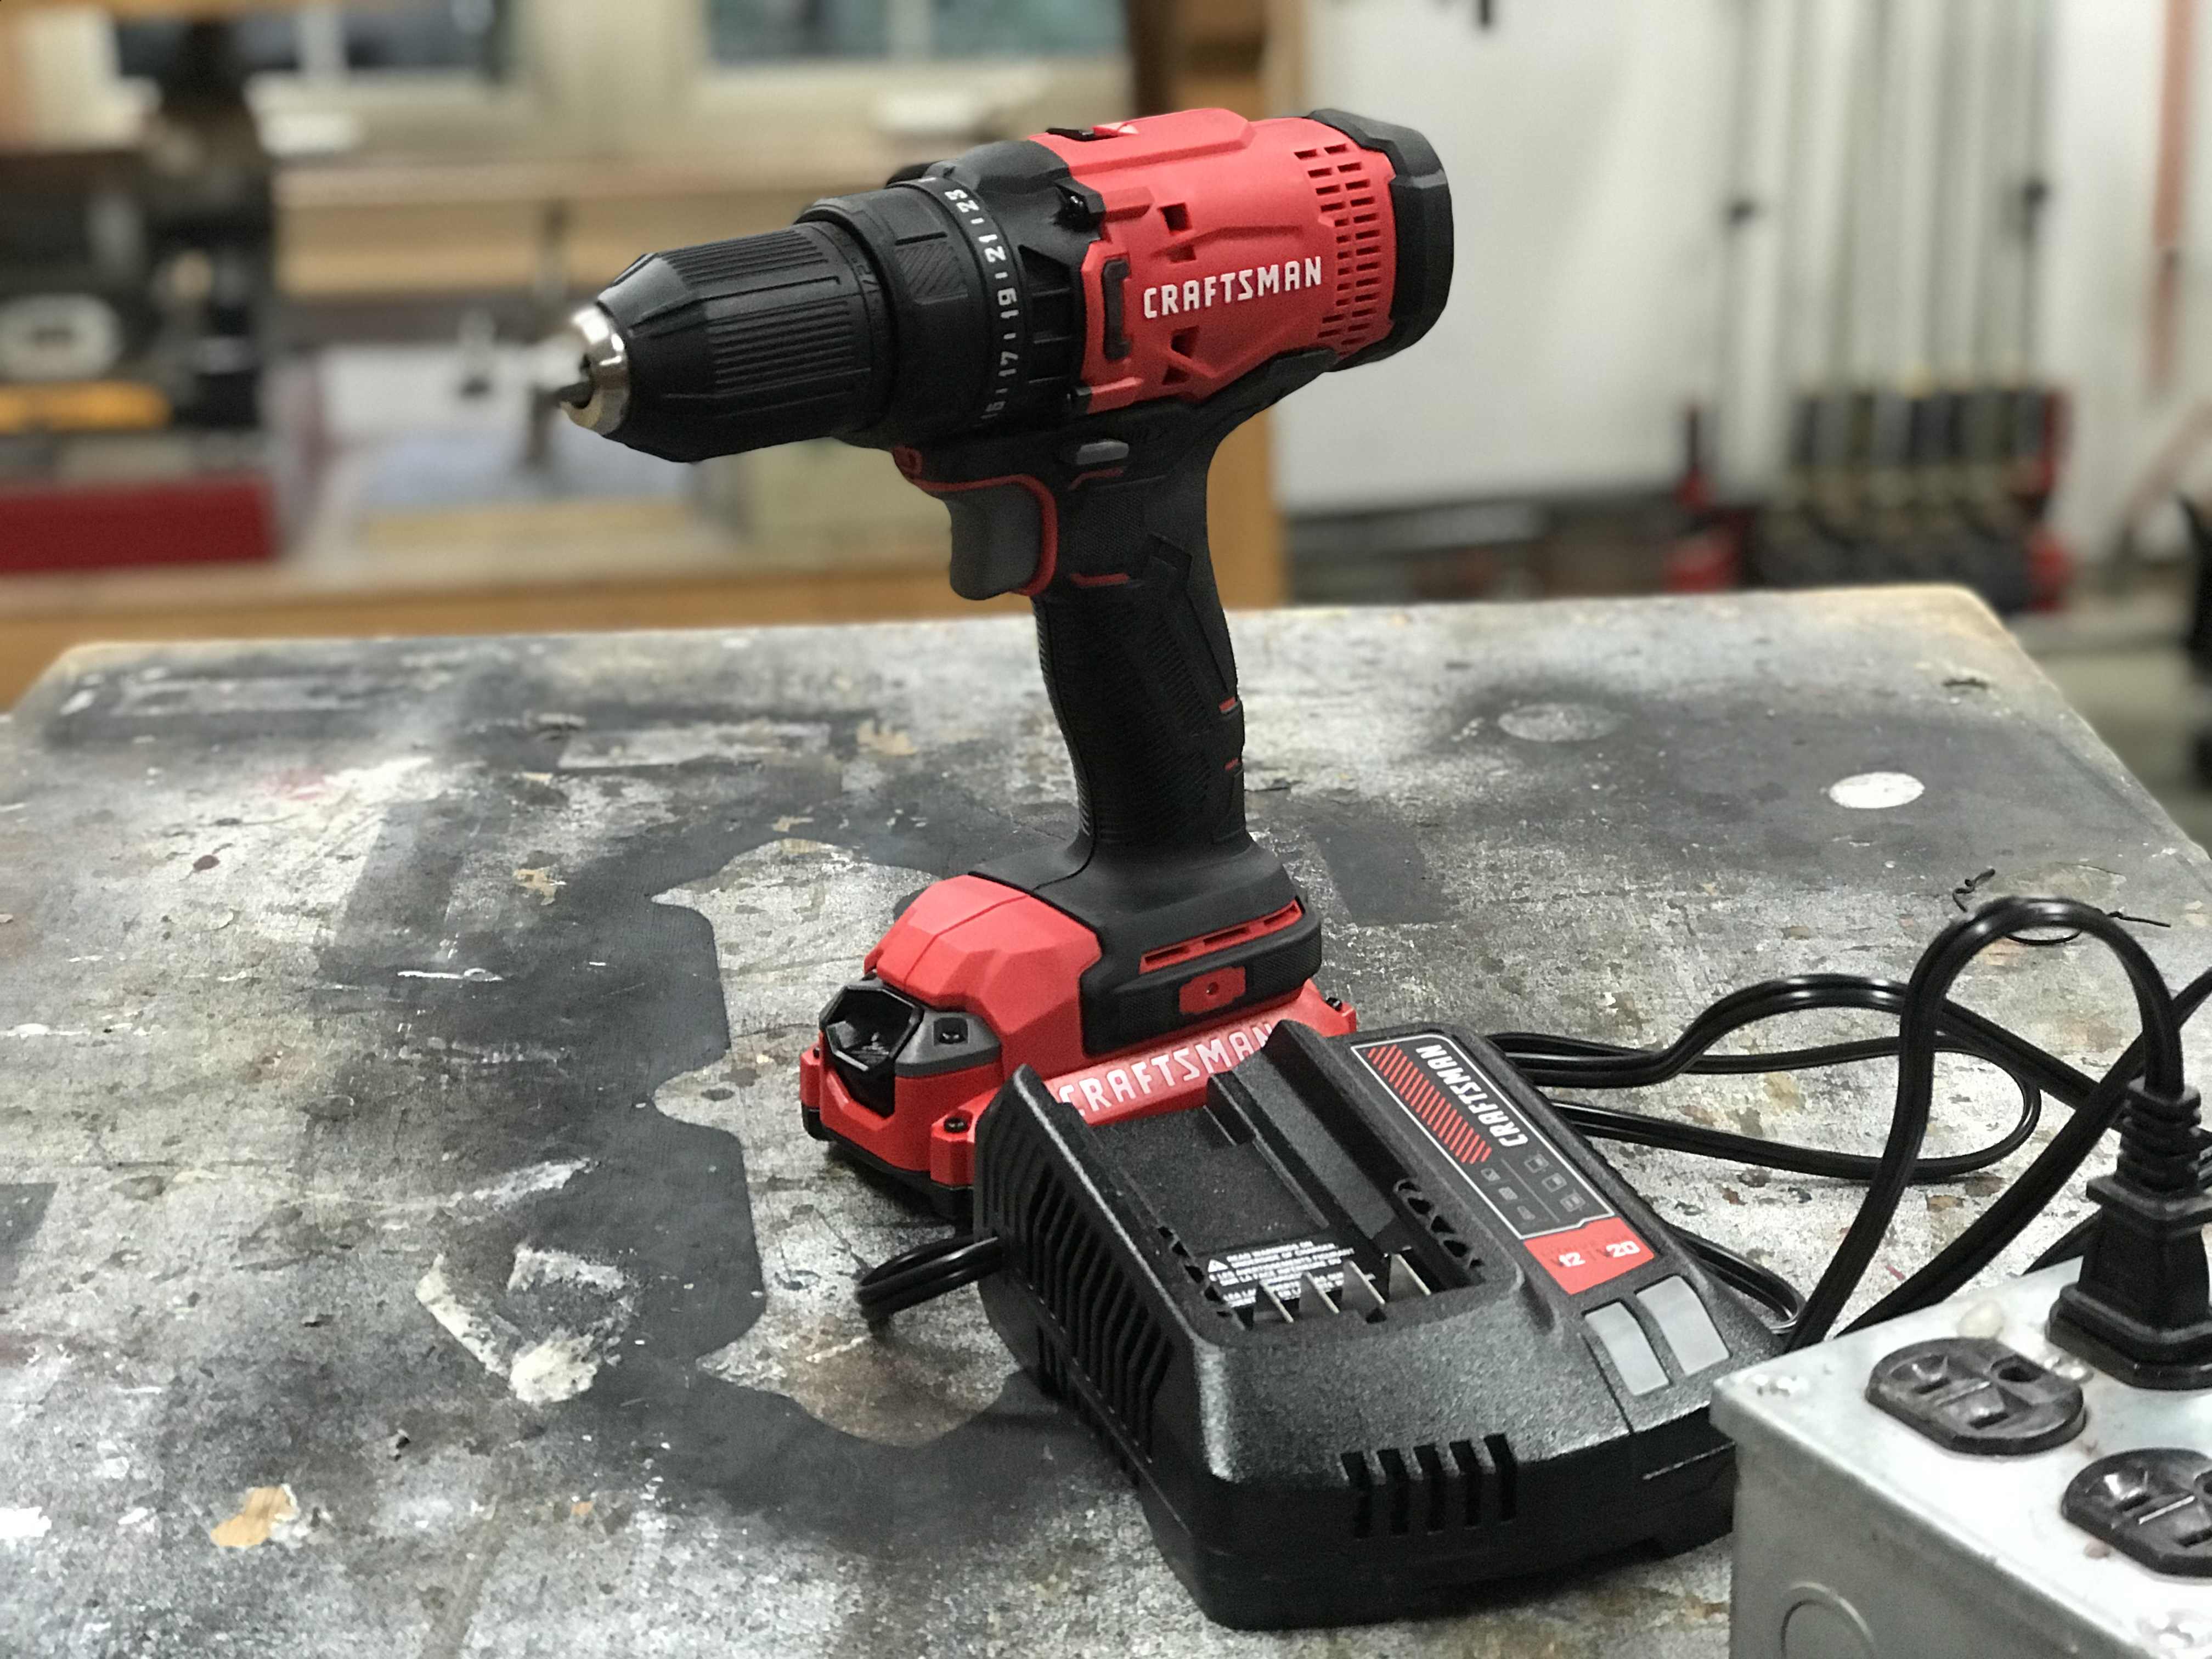
Hand-held drill: You’ll need a drill like this for making holes in wall studs for pipes and wires. A drill is also useful for driving screws to anchor the top of the wall to the joists up above. Screws have become more and more useful over the years and driving them has become much faster and easier with a cordless tool called an impact driver. If you’ve never used an impact driver before, you’ll be surprised.
+++++++++++

Impact driver: This is the ultimate screw driving tool. It’s much better than a drill for this job because it delivers more power for a given battery size and the driver bit stays interlocked with screw heads more reliably when driven by an impact driver rather than a cordless drill. As I’ve explained before, you won’t regret owning an impact driver.
++++++++++++
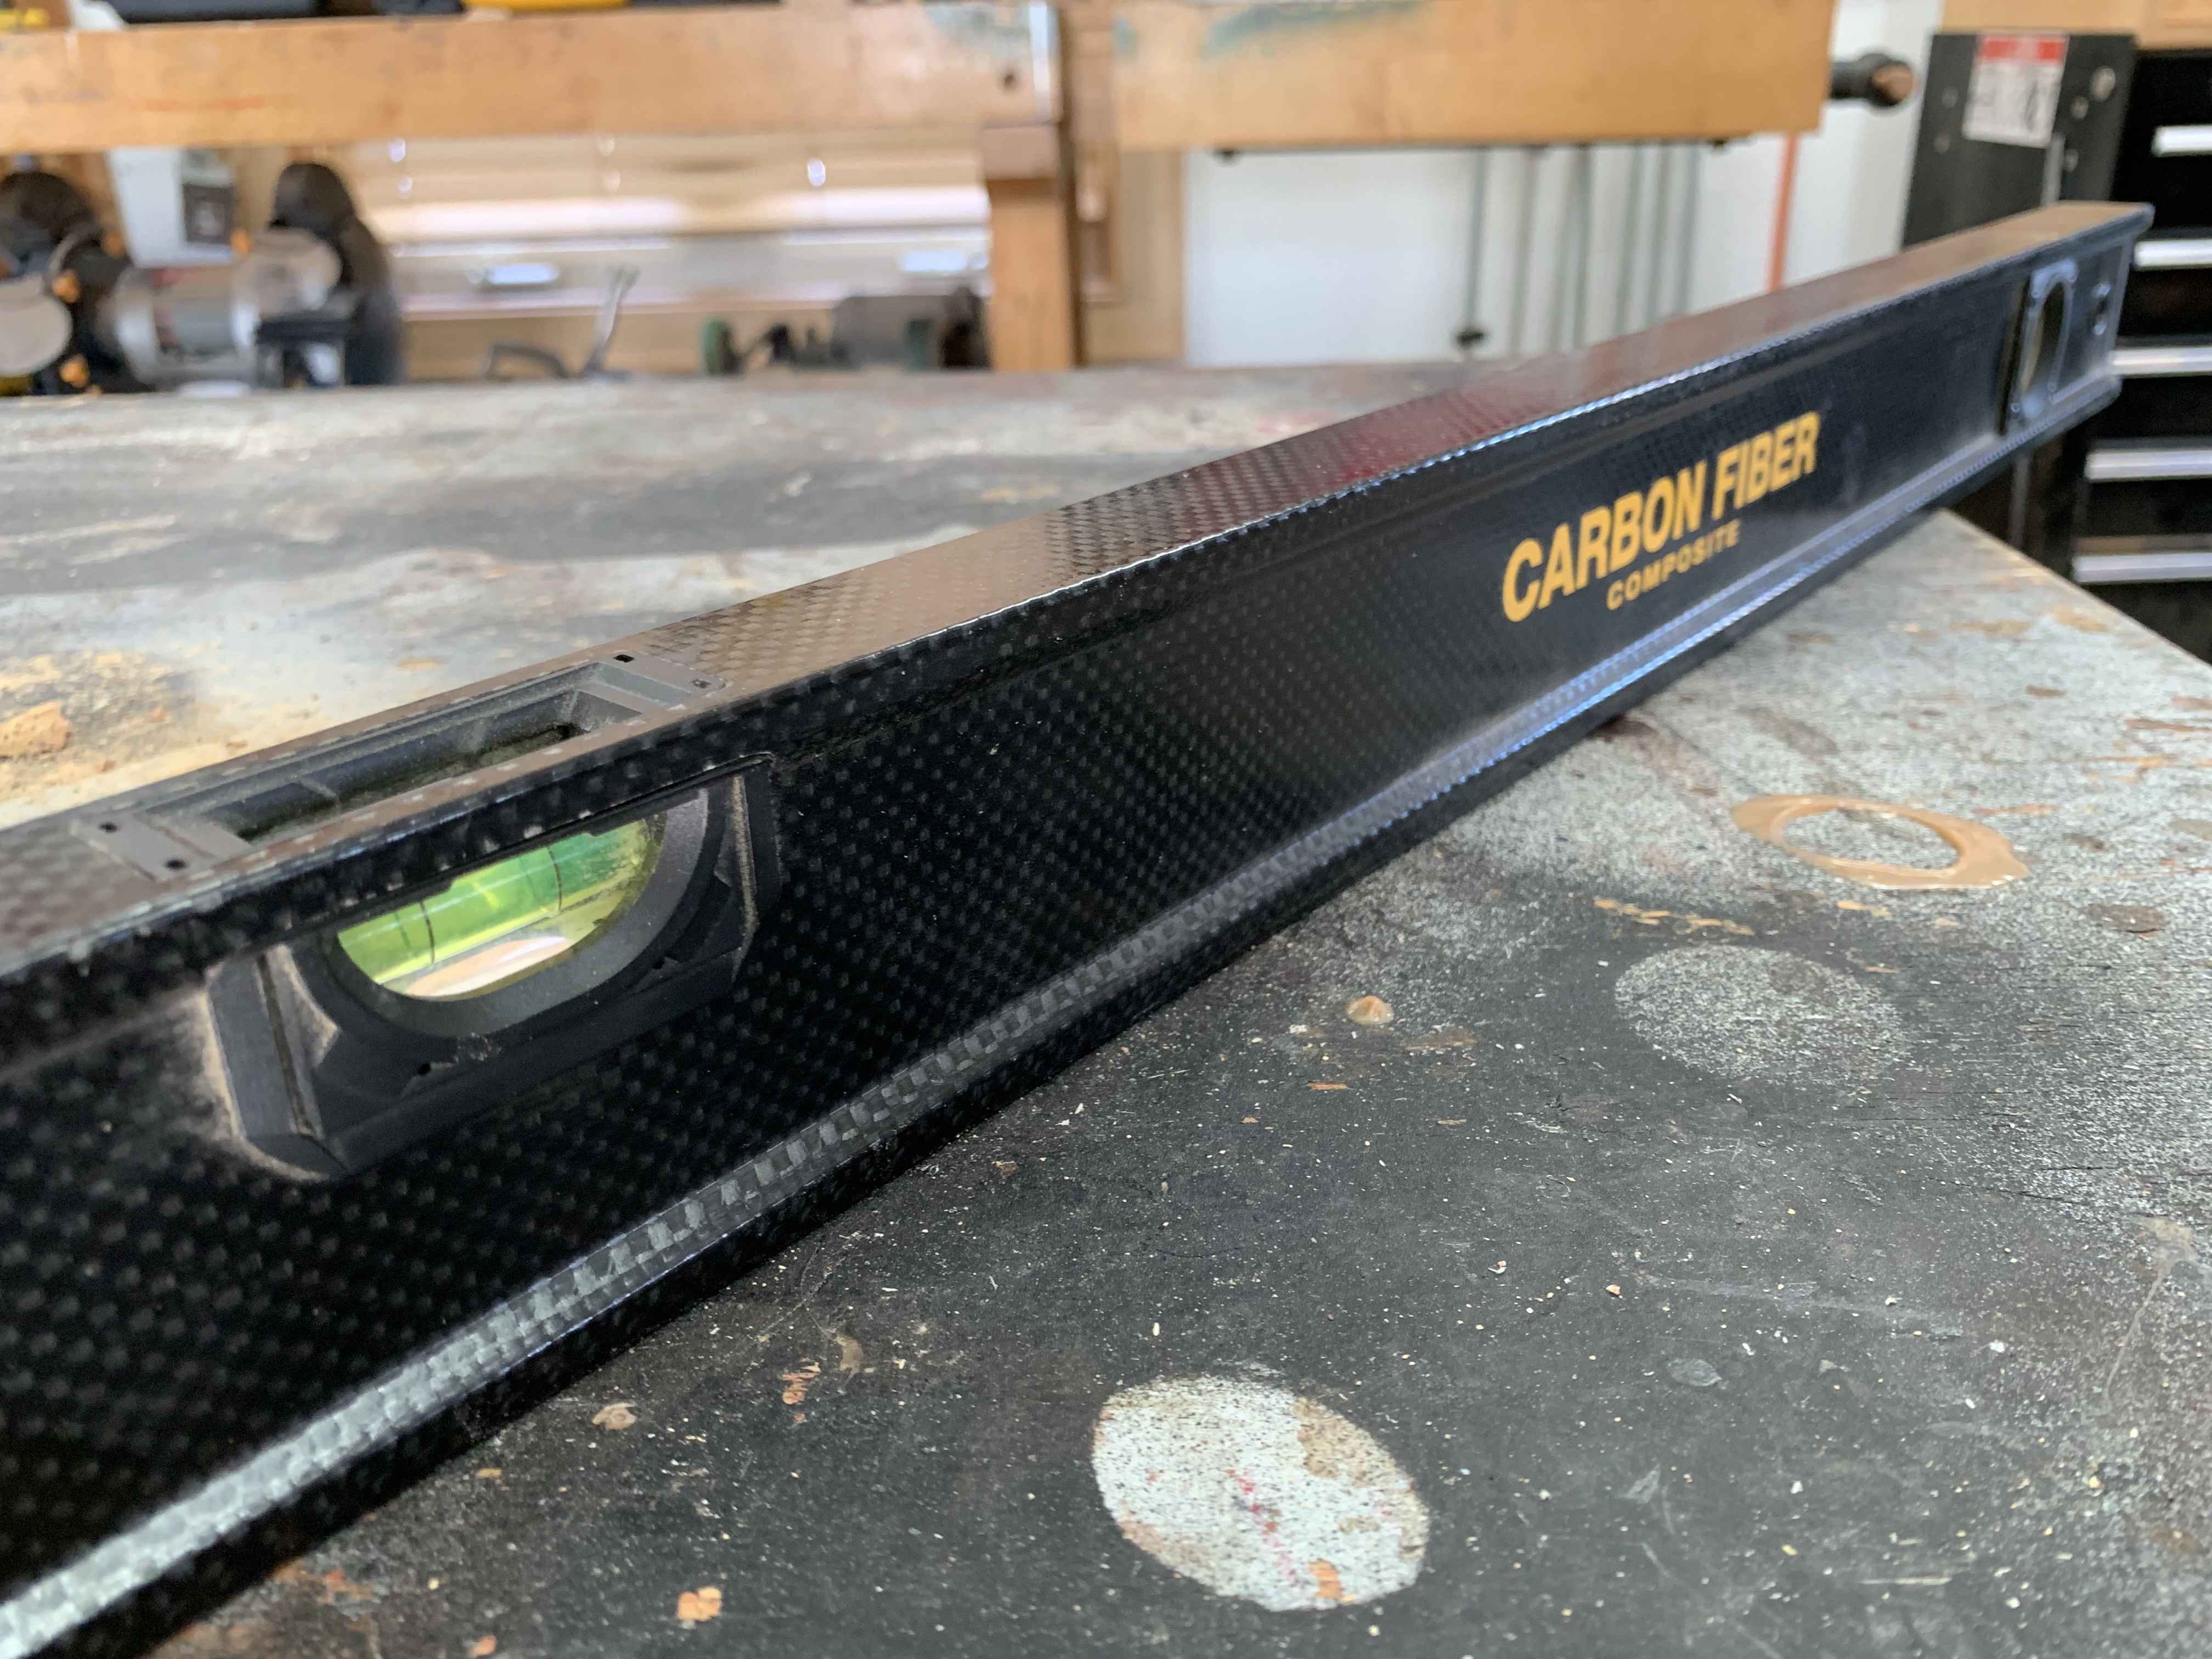
48” carpenter’s level: This is the tool that will guide you so your partition walls are straight up-and-down – “plumb” as they say in the trade. A good level will come in handy for many other operations, too. A long one, like this, is also useful as a straight edge when assessing the flatness of a basement floor.
++++++++++++++
Bottom plate anchoring: The bottom of each partition wall needs to be anchored to the concrete floor and you’ve got a few options to choose from to make this happen. In the case of the partition wall design you see in this course, the lowest part of the wall is made of plastic deck lumber. This is called a “bottom plate” in the illustrations. This bottom plate keeps the wood of the partition walls up and off the concrete floor and allows for the creation of drainage channels to allow small amounts of leaked water to flow to the floor drain. One of the best tools (and most fun to use) is a powder-actuated tool (abbreviated as PAT).
Made by a handful of companies, these tools use a charge of gun powder in a blank cartridge to propel a hardened steel nail-like fastener called a “pin” through wood and into concrete without predrilling. You can buy a basic PAT for about $50. Cartridges and pins are inexpensive and widely available at hardware stores. This is the kind of tool most pros use.
Another option for anchoring your base plates is generically called Tapcon screws. I’ve told you about these before. Tapcons thread directly into predrilled holes in most kinds of masonry and they provide plenty of power without any plastic anchors. You’ll need what’s called a “hammer drill” to bore the holes. The best cordless drills have a hammer drill setting and that’s what you need for making good progress in masonry. A non-hammer drill is way too slow. The hole needs to be precisely sized to match the Tapcon you’re using, and some packages of screws come with the right drill bit. You could predrill holes and use a hammer to drive concrete nails into place, but Tapcons hold better than nails so you might as well use them. Regardless of the type of fastener you use, apply a generous bead of construction adhesive to help secure the bottom plate to the floor. As I’ve mentioned before, one particular kind of construction adhesive called PL Premium is the best I’ve ever used by far.
Here’s a more detailed version of the basement partition steps I mentioned earlier in this lesson.
Step#1: Measure Wall Length
There’s nothing complicated about this step. Simply measure the length of partition wall you need based on the full-size layout you marked on the floor. Record this number on a piece of scrap wood or cardboard so you won’t forget and have to remeasure. The length of each section of partition wall corresponds to the length of top and both bottom plates you need to cut.
Step#2: Measure Wall Height
You’ll always need to make your partition walls a custom height because basements are not made to any kind of standard height. The thing is, there are two reasons that measuring partition wall height properly isn’t as simple as it looks. First, the ideal height of your wall will vary somewhat along its length as the levelness and flatness of the concrete floor varies. Sometimes this variation will be 1/8” or less, and other times it could be 1/2” or more. Your job is to take measurements every few feet along the length of the wall, then select the smallest measurement to work to. You can only make the wall one height, so it needs to be made for the shortest distance.
The second reason measuring the ideal height for partition walls isn’t quite as simple as it looks is because the wall needs to be somewhat shorter than the minimum space you measured. If you made the wall the full height, you’d never get the wall tipped up and vertical into position. The tipping takes up a bit more room than the space available. So how much shorter should you build your partitions? I find that 3/8” to 1/2” works best. Don’t worry about the gap that will exist between the top of the partition wall and the ceiling frame above. That will be dealt with effectively later using wedges. Watch the video up next for a trick that makes measuring easier and more accurate.
VIDEO: How to Measure Accurately Without Numbers
Step#3: Cut the Parts
At this stage you need to cut three wall plates to the same length, but why three? Wouldn’t two plates work fine – one at the top of the wall and one at the bottom? The short answer is yes, only two plates are structurally necessary but I recommend adding a third plate to the bottom. By making this bottom-most plate from non-organic plastic deck lumber, you eliminate one source of potential mold growth. If your basement ever does get unexpectedly moist or there’s a small flood, the plastic lumber keeps the wood of your partition walls high and dry. It’s a little thing, but sometimes little things make big differences.
Step#4: Cut Studs to Length
The length of wall studs you need is the shortest height of wall you measured earlier, less the thickness of the three wall plates. But to measure this accurately, don’t use numbers or math. Instead, set all three wall plates on the ground, then use the tape measuring trick you saw earlier in the video as part of step#1. Note the length of stud required, cut one to length, then test that it really does fit between the top plates as they sit on the ground and the underside of the joists above. Try this test stud along the entire length of the plates to make sure the length is correct everywhere, then cut as many studs as you need for the length of wall. They can all be the same length, even if the distance between your floor and joists overhead varies a bit. Wedges will make up the difference later.
Step#5: Mark the Plates
Studs need to exist in several different kinds of places along each partition wall to support the wall covering you’ll add later and to define door openings. Stud locations include:
- The center of a stud located every 16” so the ends of standard sheet material (such as drywall) lands in the middle of a stud.
- A stud located at every inside corner so wall board is supported.
- Two studs located on each side of every doorway opening.
There’s nothing complicated about marking the top and bottom wall plates. The video at the end of the partition wall section explains more about this.
Step#6: Assemble Partitions
Once again, there’s nothing difficult about this operation. For a partition wall frame made of 2x6s (my preference because it allows more room for soundproofing insulation and creates a more substantial looking wall), use three 3 1/2” long nails per joint. For 2×4 walls, use two nails. If you prefer not to swing a hammer, you can join top and bottom plates to wall studs using 3 1/2” deck screws driven by a cordless drill or impact driver. As you work, realize that you’re only fastening the wood plates to the studs. The plastic base plate stays off for now.
Step#7: Secure the Base Plate
Use construction adhesive and Tapcon screws or powder-driven fasteners to secure the base plate to the floor on its own. You’ll tip the assembled wall up on this base plate and secure it in the next step. As you lay this base plate down on the floor, don’t trust that it’s straight. It might be, but it might not be. Plastic lumber is especially floppy, so you can’t count on its straightness. Lay the base plate down, secure both ends, then stretch a taut string along one side or follow a chalkline mark on the floor. Use this as a reference to push or pull the base plate as needed to make it straight. Secure the center of the wall to the floor, then follow the string again as you secure the rest of the base plate. Install some kind of metal fastener every 12” to 16” along the length of the base plate.
Step#8: Raise the Wall
Get help lifting the wall from horizontal to vertical. If you left 1/2” of clearance like you were supposed to, the wall will tilt upright just below the joists. A 10 lbs sledge hammer is a valuable tool for “persuading” a wall to fit where it might not want to. It’s one thing to have the wall upright, but that’s not enough. It has to be exactly straight up and down along its full length. This is called “plumb” in the trade and a carpenter’s level lets you make this happen.
Start by securing the bottom plate of the wall to the base plate you secured to the floor earlier using screws that pass through the bottom wood plate and into the plastic base plate. The base plate will be straight at this stage, so follow it as you locate and secure the wooden bottom plate. Drive a pair of 3” screws through the bottom plate and into the base plate so there are two fasteners between each pair of studs. With the bottom of the wall locked down, use your level to make the wall plumb along its full length. The video up next recaps all 8 partition wall building steps in detail. This is a long video (25 minutes), so get comfortable before you hit the play button.