Basement Layout Options
It goes without saying that getting the layout correct for your finished basement is very important. You want the right sizes of rooms in the right locations in relation to each other. The good news is that deciding on the size and location of rooms is easier in a basement than if you were planning a house from scratch. That’s because your basement space already exists and makes it easy to experiment with different layout mockups as you settle on the details. Follow the steps coming up next, give yourself some time to experiment, and you’ll arrive at a near-ideal layout. It’s not as difficult as you might think.
Step#1: Create a Scale Plan
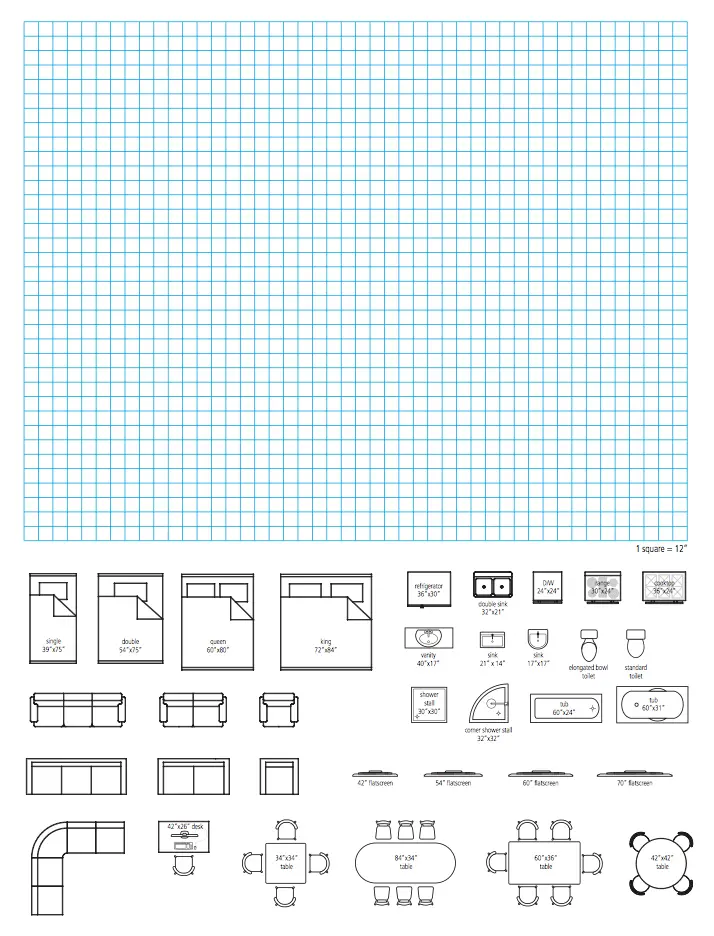
Included right here you’ll find a downloadable PDF file that will help you start planning your finished basement layout. It’s a grid plus some scale icons for most things you might want in your basement. There are scale icons for chairs, beds, tables, appliances, bathroom features, kitchen cabinets and lots of other stuff. The scale of these icons matches the size of the grid squares so everything works together. Print out as many copies of this file as you need, cut the grid sections out with scissors, then tape the pieces together to form the length and width of your bare basement space. Each square represents one foot, and no matter what size you decide to print the file, the icons remain in scale proportions to the grid squares because they were printed on the same page.
The idea right now is to determine the kind of room arrangement you want, starting from first principles. This is just a preliminary step, so feel free to try lots of things. That’s what this paper exercise is for. Watch the video up next to see how you can print the basement grid tool as large as you want on multiple sheets of paper, then cut the pieces up and tape them together for a scale layout experience.
VIDEO: How to Print & Use the Scale Mockup
Before you get started, mark your grid with the location of existing structural and mechanical things that will affect room layout. These crucial items include:
Mechanical equipment: The furnace, water heater, electrical panel and existing HVAC equipment are all challenging to move, so try to work around their existing locations. You’ll save a lot of money and time if you do. Building walls around these items to create a mechanical room is the best way to go if you can make it work.
Floor drain: While it’s true that the closer you locate your bathroom or kitchen to the existing floor drain, the less breaking of concrete you’ll need to do to connect drain lines. That said, breaking a concrete floor, installing pipes, then covering them up and replacing concrete is not a huge deal. Feel free to locate bathroom and kitchen where it makes sense. You wouldn’t want to have to run a circle around the mechanical room, but other than that, you’ll be okay no matter where you want to put kitchen and bath. As you plan, recognize that you can run water supply lines in the same floor trench that you break open for a drain line. It’s a handy little trick. Consider laying down some fairly large pipes first (3” ABS is good), so you can push water supply lines through after the fact. This way if you ever need to replace the pipes, the work will be easy.
Posts and beams: Almost every basement has structural elements and it’s highly impractical to consider moving them. Far better to align partition walls with posts and beams so they’re either hidden within walls or the posts and beams land at the edges of rooms. Coming up later in the course, I’ll show you an effective and attractive approach for boxing in those common, round steel support posts used in basements everywhere. You can’t always hide these posts in walls, but you can still make them pretty behind a wood covering.
HVAC ducting: Of all the existing things in your basement, ventilation ducts are probably the easiest to move. Not easy, but easier than other things. The issue with duct work is that it sits down below the bottom edges of the joists by almost a foot in most basements. Locating partition walls next to these ducts, or a calculated distance away from them, is the easiest way to work around things.
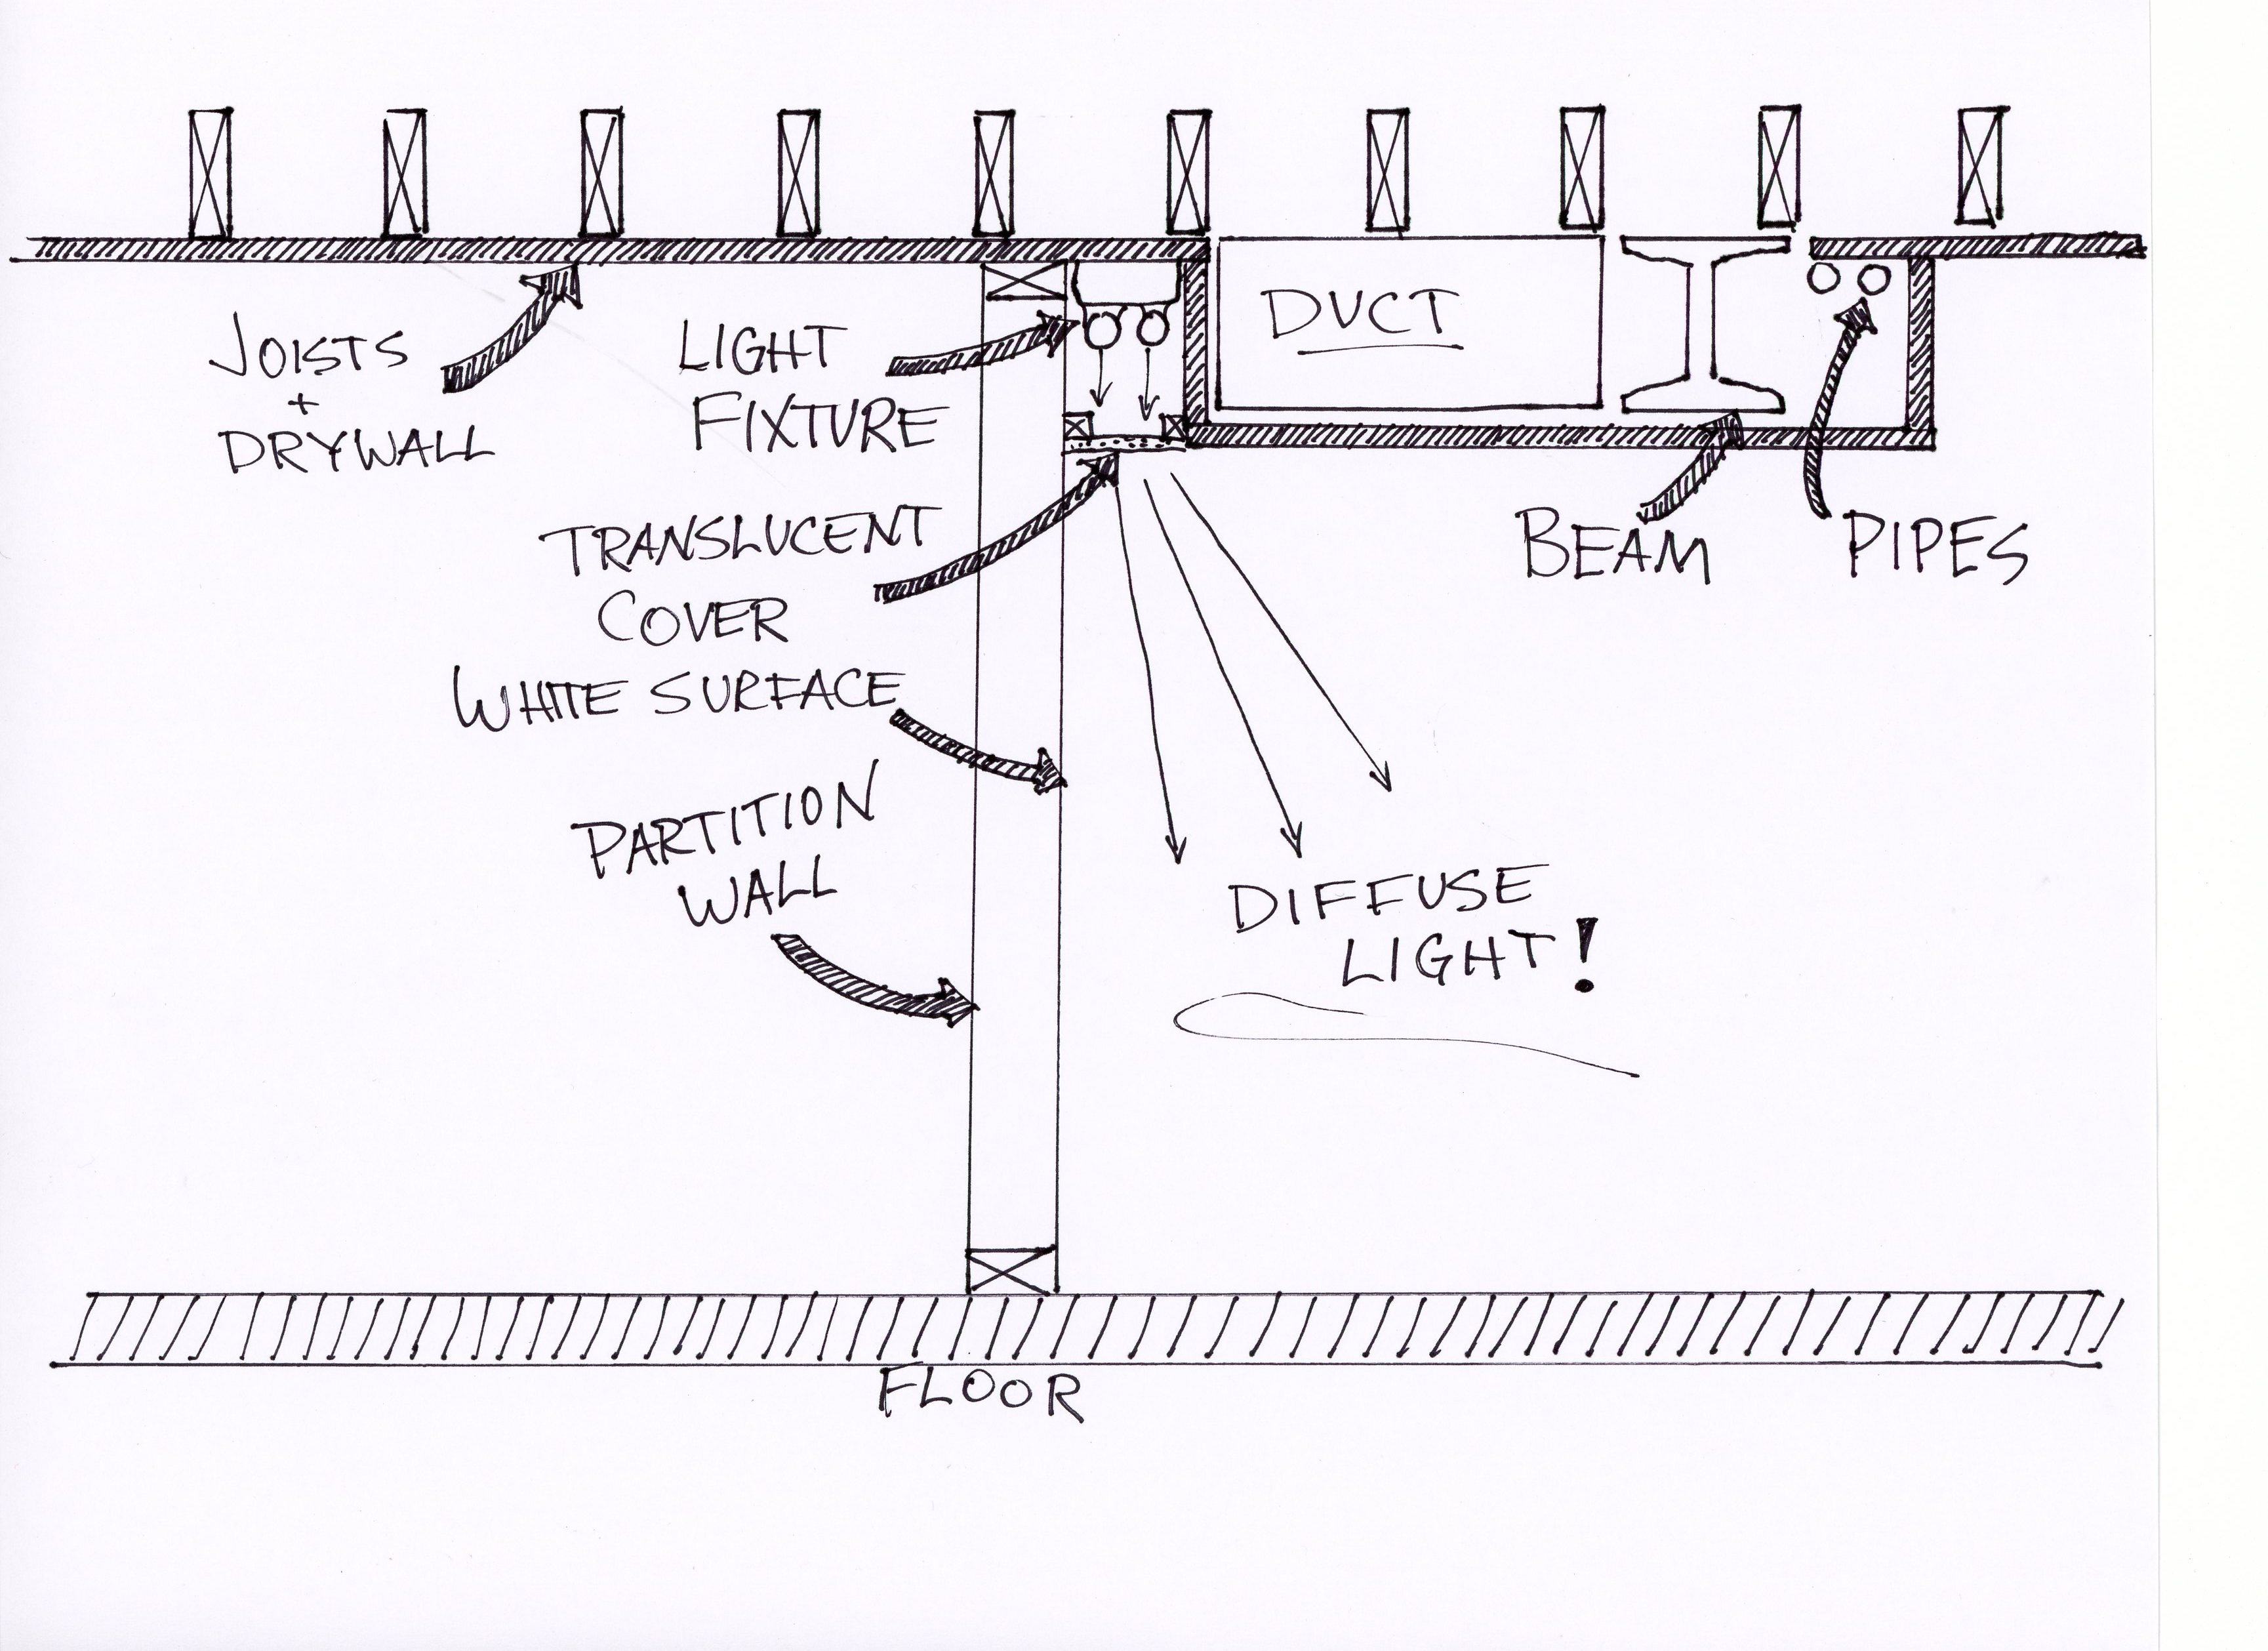
Check out the video up next. It’s a little trick for turning a troublesome ceiling duct into an attractive light valance with careful placement of a partition wall. This approach is well worth knowing about. It’s the kind of detail that can make your basement work much better than it otherwise would with less careful planning.
VIDEO: Ceiling Duct & Light Valence
