Mechanical Ventilation, Heating & Cooling Best Practices
While it’s true that every basement should have openable windows of some kind (and maybe even an outside door), windows and doors alone never offer enough ventilation for the entire basement. To have a fresh, clean smelling finished basement space you also need different forms of mechanical ventilation. It’s important not to leave heating and cooling to chance, either. Details that makes sense will vary depending on your climate and the layout of your space, but here are the options to consider now, early on in the planning process.
Bathroom Exhaust Fans

While the need for a bathroom fan might seem obvious and insignificant, what’s not so obvious to most people (some contractors included) is how most bathroom fans move way too little air. Many also make way too much noise considering what they do. That’s why I recommend larger, higher quality exhaust fans than usual. This is especially important for basement bathrooms because so few of them have a window. It’s either mechanical ventilation or a lot of stale air.
There’s still a ton of junky hardware in the world of bathroom exhaust fans, That said, quiet and powerful models are available in various configurations, including designs made especially to replace inadequate existing units or to install fans in new locations. But before you avail yourself of any of this superior technology, you need to begin with a simple but crucial calculation.
To be effective, a basement bathroom fan needs to eject all the air in your bathroom at least eight or nine times an hour. Ten exchanges per hour is even better. Any slower than this and excess moisture will probably damage walls, ceilings and windows before it’s drawn outdoors. Determine the size of fan you need by calculating the total volume of your bathroom (length x width x ceiling height in feet). Set this number aside for a minute then look at the fan you’re considering.
All exhaust fans are rated in cubic feet of air moved per minute (CFM is the abbreviation), so you’ll have to multiply this number by 60 to get an hourly figure. Can the fan you’re looking at move at least 8 times the total volume of air in your bathroom in 60 minutes? If not, you need a bigger fan, but watch out. Standard bathroom exhaust fans only work properly in the smallest of bathrooms. If you’ve got anything larger than an ordinary bathroom, you definitely need a larger than ordinary fan. Don’t undersize the fan. This is a very common mistake, and it causes plenty of avoidable trouble.
The other issue to consider as you make a choice is noise output. Larger exhaust fans are slightly louder than the best small units, though you should never go for a quieter fan that’s simply not big enough to move enough air. Even today’s largest bathroom fans generate a background sound somewhere around one “sone”. A sone is a unit of sound output used across the exhaust fan industry, and a one sone rating is quiet indeed.
One of the reasons so many homes have inadequate bathroom exhaust fans is because good units are not cheap. There’s no such thing as a decent bathroom exhaust fan for less than $150. You can easily pay more than $200 for a good fan that’s a little larger than the smallest model. Panasonic makes some exceptionally good units. This brand is what I have in my own house and I love it.
PRODUCT PICKS: Basement Bathroom Exhaust Fans
Panasonic FV-05-11VK2: This is a great fan for a small bathroom. It moves 110 cubic feet per minute (not a whole lot but enough for an 8×10 space), it’s super quiet (0.3 to 0.8 sones) and has three speed settings. Some people run fans like this on low all the time to ensure regular air circulation. Running on low you’d have a hard time hearing this fan at all. It uses less than 4 cents worth of power per 24 hours of operation assuming a 15 cent/kilowatt-hour utility rate. Many places have lower electricity prices than this, too.
Panasonic FV-1115VQ1 WhisperCeiling DC Fan: This somewhat larger fan moves 150 cubic feet per minute (enough for a 10 x 12 bathroom) with less than 0.3 sones of sound output on all three speed settings. Drawing 12 watts of power running full blast, this unit cost only 4 1/2 cents for every 24 hours of operation assuming a 15 cent/kilowatt-hour utility rate.
Panasonic FV-30VQ3 WhisperCeiling 290 CFM Ceiling Mounted Fan: Not as quiet as the other two recommended models, but this thing moves a lot of air. I have this particular fan in my most busily used bathroom and it’s great. Large enough to properly ventilate a 15 x 15 foot bathroom. Drawing 64 watts, this fan costs 25 cents for 24 hours running time assuming a 15 cent per kilowatt-hour utility rate.
Kitchen Range Hood
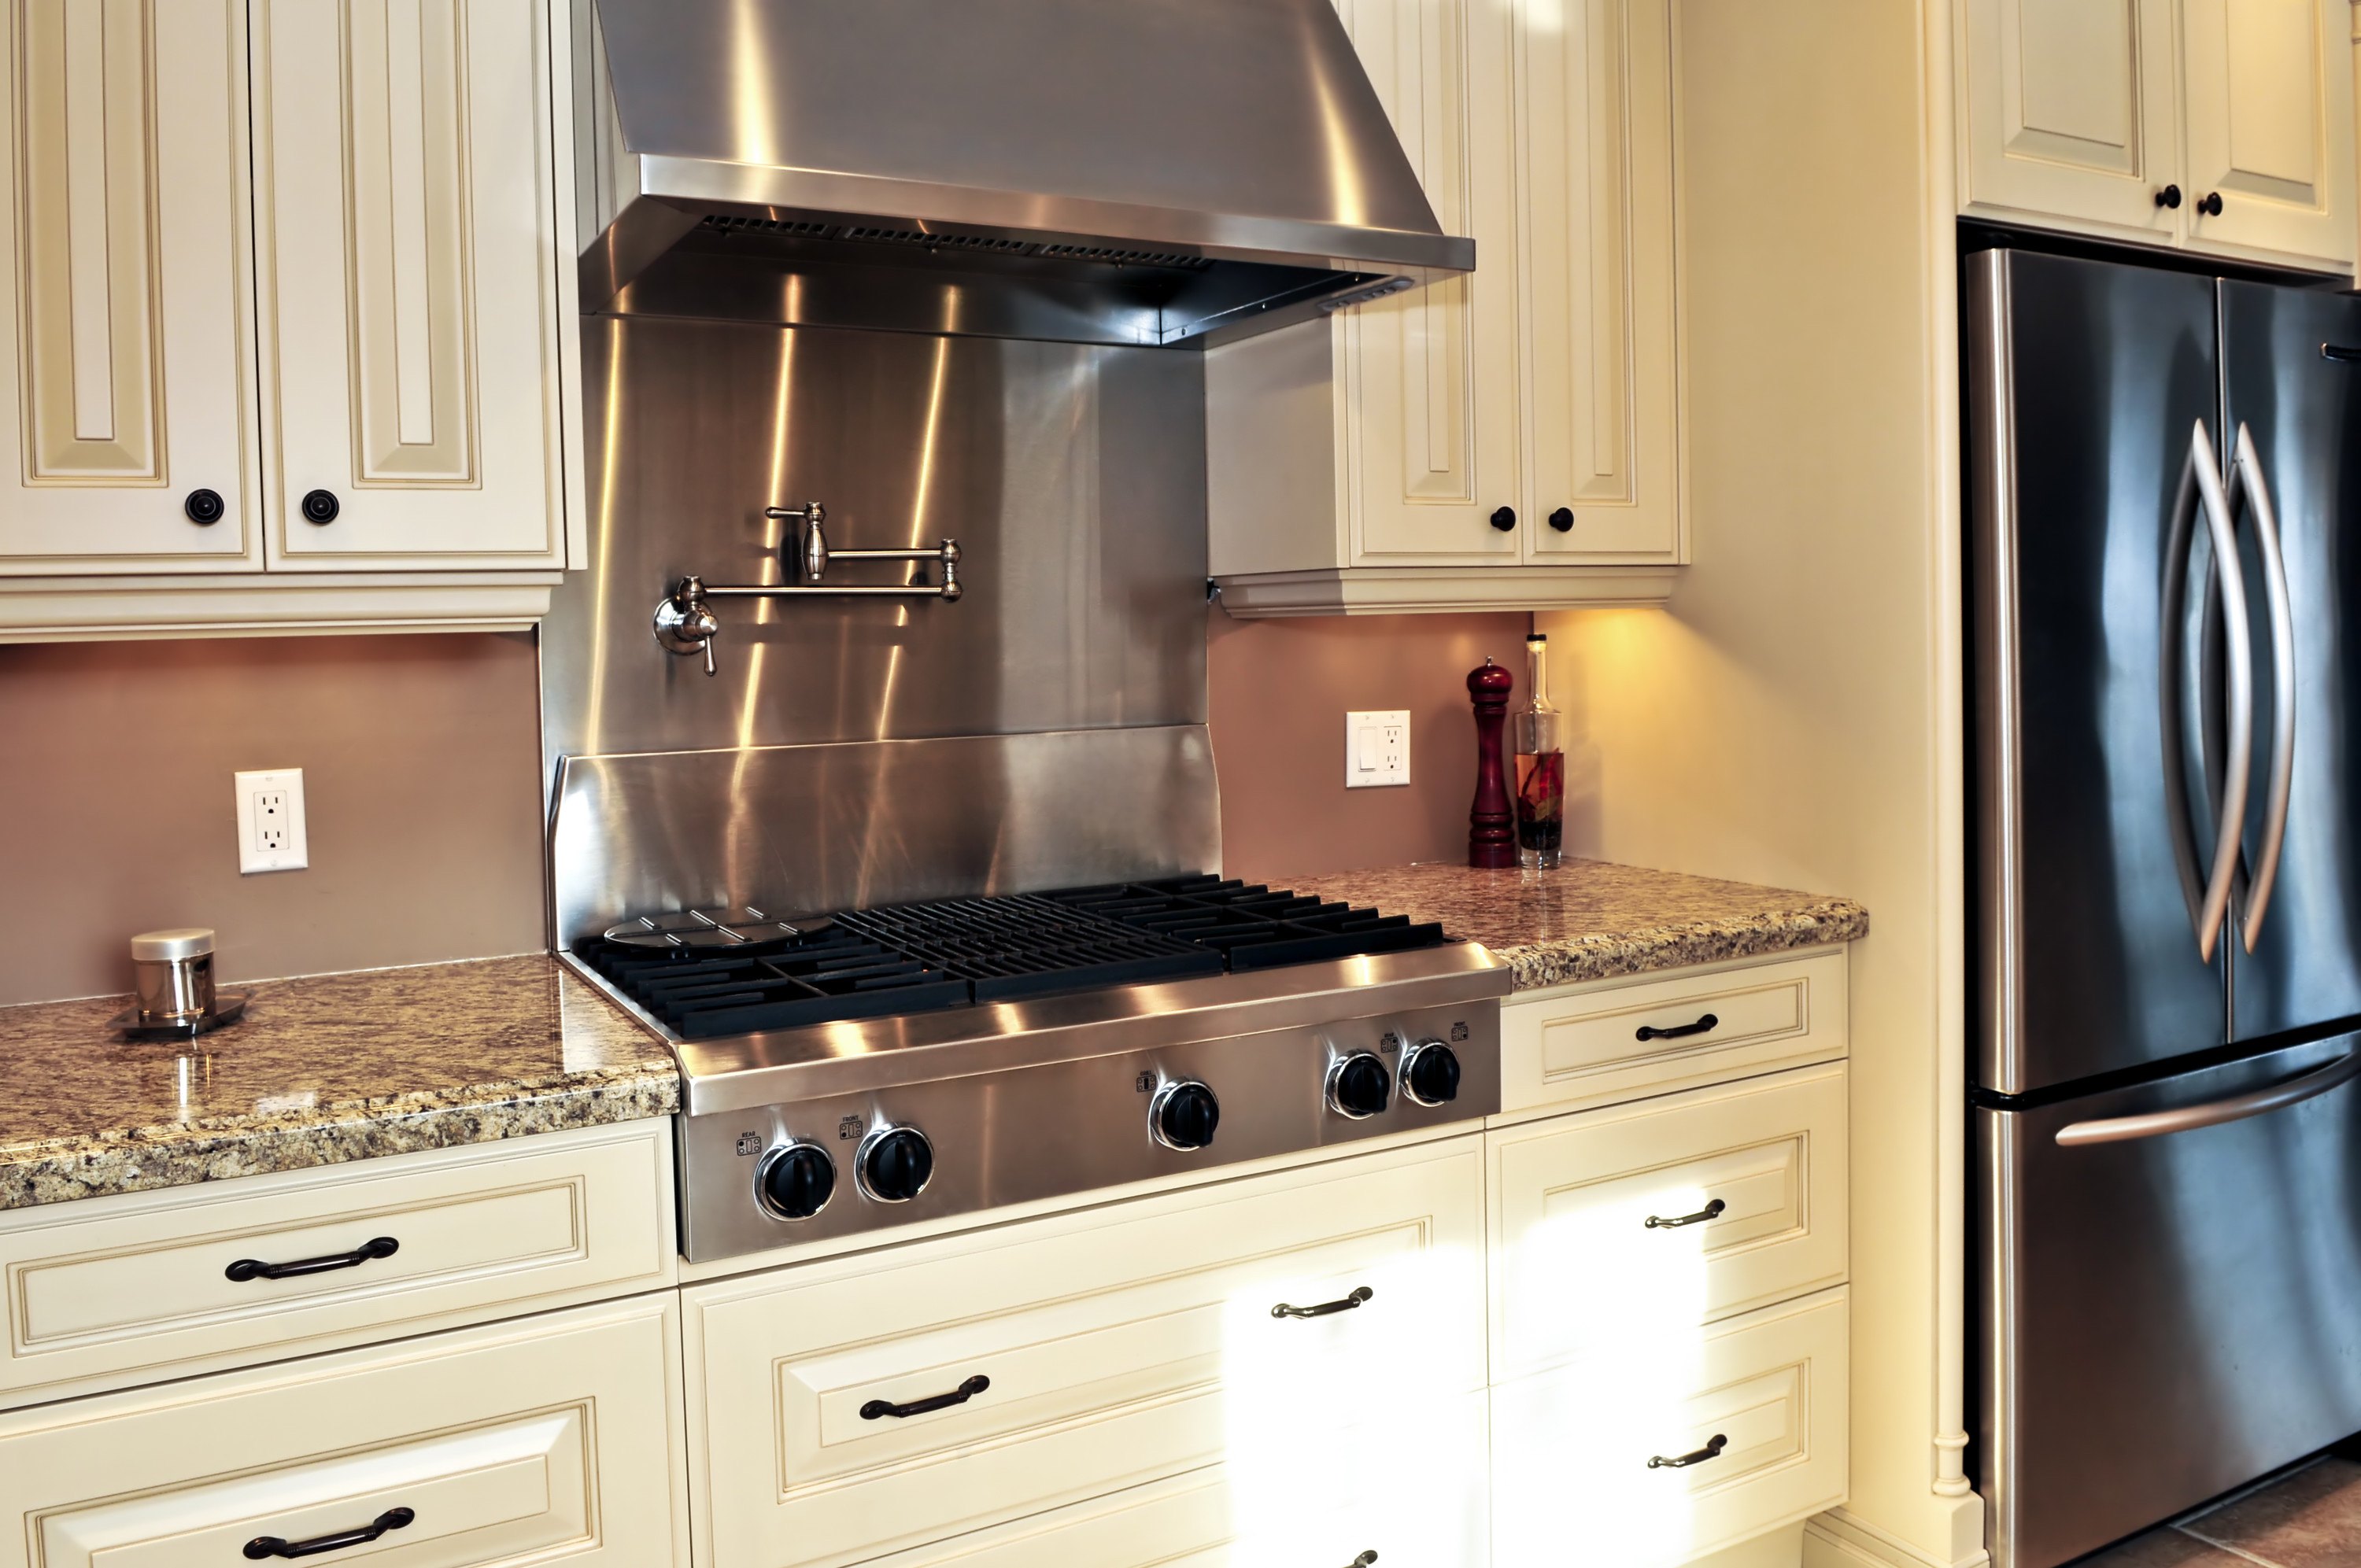
If your finished basement vision includes a kitchen (even a small one), then you need some kind of range hood to keep the air fresh. There are two types – recirculating and venting. The venting type is what you want for a basement because it actually moves air outside. Recirculating units are easier to install because they don’t need a duct to the outdoors, but they simply pull cooking fumes in through a carbon filter, then return the same air to the room. That’s hardly worth it in my book. A venting-type range hood works better because it actually shoots stale, greasy air outside. Most venting units can also be adjusted to recirculate air through an internal carbon filter, just like recirculating units. Why would you want this? Sending air outdoors through an exhaust fan provides fresh air pulled into your basement around windows and doors, but it also always results in the loss of heated or cooled air from the building. For every cubic foot of air ejected from your basement, unheated or uncooled air must be drawn inside from somewhere else. The ability to have some kind of filtration and recirculation of kitchen air is useful when it’s particularly hot or cold outside.
PRODUCT PICKS: Basement Kitchen Range Hoods
Chef 30” PS18 under-cabinet range hood: This model is made to fasten to the underside of the upper cabinets above a range or stove top. This model moves a lot of air and has a good track record for performance.
Cavaliere SV168B2-30 wall-mounted range hood: This hood is meant to be mounted to the wall immediately behind a range or stove top. It moves a decent amount of air and has a good track record of performance.
Ventilation, Heating and Cooling Systems
As homes are built and renovated to tighter standards all the time, less and less natural air circulation happens through gaps around windows and doors. This trend has resulted in lower indoor air quality in modern homes (sometimes dangerously low) and the creation of an entire category of home ventilation appliances to make things fresher. Heat recovery ventilators (HRVs) and energy recovery ventilators (ERVs) are the two main types, and you should consider one or the other as part of your basement finishing plans, depending on the climate where you live. They can make a huge difference in the healthfulness of your entire home, not just your basement.
Both HRVs and ERVs are ventilation appliances that exchange outdoor and indoor air while recovering a majority of the energy invested in heating or cooling. HRVs work this magic by exhausting a stream of indoor air through thin-walled heat exchanger passages on its way outside. These channels are immediately adjacent to neighbouring channels where outdoor air is drawn into your house in the opposite direction. Thermal energy is exchanged through the thin channel walls, without allowing the two air streams to physically mix. HRVs are ideal in climates with a heating season, and the colder the winter and the tighter your home, the more you need an HRV because of its ability to dry things out. The condensation that normally appears on windows during winter, for instance, happens inside the HRV before trickling away harmlessly through a tube connected to a household drain. Besides making indoor air fresher, running an HRV in winter reduces the indoor humidity in your home.
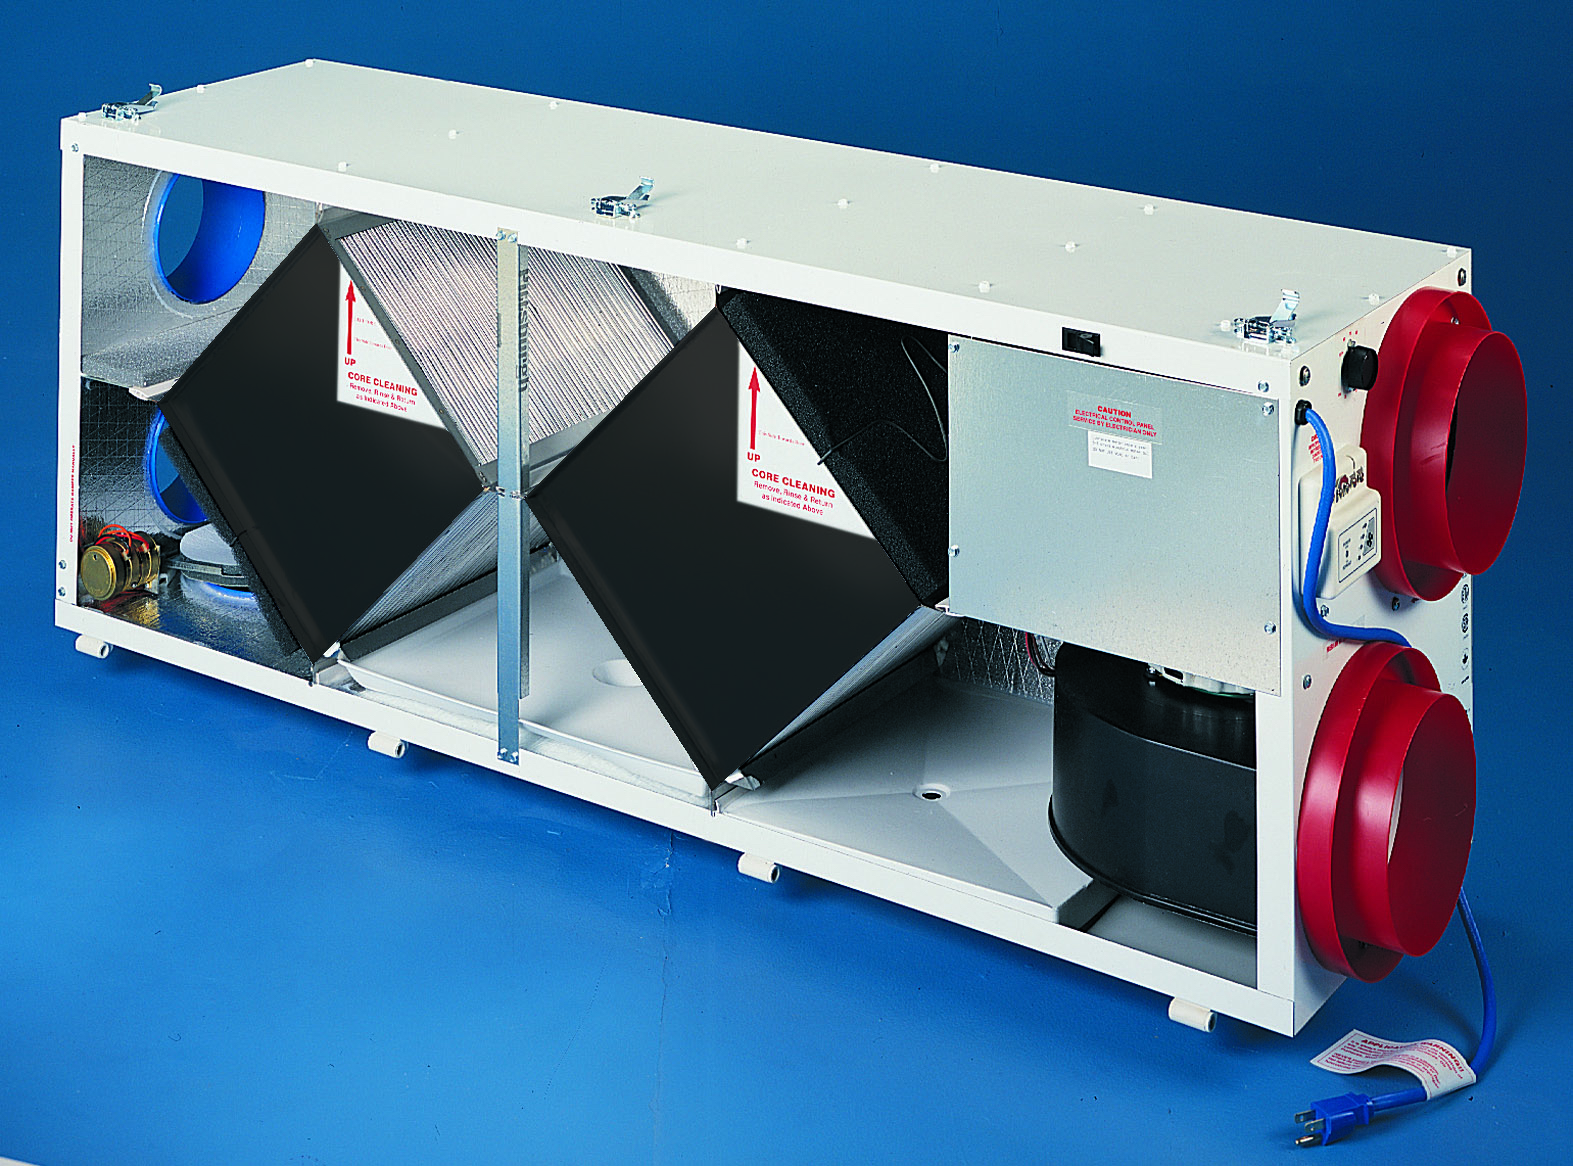
Energy recovery ventilators (ERVs) are similar to HRVs in that they exhaust stale indoor air and replace it with fresh outdoor air. But instead of just retaining the energy invested in heating and cooling, ERVs also exchange moisture between the two streams. This moisture exchange capability is the main feature of all ERVs.
So how do you decide whether an HRV or ERV makes more sense? It all comes down to your climate. If you need heating more than air conditioning, then an HRV is the appliance to choose. There’s nothing like an HRV to dry out winter windows with condensation on the inside face of the glass. If you live in a climate where air conditioning is a bigger deal than heating, then an ERV is what you need. ERVs keep outdoor humidity outdoors during hot, humid weather, just where you want it. Ideally, if you want to go all-out, an HRV for winter and an ERV for summer is ideal.
PRODUCT PICKS: HRV/ERV
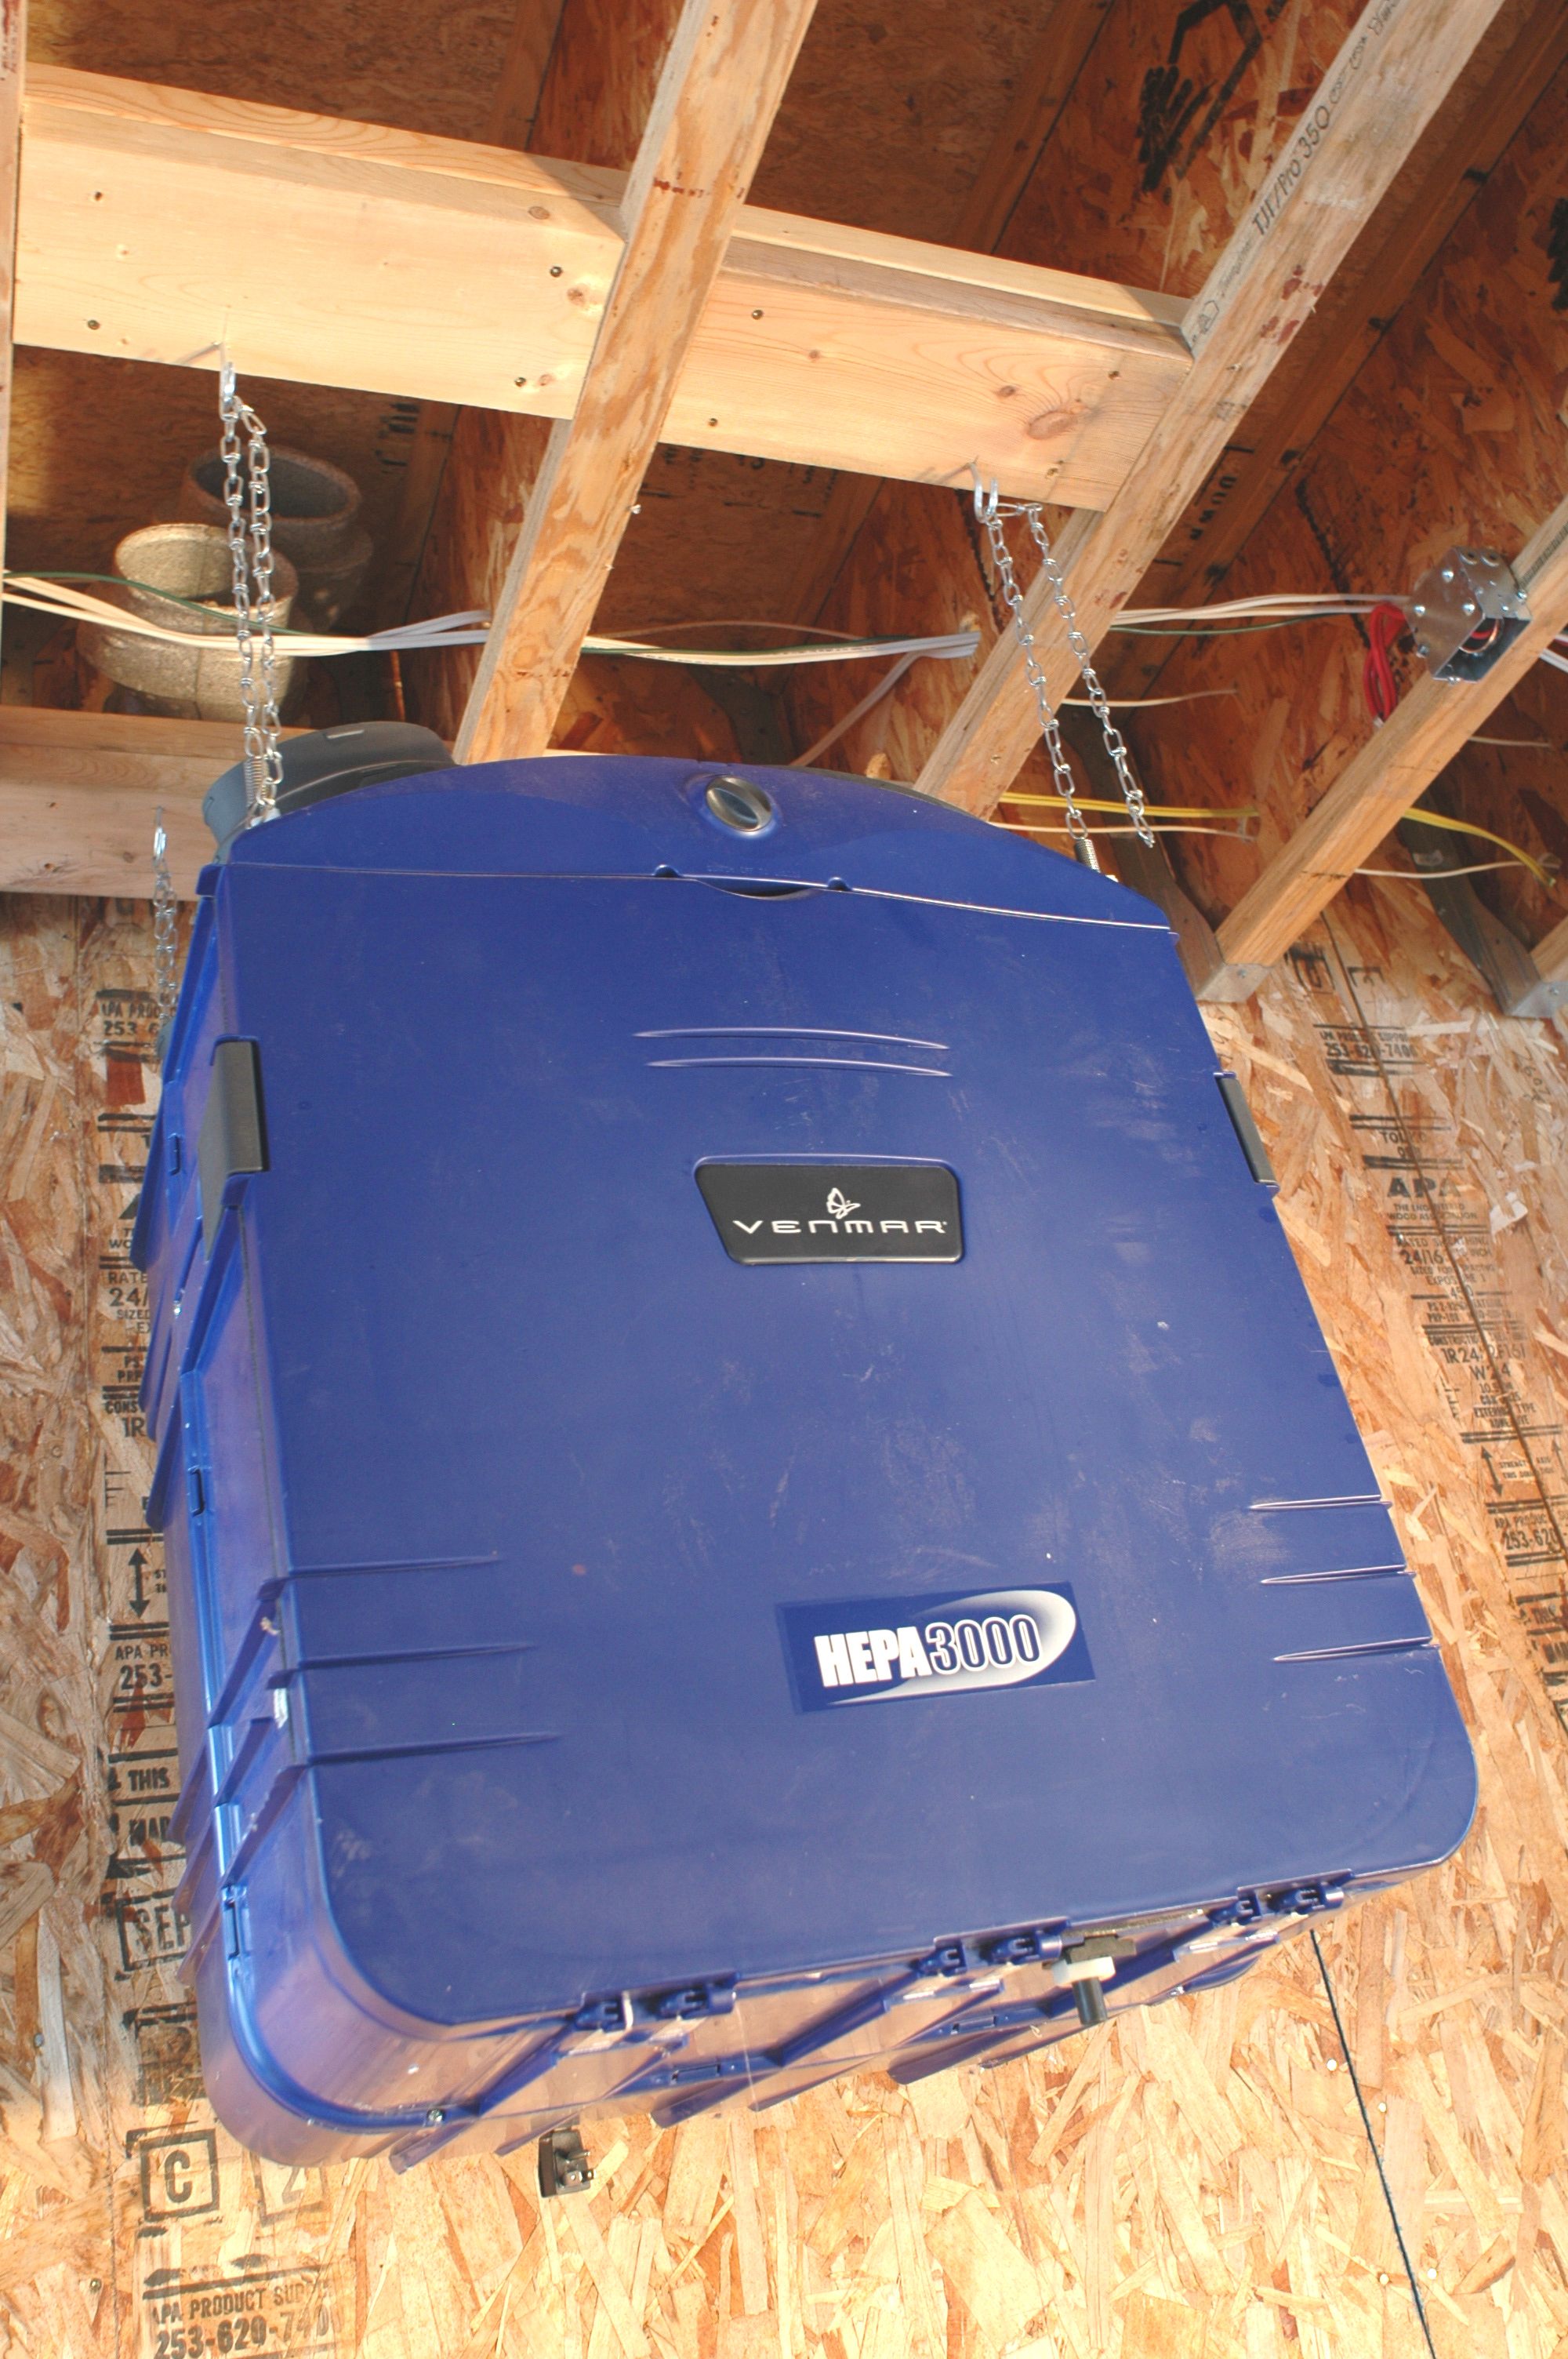
Both HRVs and ERVs are made by a handful of companies. I have personal experience with Lifebreath, VanEE and Venmar. All these brands work quite well. If I had to choose one, I’d go with Lifebreath. When choosing, you’ll need to match the capacity of the unit with the floor area of your home. Some HRV/ERVs have one heat exchanger core while others have two. You’ll get more efficient energy reclamation with a two-core unit.
Watch the video coming up next to learn more about how an HRV delivers fresh air while also retaining heating and cooling energy inside your home. This is definitely worth understanding because the single most effective thing you can do to improvement indoor air quality in your home is install and use some kind of mechanical ventilation system like this.
VIDEO: How an HRV Works
An HRV or ERV is something that will benefit your whole home (not just the basement), and getting one installed in your home will cost $1500 to $2000, so it’s a fairly hefty investment. You can save about half if you do the installation work yourself. Installation involves hanging the unit from a ceiling, punching one or two holes through the foundation wall to the outdoors, connecting the unit to ducts, and delivering electricity to plug the unit into. Is it a lot of work? Yes, but HRVs/ERVs really do the job. There’s no shortage of gimmicks in the air purification business. “Snake oil” is alive and well in any industry where the claimed benefits are largely invisible. This is why indoor air quality products are favoured by charlatans. All this being the case, three things you can be sure of: HRVs/ERVs are legitimate, they give a tremendous boost to indoor air quality, and I’ve never seen a case of sweaty winter windows that an HRV couldn’t cure.
If you’ve got heating/cooling ducts in your home, then an HRV/ERV will connect to the ducts for even distribution of the fresh air. An HRV/ERV still works in a home that doesn’t have ducts as long as you locate the intake and exhaust louvres on different floors of your house. This forces whole-house circulation of the fresh air, and I know from experience at my own place that this works quite well.
Basement Heating Systems
Will your finished basement be heated? Most are, and when it comes to choosing an approach, you’ve got three ways to go about it.
1. Expand what you’ve got: Expanding whatever forced air furnace or boiler system you have to include the basement space is an excellent option in many cases. Furnaces or boilers in most homes are large enough to handle the additional load of heating a finished basement, too. In the case of a forced-air system you’ll need to extend/modify the duct work. Extending hot water radiators involves adding pipes and new rads.
2. Install something new: Installing a brand new system to heat the basement may be necessary. This could be a central system, or it could simply be a stand-alone heating stove. Pellet stove, wood stove, oil stove, propane stove and even self-feeding coal-fired stoves all make sense depending on where you live.
3. Combine old and new: Create a combination system that includes new equipment to work alongside your existing heating system. The most popular approach uses the existing central heating system to handle the bulk of the basement heating needs, with radiant infloor electric heating to warm the floor with thermostatic control.
Air Conditioning for Your Basement?
When it comes to basements, air conditioning does more than just make living spaces cooler. The big technical benefit for basements is also moisture control. Air conditioning is the best way to lower indoor humidity levels during hot weather, and humidity is definitely an issue with basements. A dehumidifier reduces humidity (of course), but it consumes more electricity that air conditioning for a given amount of humidity reduction. Dehumidifiers are also louder indoors than central air or ductless mini-split air conditioners, and they add heat to your home – definitely not what you want during hot weather. Think now about air conditioning and how you might add it to your basement.
Central Air Conditions Versus Ductless Mini Split for Basements

Central air conditioners include a compressor installed outdoors, with coolant pipes leading into your house and into coils that fit within the ductwork of a forced air system. The central air system distributes cool, dry air throughout the house via ducts that are used for heating during the winter.
Ductless mini-split air conditioners have an exterior compressor just like central systems, but they deliver cooling action via wall mounted cooling units wherever you want it. As the name suggests, ductless mini-splits don’t have or need ducts, but they do require a wall-mounted cooling unit wherever you want cooling action. All else being equal, a ductless mini-split uses less electricity than a central system because the cooling action can be directed more strategically.
TECH TIP: Basement Humidity Management

As I keep mentioning, moisture of one sort or another is the main danger with finished basements, and hot summer weather can be a big source of hidden moisture. That’s why diligent homeowners monitor basement humidity levels all the time. Whenever the air inside your basement is cooler than the air outdoors, there’s a danger. Humidity can skyrocket in your basement if humid outdoor air is allowed inside under these conditions. This is why it’s essential to keep basement windows closed whenever it’s more than 10ºF or 6ºC warmer outside than in your basement. This is precisely the situation where you’ll probably need either air conditioning or dehumidifier to keep your basement dry. The impulse is to open windows at times like these, but that’s a mistake when it comes to basements because they’re naturally cool places. As warm, humid outdoor air enters your basement and cools, the formerly outdoor air can’t hang on to moisture as effectively any more. Relative humidity will increase in your basement as temperature of the air drops, possibly enough to cause mold-triggering condensation to form in hidden places in your basement. I’ve even seen condensation appearing on hard surfaces in basements approaching 100% humidity.
Some basements are too cool sometimes for optimal dehumidifier operation. When air is too cool condensation develops inside the dehumidifier and it freezes internally, preventing any further dehumidification. My solution (and it works really well) is to have a household fan blowing air into the intake of the dehumidifier. Put the unit on a timer so it shuts off for 15 minutes every hour. The continuous air flowing through the dehumidifier from the fan while it’s shut off causes the frost to melt off the internal coils quickly, restoring dehumidification action. This strategy works very well.
Coming up next section . . . You’ll learn about basement waterproofing strategies, sump pumps, power, lighting and plumbing best practices. I’ll also cover tearing out an old basement safely.
