Basement Bathrooms, Saunas & Steam Rooms
Building a bathroom in your basement isn’t a whole lot different than an above-ground installation. Err on the side of a larger-than-usual exhaust fan, and make sure you install lots of lighting if there’s no window. Beyond these things you’ll want to follow the best practice techniques for bathroom construction including the main features coming up.
Basement Bathroom Infloor Heating
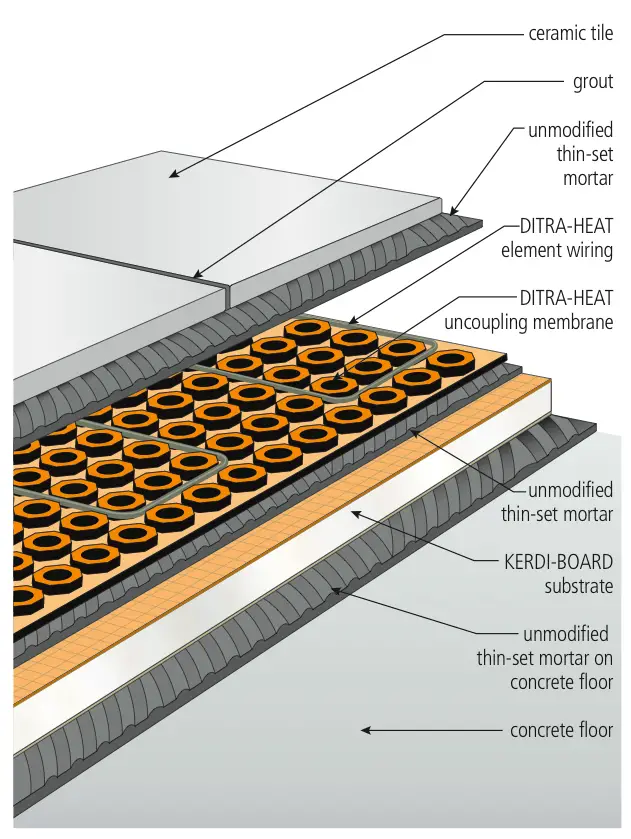
As I’ve mentioned before, the most effective and durable electric infloor heating system I know of is offered by a German company called Schluter. I’ve installed other brands and nothing else compares. Schluter has a system called DITRA-HEAT that combines an uncoupling membrane with electric heating cables. The DITRA-HEAT plastic base layer goes down first, anchored in place to the floor with thinset mortar followed by the heating cables that snap into place. Tiles are installed on the DITRA-HEAT with more thinset mortar. One particularly nice thing about this system is that it can be installed over top of a special kind of foam called KERDI-BOARD that Schluter also offers. This foam is dense enough that it can go down directly on a concrete floor with thinset mortar, with the DITRA-HEAT, heating cables and ceramic or porcelain tiles directly on top. No other support for the tiles is necessary.
This approach provides great insulation and a floor that warms quickly when the heat goes on. These products also make it easy to waterproof the entire floor before tiles go down. You really can’t rely on tiles and grout alone to keep water out. The illustration above shows DITRA-HEAT installed over a layer of foam. Watch the video from back in Section#2 to see a unique way that DITRA-HEAT and insulating board can be used to create truly warm basement floors. If the system is new to you, watch the video up next. I made it a few years ago. It shows how DITRA-HEAT works in an ordinary, non-insulated floor.
VIDEO: Best Electric Infloor Heating Option
Basement Shower Choices
There are several ways you can create a reliable, good-looking shower in your basement bathroom. As usual with these things, there are pros and cons to each option. The most expensive approach uses site-installed tile as part of a custom-framed shower enclosure. These days there are some excellent systems for waterproofing showers made of site-cut tiles. I’ll discuss one of the most successful systems in more detail later, including video tutorials on the subject.
Simulated tile systems are also available these days too, as you’ll see. These use sheets of material that look like individual tiles but aren’t. Site-built showers are a luxury option that makes complete use of the space available, but other options off the chance for a great shower, too.
Pre-made Fibreglass or Acrylic Shower Stall
These come as one-piece models, or versions that come in several pieces so you can bring them in through smaller spaces. Fibreglass models are less expensive than acrylic, but lower quality. Acrylic shower stalls are stronger and last longer than fibreglass. The main advantages of any kind of pre-made shower unit is speed of installation, lack of need for specialized labour, plus economy. Just about anyone can install a pre-made shower and not have it leak. Building a real time shower requires more know-how. Drawbacks of a fiberglass or acrylic shower stall include cheap appearance and shorter working life than more premium alternatives.
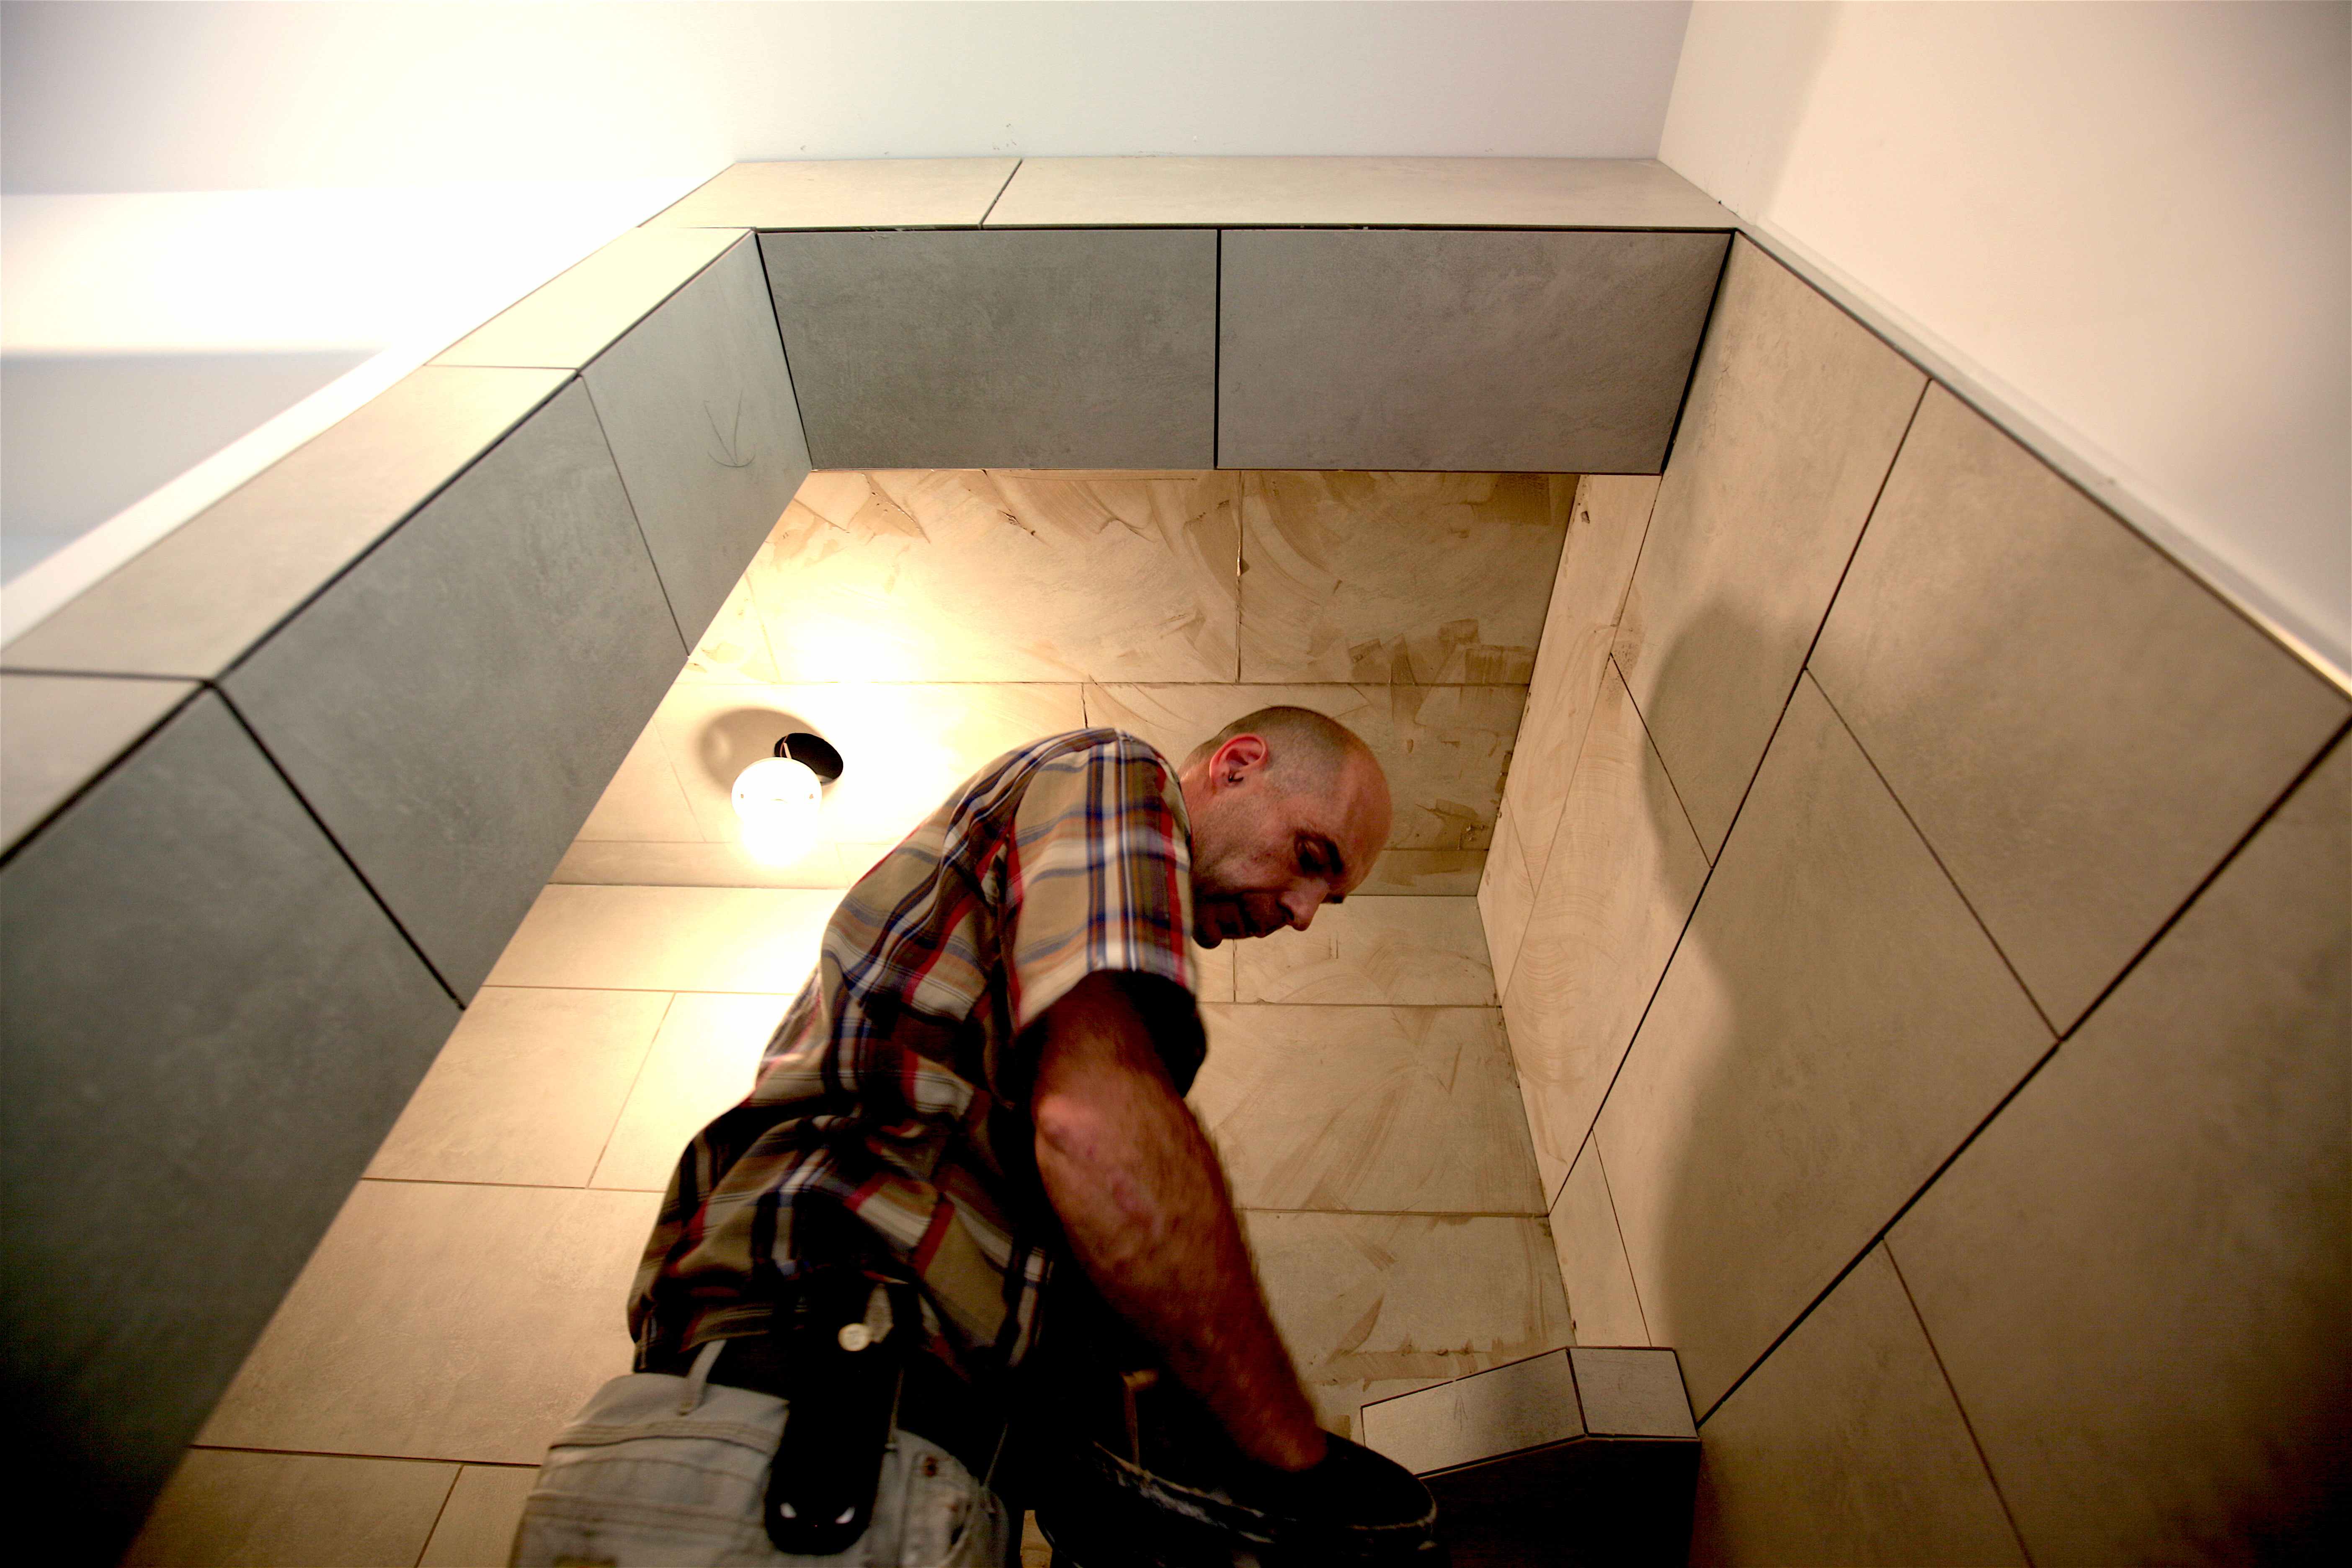
Built-On-Site Ceramic Tile Shower

This option is more time consuming and expensive than a pre-made shower stall, but the built-on-site approach allows you to customize the size of the shower for better use of space. Currently the industry standard for high-quality tile showers uses Schluter’s system of KERDI-BOARD, KERDI cloth, foam shower stall pans and waterproofing systems. There really is nothing else to compare with the performance of this system. Building a shower using these materials is similar to building a steam room that I’ll be discussing later this section. Ceramic tiles can be combined with a built-in bath tub installation, but many basement bathrooms have a shower only to save space. Watch the video coming up later in this lesson for details on construction of a steam room. The principles are the same for building a reliable, high-quality ceramic tile shower.
Built-On-Site Panel Shower
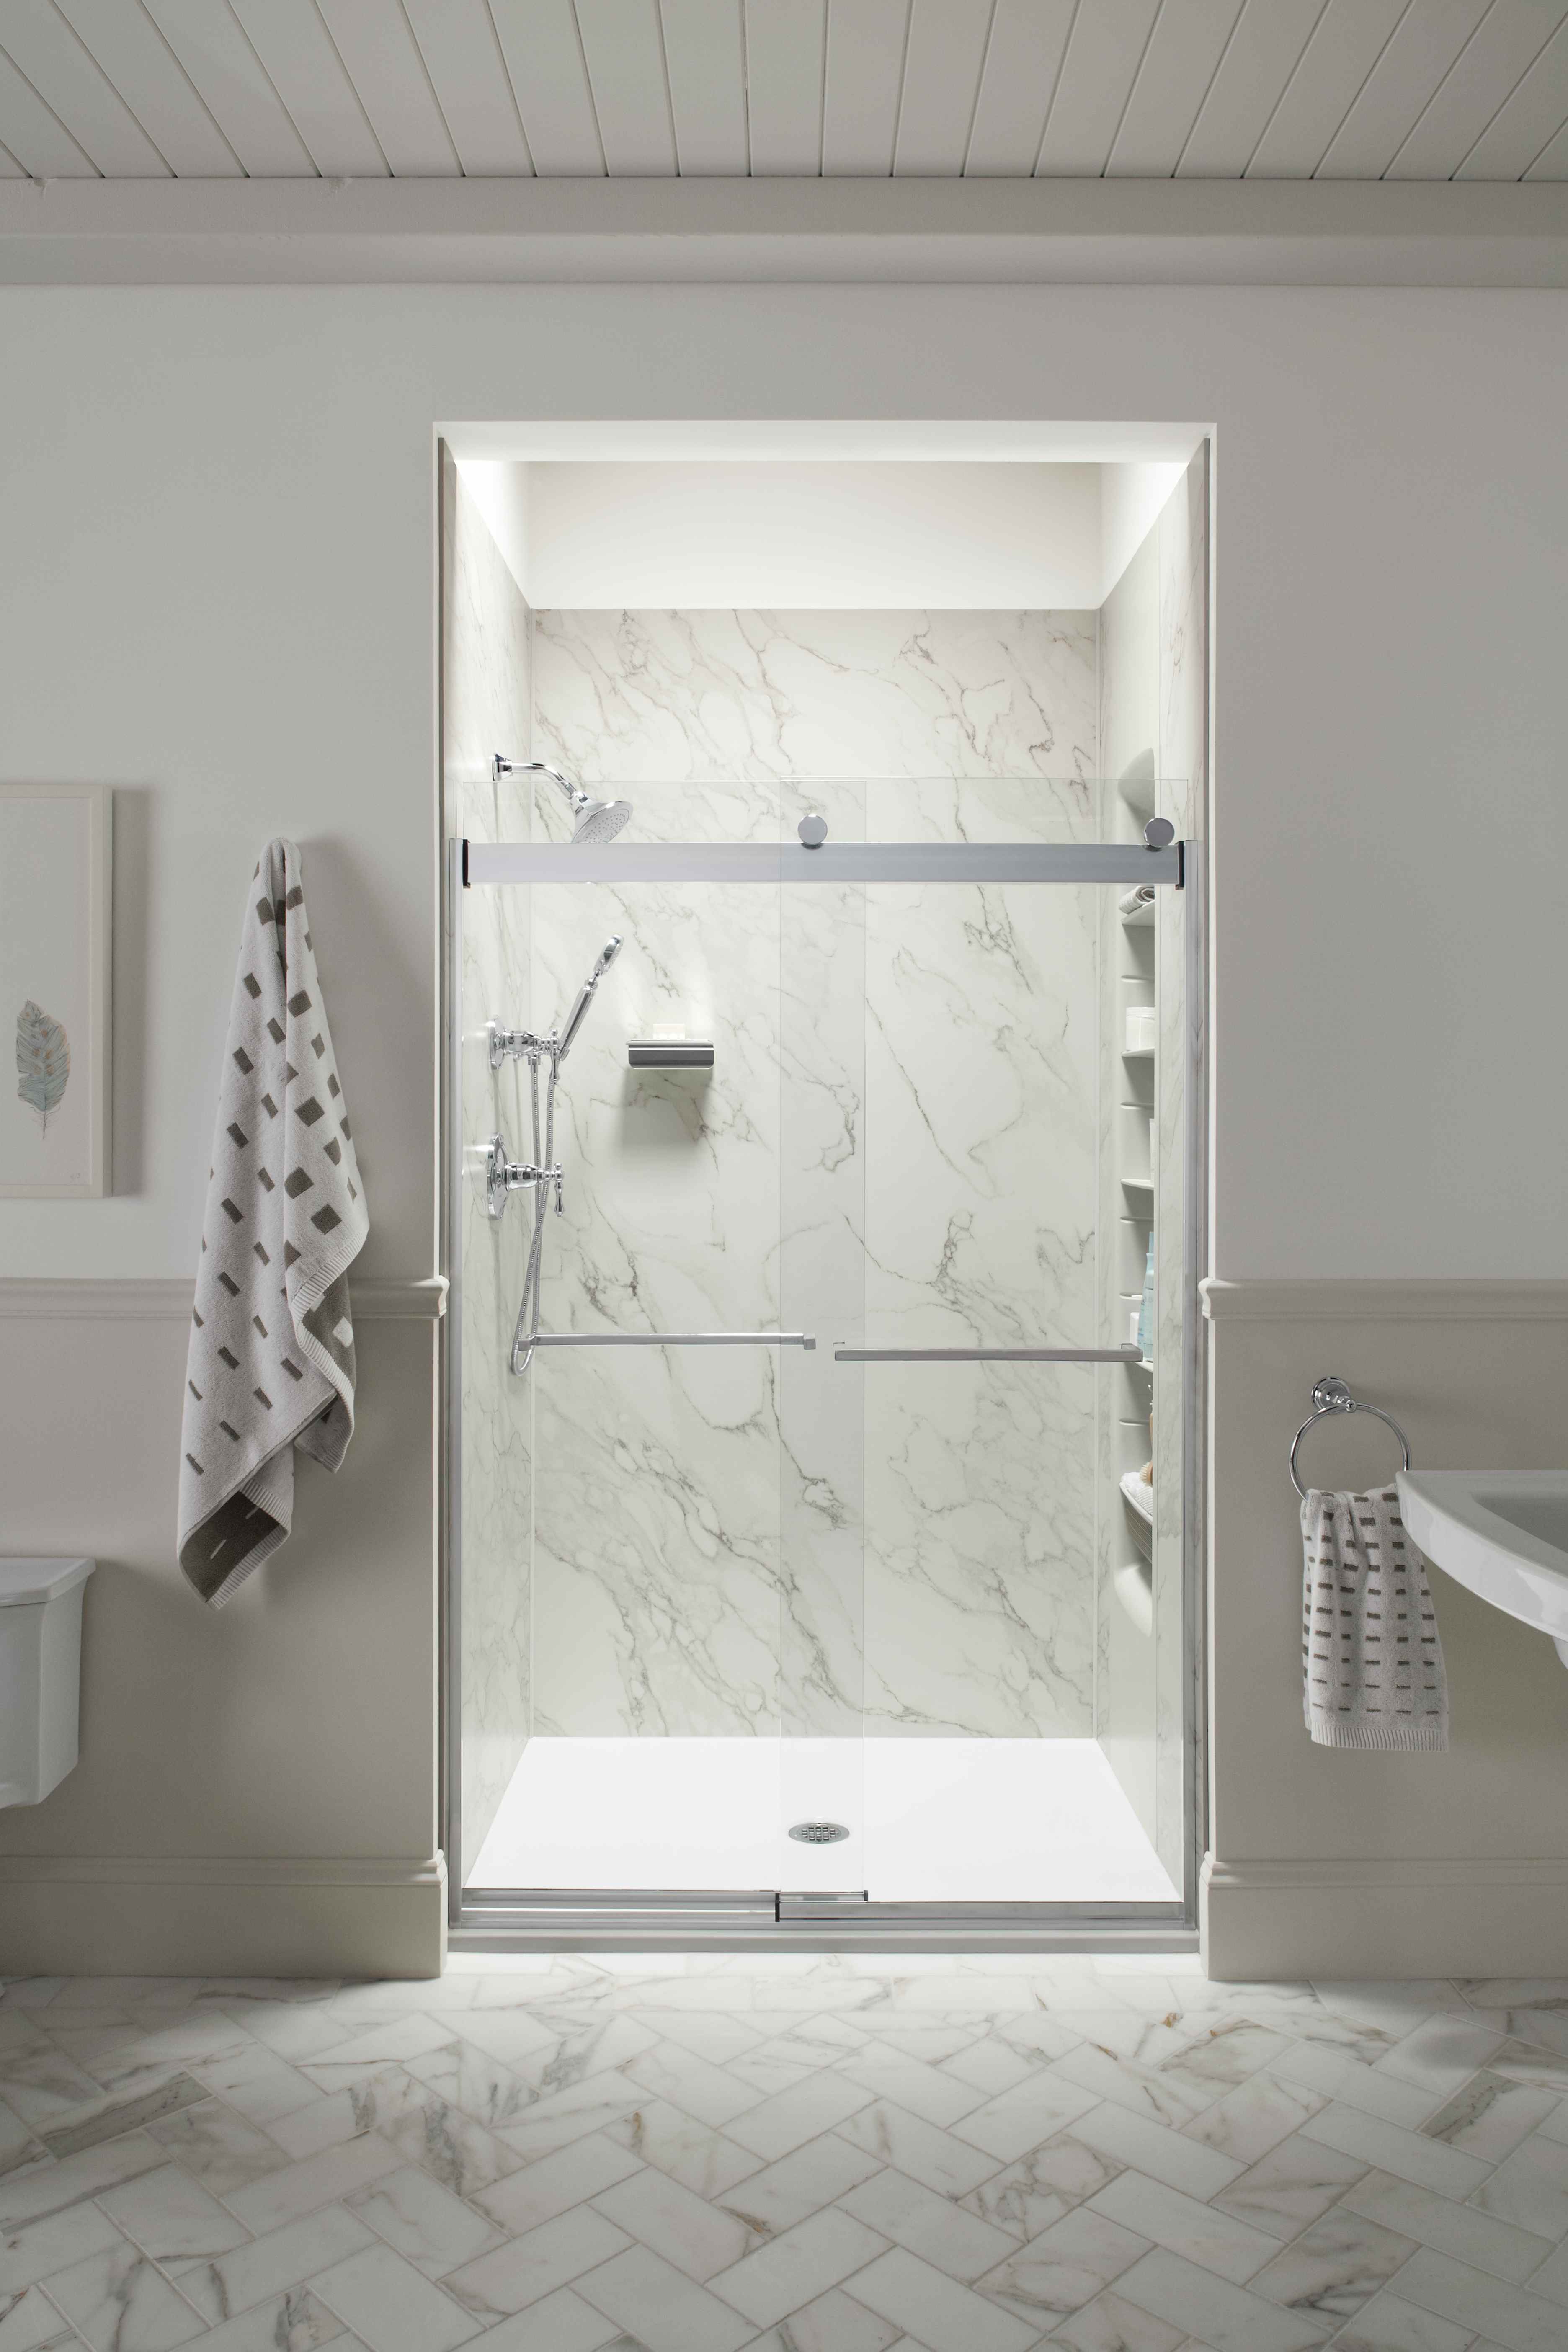
At the economical end, this approach includes the use of inexpensive flexible plastic sheets used to construct shower stall walls. This is the cheapest way to make a shower stall but it looks cheap. High-end versions of the panel approach, by contrast, use premium tile-like sheets that form the sides and ceiling. These are much better than the cheap plastic materials, and very high-end. Currently the best example I know of is something called Choreograph. It’s made by Kohler and combines the look and feel of stone or ceramics with the installation efficiency and ease of a plastic shower surround. It’s quite a premium approach.
One reason some homeowners prefer engineered panel systems like Choreograph instead of ceramic tiles is because of the wide design variety panels offer. The matte, non-porous surface of all Choreograph styles proved easy to keep clean in my tests and there are no grout lines to go moldy. This is a big plus. Made from a proprietary material called Serica, the Choreograph panels come as individual sheets or three-sided wall kits with corner trim. Strength, flexibility, durability and easy-to-use trim packages are the benefits. These panels won’t get damaged in transit, and they’re flexible enough to let you snake your way through rooms and downstairs. You make straight cuts in Choreograph with an abrasive wheel in a hand-held circular saw, or an abrasive blade in a jigsaw for curved cuts. A hole saw is the tool of choice for making holes for valving and pipes.
Bath Tub Only Bathrooms
This isn’t a common choice for basements, but some people just love a freestanding bath tub, especially the old fashioned claw-foot tubs. These can be fitted with ceiling-mounted curtain rods so you can take showers in the tub, too.
Choosing a Toilet
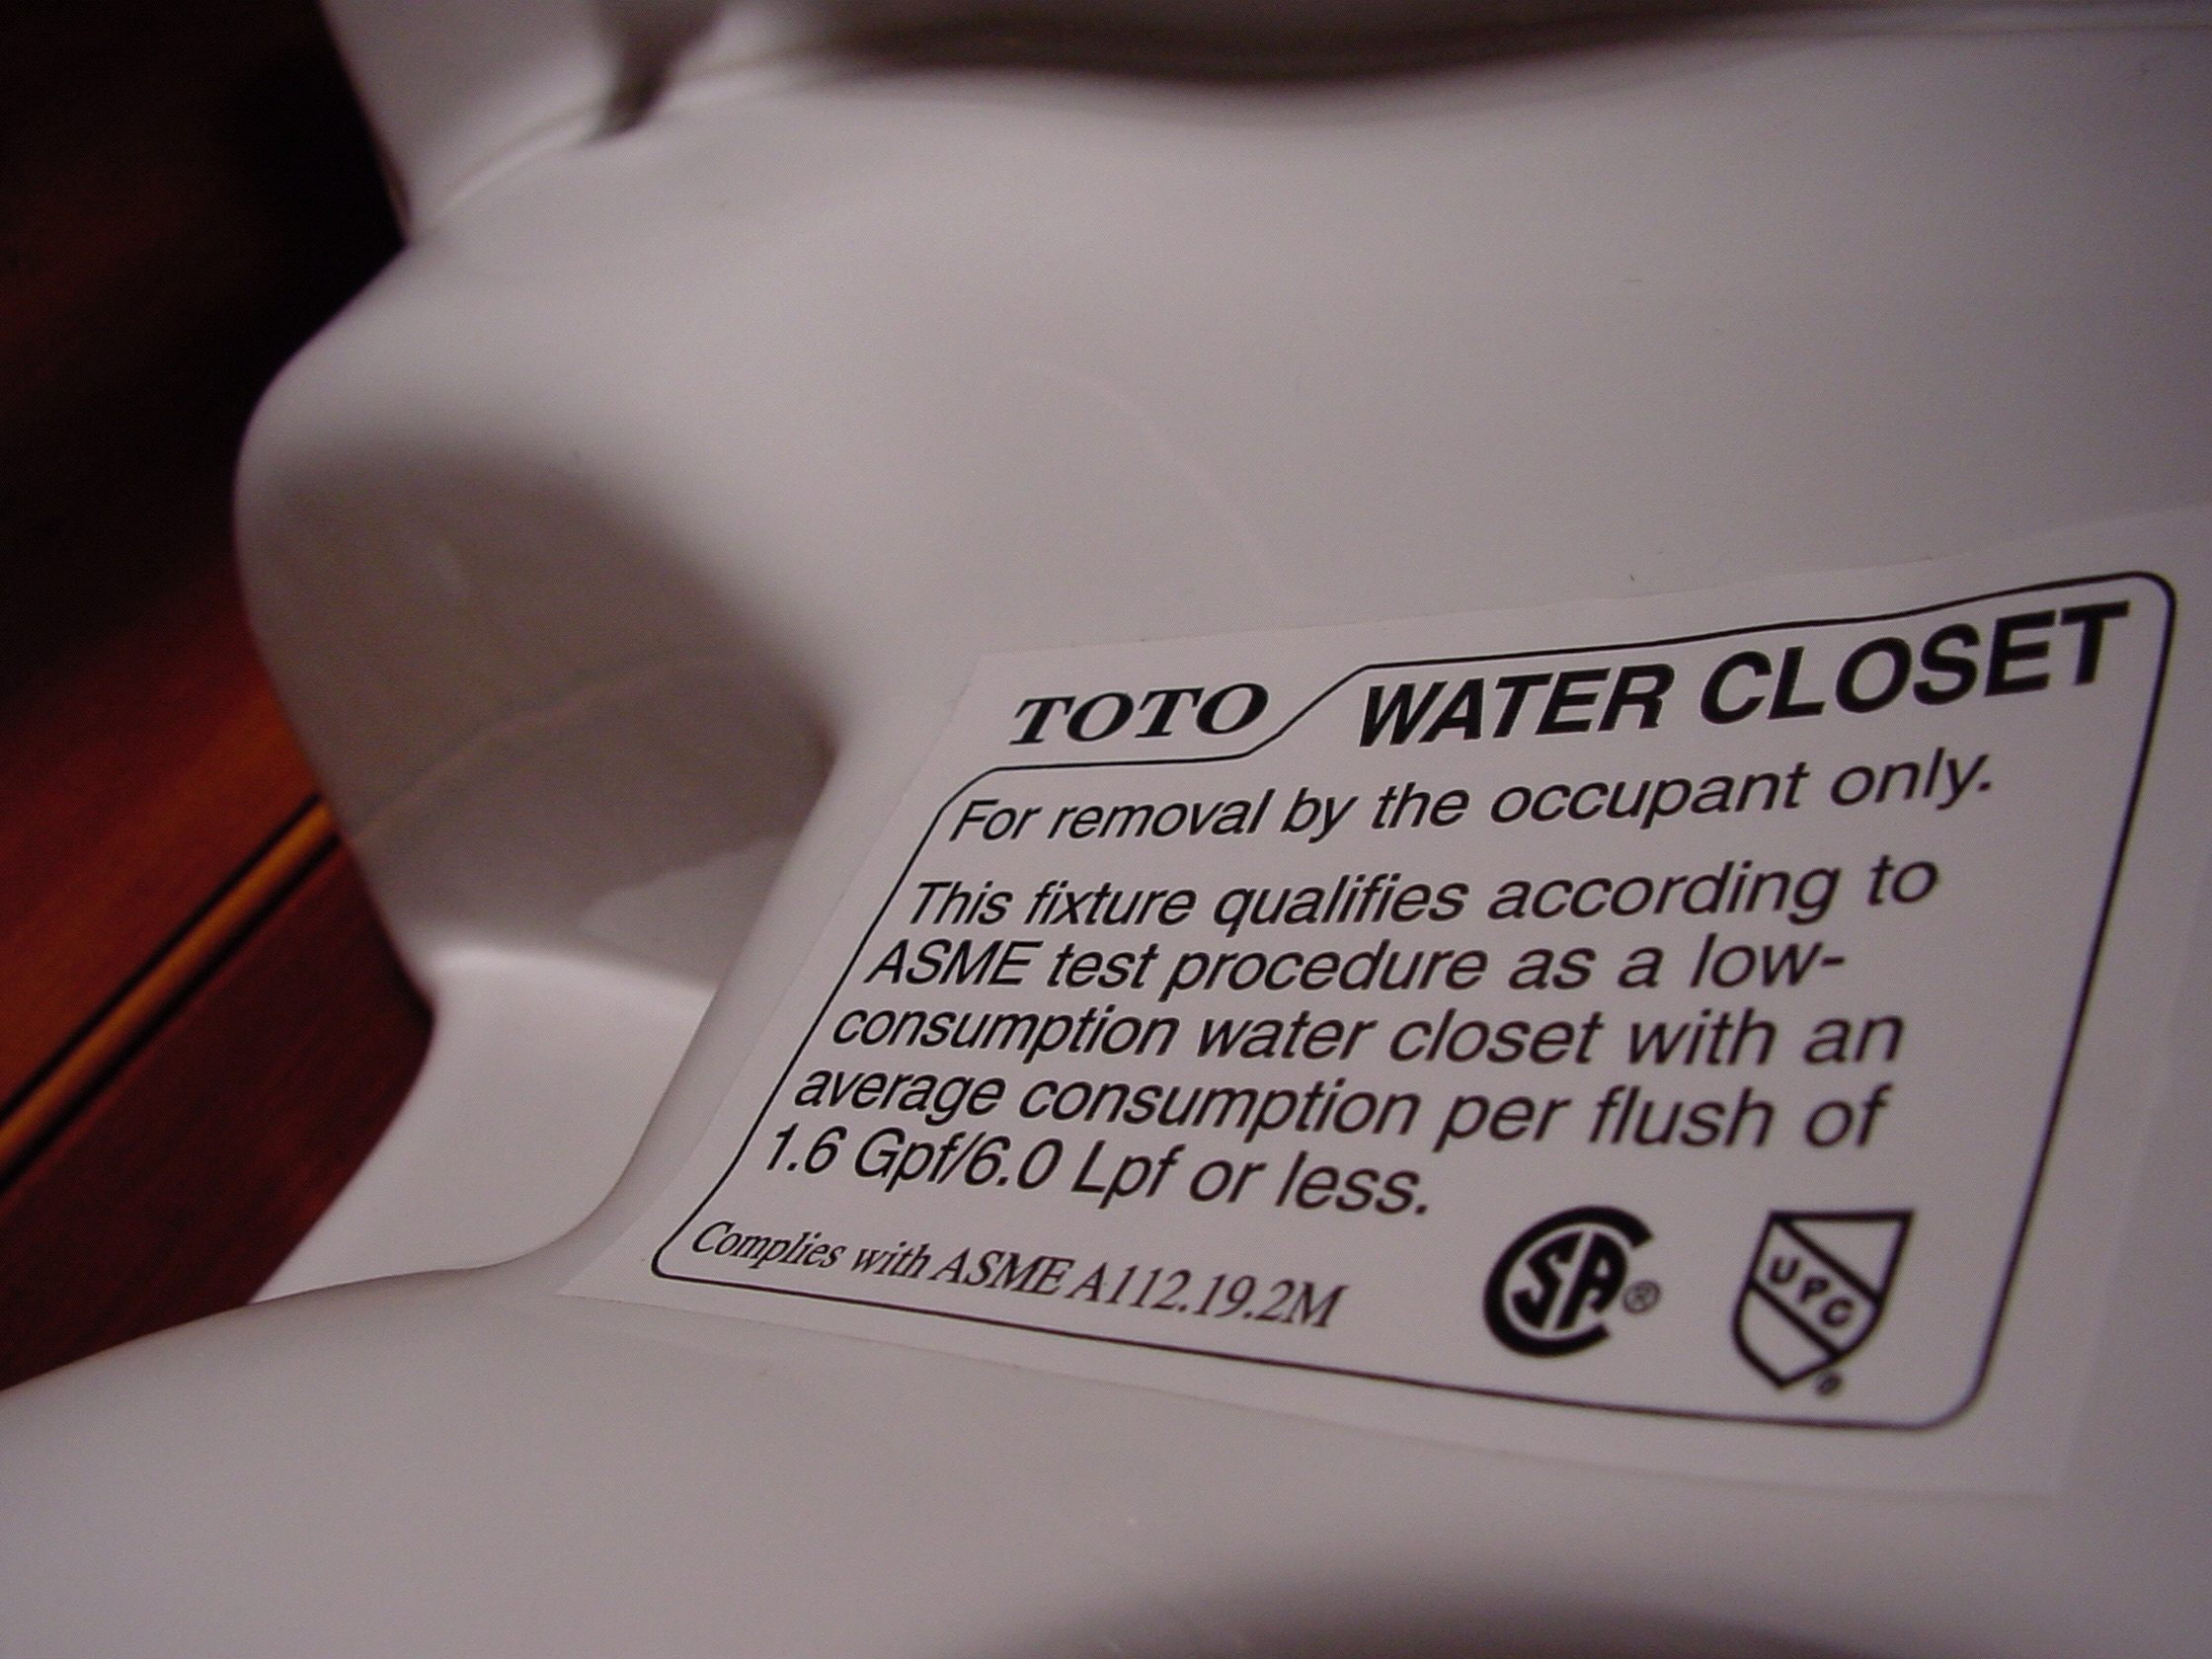
Of course you want a toilet that works well and flushes cleanly, but that’ll take some diligence on your part. You can’t just buy blind and expect good performance. When low-flow toilets came on the scene 30 years ago, very few of them flushed reliably and cleanly. And many so-called “low-flow” models back then actually used much more water than they claimed to. All this started to change when an engineer named Bill Gauley decided to start testing toilets back in the 1990s.
As Mr. Gauley released his findings of poor low-flow performance by a majority of manufacturers, things began to change. These days, many toilets now meet performance standards that were rarely achieved before Mr. Gauley started publishing test results. He really is the one man who influenced toilet design and performance around the world more than anyone else. You can find a free list of today’s best toilets at Bill’s website right here.
TECH TIP: Thoughts for Choosing a Shower Faucet

Setting style aside for a moment, there are really two main types of shower faucets in the world: the kind with built-in pipes and controls that sit hidden behind the shower stall wall; and the kind where all the hardware remains visible and accessible inside the shower space itself.
I greatly prefer this second approach because it’s more reliable and repairable. Shower faucets with pipes hidden in walls are common, but you need to install tiles over the pipes to accommodate the system. If that faucet with hidden pipes ever goes bad (and everything does eventually), then you’ll probably have to re-build the whole shower to install a replacement faucet. That seems crazy to me.
Faucets with external pipes aren’t as common as hidden ones, but nothing is buried in the wall. All that comes through the shower stall walls is one hot and one cold water pipe. The valve and pipe that brings water up and the shower head are all exposed, beautiful and easy to change. If an external faucet ever goes bad, it’s easily replaced without troubling any tiles. Use whatever faucets you like, but I prefer things that are repairable. They also look quite a bit better than more modern styles, at least to my eye.
Basement Sauna
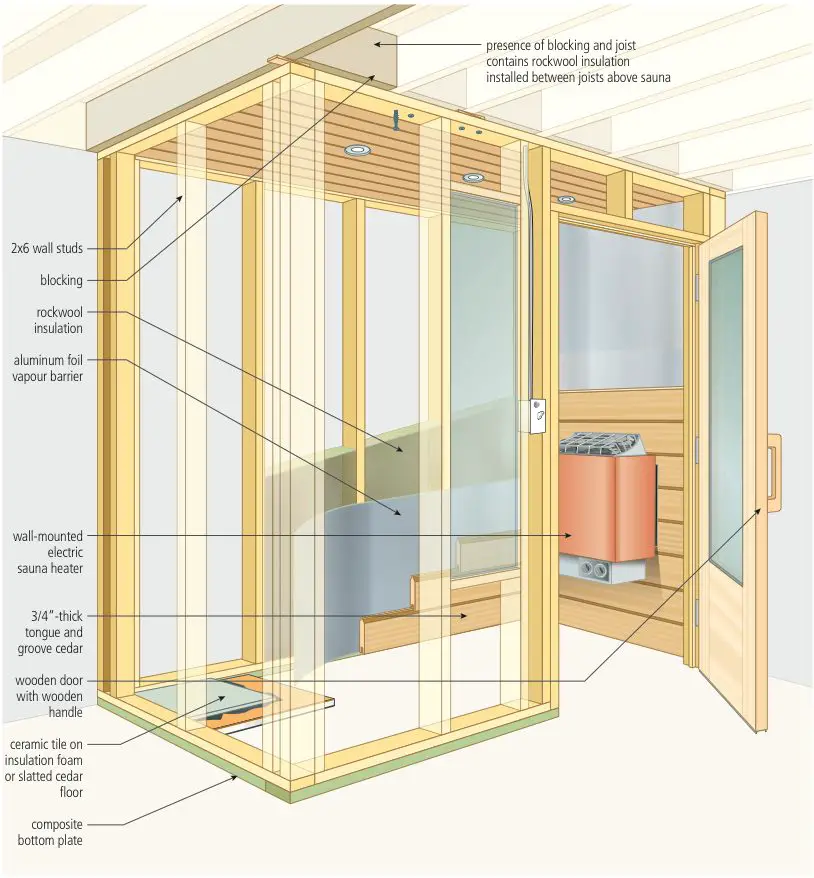
A sauna is different than a steam room because a sauna runs much hotter and isn’t nearly as moist. The plans here show the basics of building a basement sauna. There are tricks involved because saunas get so hot. Don’t make the mistake of building your sauna following only basic construction methods.
Watch the video up next for a tour of the construction plans. There’s more than meets the eye when it comes to building a high quality sauna that’ll last and perform well. The electric sauna heater listed below the video window is a very good unit that’s easy to install, powerful and long lasting.
VIDEO: Basement Sauna Plans Tour
Finlandia FLB-60 Sauna Heater: This is a very high quality sauna heater with a long track record from a reputable company. If there are better electric sauna heaters around, I haven’t seen them.
Basement Steam Room
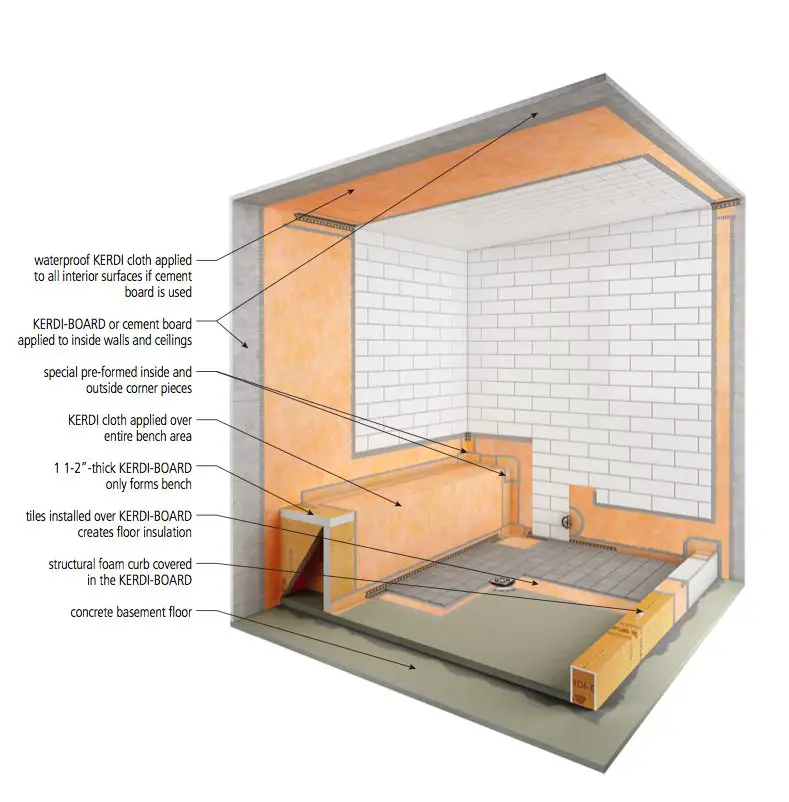
Having a steam room as part of your finished basement bathroom can be a great thing, but you need to build it right and have some method for dealing with the extra humidity it introduces to your home. The downloadable plans here show how to build a steam room that will never leak. Just realize that a steam room runs quite a bit cooler than a sauna ( 110ºF to 120ºF maximum temperature for a steam room versus 160ºF to 200ºF for saunas), so they’re not built the same way. Whatever you do, don’t change your mind and use a steam room as a sauna because the materials aren’t made to take the heat. Print the plans and watch the video below for steam room construction details. The electric steam generator listed below the video window is a reliable unit with a good track record.
VIDEO: Steam Room Details
Superior 6kW Self-Draining Steam Bath Generator:
