Interior Partition Wall Best Practices
The situation with partition walls is different than with perimeter basement walls because the threat of moisture is lower and there’s no need for thermal insulation. This is why dividing the basement area into different rooms is an easier challenge than finishing any kind of perimeter wall. That said, the main challenge with interior partition walls is sound resistance. Standard practice in finished basements is to install little or no soundproofing details into partitions. This is a mistake because it’s difficult to boost the sound resistance of a wall after it’s built, yet quite easy to do during construction. Noises coming from one room into another can be surprisingly annoying.
Unlike with perimeter walls, there’s no problem framing basement partition walls with wood. That’s because the threat from moisture is extremely low with partitions. My personal preference is to sit wooden partition wall frames on lengths of composite or plastic decking material as a second bottom plate to get the wood up and off the floor. Composite decking is made with reclaimed plastic, so it acts as a non-organic barrier between the wood and the concrete floor underneath it. Steel studs are also a good option for basement partition walls because they eliminate organics all together, but wood is easier to work with for most people and more substantial in my experience. Either way, you should consider one of several methods for reducing sound transmission through partition walls. And depending on the purpose of the wall, you can dial in more or less sound resistance.
Click the video up next to see the main approaches to boosting sound resistance of partition walls. More on actually building walls later.
VIDEO: Boosting Sound Resistance in Partition Walls
Basement Floor Levelling Best Practices
Almost all basement floors require some kind of levelling before a finished floor can be installed properly. Very few concrete basement floors were poured and finished with enough care to accept a finished floor without some kind of remedial work. Some basement floors are exceptionally rough and uneven. It’s especially important to have a flat floor if you’ll be installing laminate flooring or luxury vinyl (more on this later) since they require full support. Even ordinary ceramic tiles need a floor to be flat within 1/4” in a 10-foot circle. Large format tiles require no more than 1/8” of deviation from flat over the same area. That’s pretty flat.
Watch the video tutorial up next for a tutorial on how to test a basement floor for flatness.
VIDEO: Testing Basement Floors for Flatness
When it comes to floors, there can be two kinds of imperfections you may need to deal with. Your basement floor might be flat, but not level. By this I mean it could be sloping to one side or the other. On the other hand, your basement floor might be level overall, but it could have peaks and hollows and undulations in different places. Undulations like these are the most common problem because of the way the floor was originally poured, and undulating floors are usually accompanied by at least some degree of unlevelness, too. The video coming up next explains how to test your basement floor for flatness. Very important stuff because levelling now can save you big hassles later.
Shims for Levelling Basement Subfloor Tiles

If your basement floor is level but has minor undulations (less than, say, 1/4” in a 10-foot diameter), you may be able to flatten things up with plastic shims made for use with various subfloor tile products. These shims come as part of a levelling kit made to go with specific subfloor panels. More on the use of subfloor panels in a minute. The shims fit underneath the tiles and interlock with the dimpled feet underneath. You add more or fewer shims as needed to compensate for hollow spots. This is a great idea as far as it goes, but the ability to make a difference with subfloor tile shims is limited. The best you can do with these shims is to stop wobbly tiles from wobbling. If you need more levelling action than this, you’ll need to prepare the floor with levelling compound or mortar before any finished flooring goes down.
Self-Levelling Floor Compound
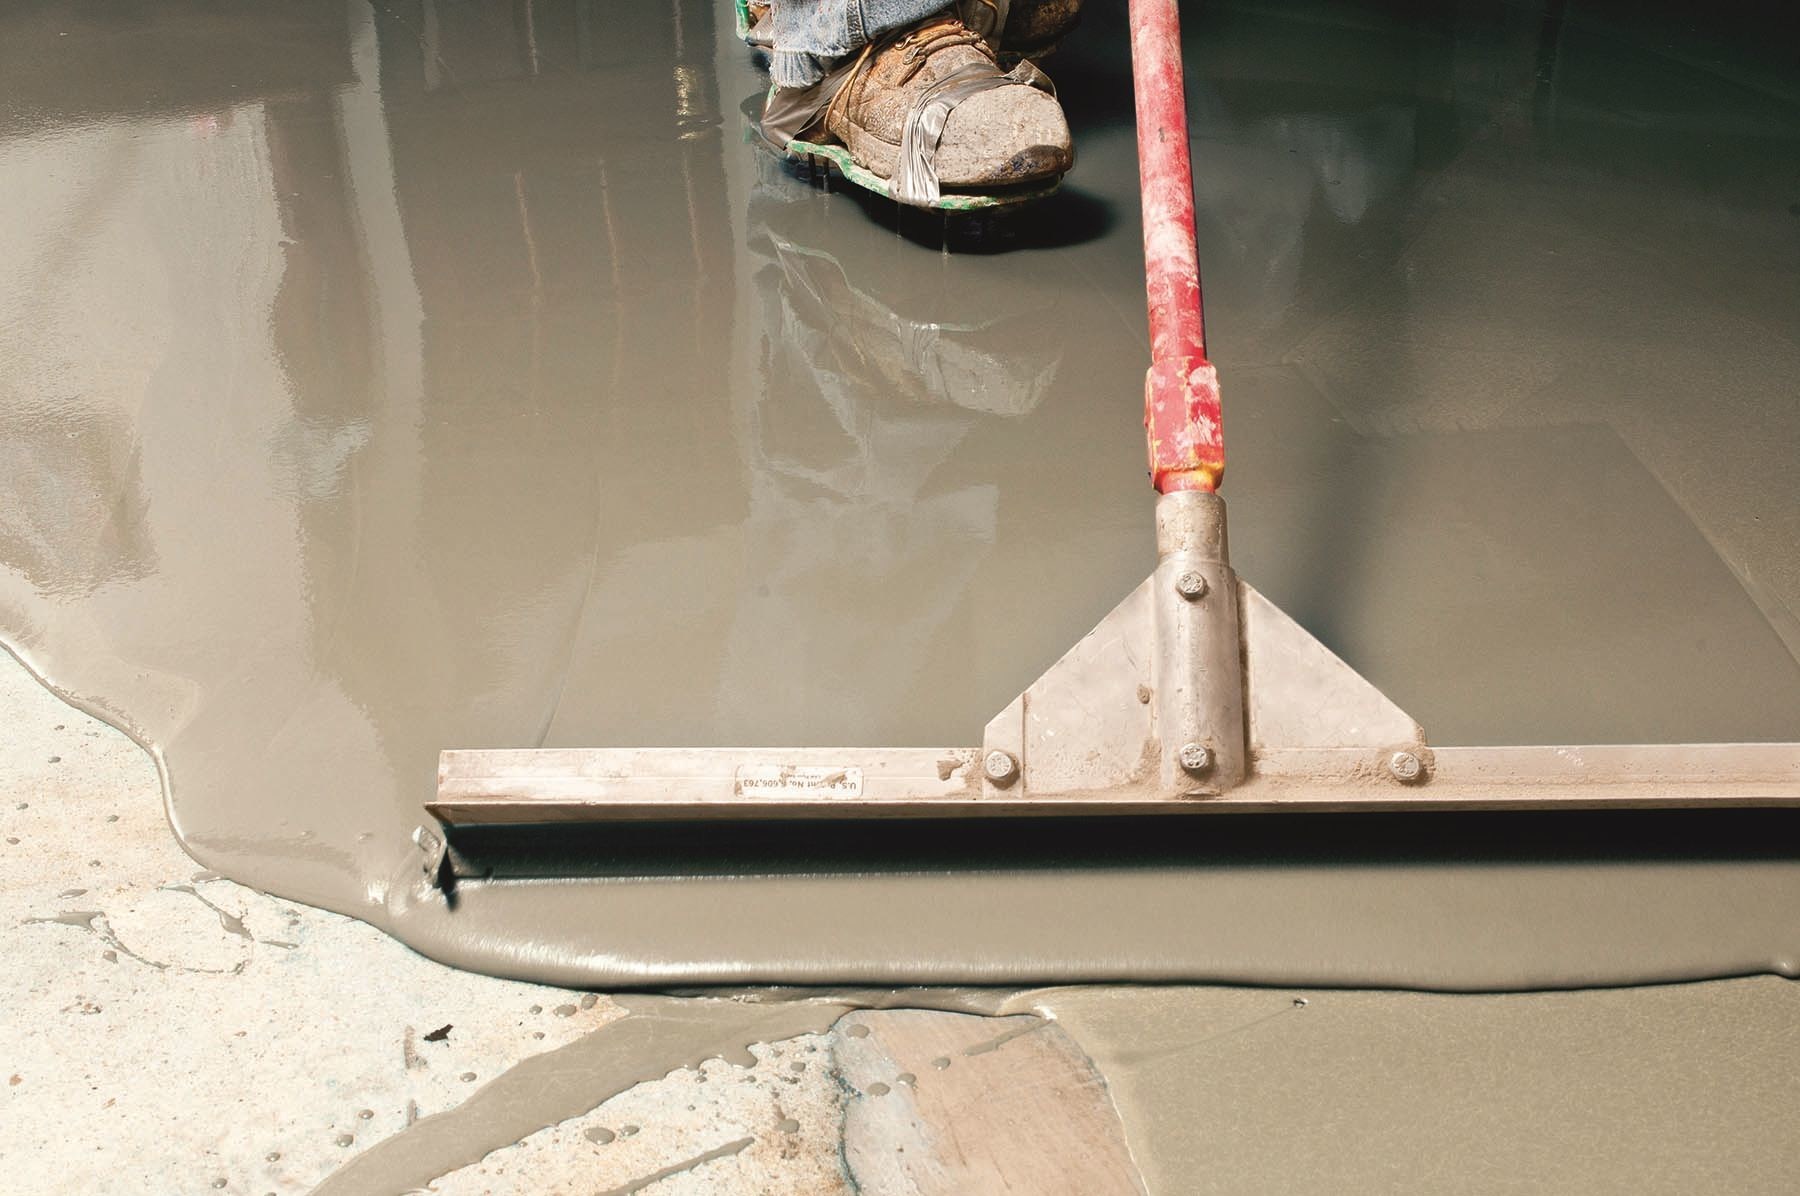
This is for more serious floor defects. It’s a powder that’s mixed with water into a slurry resembling thin pancake batter. Floor compound is thin enough that it flows to a certain extent, “self levelling” by gravity as the name implies. Many companies make different formulations. Bostik and Henry are two popular brand names offering a large selection of floor levellers for different thicknesses and scenarios. Regardless of whether you intend to level a floor yourself or hire someone to do it, the following steps need to be followed:
1. Select the right floor levelling product: Use a straight piece of lumber or a strip of plywood with a factory edge to determine how flat your floor is. Identify and measure the area of greater depth and least depth, and choose a product that’s suitable. Although you probably won’t encounter a wooden subfloor when finishing a basement, self-levelling products are also available for use over wood subfloors as well as concrete. Circle areas of your floor with a marker to help you remember where the low spots are. Different levelling products are made for different thickness situations.
2. Make the floor clean and dust-free: Levelling compounds need to stick to the underlying concrete reliably, so the surface needs to be free of dirt, grease, old adhesive and dust. Walk-behind floor levelling power tools are available to rent for smoothening rough concrete and getting back to a bare surface if there’s paint or old adhesive present on the floor. Think of these things like a walk-behind floor sander for wood, except that they use abrasives or little mechanical hammers to remove the top-most layer of concrete. Wrestling one of these down into your basement will be a struggle if you don’t yet have an outside entrance to your basement, but they are highly effective tools.
3. Estimate how much leveller you need: Even a floor in decent condition can gobble up a lot of floor levelling compound. Make sure you have enough dry product on hand because the whole pour needs to go down before it cures. You’ll be surprised how many bags it’ll take to do even a small area. Also, some brands recommend the use of a primer on the old floor to boost adhesion. Don’t skip the primer or any other supplemental liquids that are recommended for use along with water. Read and follow all instructions precisely. Is your floor levelling job bigger than you can handle? Specialized companies exist for this kind of work. They have mixing machines with pumps that deliver a lot of levelling material in a short time. Compare the cost of having them do the job with the cost of buying floor leveller and the equipment needed to mix and apply your own.
4. Mix floor leveller properly and thoroughly: You’ll need some kind of mixing paddle to use in a heavy duty drill to mix floor levelling powder with water. You can never get thorough enough mixing by hand so don’t try. Also, be sure to measure how much water is required for a given amount of levelling powder. Too little water and the mixture won’t flow. Too much water and the mixture will be weak and will fail in time. Room temperature application is best. Most products recommend adding powder to water, not the other way around. Try mixing a little compound to see how the process goes and to get a sense of how fast your product sets up.
5. Have enough help on hand: You only have a limited time to get the compound down and levelled – sometimes as little as 10 minutes. Different products have different setting times. You’d be wise to have some help mixing so you can concentrate on pouring the mixed product and working it flat.
6. Get the tools you’ll need: Besides something to mix the leveller in, you’ll need a mixing paddle and some kind of squeegee to push the slurry around. If the area you’re working on is too large to reach the centre from the edges, you’ll also need spiked shoes or spiked shoe coverings so you can walk on the liquid leveller without leaving foot prints. Tools for floor levelling aren’t expensive, so be sure to equip yourself properly before you begin.
Product Picks: Floor-Levelling Tools
Kraft Tool 7 piece levelling toolkit: This kit provides everything you need for the job. All the products work well except the spiked shoe coverings. Depending on how much you weigh, you may need to buy a higher quality pair of spikes than comes with this kit.
Mortar For Floor Levelling
If you’ve got areas of floor that need to be raised an inch or more, then you should consider using mortar instead of floor levelling compound, at least as an initial step. What’s the difference? Mortar is a mixture of cement and sand, with no crushed stone. This is ideal for raising large areas of low floor because it’s inexpensive, and it’s better for this purpose than concrete. Concrete includes crushed stone that would interfere with the smoothening process near the edges of the area being filled. Since mortar doesn’t contain crushed stone, you can smooth it out quite thin where you’re feathering the patch near the edges. So when would you want to use mortar to raise and level an area of floor instead of floor levelling compound? The question comes down to economics and how much floor levelling you need to do. Floor levelling compound can certainly be used on its own, but it doesn’t have to be.
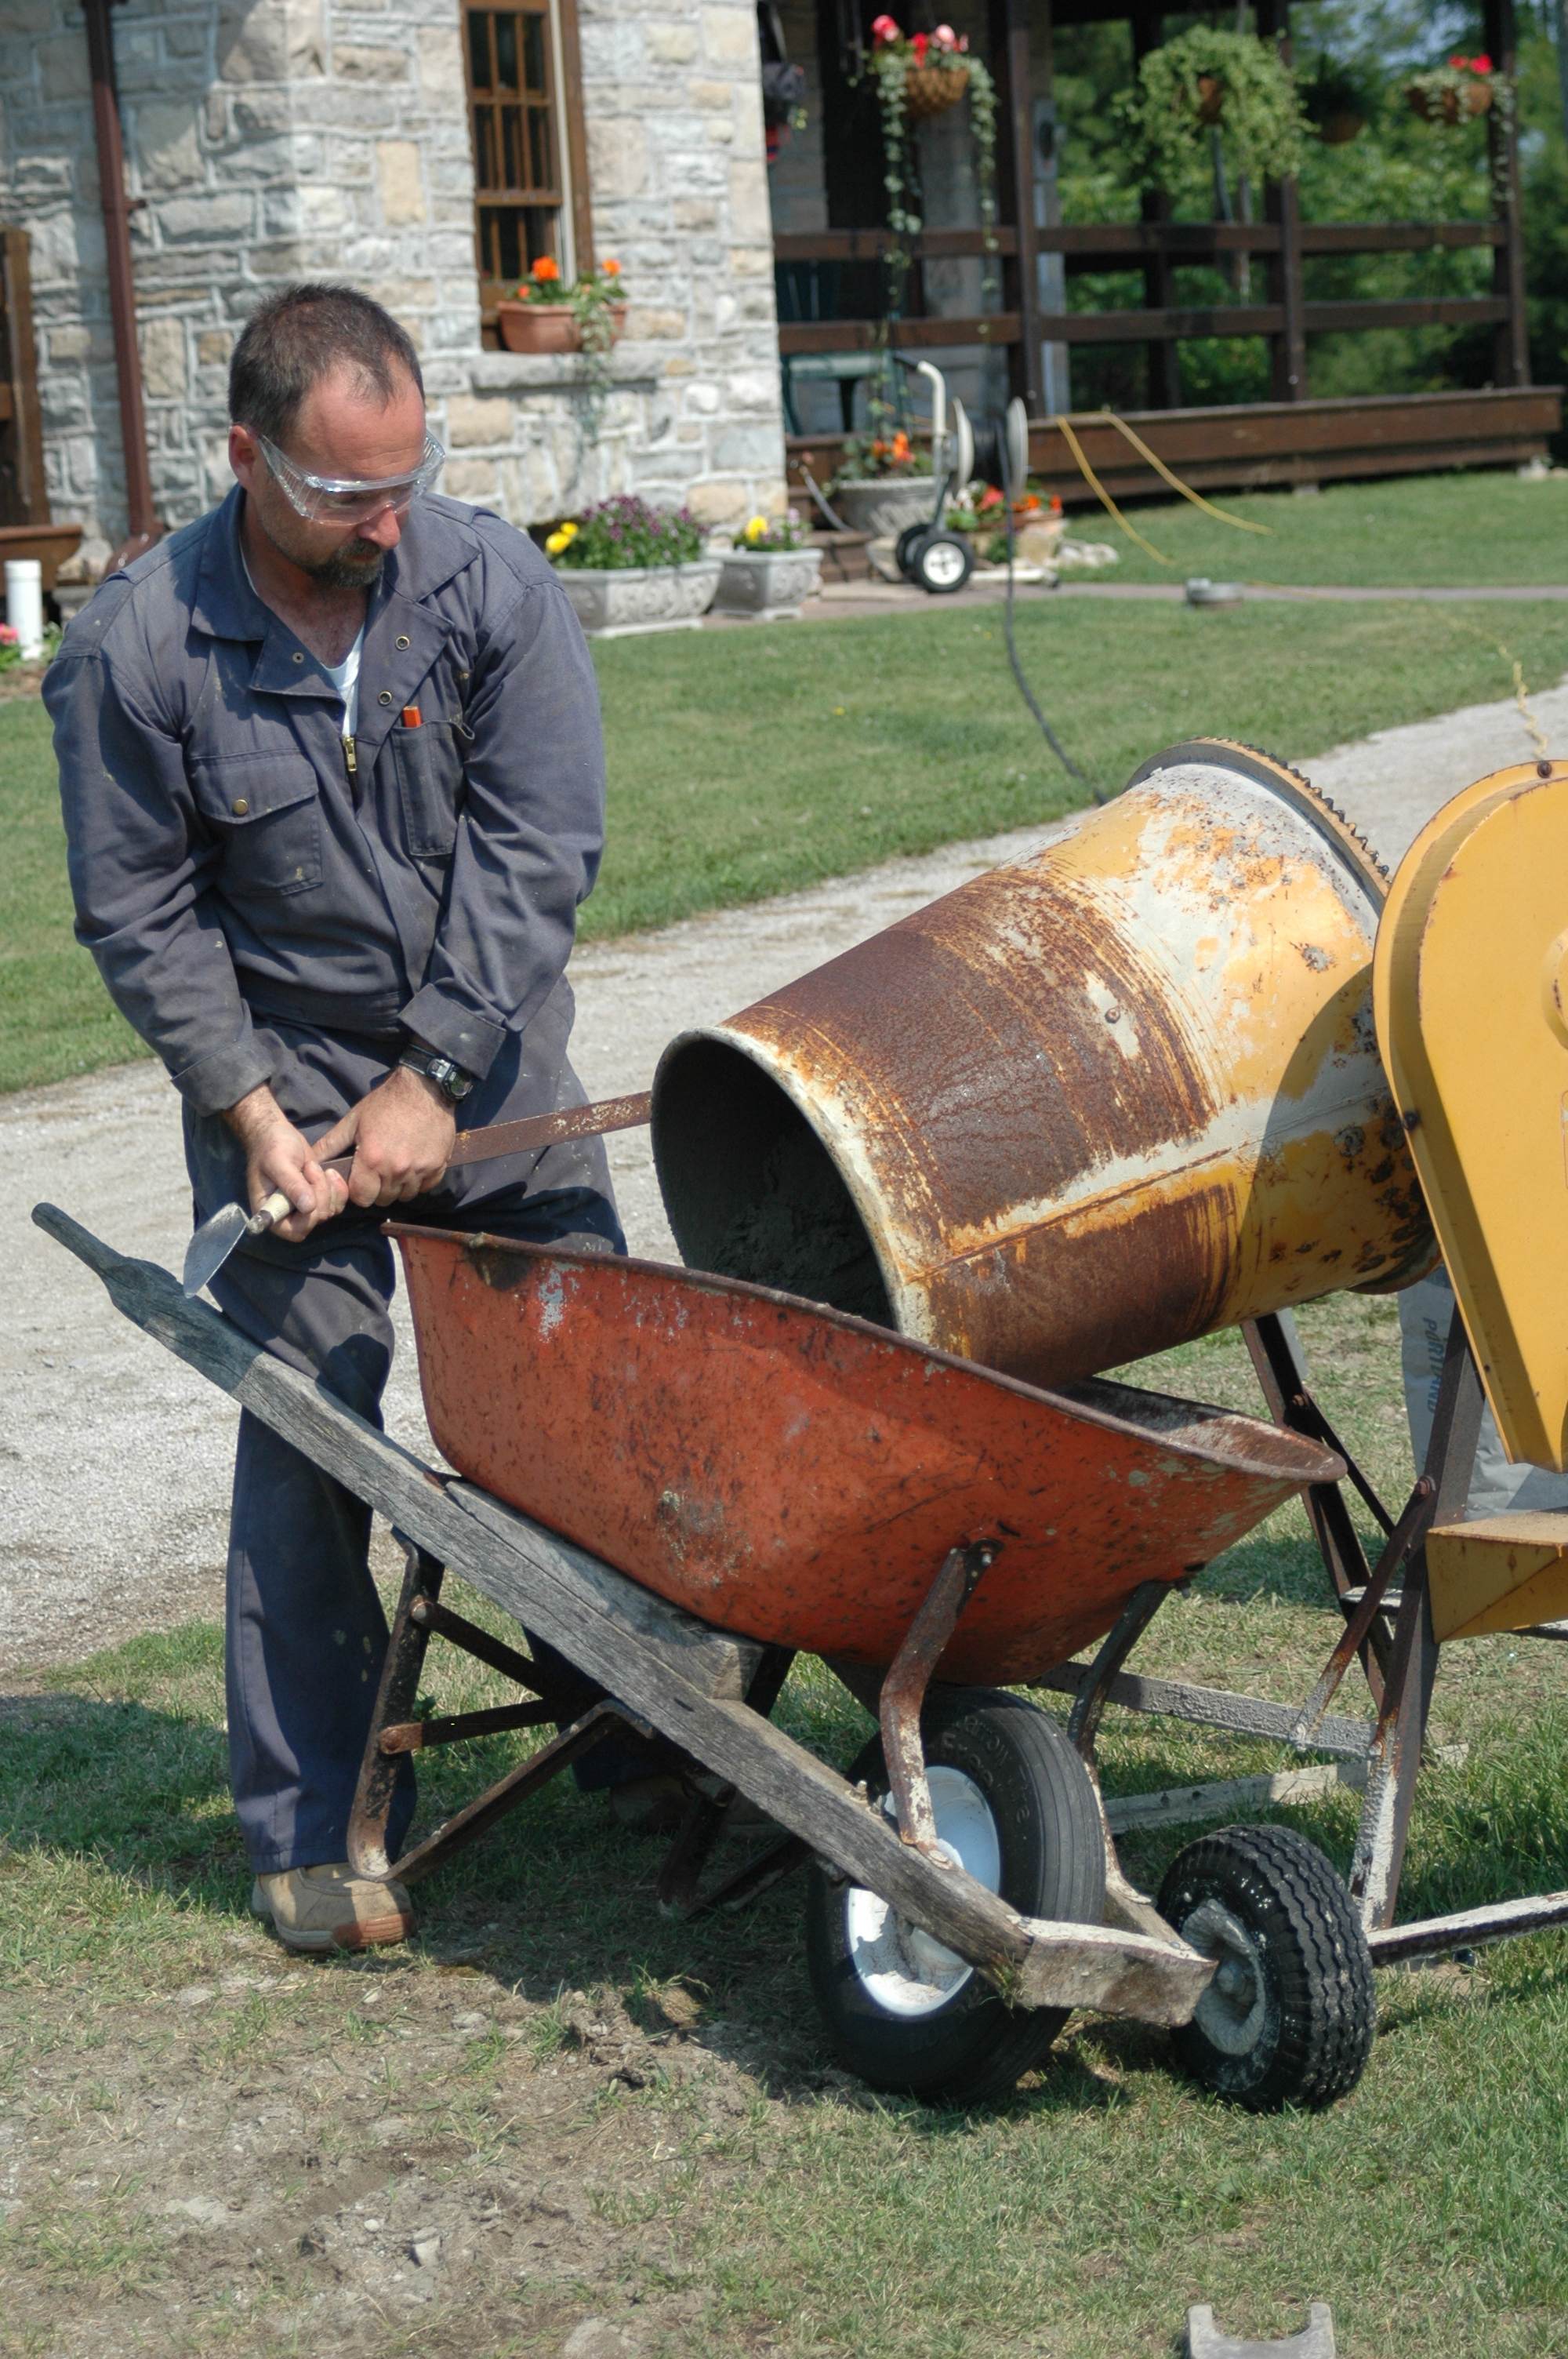
Filling areas with mortar makes sense when you have more than 1 1/2” of depth to fill in a given area (not less) and this area is more than 5 or 6 square feet. Dedicated floor levelling compound is great, but it’s also quite expensive given how fast a bag gets used up. Mortar mix, on the other hand is quite a bit cheaper when you buy it in bags, and it’s even cheaper when you buy bags of cement and bulk sand and mix your own mortar from scratch. 1 part Portland cement to 3 parts sand works great. A simple drum-type mixer does a superb job when you need a lot of mortar. Add a gallon of water to the drum, put one shovel full of Portland cement into the water, let it mix for a while into a slurry, then add 3 shovels of sand. Let the whole thing mix completely and you’ll probably find things are too dry and crumbly. Add more water, then more cement and sand in the 1 to 3 proportions. Keep adding and mixing like this until the drum approaches 1/3 full, tweak the cement, sand and water so the mixture is firm but fully moist. A little pile of mortar should be wet enough to trowel, but able to stand up 3” or 4” high without slumping.
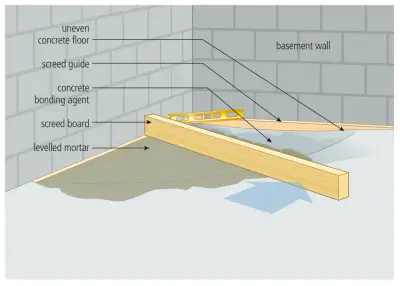
The trick of using mortar to fill big depressions in your floor involves adding strips of wood along the walls that act as a guide for levelling and smoothening the surface. Mortar won’t seek it’s own level automatically because it’s too thick. Make the strips level and the surface you smoothen with a piece of wood resting on these strips will also be level. One note of caution . . . If your concrete floor is broken and unstable, don’t simply put mortar over it and hope for the best. The new mortar will break up for sure because of the unstable support under it. You’ll need to remove everything loose that you can, than add enough mortar to be self supporting and structurally sound.

What depth of mortar do you need? You’ll need at least 4” to be self supporting, and even then you should add reinforcing fibres to the mix. These fibres come in bags and you can even get them on Amazon these days. I use a quart of dry fibres with every mixer load of mortar I make.
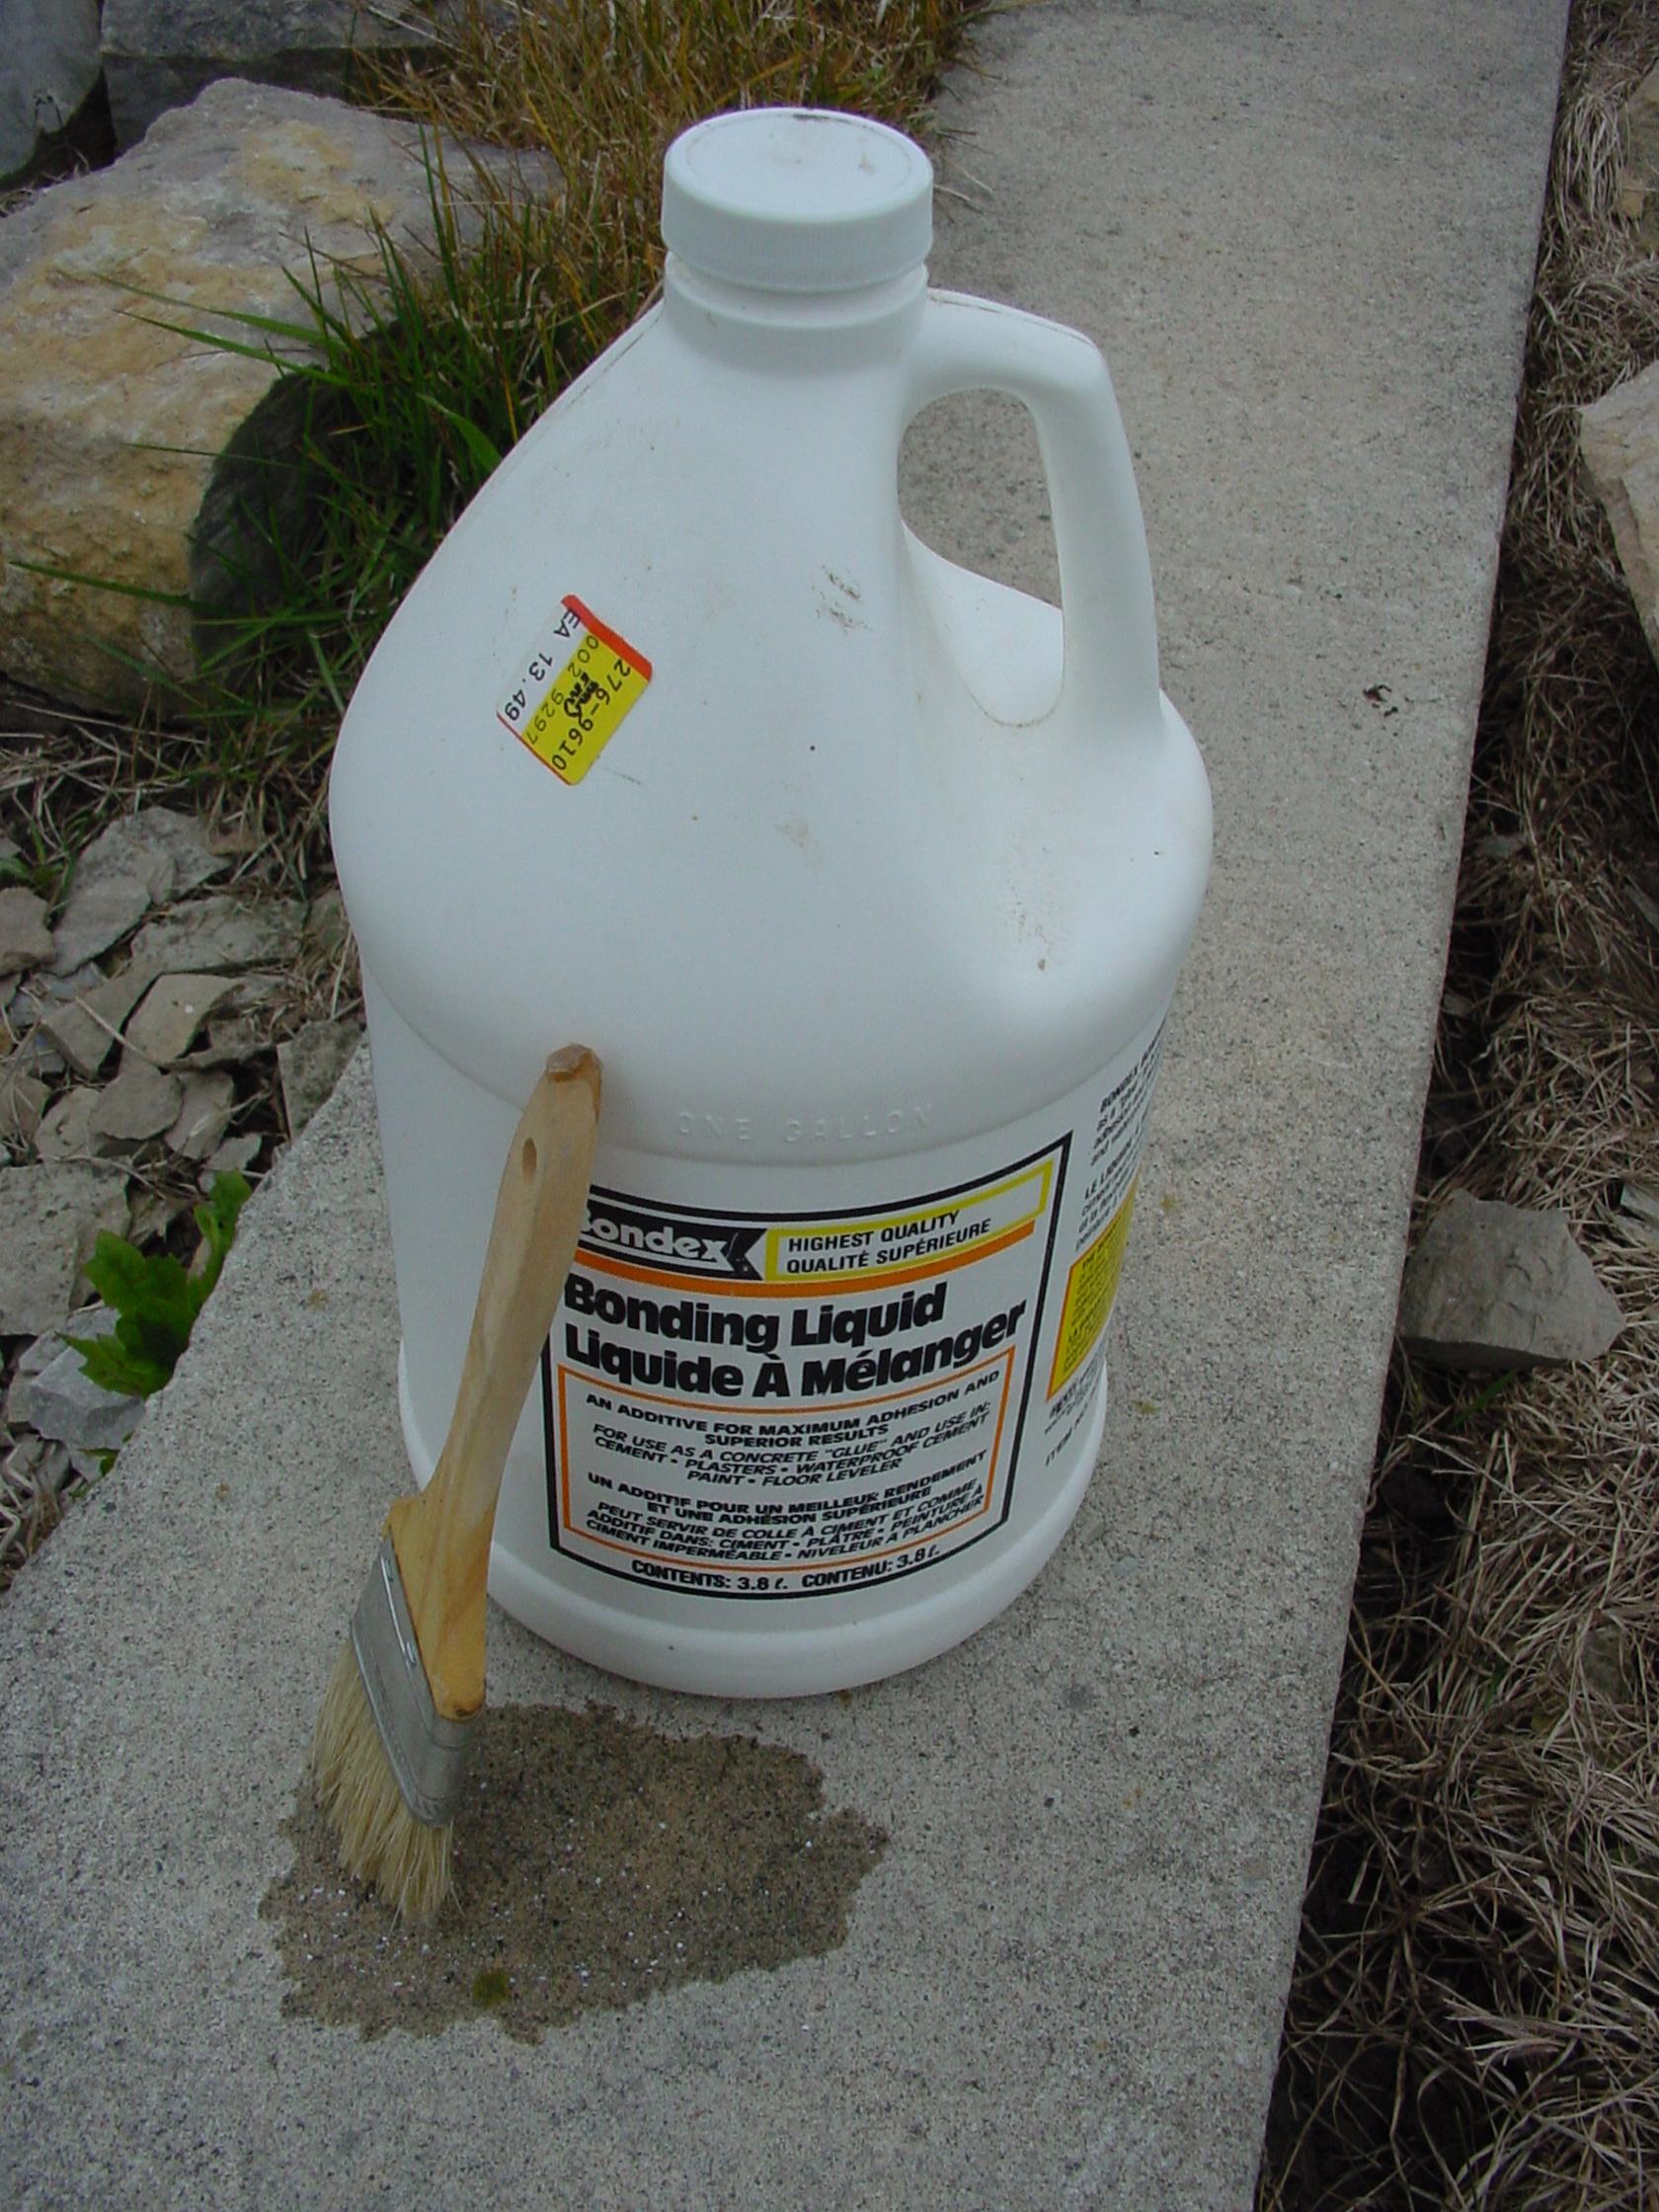
Regardless of how deep a space you’re filling, use concrete bonding agent in place of 25% of the water used to make the mortar, then brush on a coat of concrete bonding agent to the clean, dry, dust-free concrete floor. Bonding agent is a thin, white liquid that gives masonry a little flexibility and causes it to stick perfectly to existing masonry. Every building supply outlet carries concrete bonding agent and concrete reinforcing fibres.
Watch the video up next for a tour on filling floor depressions with mortar instead of floor leveller.
VIDEO: How to Level Basement Floors With Mortar
